

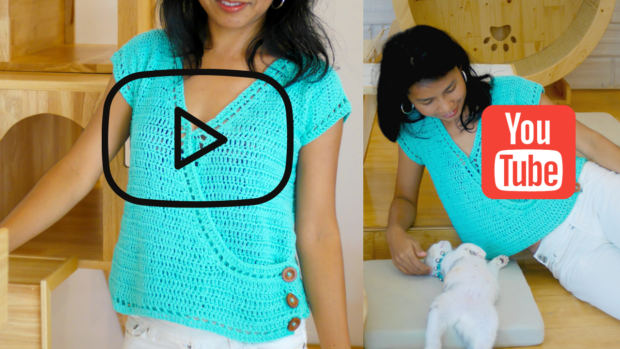
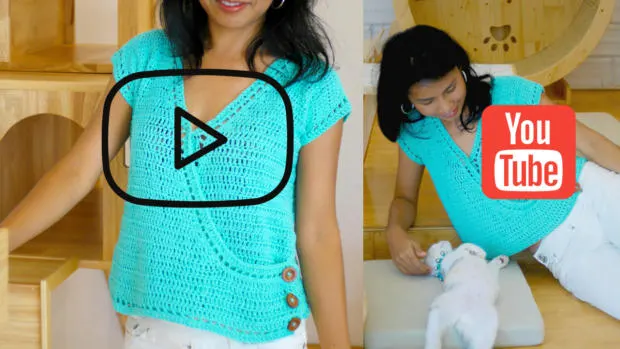
Cute crochet criss cross wrap top free pattern with step by step video tutorial. I made this simple wrap crochet top or a cross front with beginner friendly inmind.
And they are mostly made from double crochet stitch which is very basic stitch that you may have knew already!

This easy and cute crochet cross front or wrap top for summer is made from 100% cotton yarn which is very good to wear for hot weather and spring, I have add some button to make it super cute!!

Have you try another easy beginner crochet summer top yet? They are great for your first summer top.

– I used cotton dk weight yarn or 3 light. I use around 700-800 yard.
– 4.0 mm crochet hook
– Sewing yarn needle
-stitch marker
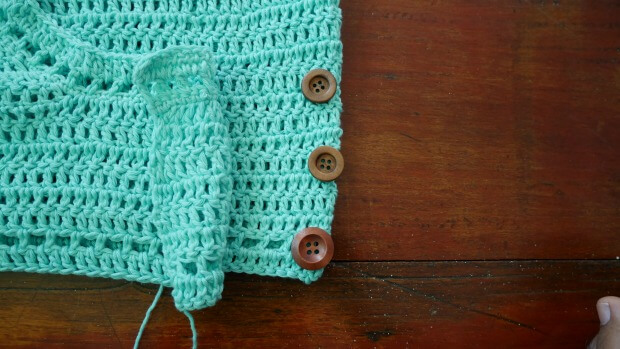
-3 wooden buttons about 1 inch big.
-sewing thread and needle
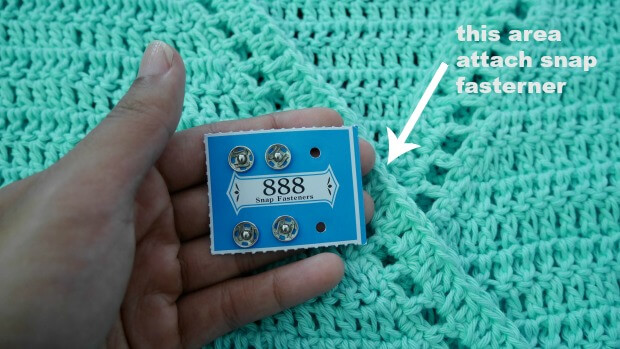
-1 or 2 snap fastener
Gauge: 3 double crochet stitch x 3 row = 1 inch
Skill and abbreviations
You will need to know how to make (American crochet term)
-dc which mean double crochet
-sc which mean single crochet
-dc increase which mean make 2dc in the same stitch
-ch Chain
-slip knot


Finished Size Approximately: Small to medium easy to adjust
This top is made in size small to medium. For me the model wearing this piece, I am 4’9 feet tall.

Get the free pattern below or this pattern is also available as an inexpensive, ad-free, PDF printable instant download in my etsy shop. Thank you so much for your love and support. I am really appreciate you.
Video tutorial for this cute crochet criss cross wrap top for beginners.
Measurement.
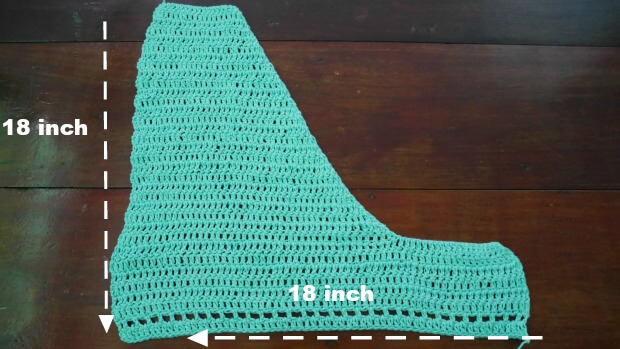
front panel.
-18 inches long
-18 inches wide
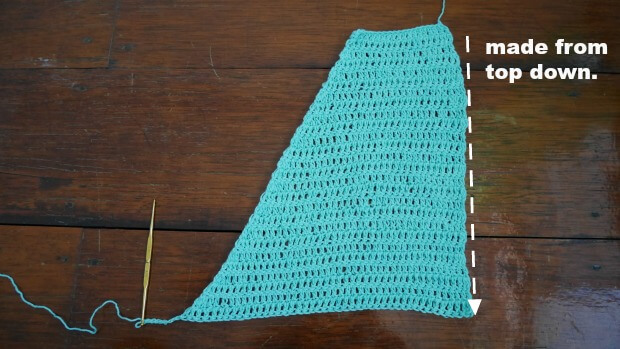
We will make this criss cross wrap top from top to bottom.
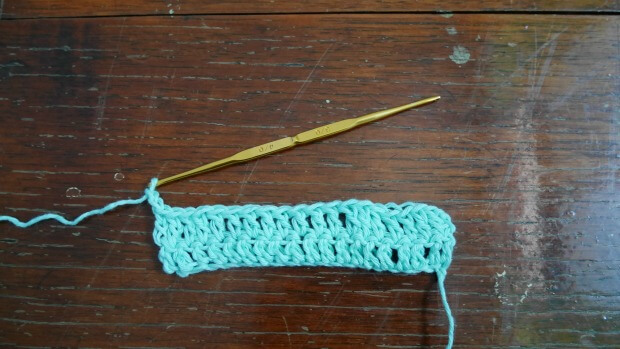
Start with one shoulder by Pick up crochet hook size 4.0 mm and Start of by making a slip knot Then make 20 chains (foundation chain in even number)
Row1: make 1dc in the next chain from hook and across until the end of the row, ch2 turn.
Row2: make 1dc in the next chain from hook and across until the end of the row, ch2 turn.
Row3 now you will work 1dc in each stitch across until end of the row in the last st make 2dc . ch2 turn.
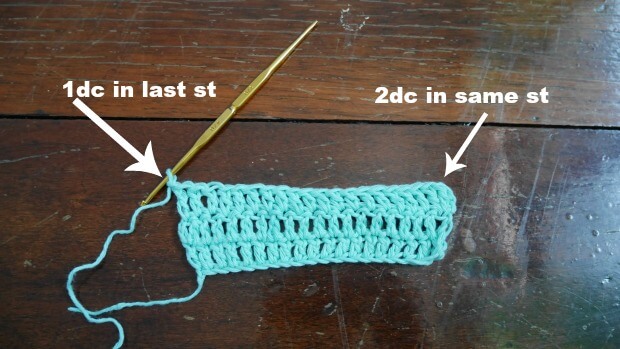
Row4. now you will work 2dc in first stitch then 1dc in each stitch across until end of the row. ch2 turn.
Row5. now you will work 1dc in each stitch across until end of the row in the last st make 2dc . ch2 turn.
Row6. now you will work 2dc in first stitch then 1dc in each stitch across until end of the row. ch2 turn.
Row7. now you will work 1dc in each stitch across until end of the row in the last st make 2dc . ch2 turn.
Row8. now you will work 2dc in first stitch then 1dc in each stitch across until end of the row. ch2 turn.
Row9. now you will work 1dc in each stitch across until end of the row in the last st make 2dc . ch2 turn.
Row10. now you will work 2dc in first stitch then 1dc in each stitch across until end of the row. ch2 turn.
Row11. now you will work 1dc in each stitch across until end of the row in the last st make 2dc . ch2 turn.
Row12. now you will work 2dc in first stitch then 1dc in each stitch across until end of the row. ch2 turn.
Row13. now you will work 1dc in each stitch across until end of the row in the last st make 2dc . ch2 turn.
Row14. now you will work 2dc in first stitch then 1dc in each stitch across until end of the row. ch2 turn.
Row15. now you will work 1dc in each stitch across until end of the row in the last st make 2dc . ch2 turn.
Row16. now you will work 2dc in first stitch then 1dc in each stitch across until end of the row. ch2 turn.
Row17. now you will work 1dc in each stitch across until end of the row in the last st make 2dc . ch2 turn.
Row18. now you will work 2dc in first stitch then 1dc in each stitch across until end of the row. ch2 turn.
Row19. now you will work 1dc in each stitch across until end of the row in the last st make 2dc . ch2 turn.
Row20. now you will work 2dc in first stitch then 1dc in each stitch across until end of the row. ch2 turn.
Row21. now you will work 1dc in each stitch across until end of the row in the last st make 2dc . ch2 turn.
Row22. now you will work 2dc in first stitch then 1dc in each stitch across until end of the row. ch2 turn.
Row23. now you will work 1dc in each stitch across until end of the row in the last st make 2dc . ch2 turn.
Row24. now you will work 2dc in first stitch then 1dc in each stitch across until end of the row. ch2 turn.
Row25. now you will work 1dc in each stitch across until end of the row in the last st make 2dc . ch2 turn.
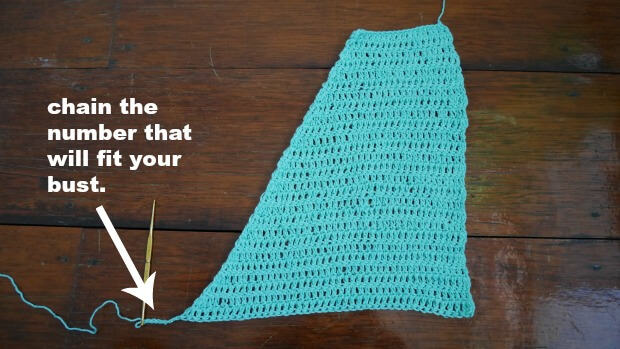
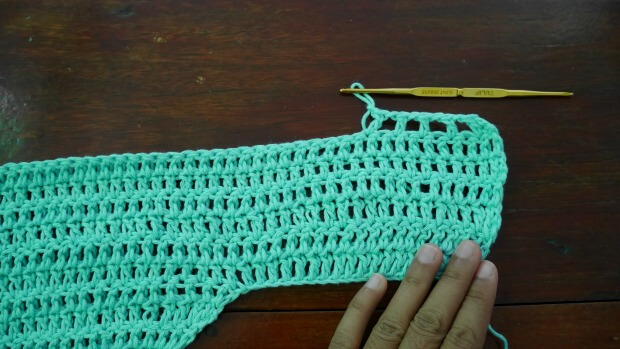
Row26. now you will work 2dc in first stitch then 1dc in each stitch across until end of the row , then ch20. chain2 and turn.
On this row 26 we will start to make the bottom of the top.
On this row we will start to make a bottom of the top.
or you can add more chain to increase your size that will fit you bust.
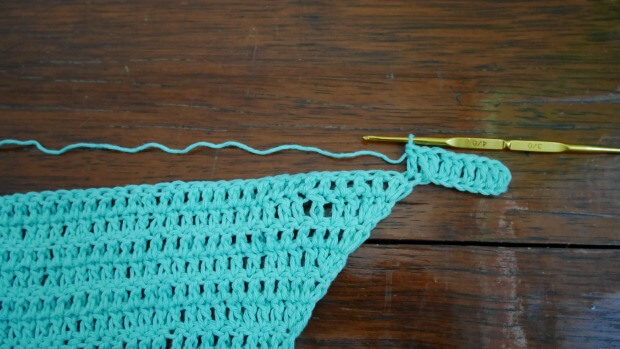
Row27: make 1dc in the next chain from hook and in each st across until the end of the row, ch2 turn.
Row28: make 1dc in the next chain from hook and across until the end of the row, ch2 turn.
Row 29 -33, Repeat row 28 and until you get 17-18 inch long. or your desired length.

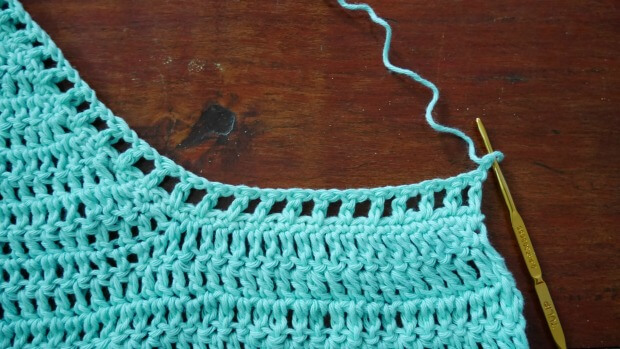
and we will start to making lace bottom.
Row1 of lace. ch2,*dc in next st , ch1 ,skip1, dc in next* repeat * to * across until the end of he row.
Row2 of lace. ch2,*dc in each st ,* repeat * to * across until the end of the row. Then fasten off.
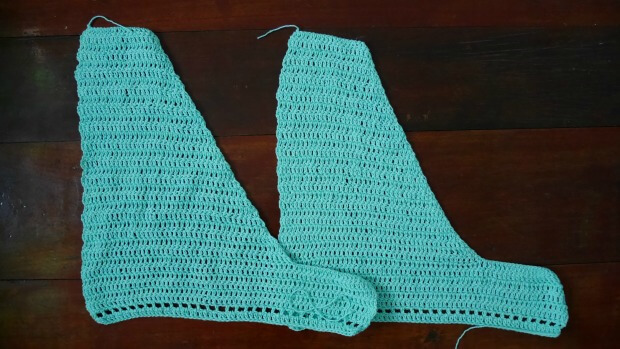
And repeat the same for the second panel.
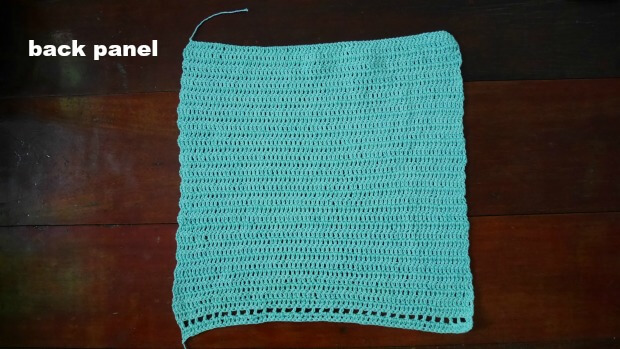
Back panel.
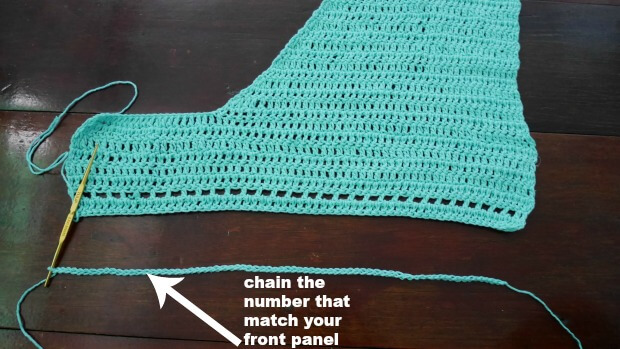
Start by chain the number that match with your front panel.
Row1. dc in each chain across. ch2 turn.
Row2. 1dc in each st across, ch2 turn.
Row 3 and beyond ,….Repeat row 2 until you get 18 inch long. or your desired length and we will start to making lace bottom.
Row1 of lace. ch2,*dc in next st , ch1 ,skip1, dc in next* repeat * to * across until the end of he row.
Row2 of lace. ch2,*dc in each st ,* repeat * to * across until the end of the row.
Assembly.
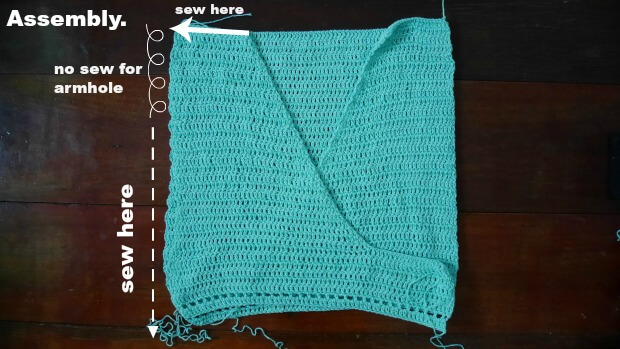
lay front panel on top of back panel. sew each side as the pic above.
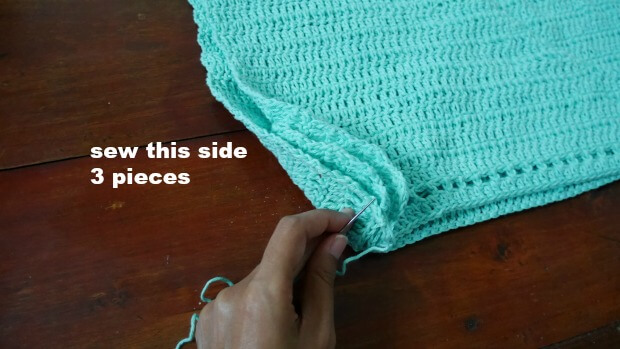
Then the other side sew only 2 piece leave the front panel open.
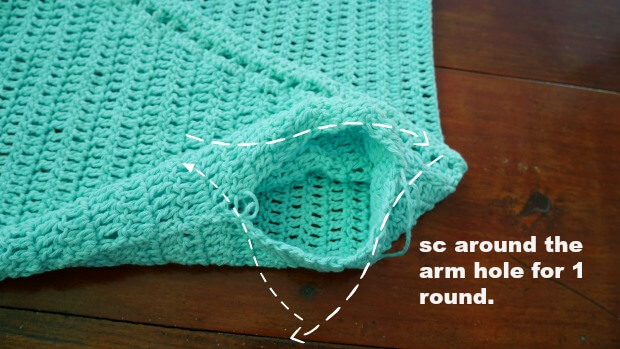
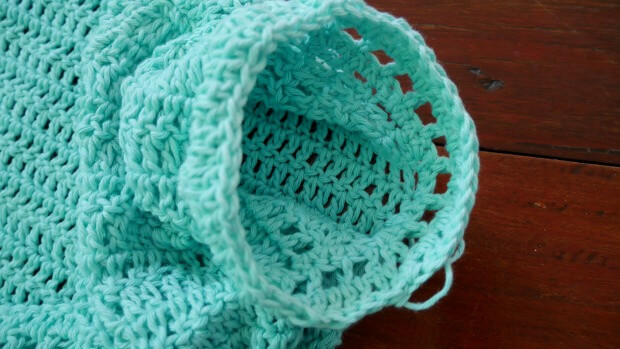
Make the short sleeve.
Make sc around the armhole for one round.
Then we will start to making lace .
Row1 of lace. ch2,*dc in next st , ch1 ,skip1, dc in next* repeat * to * across until the end of he row.
Row2 of lace. ch2,*dc in each st ,* repeat * to * across until the end of the row. Fasten off.
Add pretty lace at the edge of front panel.
Make sc at the edge of the each side of front panel.
Then we will start to making lace.
Row1 of lace. ch2,*dc in next st , ch1 ,skip1, dc in next* repeat * to * across until the end of he row.
Row2 of lace. ch2,*dc in each st ,* repeat * to * across until the end of the row. Fasten off.
Then attach snap fastener for the option by using sew thread and needle.
All done!
Happy crocheting.

Patsy
Tuesday 4th of May 2021
How do I make this top larger
jane
Tuesday 4th of May 2021
Hi Patsy, on row 26 the pattern said add 20 to 30 chain if you want to make it large to fit you size add more chain that will be fit to you bust for example like maybe 40 chain for size large of 50 chain for xl this is just estimate.
Dot Brown
Tuesday 4th of May 2021
You make the cutest patterns!!! Thanks so much.
jane
Tuesday 4th of May 2021
HI Dot, you are so sweet thank u.
Yvette
Sunday 13th of December 2020
Very nice and easy to making thank you for this project
Laura Waterfield
Wednesday 15th of January 2020
Adorable top. Thank you so much for the pattern.