


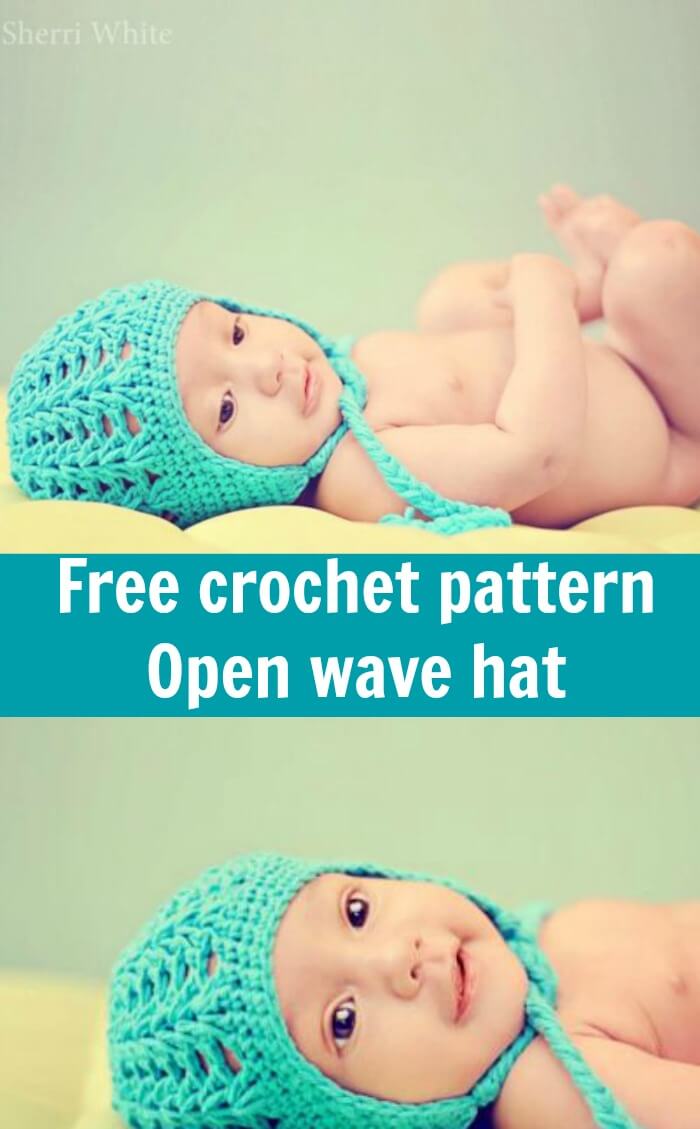

Happy day everyone!Ready for another easy hat pattern called “Open weave earflap”? At first I didn’t know what colour to pick for this fun project so I decided to use blue colour because they are so versatile and relaxing. This hat are easy to make with simple crochet stitches perfect for beginner. It’s start with single crochet, as you might guess from the photo. 😉 that there will be double crochet as well. This open weave hat is easy and quick to whip up also great for summer time too.


Special thanks to Sherri White for this adorable photo.
Sizes:
Newborn-6 months (fits up to 16 inch)
6 months-1 year (fits 16- 20 inch)
Materials:
You will need
MC: 1 skien of 50 grams/110 meters of MODA Vera BEETLE 50% acrylic, 50% cotton) or worsted weight yarn.
Crochet hook size 3.50 mm
Sewing yarn needle
Removable stitch markers or contrasting color yarn
Gauge: 3 sc x 3 rows = 1 square inch
Skill and abbreviations:
You will need to know how to make:
Chain (ch)
Slip stitch (sl st)
Single crochet (sc)
Half double crochet (hdc)
Magic ring or adjustable ring
Main Colour (MC)
Contrasting Colour (CC)
My beginner tutorial check it out here
How to start magic ring or adjustable ring
Note:
1. In this pattern, you will work in the round continuously. You may use a removable stitch marker or a short piece of yarn of contrasting colour to mark the beginning of each round. At the end of each round, you will not join, but begin the next round in the next stitch.
2. The stitch counts at the end of each round are given.
Size 0-6months
You will work from top to bottom
Round1. Make magic ring or adjustable ring and 8sc in ring (8 sts)
Round2. 2sc in each st around (16 sts)
Round3. *sc in next st, 2sc in next st*, repeat from * around (24 sts)
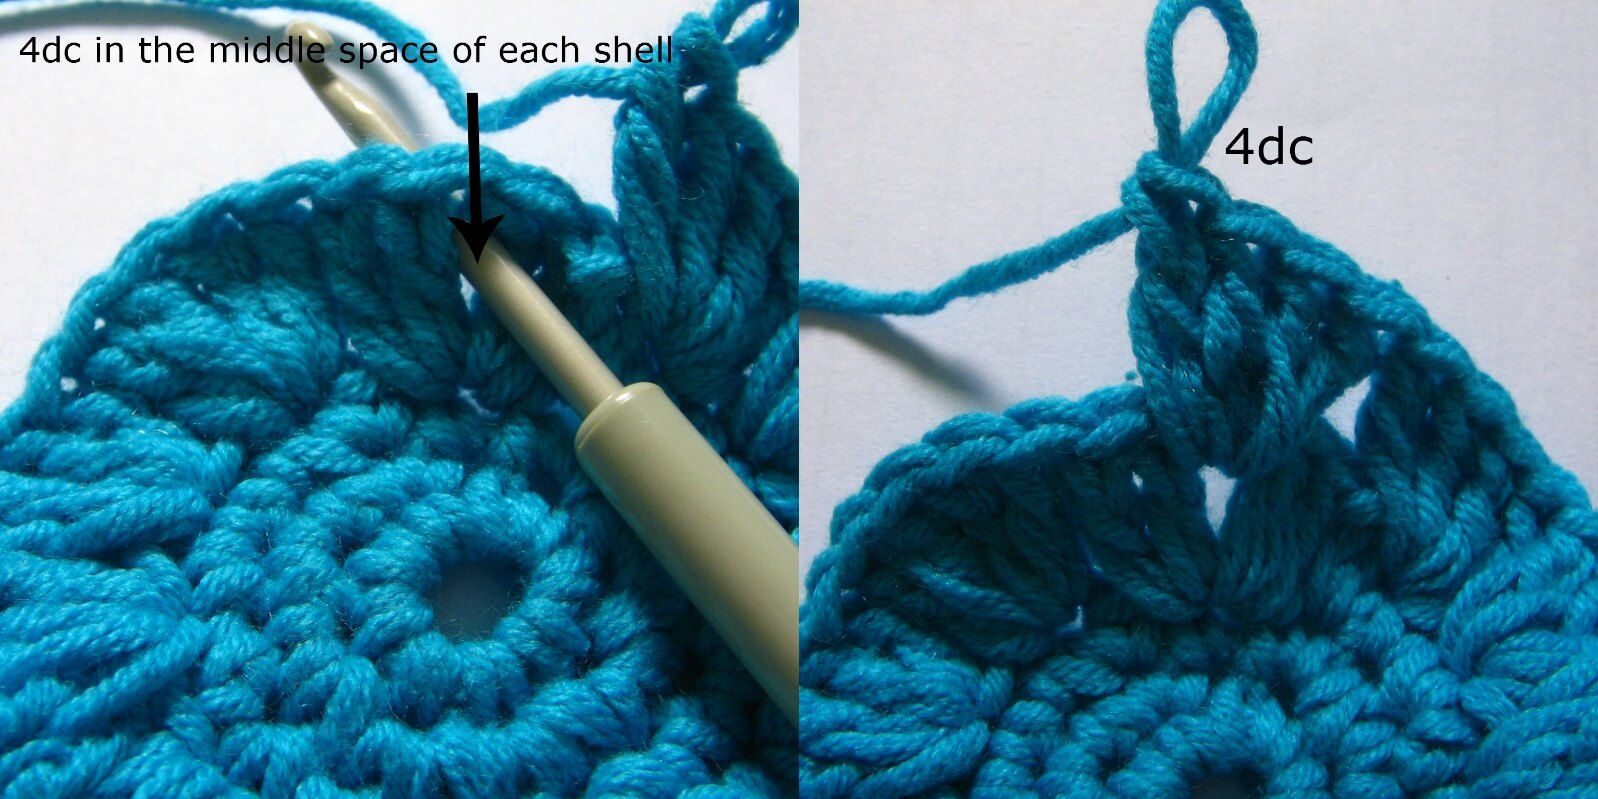
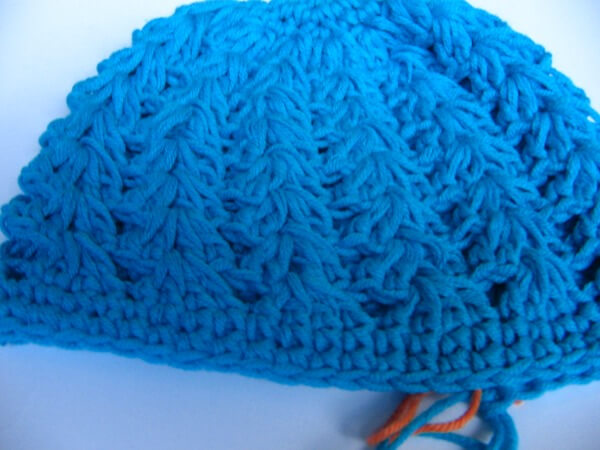
Round4. *work 4dc in the first st, skip next 1 st*, repeat from * around (12 shells)


Round5-11. *4dc in the middle space of each shell*, repeat from * around (12shells)

Round11. sc in each st around (no st count)
Round12. sc in each st around (no st count) and fasten off.

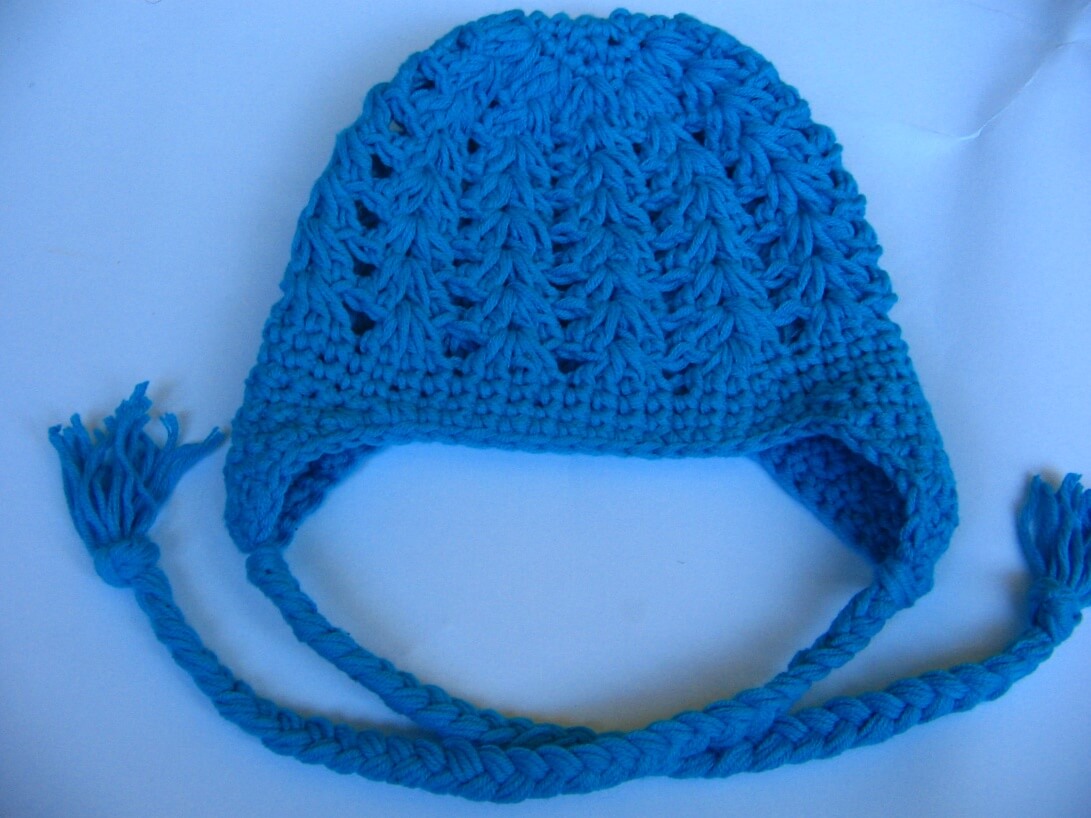
Shape earflap :
Use two stitch markers to mark the stitch in the middle of each side of the hat. Join MC at the first marker with sl st.

Row1. Ch 1 (counts as first sc here and throughout), sc 12, ch1, turn (13 sts)
Row2. sc in next 11 sts, ch1, turn (12 sts)
Row3. sc in next 10 sts, ch1, turn (11 sts)
Row4. sc in next 9 sts, ch1 turn (10 sts)
Row5. sc in next 8 sts, ch1 turn (9 sts)
Row6. sc in next 7 sts, ch1 turn (8 sts)
Row7. sc in next 6 sts, ch1 turn (7 sts)
Row8. sc in next 5 sts, (6 sts) and fasten off. Join MC at second marker with sl st and repeat as above for second earflap.
Edging:
Join MC at any st along the edging with sl st and work sc around the edge, including the earflaps. Fasten off.
Size 6 months-1 year.
You will work from top to bottom
Round1. Make magic ring or adjustable ring and 8sc in ring (8 sts)
Round2. 2sc in each st around (16 sts)
Round3. *sc in next st, 2sc in next st*, repeat from * around (24 sts)
Round4. *sc in next st, 3sc in next st*, repeat from * around (32 sts)
Round5. *work 4dc in the first st, skip next 1 st*, repeat from * around (16 shells)
Round6-13. *4dc in the middle space of each shell*, repeat from * around (16shells)
Round14. sc in each st around (no st count)
Round15. sc in each st around (no st count) and fasten off.
Shape earflap :
Use two stitch markers to mark the stitch in the middle of each side of the hat. Join MC at the first marker with sl st.
Row1. Ch 1 (counts as first sc here and throughout), sc 17, ch1, turn (18 sts)
Row2. sc in next 16 sts, ch1, turn (17 sts)
Row3. sc in next 15 sts, ch1, turn (16 sts)
Row4. sc in next 14 sts, ch1 turn (15 sts)
Row5. sc in next 13 sts, ch1 turn (14 sts)
Row6. sc in next 12 sts, ch1 turn (13 sts)
Row7. sc in next 11 sts, ch1 turn (12 sts)
Row8. sc in next 10 sts, ch1 turn (11 sts)
Row9. sc in next 9 sts, ch1 turn (10 sts)
Row10. sc in next 8 sts, ch1 turn (9 sts)
Row11. sc in next 7 sts, ch1 turn (8 sts)
Row12. sc in next 6 sts, ch1 turn (7 sts)
Row13. sc in next 5 sts, (6 sts) and fasten off. Join MC at second marker with sl st and repeat as above for second earflap.
Edging:
Join MC at any st along the edging with sl st and work sc around the edge, including the earflaps. Fasten off.


Ties:
With Main Colour, loop yarn into approximately 18-20 inch long loops as shown in the picture.
Using a crochet hook, pull the folded side of the yarn through the centre stitch at the bottom of the earflap, making a loop. Pull the free ends of the yarn through this loop and pull tight.
Divide yarn in to three parts, plaint or braid to the end, and tie a knot to finish up. One tie is made. Repeat on the other earflap to make second tie.

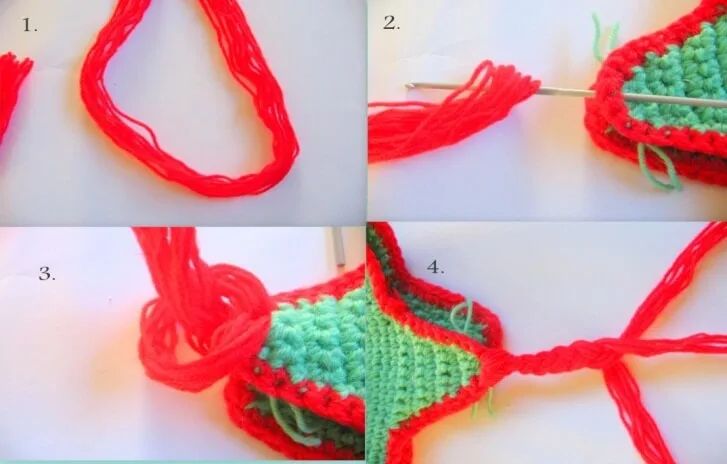
Confuse about this part here tutorial on How to add braids to an earflaps crochet hat
Happy crocheting!
Jann Olson
Wednesday 15th of October 2014
Oh my gosh, this is so darling and that baby is just precious!! Thanks for sharing with SYC. hugs, Jann
Sherry
Wednesday 23rd of July 2014
Beautiful hat and even more beautiful model!
jane
Wednesday 23rd of July 2014
Thanks Sherry.