

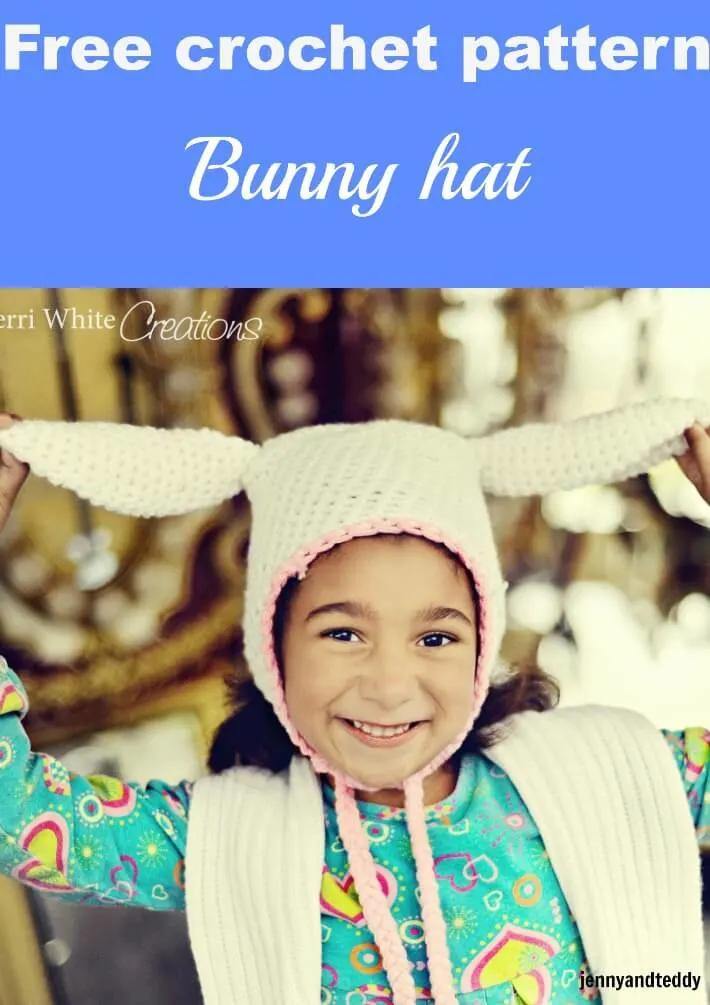
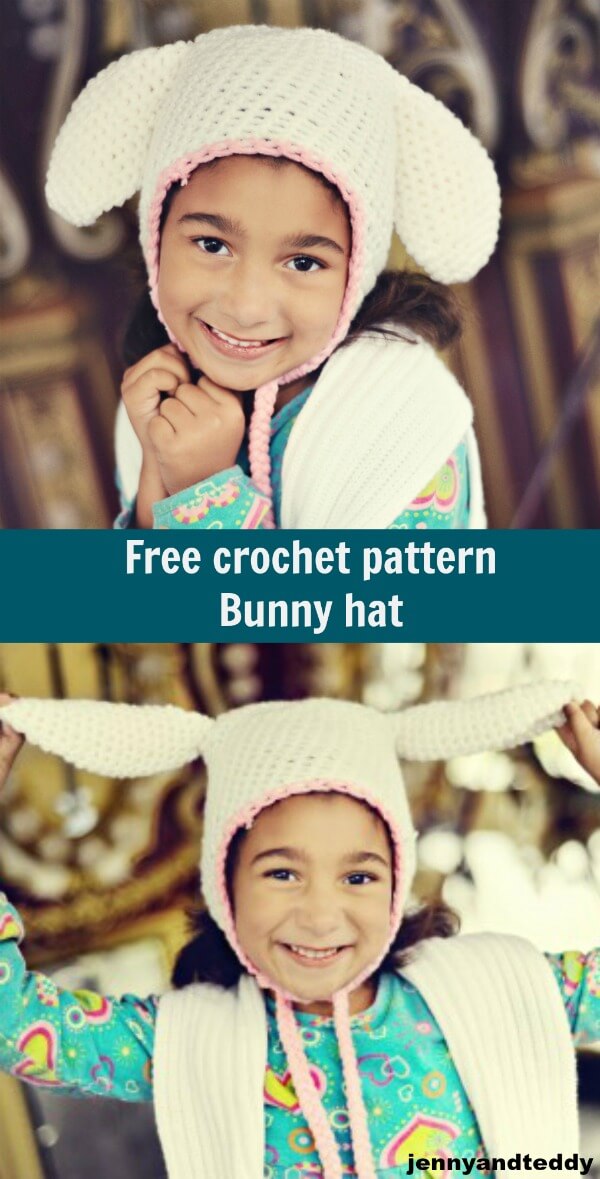

Easter just around the corner! So I make this crochet floppy bunny ear hat free pattern for you guys to enjoy during this time of the year. They will be perfect for your little angel and everyday use, especially in this cold winter season.


Special thanks to Sherri White photography for this fantastic picture.


Sizes:
This hat is working in round, so you can change the size to fit your head by making fewer or more rounds of increases.
4 years – teen (fits up to 22 inches)
Materials:
You will need:
DK weight (8-ply) yarn in the following colors:
- White (MC-main colour): around 100 g / 230 yards, held double. You can substitute any yarn that gives you gauge.
- Pink (CC-contrast colour): small amount
- Crochet hook size 6.0mm
- Sewing yarn needle
- Removable stitch markers or contrasting coloured yarn
Gauge: 2 single crochet stitches x 2 rounds = 1 square inch
Notes:
In this pattern, you will work in the round continuously. You may use a removable
stitch marker or a short piece of yarn of contrasting colour to mark the
beginning of each round. At the end of each round, you will not join, but begin
the next round in the next stitch.
The stitch counts at the end of each round are given. If you are off by 1 or 2
stitches, do not worry about it.
Skill and abbreviations:
You will need to know how to make:
Chain (ch)
Stitch (st)
Slip stitch (sl st)
Single crochet (sc)
Crochet decrease (dec): sc 2 sts together
* = Repeat stitches from *to end of *
Magic ring or adjustable ring
My beginner tutorial check it out here
How to add braid to an earflap
HAT BODY


You will work from top to bottom.
Make magic ring or adjustable ring.
Round 1. 8sc in ring (8 sts)
Round 2. 2Sc in each st around (16 sts)
Round 3. *Sc in next st, 2sc in next st*,repeat from * around (24 sts)
Round 4. *Sc in next 2 st, 2sc in next st*,repeat from * around (32 sts)
Round 5. *Sc in next 3 st, 2sc in next st*,repeat from * around (40 sts)
Round 6. *Sc in next 4 st, 2sc in next st*,repeat from * around (48 sts)
Round 7. *Sc in next 5 st, 2sc in next st*,repeat from * around (56 sts)
Round8– 23. Sc in each st around (56 sts). Finish off.
SHAPE EARFLAP


Use two stitch markers to mark the stitches in the middle of each side of the hat.
Join MC at the first marker with sl st.
Row 1. Ch 1 (counts as first sc here and throughout), sc in 11 sts across, ch1, turn (12 sts)
Row 2. Sc in next 10 sts, ch1, turn (11 sts)
Row 3. Sc in next 9 sts, ch1, turn (10 sts)
Row 4. Sc in next 8 sts, ch1, turn (9 sts)
Row 5. Sc in next 7 sts, ch1, turn (8 sts)
Row 6. Sc in next 6 sts, ch1, turn (7 sts)
Row 7. Sc in next 5 sts, ch1, turn (6 sts)
Row 8. Sc in next 4 sts, ch1, turn (5 sts)
Row 9. Sc in next 3 sts, fasten off.
Join MC at second marker with sl st and repeat as above for second earflap.
CONTRAST EDGING


Join CC at any st along the edging with sl st and work one round of sc around the
edge, going around the earflaps. Fasten off.
Ears:
Make 2 pieces with MC (shown white colour)
You will work from top to bottom
Round1. Make magic ring and 6sc in ring (6)
Round2. 2sc in each st around (12)
Round3. *Sc in next st, 2sc in next st* and repeat from * around (18)
Round4-5. sc in each st around (18)
Round6. *Sc in next 2 st,2sc in next st* and repeat from * around (24)
Round7-15. Sc in each st around (24)
Round16. *sc in each of next 6 st,dec 1* and repeat from * around (21)
Round17. *sc in each of next 5 st,dec 1* and repeat from * around (18)
Round18. *sc in each of next 4 st,dec 1* and repeat from * around (15)
Round19-20. Sc in each st around (15)
Then finish off and leave long tail for sewing.
Inner of the ear.
Make 2 pieces with CC (colour of your choice pink).
Start with 13 chain.
Round1-3. sc in next st from hook each st around (24).
Then finish off and leave long tail for sewing.
Finishing
Attach inner of the ear(pink) to outer of the ear (white) by sewing use yarn needle.
Attach bunny ear to the hat body by sewing.
All done.
Enjoy!
Lou Lou Girls
Sunday 12th of October 2014
Super cute hat! Pinned. Lou Lou Girls
jane
Tuesday 14th of October 2014
thank you Lou Lou girl.
Ginger
Monday 22nd of September 2014
What a cute little hat. My kiddos would flip! Thanks for linking up to Gingerly Made.
Navy Wifey Peters @ USS Crafty
Monday 18th of August 2014
Cute bunny hat!
Jenna
Wednesday 18th of April 2012
Aww so cute :) thanks for the free pattern! jaysboutiqueblog.blogspot.com
jane
Wednesday 18th of April 2012
your welcome.
Lauren
Tuesday 3rd of April 2012
This is super cute! Thank you so much for sharing this pattern! I hope I have time to whip one up in time for Easter!
I'd love for you to link up and share: http://tutusandteaparties.blogspot.com/2012/03/pinteresting-party-week-33.html