

If you are a layering queen you will love the crochet sweater vests so much and I guess you guys probably had more than one in your closet.
I am not going to lie-I haven’t always loved a sweater vest that much. Because It’s all about layering for the vest outfit.
And I don’t have a plain collar shirt to layer with moreover, I won’t be bothered to buy a new collar shirt just to match them lol.
But now, I’ve seen a lot of sweater vest outfit ideas pop up on Instagram and Pinterest lately.
So I want to give it a shot and create my own version of the crochet sweater vest pattern that easy made and looks so good to wear solo or with the layering.

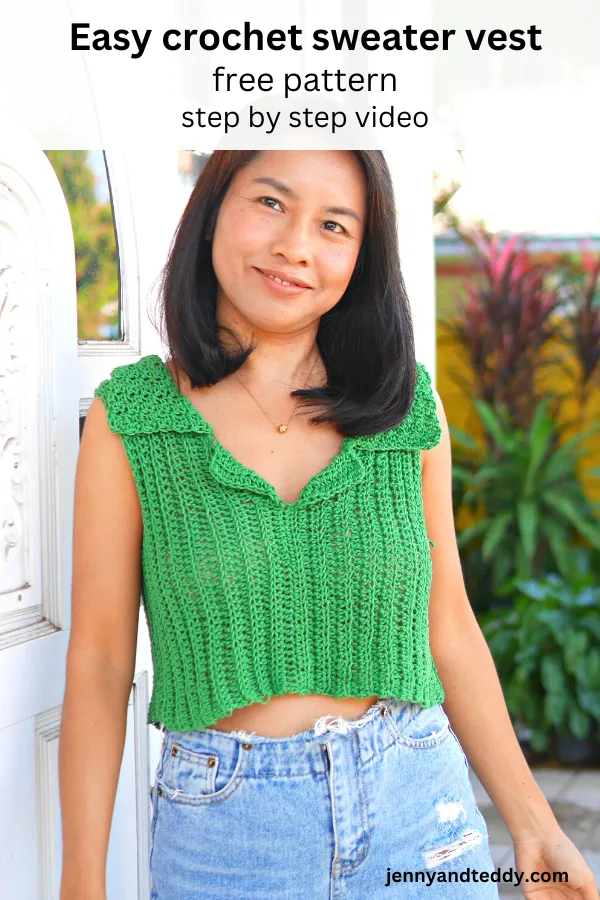
Simple and stylish crochet sweater vest top pattern.
There are so many styles of crochet sweater vest-free patterns out there that I love and wanna make my own version of it, for example, the crochet fringe vest, and the 70’s vest my favorite ones would be the granny square vest.
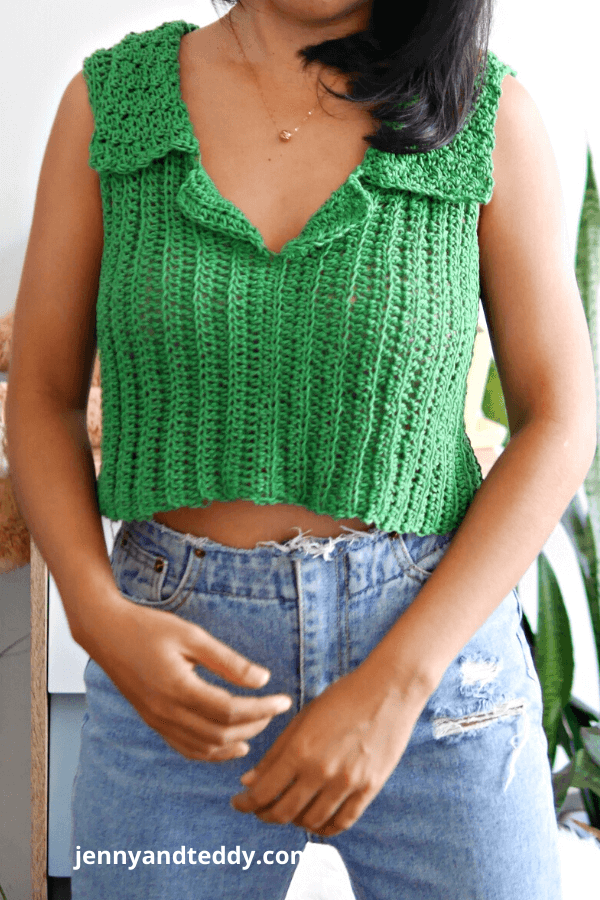
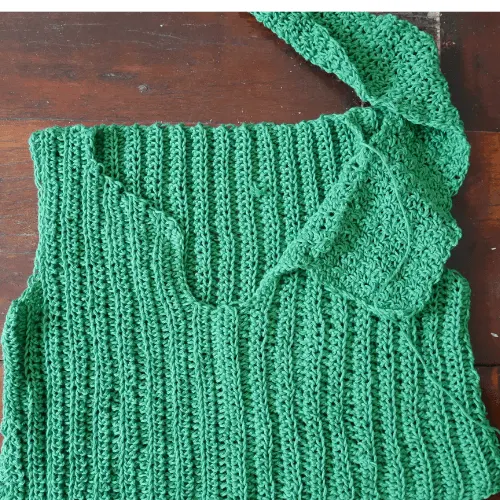
And this crochet womens vest pattern features a stunning collar created from a mix of basic crochet stitches that will give a beautiful crochet texture result.
This crochet vest top could wear by itself or style with a nice layer will be modest and trendy for this summer or a cold season.

What you need to know before crocheting a vest?
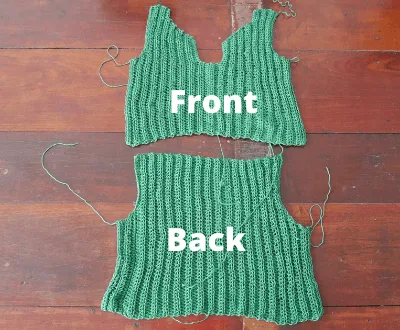
This cute sweater vest is made from a 2-panel front and back, and the entire body of this crochet sweater vest pattern is made from half double crochet stitch.
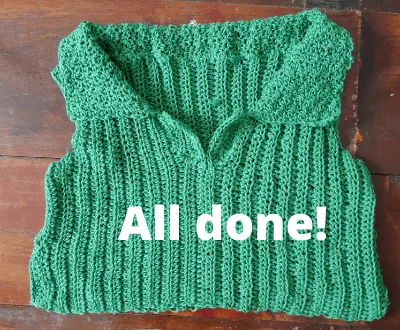
In addition, the collar is made separately and then attached to the vest body part by sewing and that is it! You done!
The best yarn for this beginner’s crochet vest top-free pattern.
Oh well, you can use any kind of plant fiber in a DK weight.
For this sweater vest pattern, I use 100% cotton dk weight yarn; they work just fine If you have any polyester, acrylic, cotton, bamboo, or wool blend will work just great also, and they will give you a nice and soft texture for those blends.
I use cotton 100% because I didn’t have much choice of the pretty color for polyester fibers, so I go with cotton.
The size is available from small to extra large.
If you love this simple sweater vest I also have another free crochet sweater patterns for you.
Let’s get into the crochet vest pattern, shall we?
Material.
- I used DK weight yarn of around 800 yards for sizes small to medium from bust size 30-36 inches.
- 4.0 mm crochet hook
- Sewing yarn needle
- Gauge: 4 hdc = 1 inch
Skill and abbreviations
- you will need to know how to make (American crochet term)
- sc which means single crochet
- dc, which means double crochet
- hdc, which means half double crochet
- blo, which means crochet in the back loop only
- 1dec, which means crochet decrease = crochet 2 stitches together to become 1 stitch
- ch Chain
- slip knot
- sk mean skip stitch
Finished Size Approximately:
This example sweater vest is made to fit size small to medium 30-36 inch bust size
For me the model wearing this piece, I am 4’9 feet tall, bust of 32 inches.
How to crochet a sweater vest top step-by-step video tutorial.

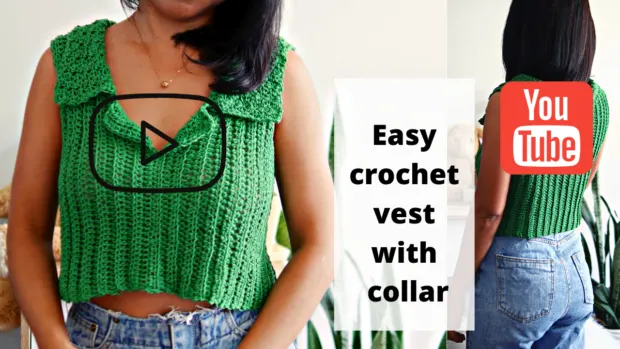
Easy crochet sweater vest with stunning collar pattern instruction.

This example crochet vest with collar the length is 15 inches long, including shoulder height.
We will make the front panel first.
The foundation chain is the length of the vest.
All sizes made the same.
- Row 1 -20 all sizes made the same.
- Row 21-24 for sizes L and XL
Start making foundation chains for all sizes.
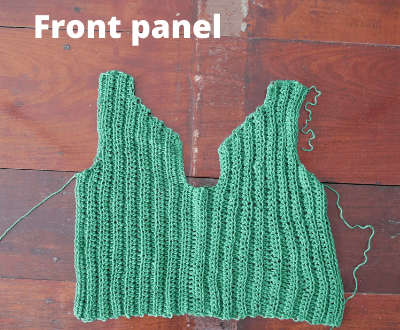
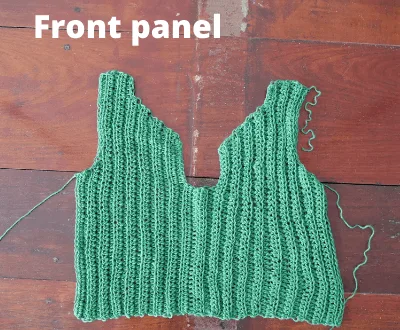
Front half panel.
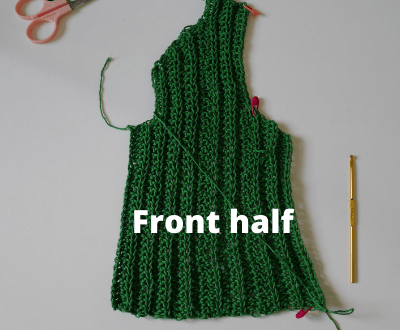
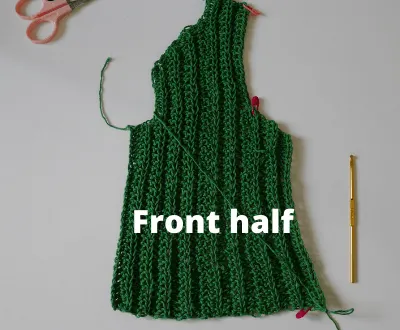
Now we will start to make a front panel with the first half then will make the second half later.
We will start with 30 chains.
All sizes make the same start with chain 30.
For all size make the same from row1 – 20.
Row1. Make hdc in each chain across until the end of the row. chain 1 and turn.
Row2. Make hdc in each stitch across until the end of the row. chain 1 and turn.
Row3. Make hdc in each stitch across until the end of the row. chain 10 and turn.
Row4. make 2hdc in the first chain and make 1hdc in each chain and in each st across until the end of the row chain 1 and turn.
Row5. make 1hdc in the first st and in each stitch across than in the last st make 2hdc to continue to make the slope for open neck until the end of the row. Chain 1 and turn.
Row 6-10. repeat rows 4-5 then at the end of row 10, we chain 5 to make them longer for the shoulder and turn.
Row11-15. ( this we will even it out for the shoulder) Make hdc in each stitch across until the end of the row. chain 1 and turn

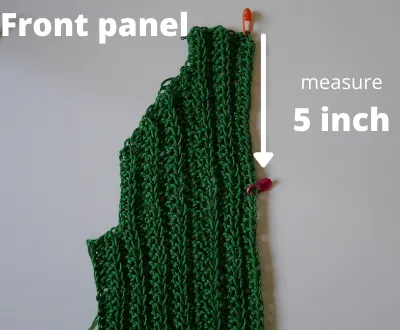
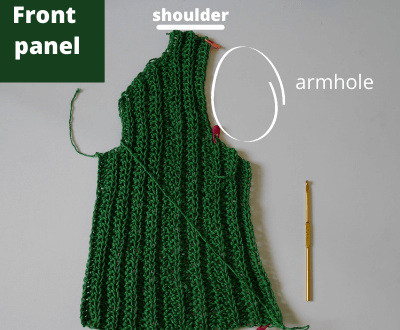
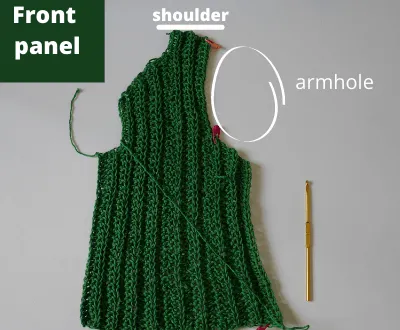
Now we are going to make the armhole by crochet decrease for only 2 rows on rows 16-18.
Measure from the top end down to 5 inch put your stitch marker in at the 5-inch point then, join the new yarn.
Row16. Make 1 decrease ( which mean crocheting 2 stitches to become 1 stitch) in the back loop only then the rest is just 1hdc in a back loop until the end of the row then chain 1 and turn.
Row17. make 1hdc back loop only in each stitch across until the end of the row then make 1dec in the last 2 stitch. then chain 1 and turn.
Now we will continue from the armhole to row 18-20.
Row18-20. make hdc in back loop until the end of the row then chain 1 and turn.
Decrease or add more rows of hdc row to adjust to fit your size and remember the nature of the ribbed stitch is quite stretching so u might need more rows or decrease rows.
For sizes L to Xl add more rows of hdc row by 1 more inch.
Fasten off and leave the long tail for sewing.
After we finished the first half of the front panel then we will repeat the same for the second half of the front panel.
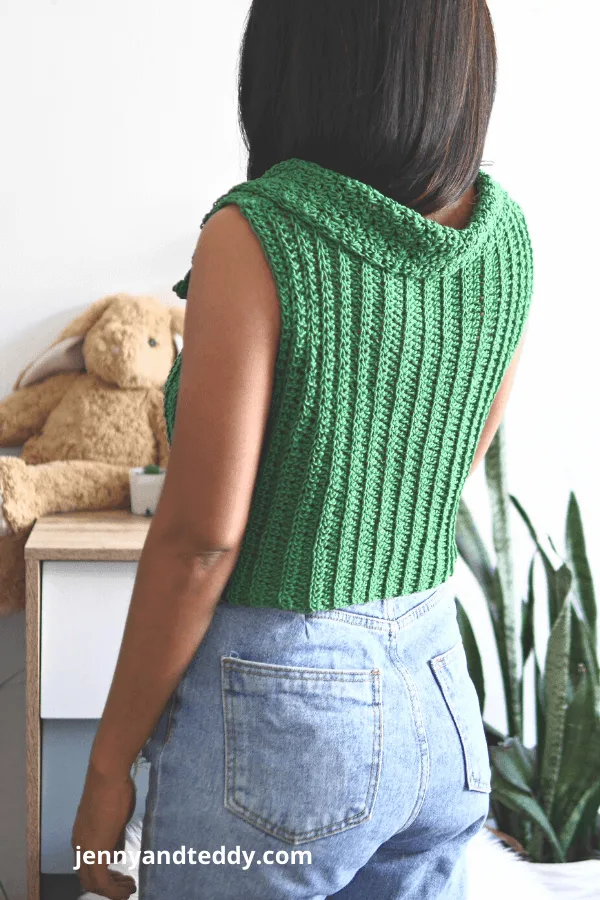
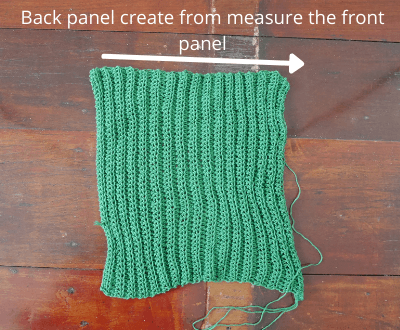
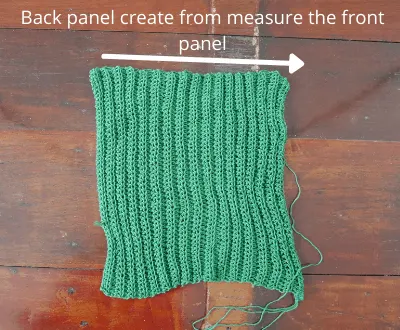
Back panel.
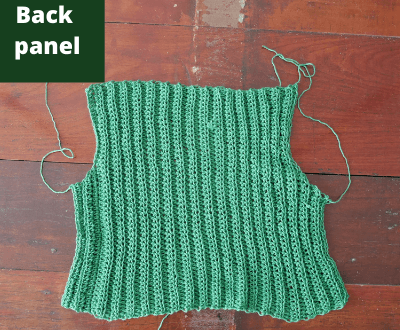
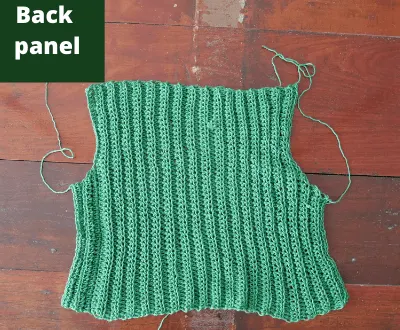
Start to make the back panel by bringing your front panel and measuring from each end of the shoulder and you will get the length of your back panel.
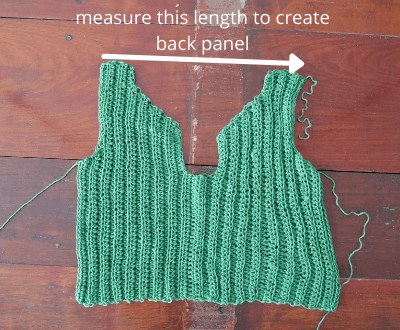
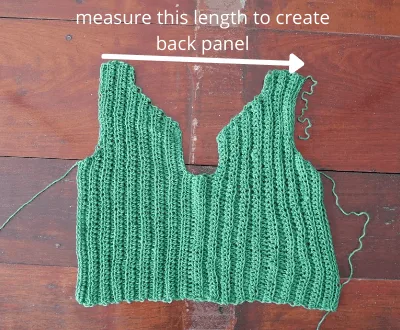
Then start to make the foundation chain in any number that will match the length of your front panel.
After we got the back panel already then we will start to make the armhole by repeating the step from rows 16-20 from the front panel.

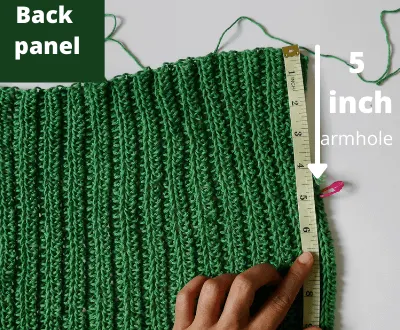
Add the armhole for each side.


After we have done with the armhole for both sides of the back panel. Now we will start to make the collar.
Make collar make 1 piece.

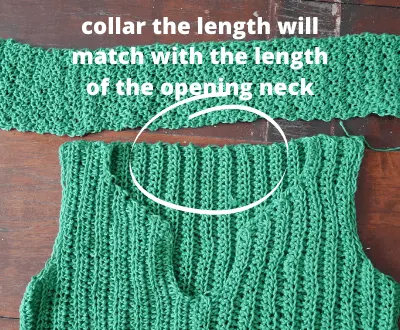
To make the band simply make the foundation 14 or in any even number then * in the first stitch make sc and in the next stitch make dc * and repeat this * to * row after row until you get the length that matches the length of your opening neck of the vest.
Then attach the band by sewing using a yarn needle.

Make 2 small bands to attach at the opening neck.

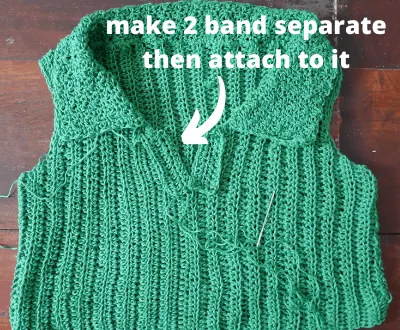
Just a simple chain in any number that matches the length of your opening neck for 1 or 2 rows in hdc.
And attach them by sewing.

none ya
Saturday 7th of May 2022
terrible. all your pop ups make it impossible.