
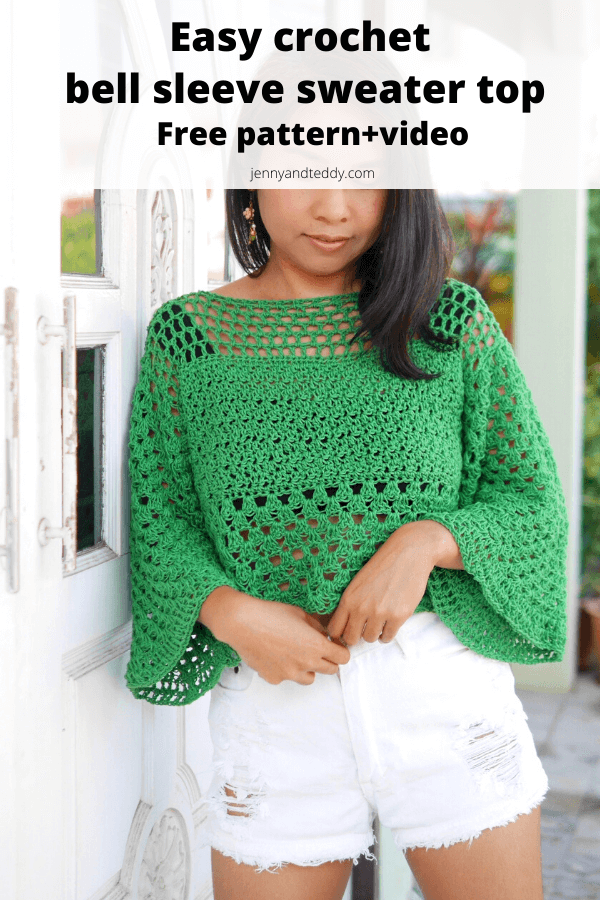
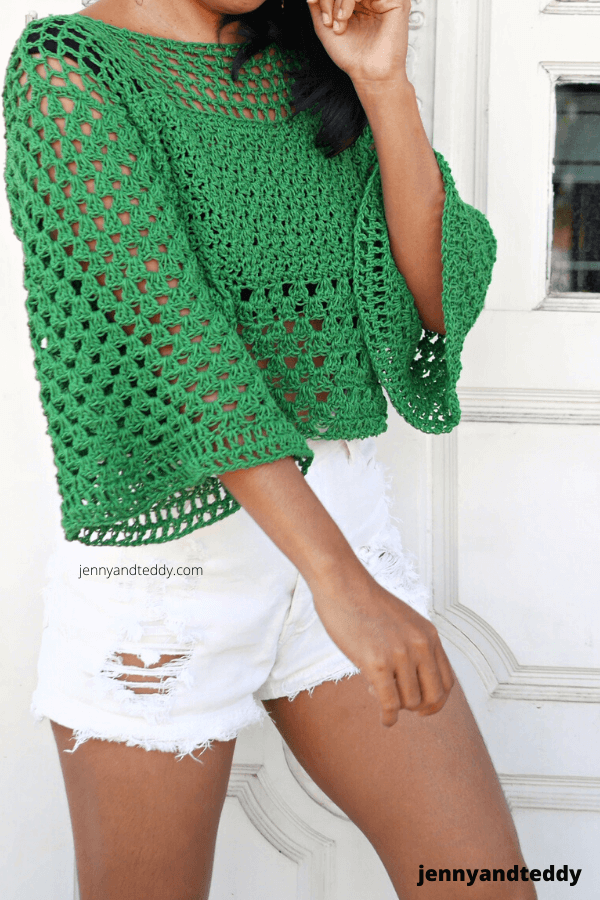
Girl, you won’t believe how simple this free crochet bell sleeve sweater pattern is.
This is the crochet top that you can make to fit your size ( seriously- any size from the smallest XXS to XXXL plus size).
The crochet pullover has no shaping required just simply made two matching rectangles and joins them with little seam then crochet a long sleeves onto it.
The bell sleeves of this crochet top are made with basic lace stitches that are perfect for beginners with a full step-by-step video tutorial. Ding Dong, talking of bells, you’ll also love this bell sleeve crochet wrap top, give it a try!
The inspiration behind this easy crochet bell sleeve sweater.
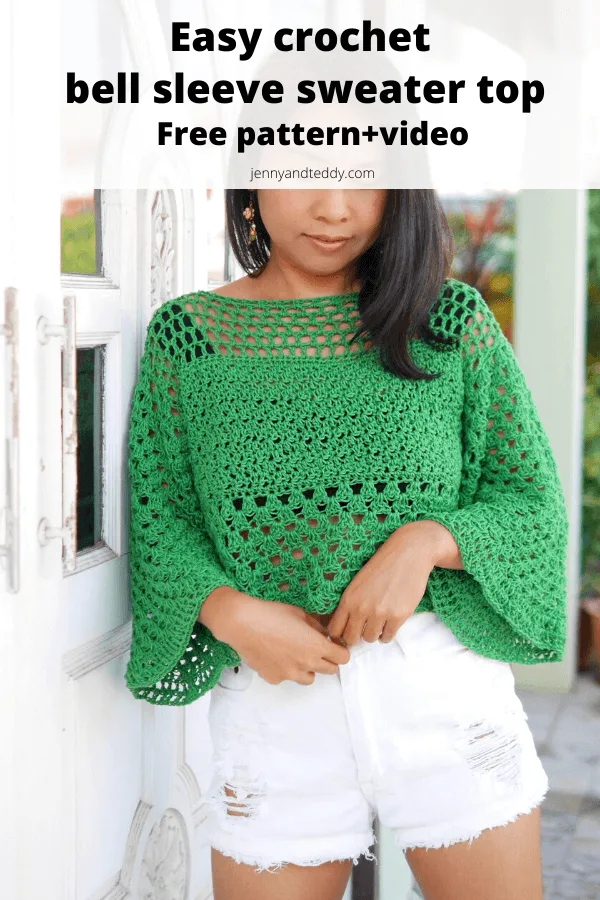
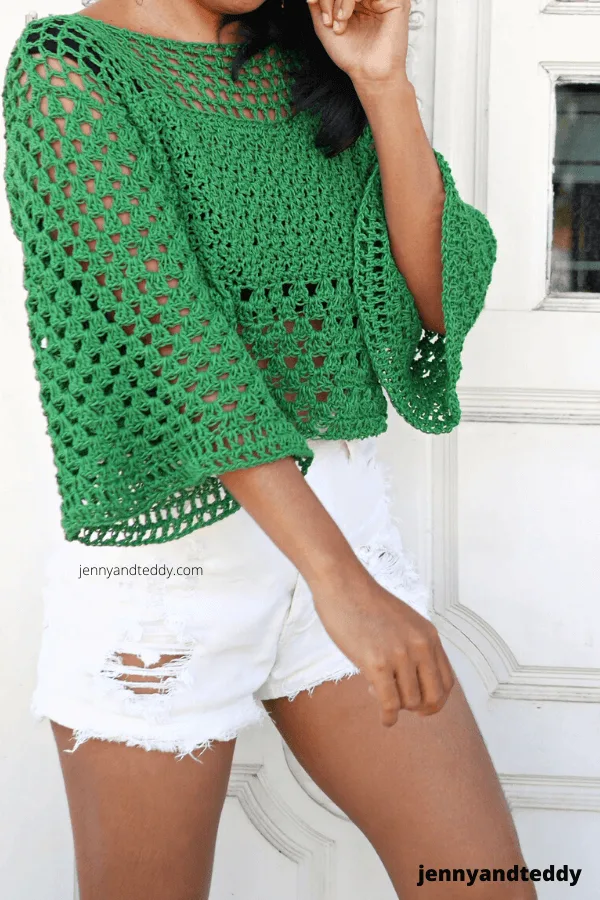
So I have been jumping on the green color trend wagon lately.
I feel like the green shade would be great to match with any outfit for the fall season and springtime.
Likewise, I want to try my hand at crocheting a granny stitch in rounds to see if they would make it easy and flawless for the long sleeve sweater more than my favorite fancy lace stitch.
And this bell sleeve crochet top came out fabulous!
Simple and Beginner friendly crochet flared sleeve sweater.
You will be surprised how easy this sweater with flared sleeves is.
First, we will make this sweater start from the middle section then follow by the bottom part, and finally top part.
And the crochet stitch in this sweater pattern is a mixture of a variety of simple stitches like lemon peel stitch, granny stitch, and easy lace stitch all of them are only one-row repeat.
The best yarn for this bell sleeve crochet top.
A cotton yarn will give good weight and a beautiful drape, in this tutorial I use 100% cotton yarn DK weight.
You could get any kind of plant fiber blend like bamboo yarn, cotton blend, hemp yarn, and more.
Or you could use just any DK weight yarn will work just fine.
Make this sweater in any size.
This bell sleeve sweater top pattern is made to measure, basically, we will measure your bust size then dive by2 and that is your foundation chain.
You can see how I show you guys to calculate the foundation chain in the video tutorial Easy.
Want more free crochet sweaters patterns?
- Summer lace sweater top
- Cowl neck sweater
- Bobble stitch oversize sweater
- Knit look oversize sweater
- easy v neck sweater
- Polo sweater.
Let’s get into crochet bell sleeve pattern, shall we?
Material.
- I used DK weight yarn of around 1000 yards for sizes example small to medium from bust size 30-36 inches.
- 4.0 mm crochet hook
- Sewing yarn needle
Skill and abbreviations
- you will need to know how to make (American crochet term)
- sc which mean single crochet
- dc which mean double crochet
- hdc which mean half double crochet
- 1dec which mean crochet decrease = crochet 2 stitch together to become 1 stitch
- ch Chain
- slip knot
- sk mean skip stitch
Finished Size of this bell sleeves sweater Approximately:
This example crochet sweater is made to fit size small to medium 30-36 inch bust size
For me the model wearing this piece, I am 4’9 feet tall, bust of 32 inches.
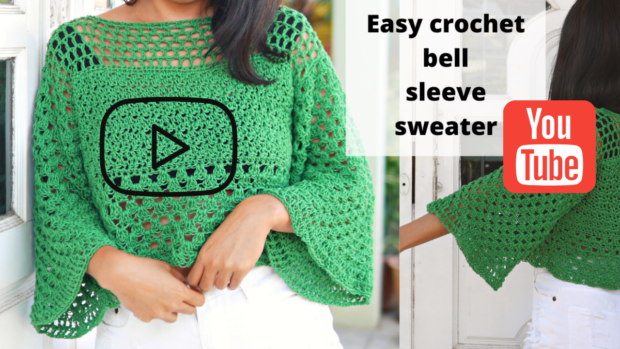
How to crochet bell sleeves sweater step-by-step video tutorial.

Pattern note.
- This sweater can make in any size they are made by measuring your bust size.
- the rectangle front and the back are made the same
- The rectangle is made from the middle section first then follow by the bottom part and then add the top part.
Get the free pattern below or this pattern is also available as an inexpensive, ad-free, PDF printable instant download in my etsy shop. Thank you so much for your love and support. I am really appreciate you.
Easy crochet bell sleeve sweater free pattern instruction.
Top make 2 pieces.
Top make 2 identical pieces front and back panel.
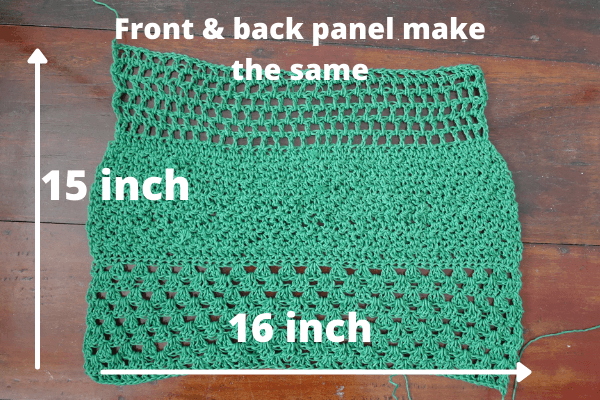
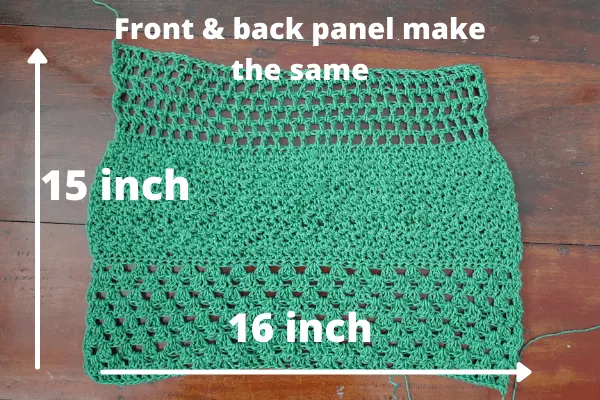
The measurement of one rectangle.
- 15 inches long for a crop size length. For full-length top is 16-17 inches.
- 16 inches wide fit bust size 30-36 inches.
First, let’s measure your bust size and then divide by 2, for example, my bust size is 32/2 so I will get 16 inches for my size. Feel free to add more inches for a loose-fitting or perfect fit.
For example, if I will add 2 more inches for loose fitting for my sweater.
If you girl wants your sweater to be loose fitting just add 2 more inches for your bust after diving by 2 or if you want an oversize sweater to add 4 more inches.
See the video tutorial for how to make them into your size.
Start with the middle section first.
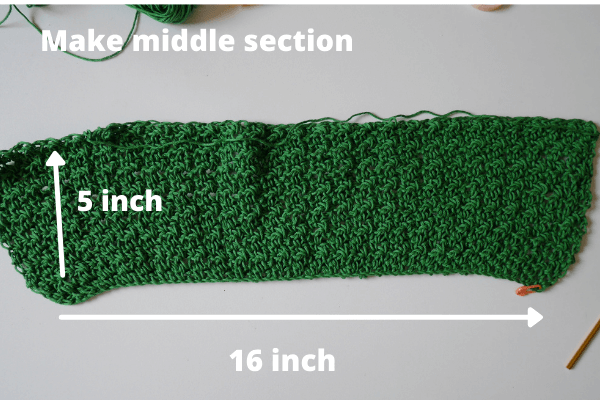

Pick up a crochet hook size 4.0 mm and Start off by making a slip knot Then make 56 chains for sizes small and medium fit from bust size 30-36 ( For the other size start a foundation chain in any number that matches your bust size calculation)
Row 1: * in the first chain make Sc then make dc in the next chain * repeat this * to * across until the end of the row, ch 1, and turn.
Row 2: * in the first stitch make dc if the previous row is sc then in the next make sc if you see the previous is dc* repeat this * to * across until the end of the row
Repeat row 2 until you get around 5 inches long. chain1 and turn to the bottom section of the rectangle.
After we finished the middle section of the rectangle then we are going to add a granny stitch to the bottom part.
Add the bottom section for the sweater.
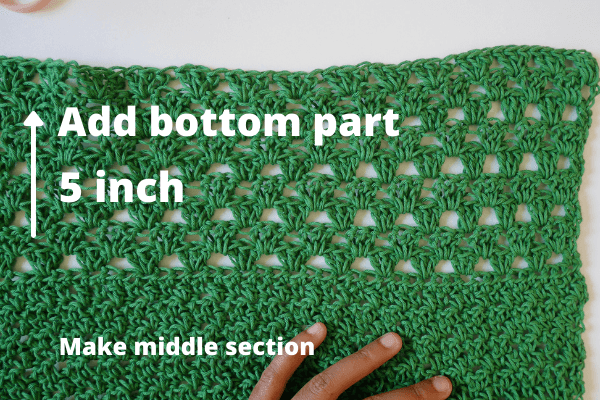
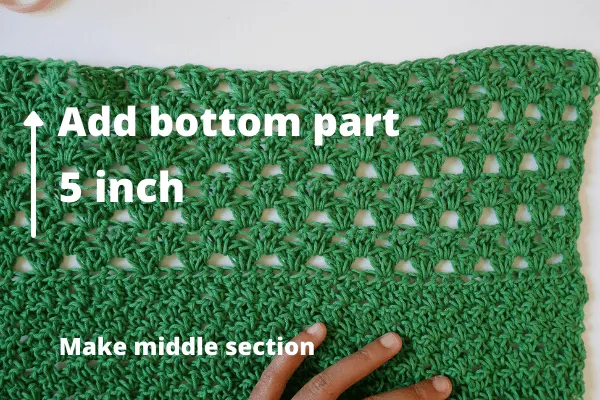
Continue from the middle section. After we chain1 and turn then we will make hdc in each stitch across until the end of the row. Chain 2 and turn to the granny stitch part.
Granny stitch for the bottom part.
Start row1 of the granny stitch.
Row1: make 1dc in the same stitch * skip 2 stitches, then work 3dc in the next stitch* repeat * to * across until the end of the row until you will have 3 stitches remain, skip 2 st, 2dc in the last stitch, ch2 turn.
Row2. now you will work 3dc in each space ( between double crochet groups) across until the end of the row, then dc in the last stitch, ch2 and turn.
Repeat row 1 and 2 until you get your 5 inches for the bottom section or longer for full length. Finish off and leave the long tail for sewing.
Now we are going to add a top section for this rectangle.
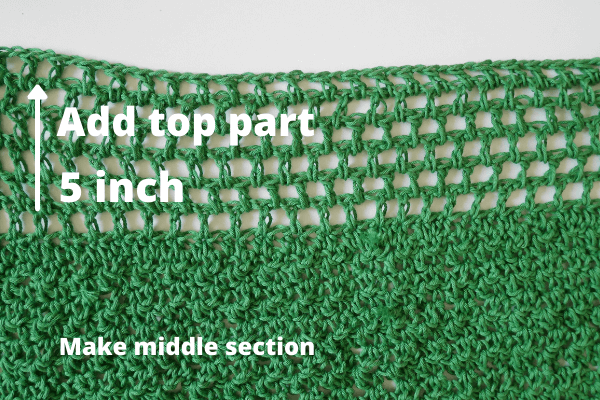
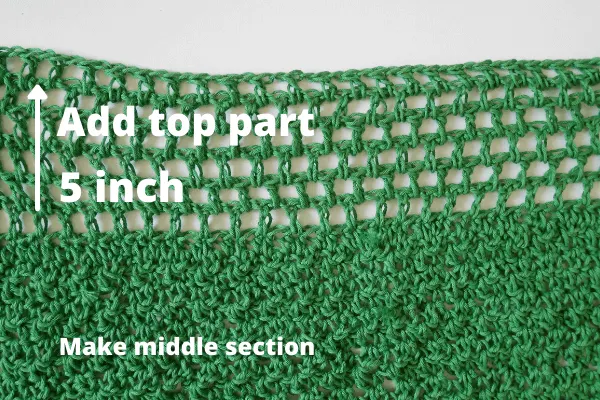
Join the new yarn at the end of the corner of the rectangle and chain 1 then make hdc in each stitch across until the end of the row. then chain2 and turn.
row1. made dc in the same st, * chain1, skip1 st and dc in next st* repeat this * to * until the end of the row. ch1 and turn.
row2. dc in the same st * ch1 then skip 1 st then dc in the next chain space* repeat this * to * until the end of the row. ch2 and turn.
Repeat row 2 until you get your 5 inches for the top section or longer for full length. Finish off and leave the long tail for sewing.
Repeat the same process for the second piece.
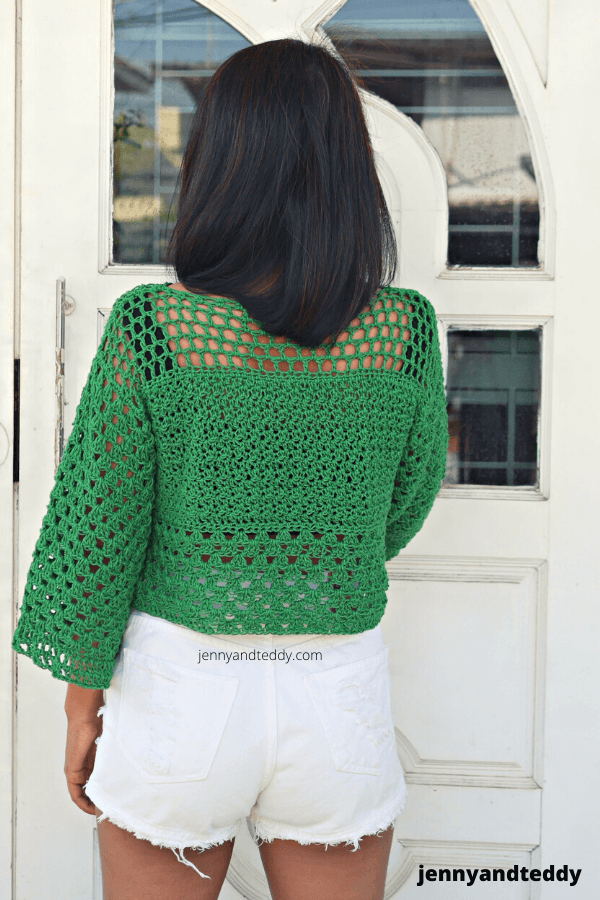
Assemble.
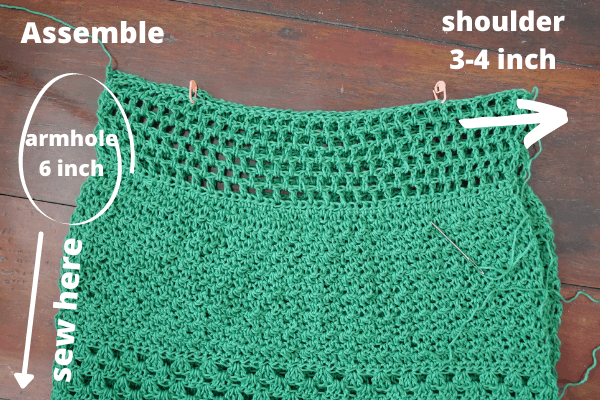
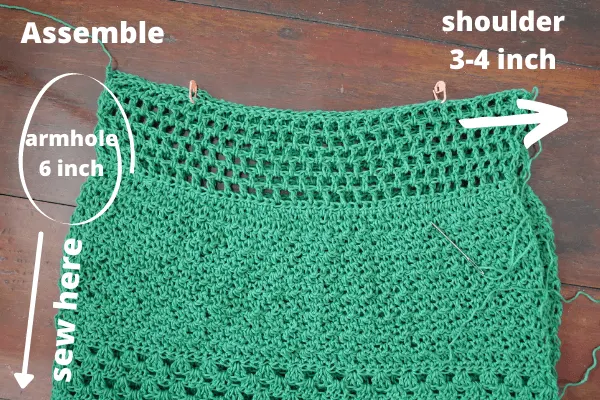
Now you have 2 pieces then we will be ready to assemble the sweater top.
Lay 2 pieces of rectangles flatted on top of each other.
And sew as the photo above.
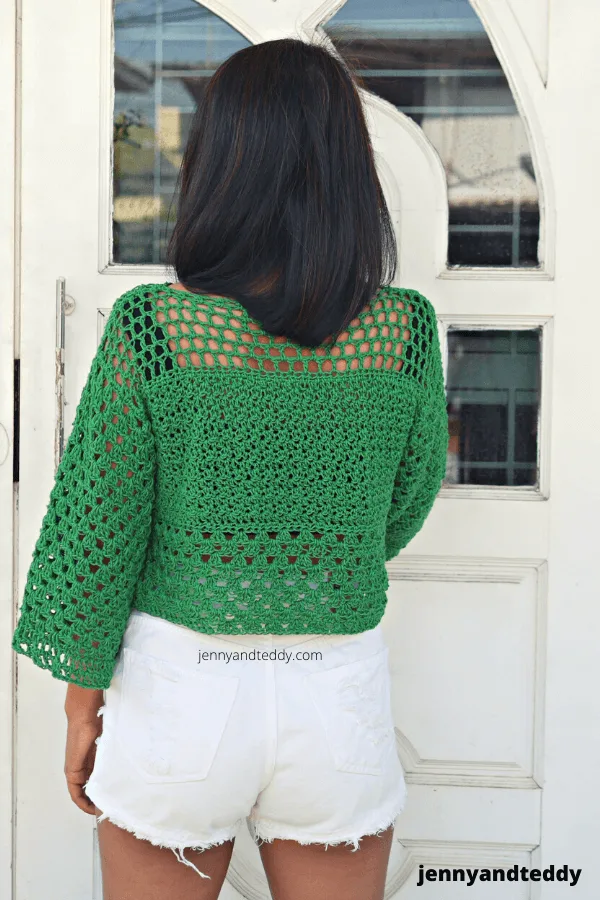
Add bell sleeves.

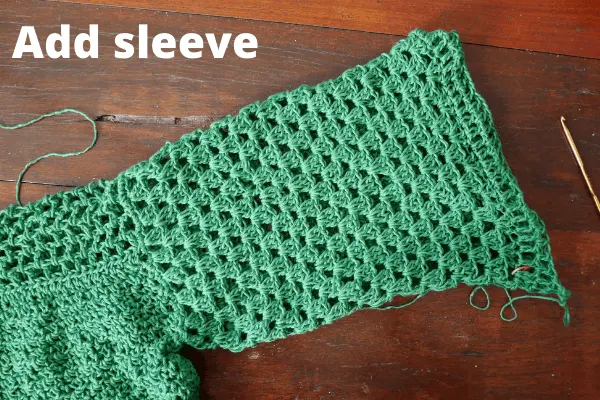
Now we finished assembling the sweater, we will move on to make the long sleeves by joining the new yarn.
Join new yarn at any point of the armhole. in the bell sleeve, we will work in a spiral don’t join round.
Now we will make sc in each stitch around the armhole for 1 round. ( we will need to count stitches in this round for the same size of the sleeve)
After we finished make sc around the circle for 1 round then chain2.
In the next round, we make.
Now, we are going to make the granny stitch.
Round1. making 1dc in the same st then skip the 2 stitches and make 3dc in the next stitch, then* skip 2 and make 3dc in the next stitch* repeat * to * around until end of the round ( don’t join round), then at the end of the round if you have 2 stitches left sk1 and make 2dc in the last stitch. Or if you have 3 stitches left make 2dc in that st. ( don’t join the round and continue to the next round)
Round2. now you will work 3dc in each space ( between double crochet groups) across until the end of the round.
Repeat round 2 until you get your desire length of the long sleeves. My length is about 10-11 inches.
Now in the last 2 rounds of the bell sleeve, we will add different simple lace stitches.
After we got your bell sleeve length then we will add the last 2 rounds for the bell sleeve.
round1. continue from the granny stitch round by making dc in the next stitch then *ch1 and dc in the next stitch* repeat this * to * until the end of the round.
round2. continue from round1 make *1dc , ch1, skip1 st then make 1dc in next stitch* repeat this * to * until the end of round then, Fasten off. And repeat the same for the other sleeve.
Nasheema
Saturday 18th of February 2023
I love your clear explanations ...so excited to make this for my daughter 💕.
Tammy Beatse
Saturday 23rd of April 2022
I am confused on your foundation chain, 56 is not long enough using dk cotton and a 4mm hook.
Mary
Sunday 10th of April 2022
So creative and so cute!
jane
Friday 15th of April 2022
thank you Mary.
Valerie
Tuesday 22nd of March 2022
Hi I cannot find the free patterns to print out & lovely patterns they are too, thank you