


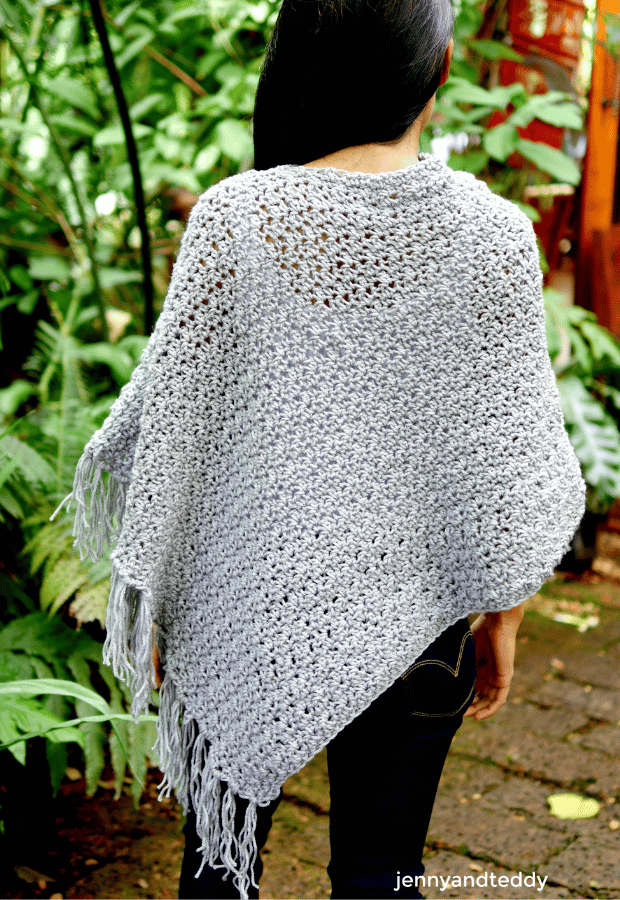
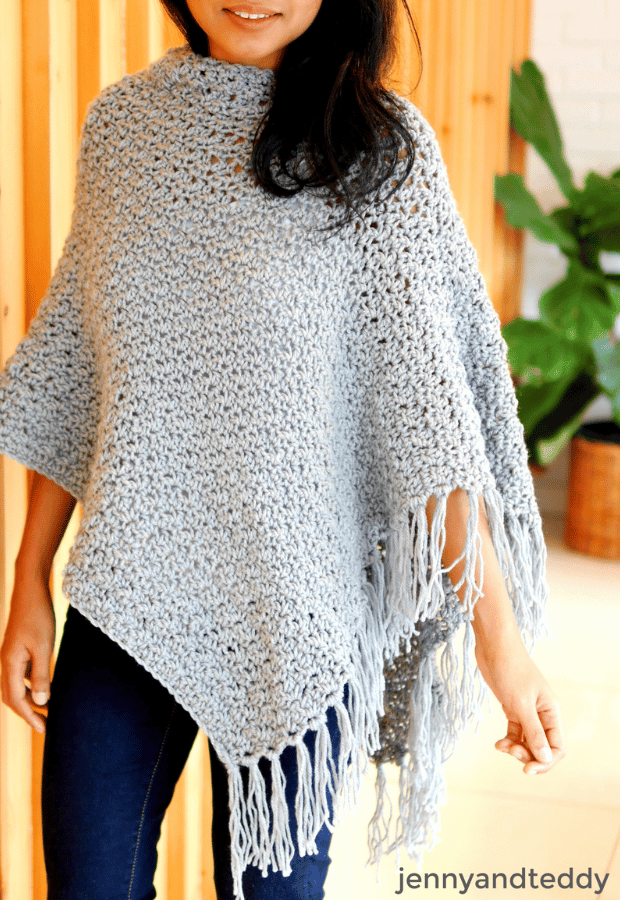
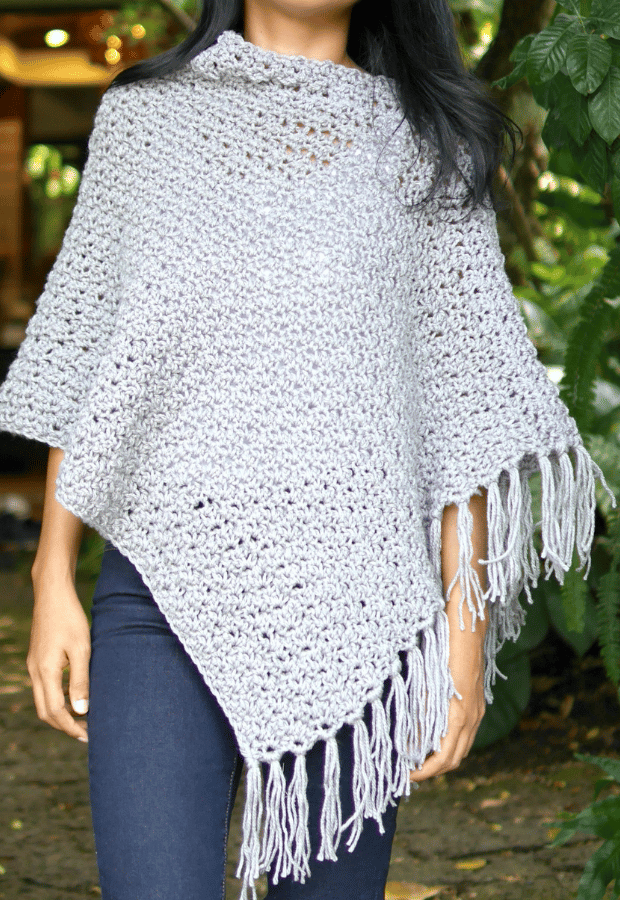
Nina crochet Fringe Poncho is a great way to add some fun to your fall/winter wardrobe and keep you cozy for this fall.
I love how ponchos are versatile outerwear and make you look chic at the same time.
They are the perfect pieces when you don’t feel like dressing up and want to find something easy to put on and still make you look flawless!


The easiest crochet poncho with fringe pattern.
Ok, girls, let me quickly tell y’all how I came up with this cute poncho name.
Oh well……. the name is inspired by my favorite singer right now, Ed Sheeran and his song are what I like….. if you are a fan, you probably know the song, right? I guess lol.
Anyhow, the Nina fringe poncho is one of the simplest ponchos patterns ever among those easy ones I made.
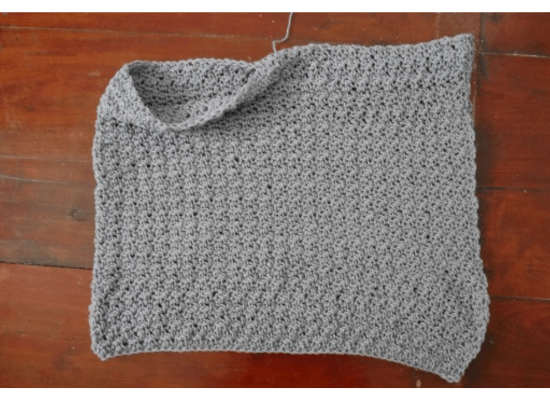
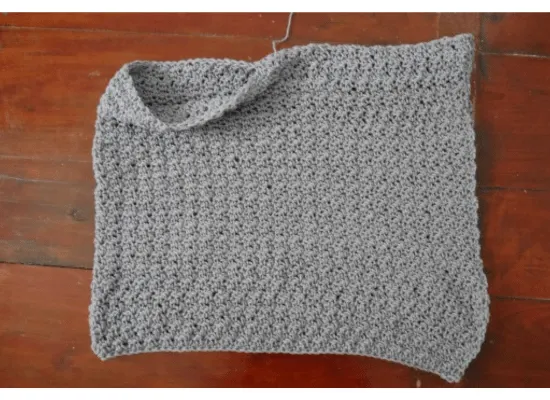
Nina is a one-rectangle basic crochet poncho with fringe pattern that has a relaxed fit with no shaping involved and little seam on the side to create an open head to pull through.

Crochet Stitch is used for this modern fringe poncho.
The crochet stitch might look crumbled and a little complicated, but they are super easy for beginner crocheters. Just alternate single crochet and double crochet.
Actually, they are lemon peel crochet stitches which I have used them in my beginner-friendly free crochet poncho patterns, like, the boho chic houndstooth poncho and Lilly easy poncho.

Yarn for this chunky feel Nina fringes poncho.
For this fringed poncho crochet pattern, I use 4 medium-weight yarn, or we could use 10-ply yarn to give it a feel chunky but look pretty at the same time.
- Acrylic yarn: In this free pattern, I use 100% polyester fiber content yarn because they are budget friendly and they come out pretty; moreover, they keep me warm, so what more could I ask for this perfect yarn? I absolutely love it.!
- Wool yarn: You girls can go for wool yarn or wool blend if you like. They are probably best to keep toasty warm on a chilly cold day.
- Cotton yarn: if you prefer cotton yarn, just go for it, girls! they are perfect for summer and give a beautiful drape to the poncho.
Supplies & materials.
- I used 4 medium weights. , The one That I would recommend is from Lion brand Feel like butta, 100% polyester They have great varieties at a good price!!! I Love them ^^.
- I am using about 1200 yards altogether.
- 6 mm crochet hook or J/10 US hook size
- Sewing yarn needle
- stitch marker
Gauge: ” 1 dc in next st and 1 sc in next st ” = 1 inch
Note: we are crocheting this poncho loosely, not too tight.

Skill and abbreviations
- (American crochet terms)
- You will need to know how to make
- sc which means single crochet
- dc, which means double crochet
- ch, Chain
- slip knot
Finished Size Approximately:
Example size is Small to XL (another size to make it bigger by adding more chain to the foundation chain, detail in the pattern)
- For me the model wearing this piece, I am 4’9 feet tall.
- S-xl 48 inches long and 18 inches wide
- 2XL 67 inches long and 23 inches wide
- 3XL-4XL 70 inches long and 24 inches wide
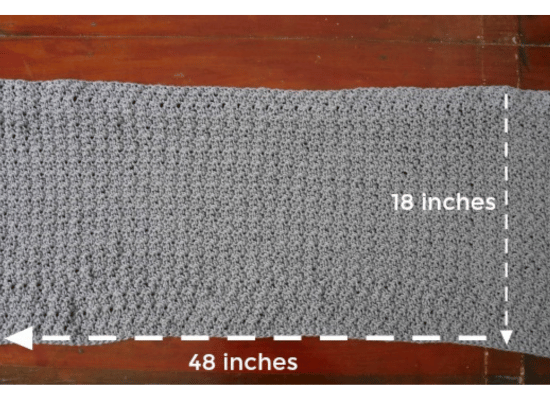
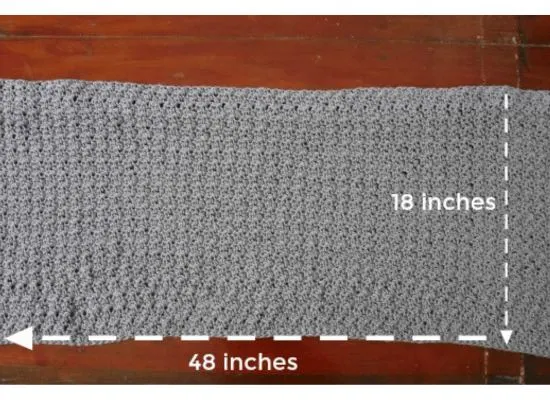
Measurement.
one rectangle 18×48 inch.
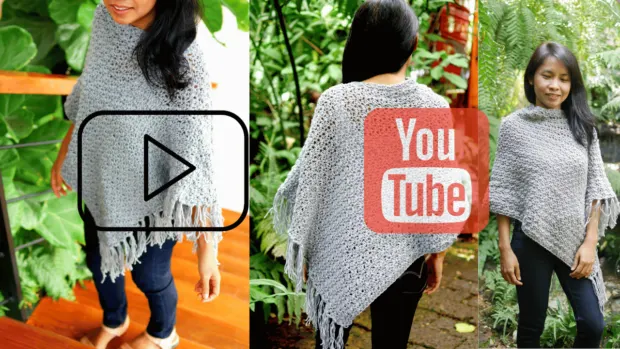
How to crochet poncho with fringed for the beginner’s video tutorial.

Nina chunky poncho free crochet pattern instruction.
Pick up a crochet hook size 6 mm and Start off by making a slip knot.
Then make 100 chains (foundation chain multiple of 2 ).
- s to Xl chain 100
- 2XL chain 150
- 3XL to 4XL chain 160
You will crochet it loosely, not too tight, to create a soft and squishy feel.
Row1. sc in the next chain from hook, then sc in each chain across until the end of the row, ch1 turn.
Row2. *sc in next st, then dc in next st* repeat * to * across until the end of the row. Ch1 turn
Row 3 and beyond Repeat row 2 or until the piece measures approximately 18 inches long and Fasten off.
- 18 inches wide for sizes s to xl
- 23 inches wide for sizes 2xl
- 24 inches wide for sizes 3xl to 4xl
Assembly poncho.
After we all finished with the long rectangle piece, now time for assembly.
Lay a piece of a big rectangle in flatted and then fold them in half and sew along the edge to create the shoulder by using a yarn needle. See pic below.
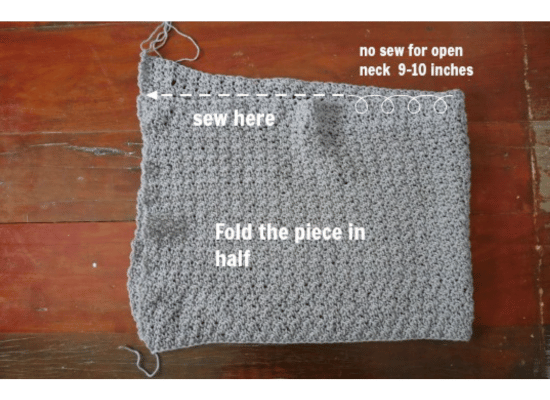
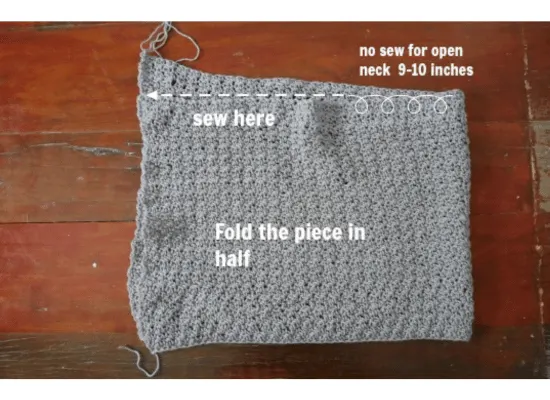
After we sew the shoulder, the piece will look like this.
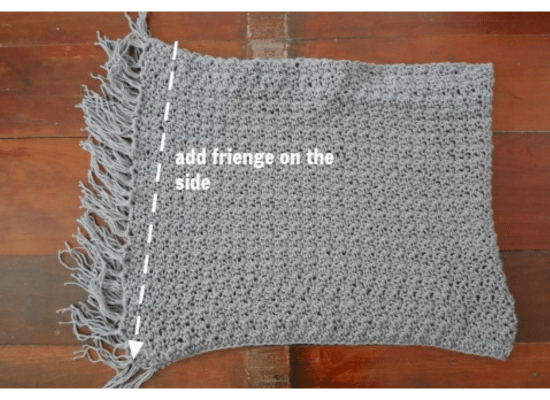
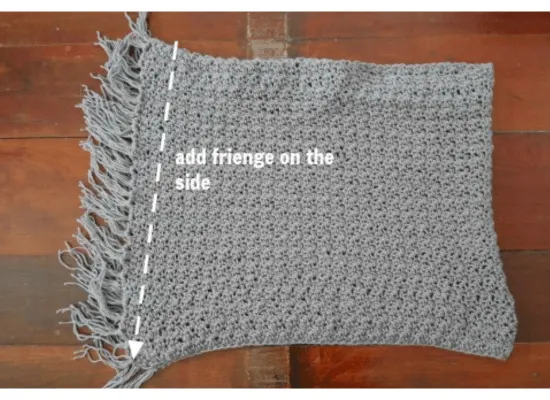
How to add fringe to a crochet poncho.
After we finish sewing the edge to create the shoulder, then we will add fringe at the side of the poncho.
To add fringe, cut the yarn into a long piece and group them into 2 to 3 strands and use your crochet hook to pull up the ground of the yarn strand through the loop on the edge of the poncho.
I made a video tutorial on how to add fringe to the poncho at the end of the video; check it out.
Happy crocheting!
If you make one I would love to see your creation tag me on Instagram!
Donna
Saturday 1st of October 2022
Love your patterns. They are great for beginners like myself. I am currently crocheting your summer cardigan. Next on my list is your boho poncho. Thanks for all your beautiful work!
anna m winn
Saturday 20th of August 2022
How do I get help selling my crocheted products on line>
Denise
Thursday 26th of May 2022
I made this poncho and it's so cute, now I'm making another one! Super easy great for just a non thinking project...
Denise
Thursday 12th of May 2022
I made this & it turned out so cute! Now I'm making another one! Thank you!
Edith
Friday 4th of February 2022
The poncho looks beautiful in the picture. I bought Feels Like Butta yarn which I have never used before. I like how soft it feels. But when I did a test swatch of 20 chains with the yarn and a J hook as recommended in the pattern, I did not get the gauge. I crocheted loosely. My 20 chains made around 7.5 inches long. 100 chains would not make 48 inches long. Should I add more chains in order to get 48 inches long? I figured I'd need 126 chains.