

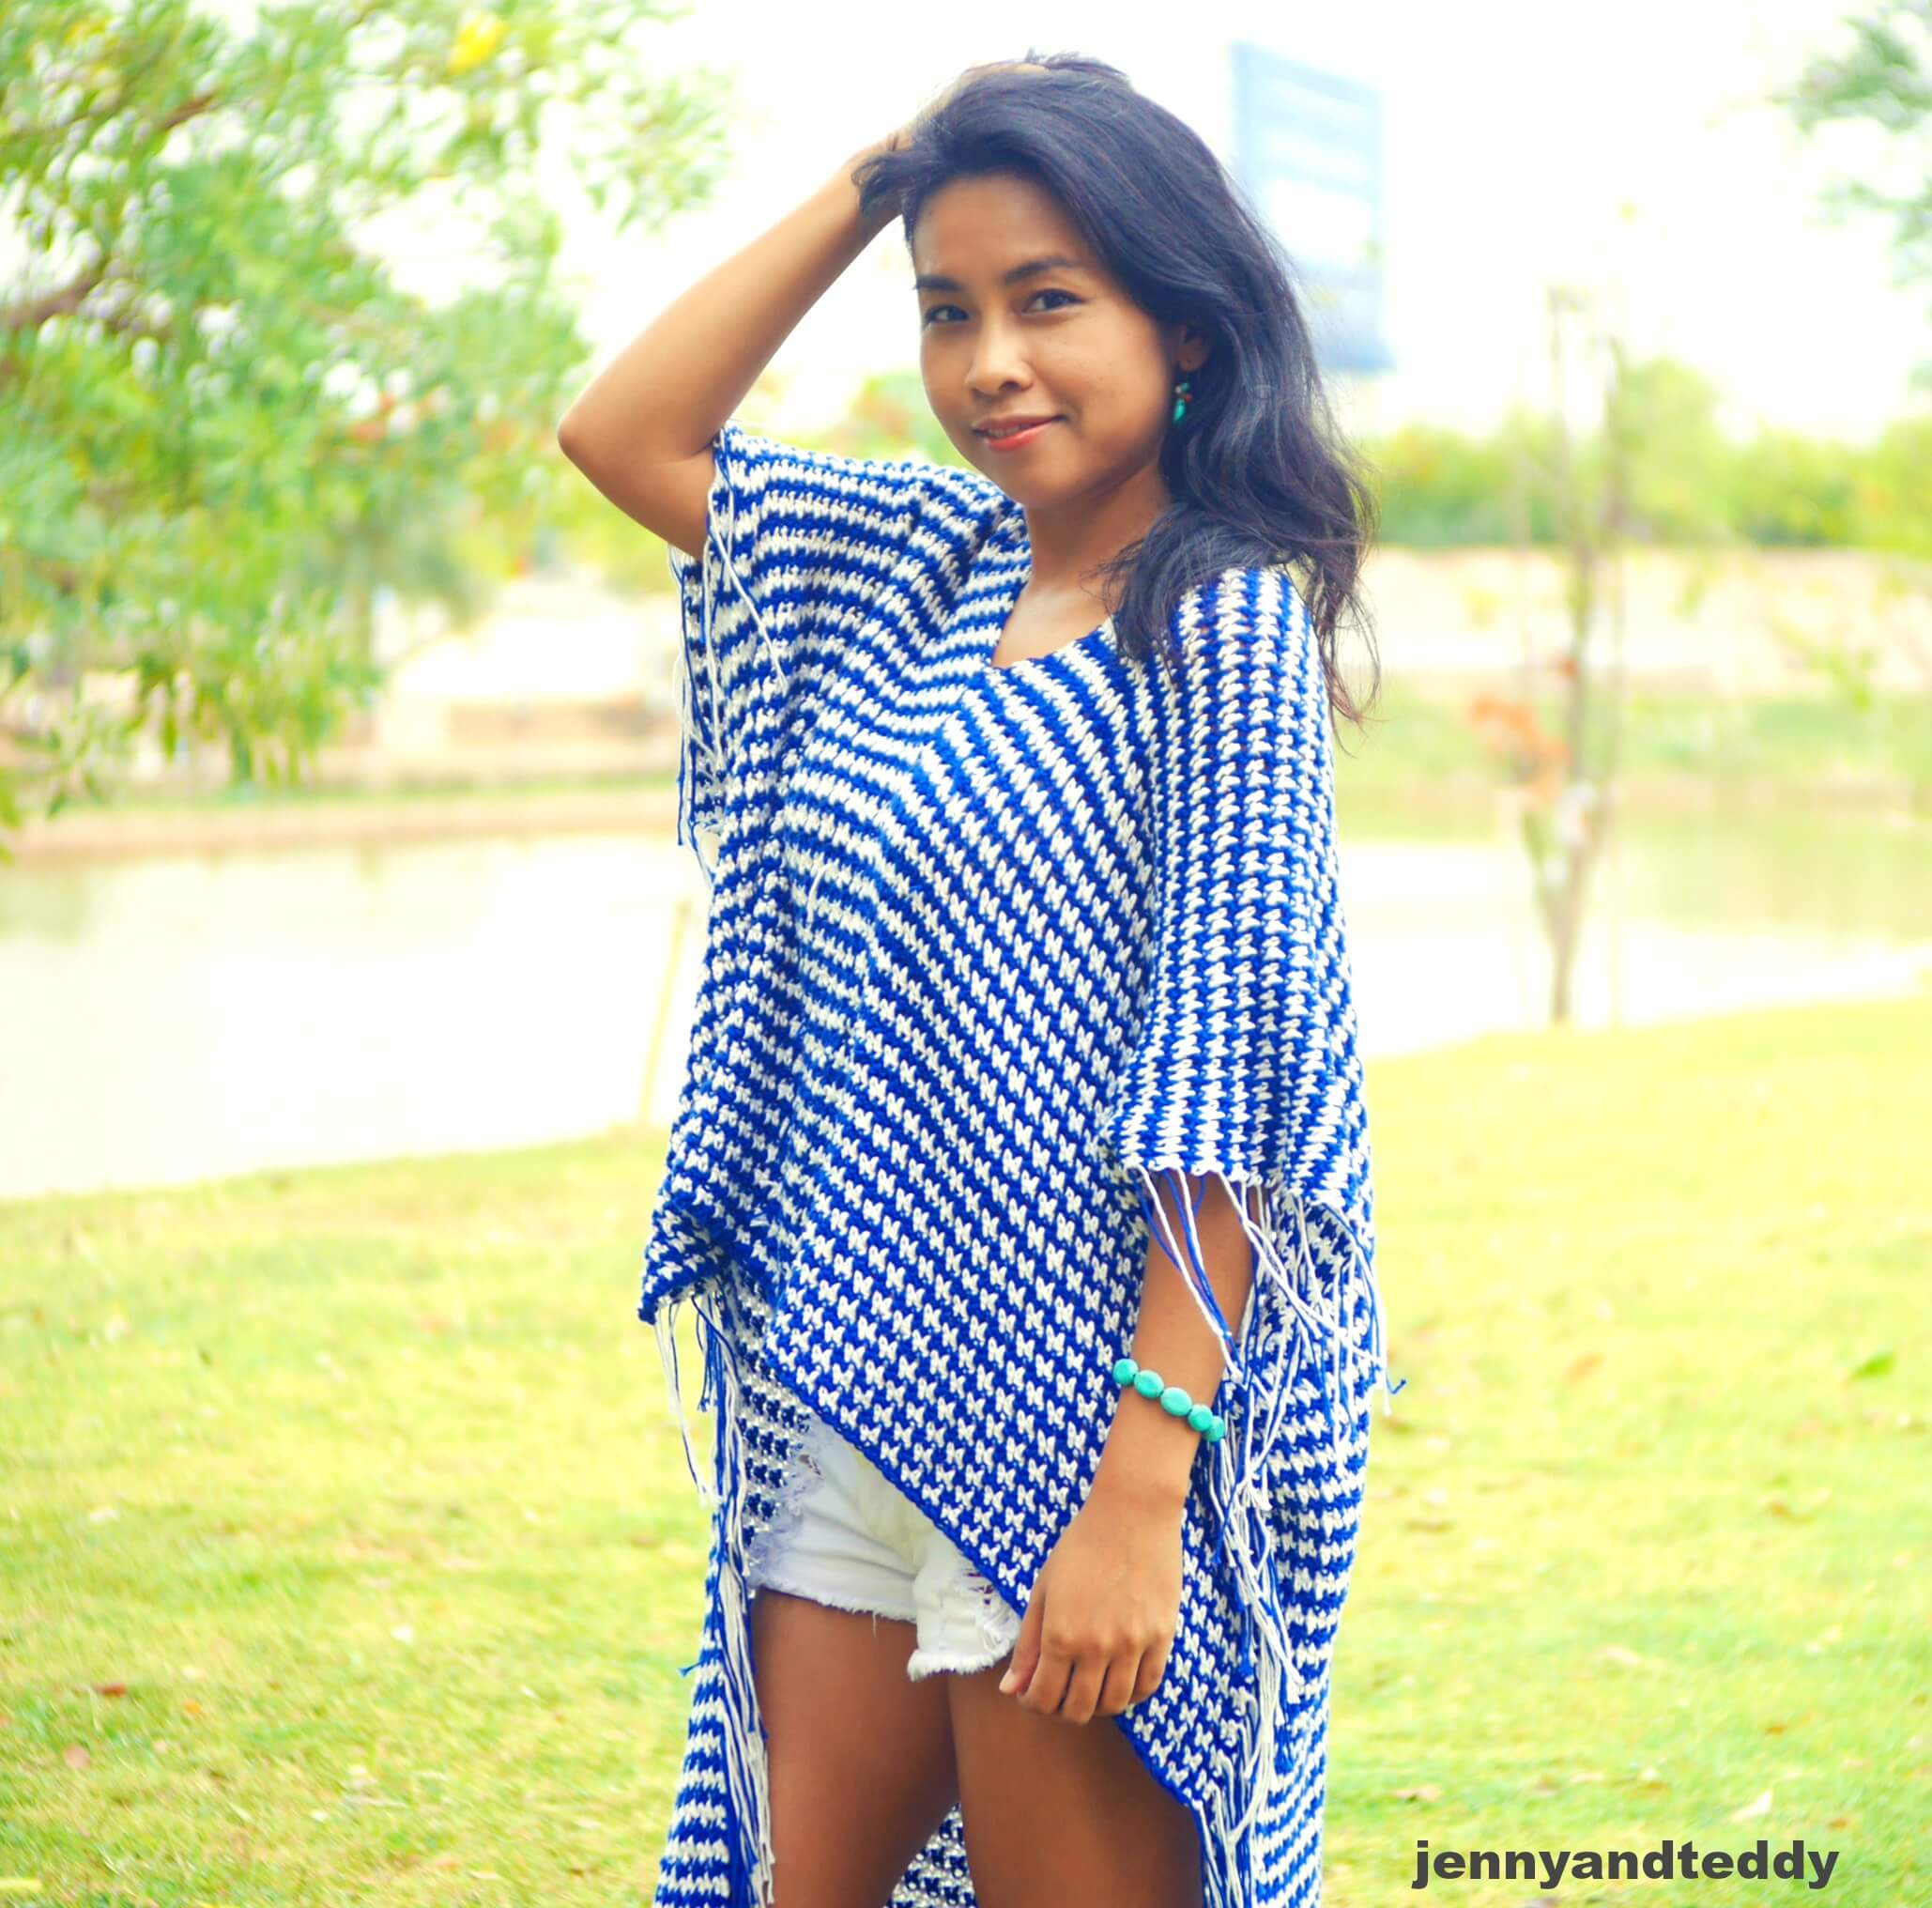
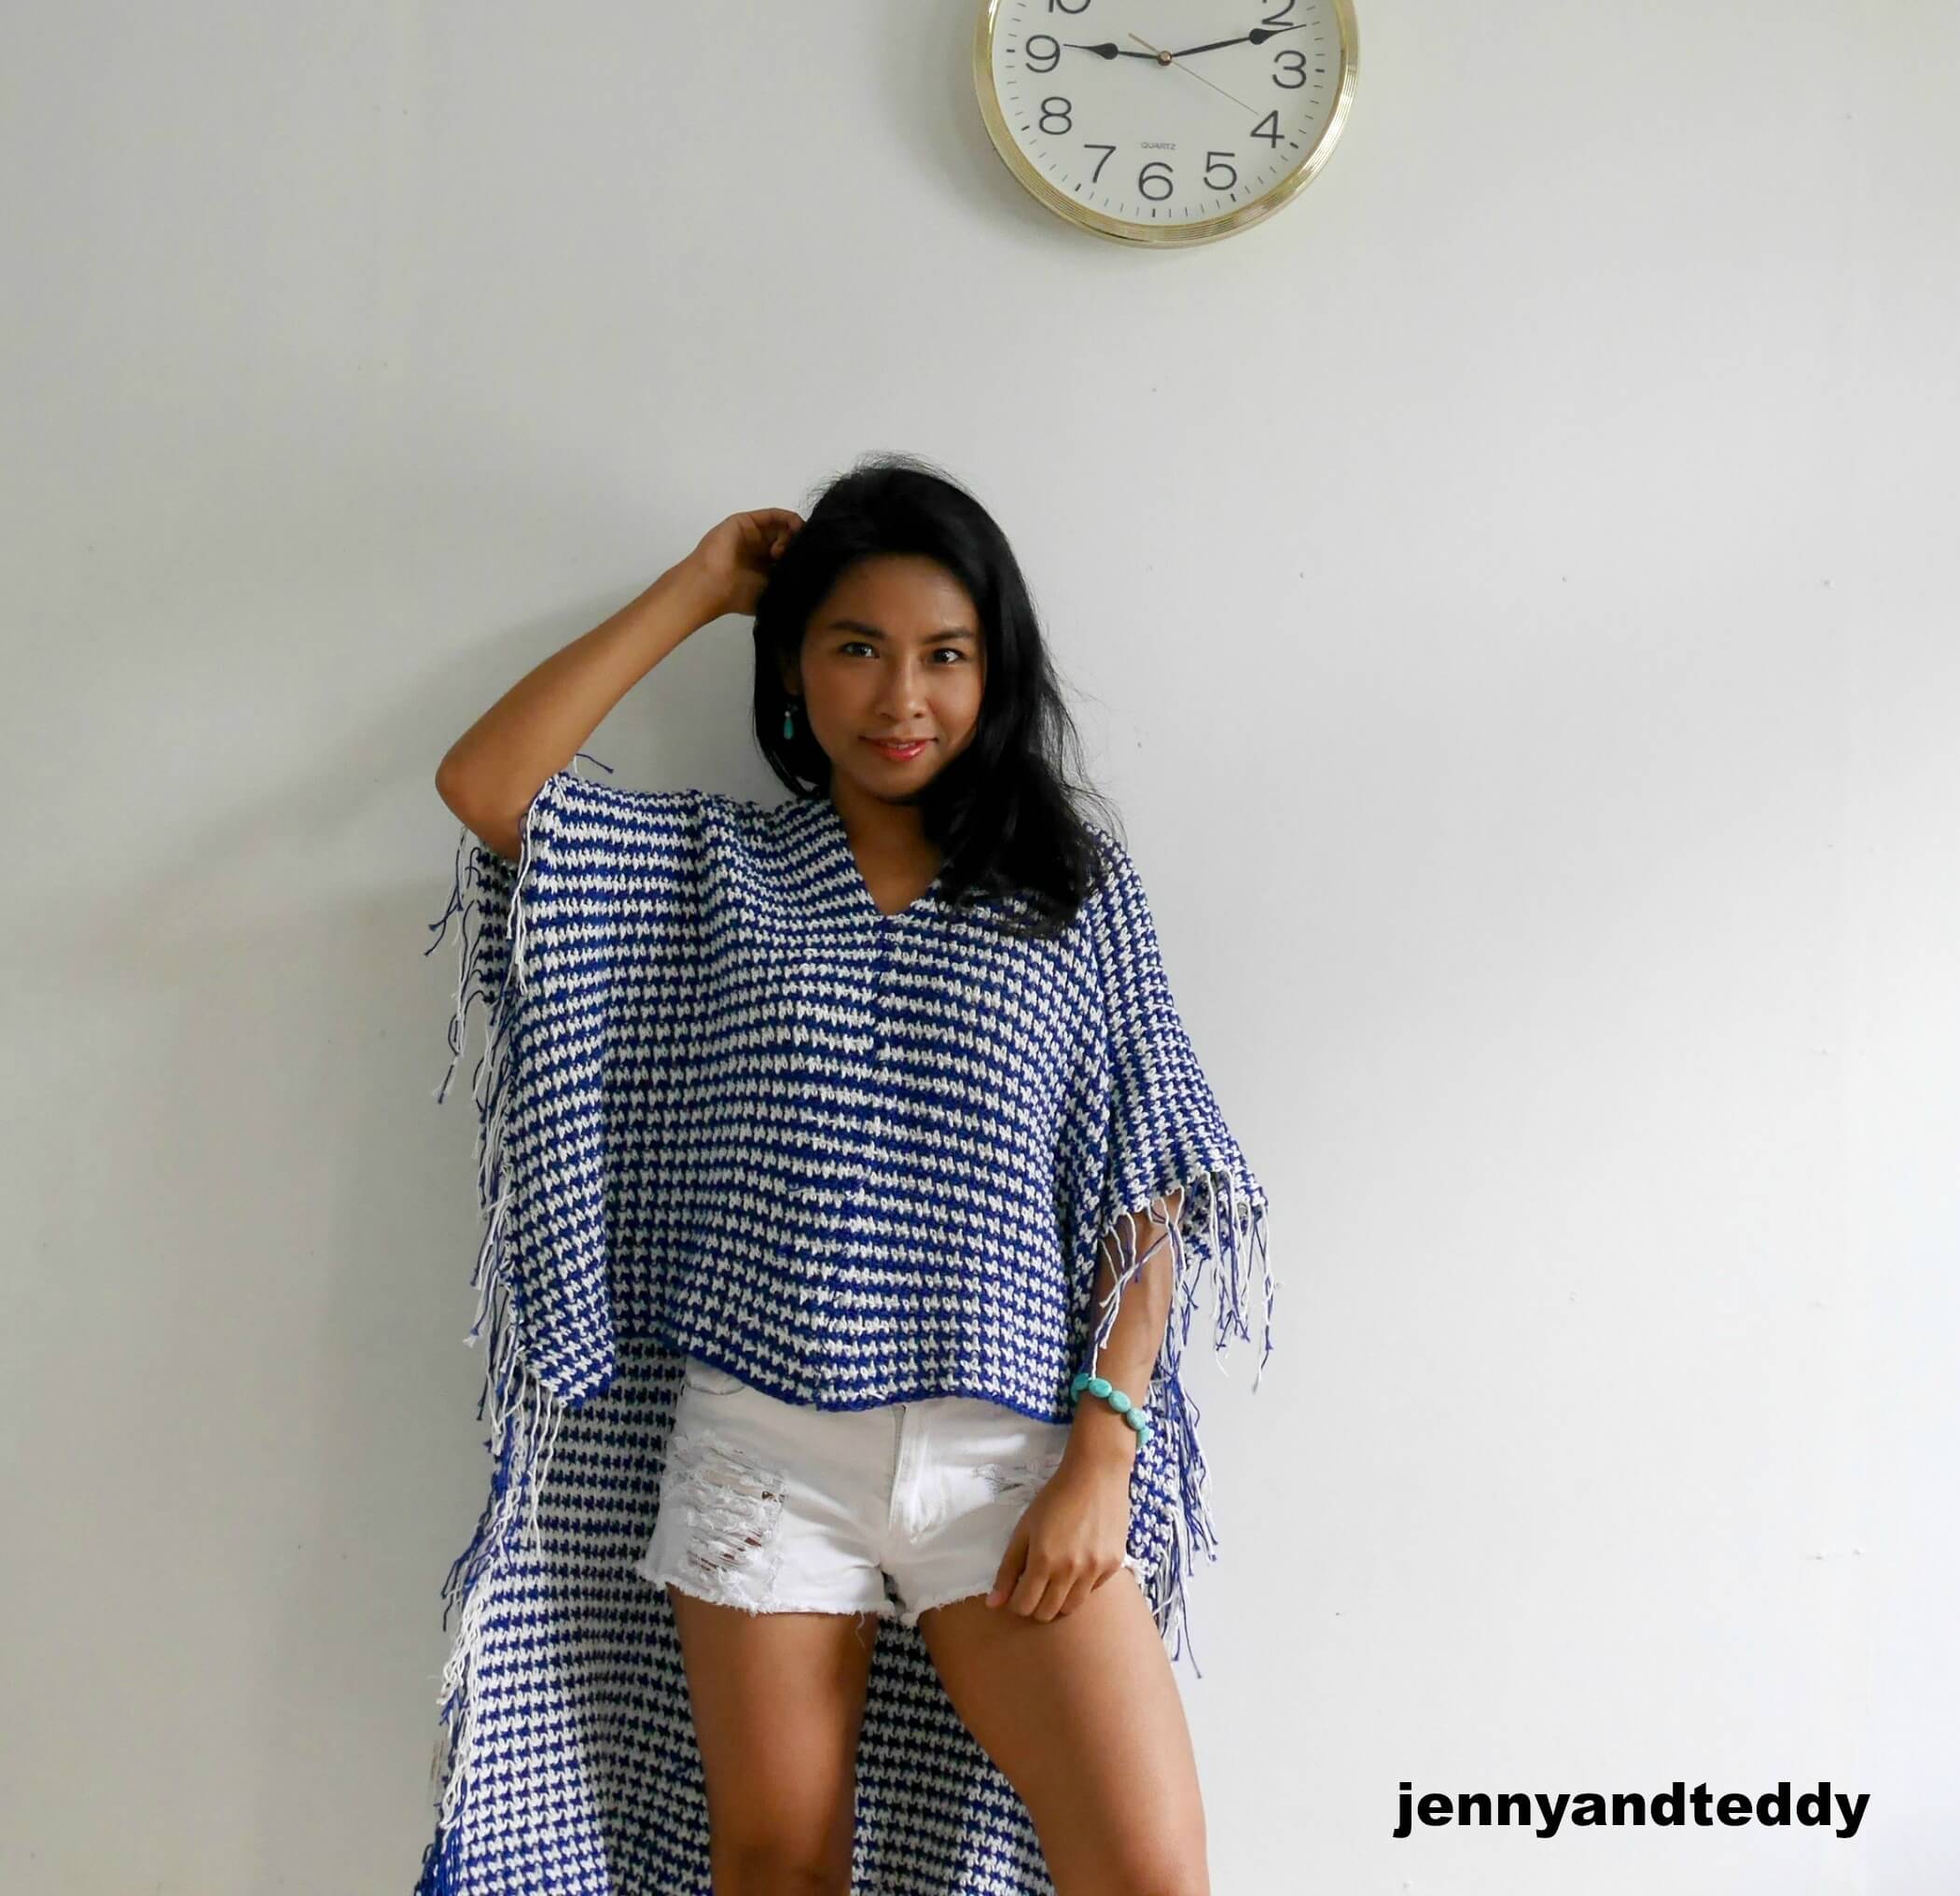
This colorful crochet houndstooth poncho is the perfect outer garment to wear for transitional weather from winter to fall/spring season.
Fall season is approaching sooner or later, and the temperature is getting a bit warmer than freezing cold month.
Now that I have taken on a new adventure learned how to crochet houndstooth stitch.
And you guys won’t believe this crochet stitch is ridiculously easy! really really simple, a piece of cake…..mmmm… I need more words to describe how super easy they are for beginners!
What is the houndstooth pattern?
Houndstooth is a two-tone pattern that originated in Scotland in the 1800s. It is a timeless iconic graphic pattern that is easy to recognize.
The houndstooth graphic has been used in many high-end luxury brands such as Chanel, Louis Vuitton, Armani and much more, etc.
The graphic stitch can be easily incorporated to create many stylish wearable garments, from hats, scarves, cardigans, sweaters, jackets, and more.
At first, when I saw this crochet stitch, I thought it would be very difficult because of its look indeed, but let’s hear me out.
This crochet stitch is basically a two-color pattern repeat made from a single-crochet stitch and a double-crochet.
A one-row repeat with changing color on each row. It’s exactly a lemon peel stitch with two contrasting colors changing in every row.

How to crochet the houndstooth stitch poncho.
To crocheted a bohemian-style houndstooth poncho, they basically made from crocheting two rectangles and seam them together, and that is you all done!
See how simple this crochet poncho pattern is?
Be unique and creative just picking out some of your favorite bright and fun colors for this poncho pattern.
Best yarn for this crochet poncho tutorial.
Time to pick out your favorite yarn for crocheting this boho chic style poncho free pattern.
Cotton yarn: This poncho pattern is made from soft and breathable cotton yarn with DK weight; they are lightweight that will make you feel oh-so-soft and comfy. The cotton yarn will also give a beautiful drape to the crochet garment.
Acrylic yarn: we can also pick out acrylic yarn for the free pattern poncho in DK weight also, 4 medium weight is ok.
the polyester fiber yarn is more stretchy and flexible than the cotton content.
Wool yarn: We can also use wool yarn or wool blend in dk weight for the poncho pattern they will work just fine however, they won’t give a beautiful drape like cotton yarn.
Need more variety and cute crochet poncho free patterns to make?
Supplie & material.
- I used Lion brand 24/7 cotton. or knitpicks cotton blend. I am using about 1800 yards altogether, around 900 yards for blue color and 900 yards for white color, yarn weight 4 medium or dk weight/3 light will work fine.
- 3.0 mm crochet hook or 4.0 mm hook size
- Sewing yarn needle
- 2 stitch marker
Skill and abbreviations
- (American crochet terms)
- You will need to know how to make
- St (stitch)
- sc which means single crochet
- dc, which means double crochet
- ch, Chain
- slip knot
houndstooth stitch from made with love by Glama,
which means white, *sc on top of the dc from the previous row, then dc on top of sc of the previous row * repeat from * to * across until the end of the row and in the last st make dc, ch1 turn. and switch up the new color.
Get the free pattern below or this pattern is also available as an inexpensive, ad-free, PDF printable instant download in my etsy shop. Thank you so much for your love and support. I am really appreciate you.
Finished Size Approximately:
One size fits all ( Easy to adjust by adding more or decreasing chain to foundation chain).
For me the model wearing this piece, I am 4’9 feet tall.
Measurement.
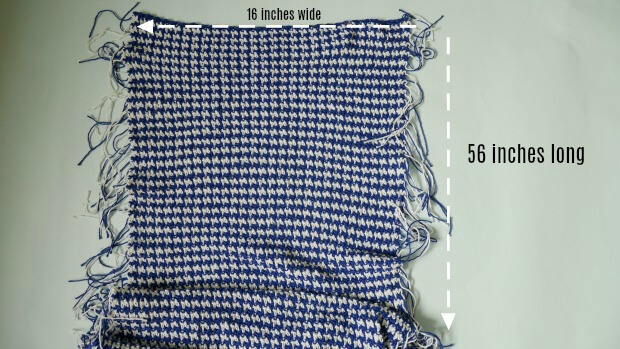
- of one rectangle.
- 16 inches wide
- 56 inches long
- Each rectangular I measures around 16 inches wide x 56 inch long.
- For the width: If you need to make it wider simply add more chain in even number +1 to foundation chain..like 60+1, 70+1 , 80+1 etc. I start this poncho with foundation chains of 60+1.
- For the length: add more row.
Gauge: 2 groups of single and double crochet= 1 inch
Boho chic houndstooth poncho pattern instruction.
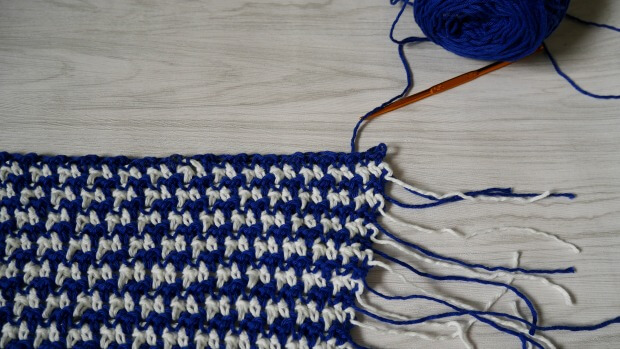
Start off by making a slip knot. Then make 60+1 chains (foundation chain) blue.
Row1. blue, sc in the next chain from hook, then dc in next chain * sc in next, then dc in next* repeat from * to * across until the end of the row and in the last chain make dc, ch1 turn.
Leave the yarn tail about 3 inches and cut it off; this will make the fringe.
Row2. white, *sc on top of the dc from the previous row, then dc on top of sc of the previous row * repeat from * to * across until the end of the row and in the last st make dc, ch1 turn. Leave the yarn tail about 3 inches and cut it off; this will make the fringe.
Row3. blue, *sc on top of the dc from the previous row, then dc on top of sc of the previous row * repeat from * to * across until the end of the row and in the last st make dc, ch1 turn.
Leave the yarn tail about 3 inches and cut it off; this will make the fringe.
Repeat rows 2 and 3 until your piece measures approximately 56 inches long, and Fasten off.
Repeat the same process to make a second piece of rectangle
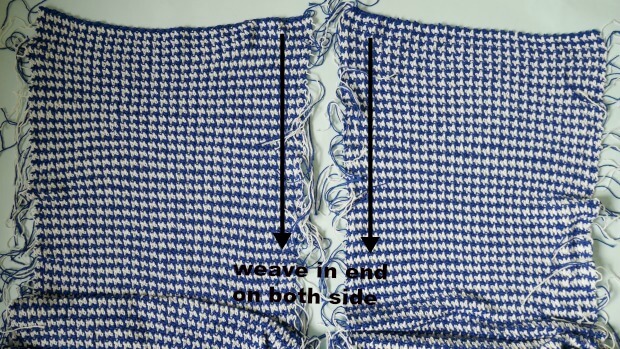
After you got 2 pieces of the rectangle, then time to tidy up the yarn tail in the center part by weaving in all ends so it is easy to seam up.
Time to assemble the poncho.
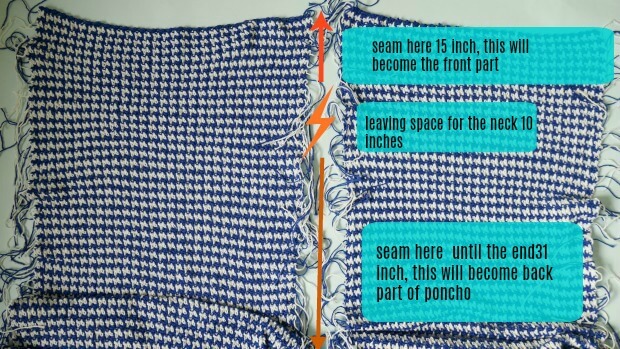
Front Seam:
Lay 2 pieces of rectangles side by side. Now, use a yarn needle and whip stitch to seam up the middle part together to create the front panels, from the top up around 15 inches. Tie off and weave in ends.
Leaving space for the open neck 10 inches.
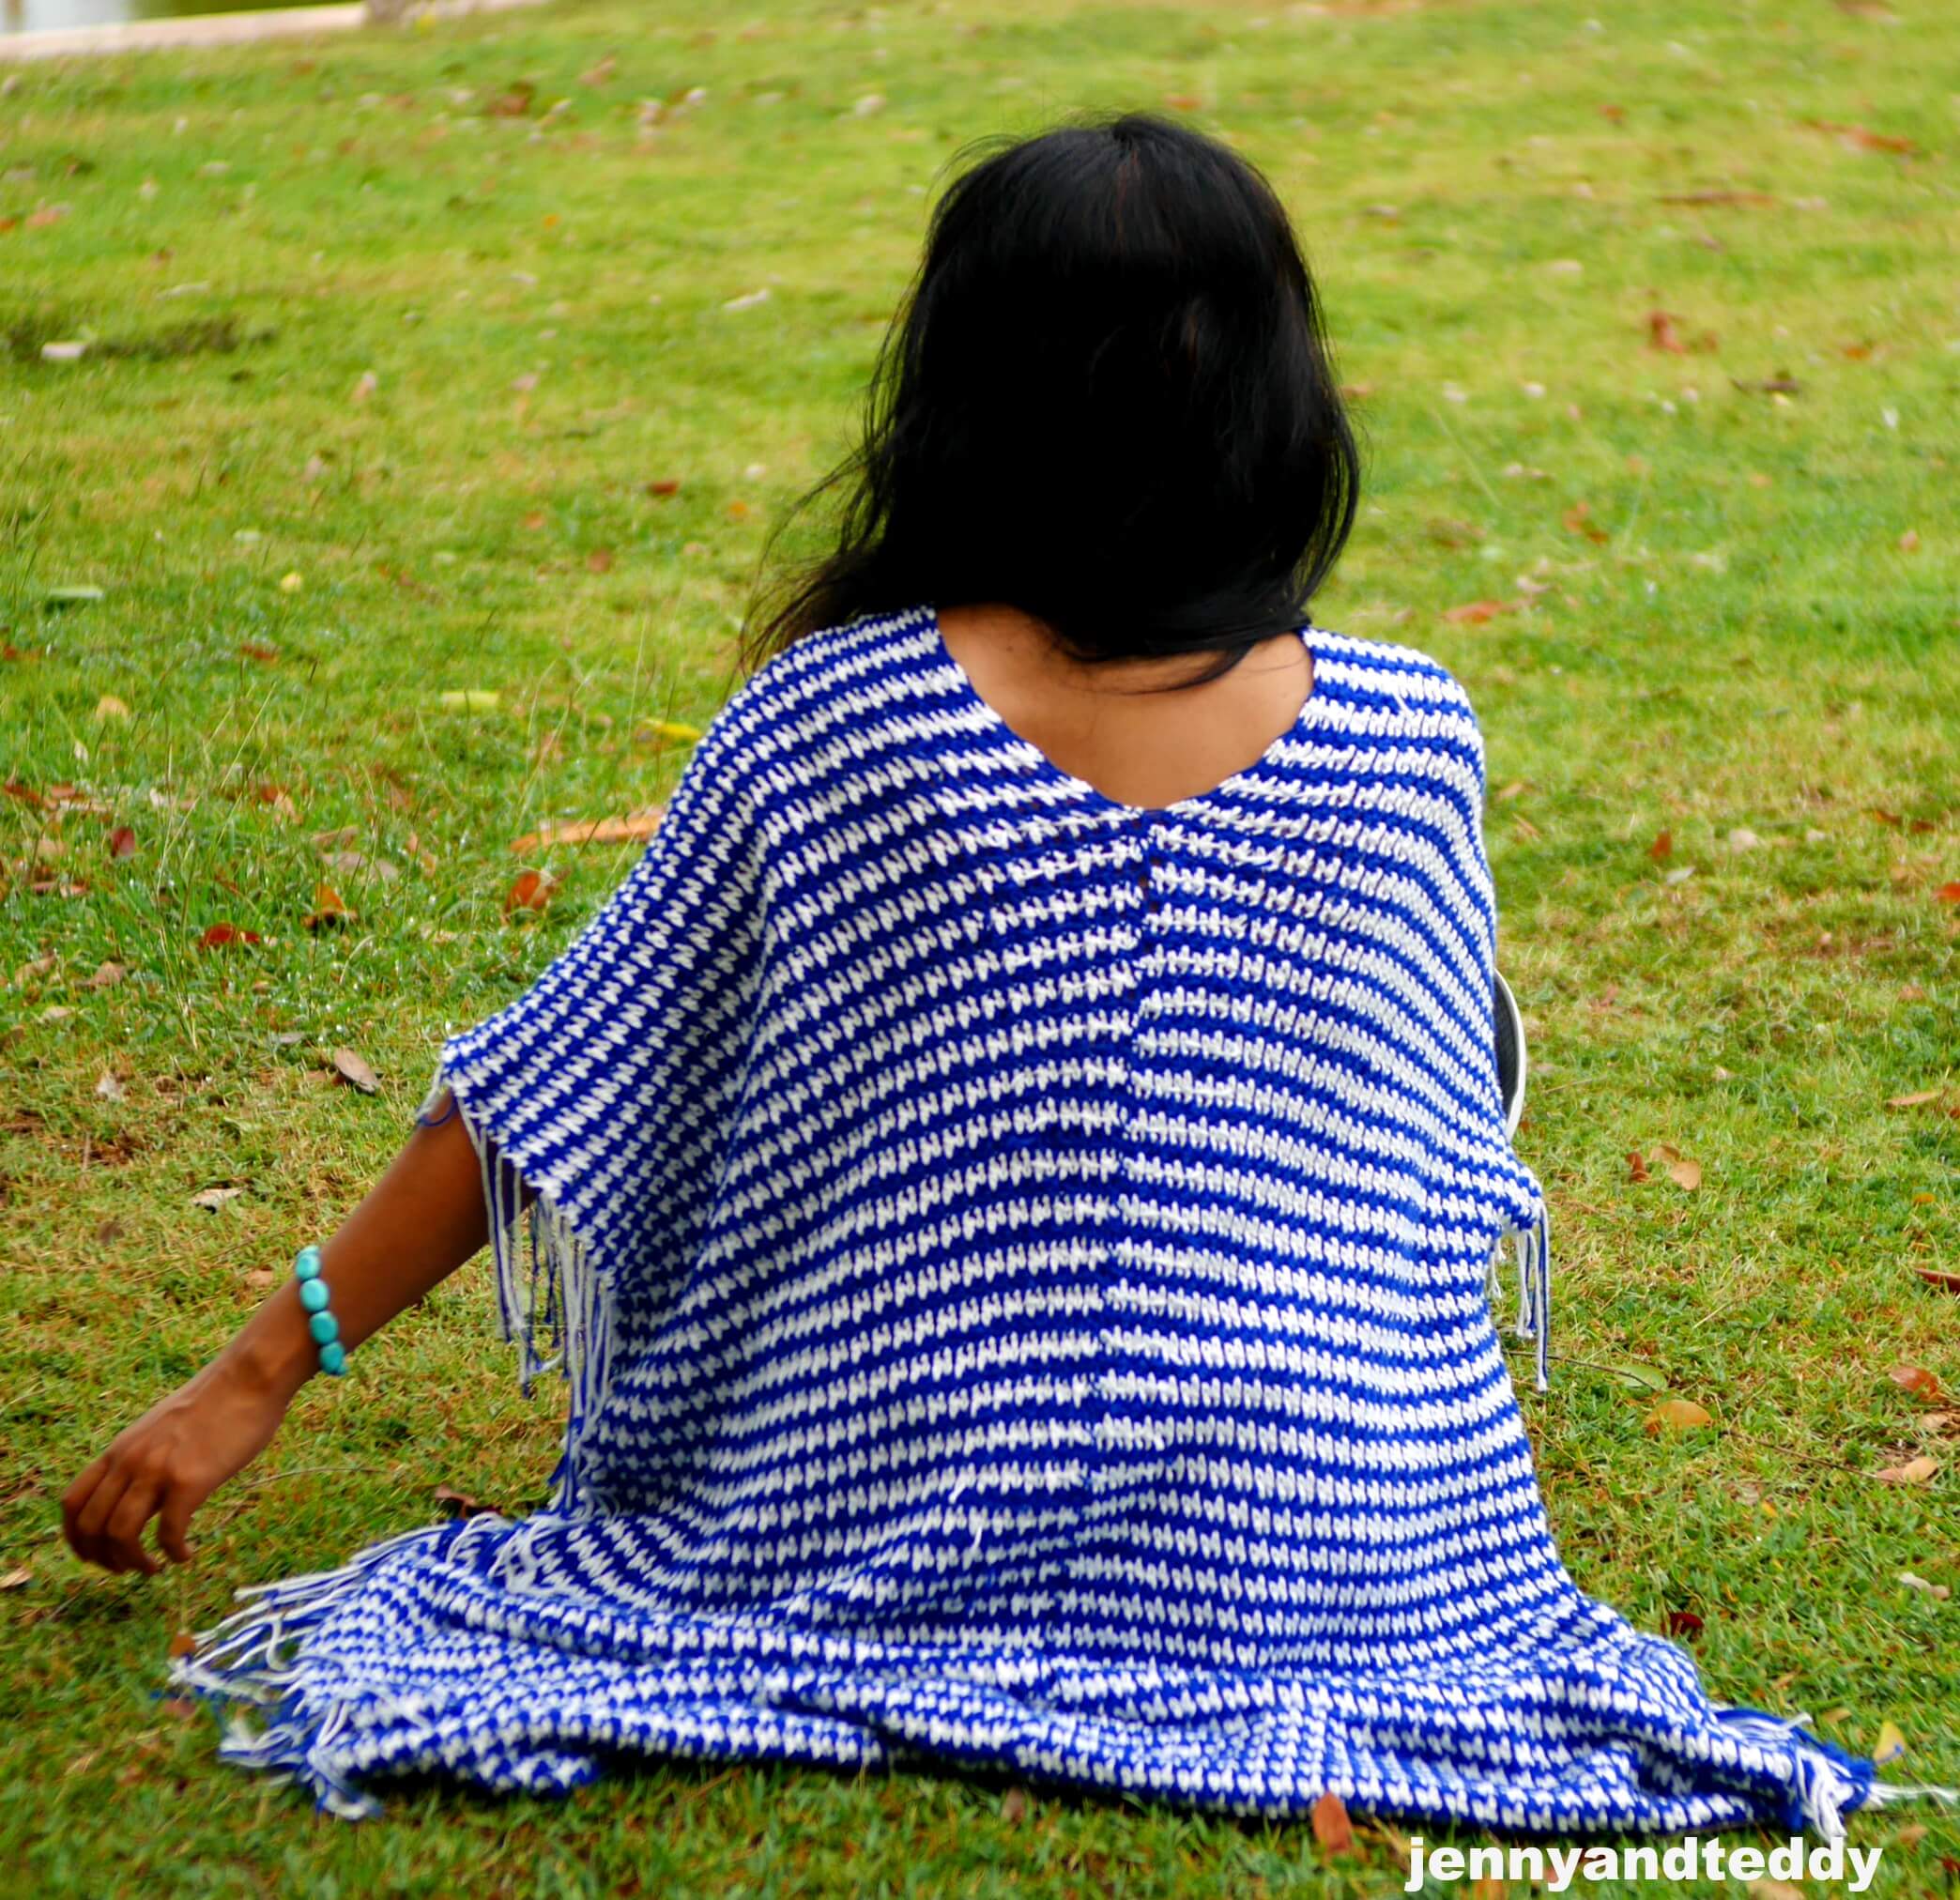
Back seam:
Then seam up from the neck down to the end to create the back part of the poncho see pic below.
After you finish, seam up the center part of the poncho.
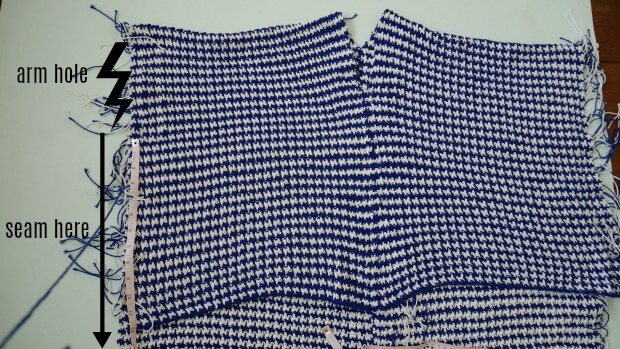
Now we are going to fold up the front part and seam up the side of the poncho to create the armhole
( I am leaving space for the armhole 8 inches ). See pic below.
All done! hope you guys enjoy making this Boho chic poncho.
If you make one, I would love to see your creation. Tag me on Instagram! would love to see your creation.
Happy crocheting.
Lesley Fahey
Tuesday 5th of June 2018
Thanks Jane. what a beautiful stitch!
jane
Tuesday 5th of June 2018
Sweet!!! Thanks you Lesley.
Dorcas
Sunday 6th of May 2018
I love your work
jane
Sunday 6th of May 2018
So sweet!!!! thank so much Dorcas.