
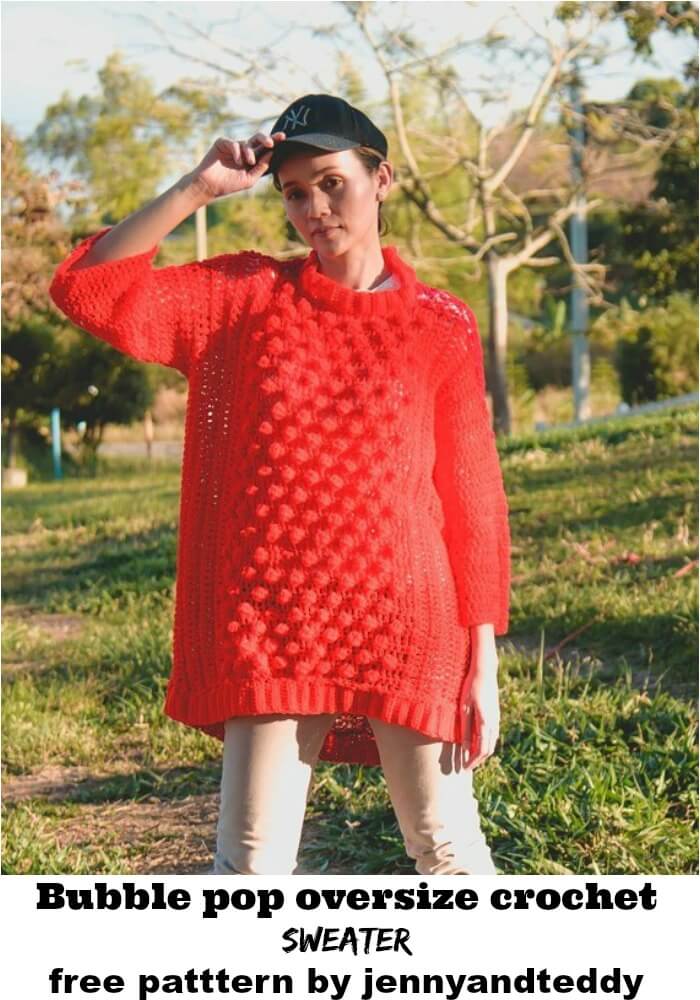
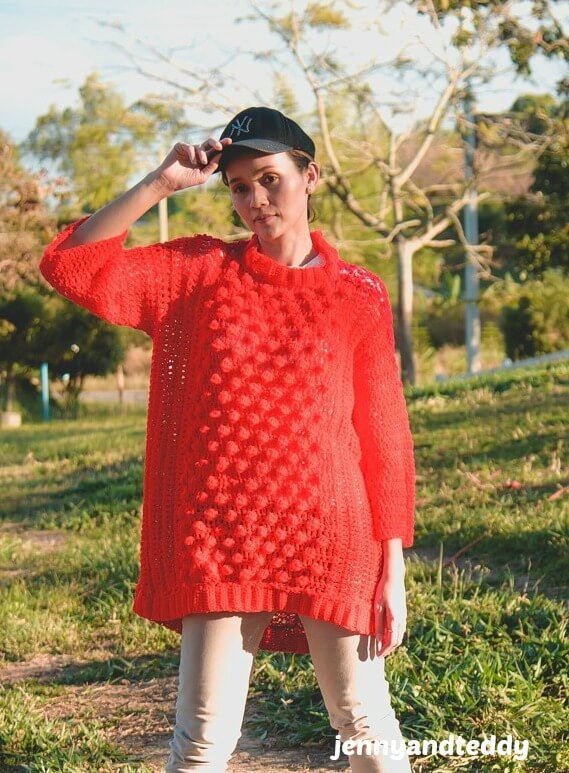
Simple crochet oversized bobble sweater free pattern with full step by step video tutorial, size available from small to plus size and they are easy to make them bigger or smaller by just add more row.
the winter month is here, so I was thinking about making something cozy and cute oversize crochet texture sweater for this xmas season.
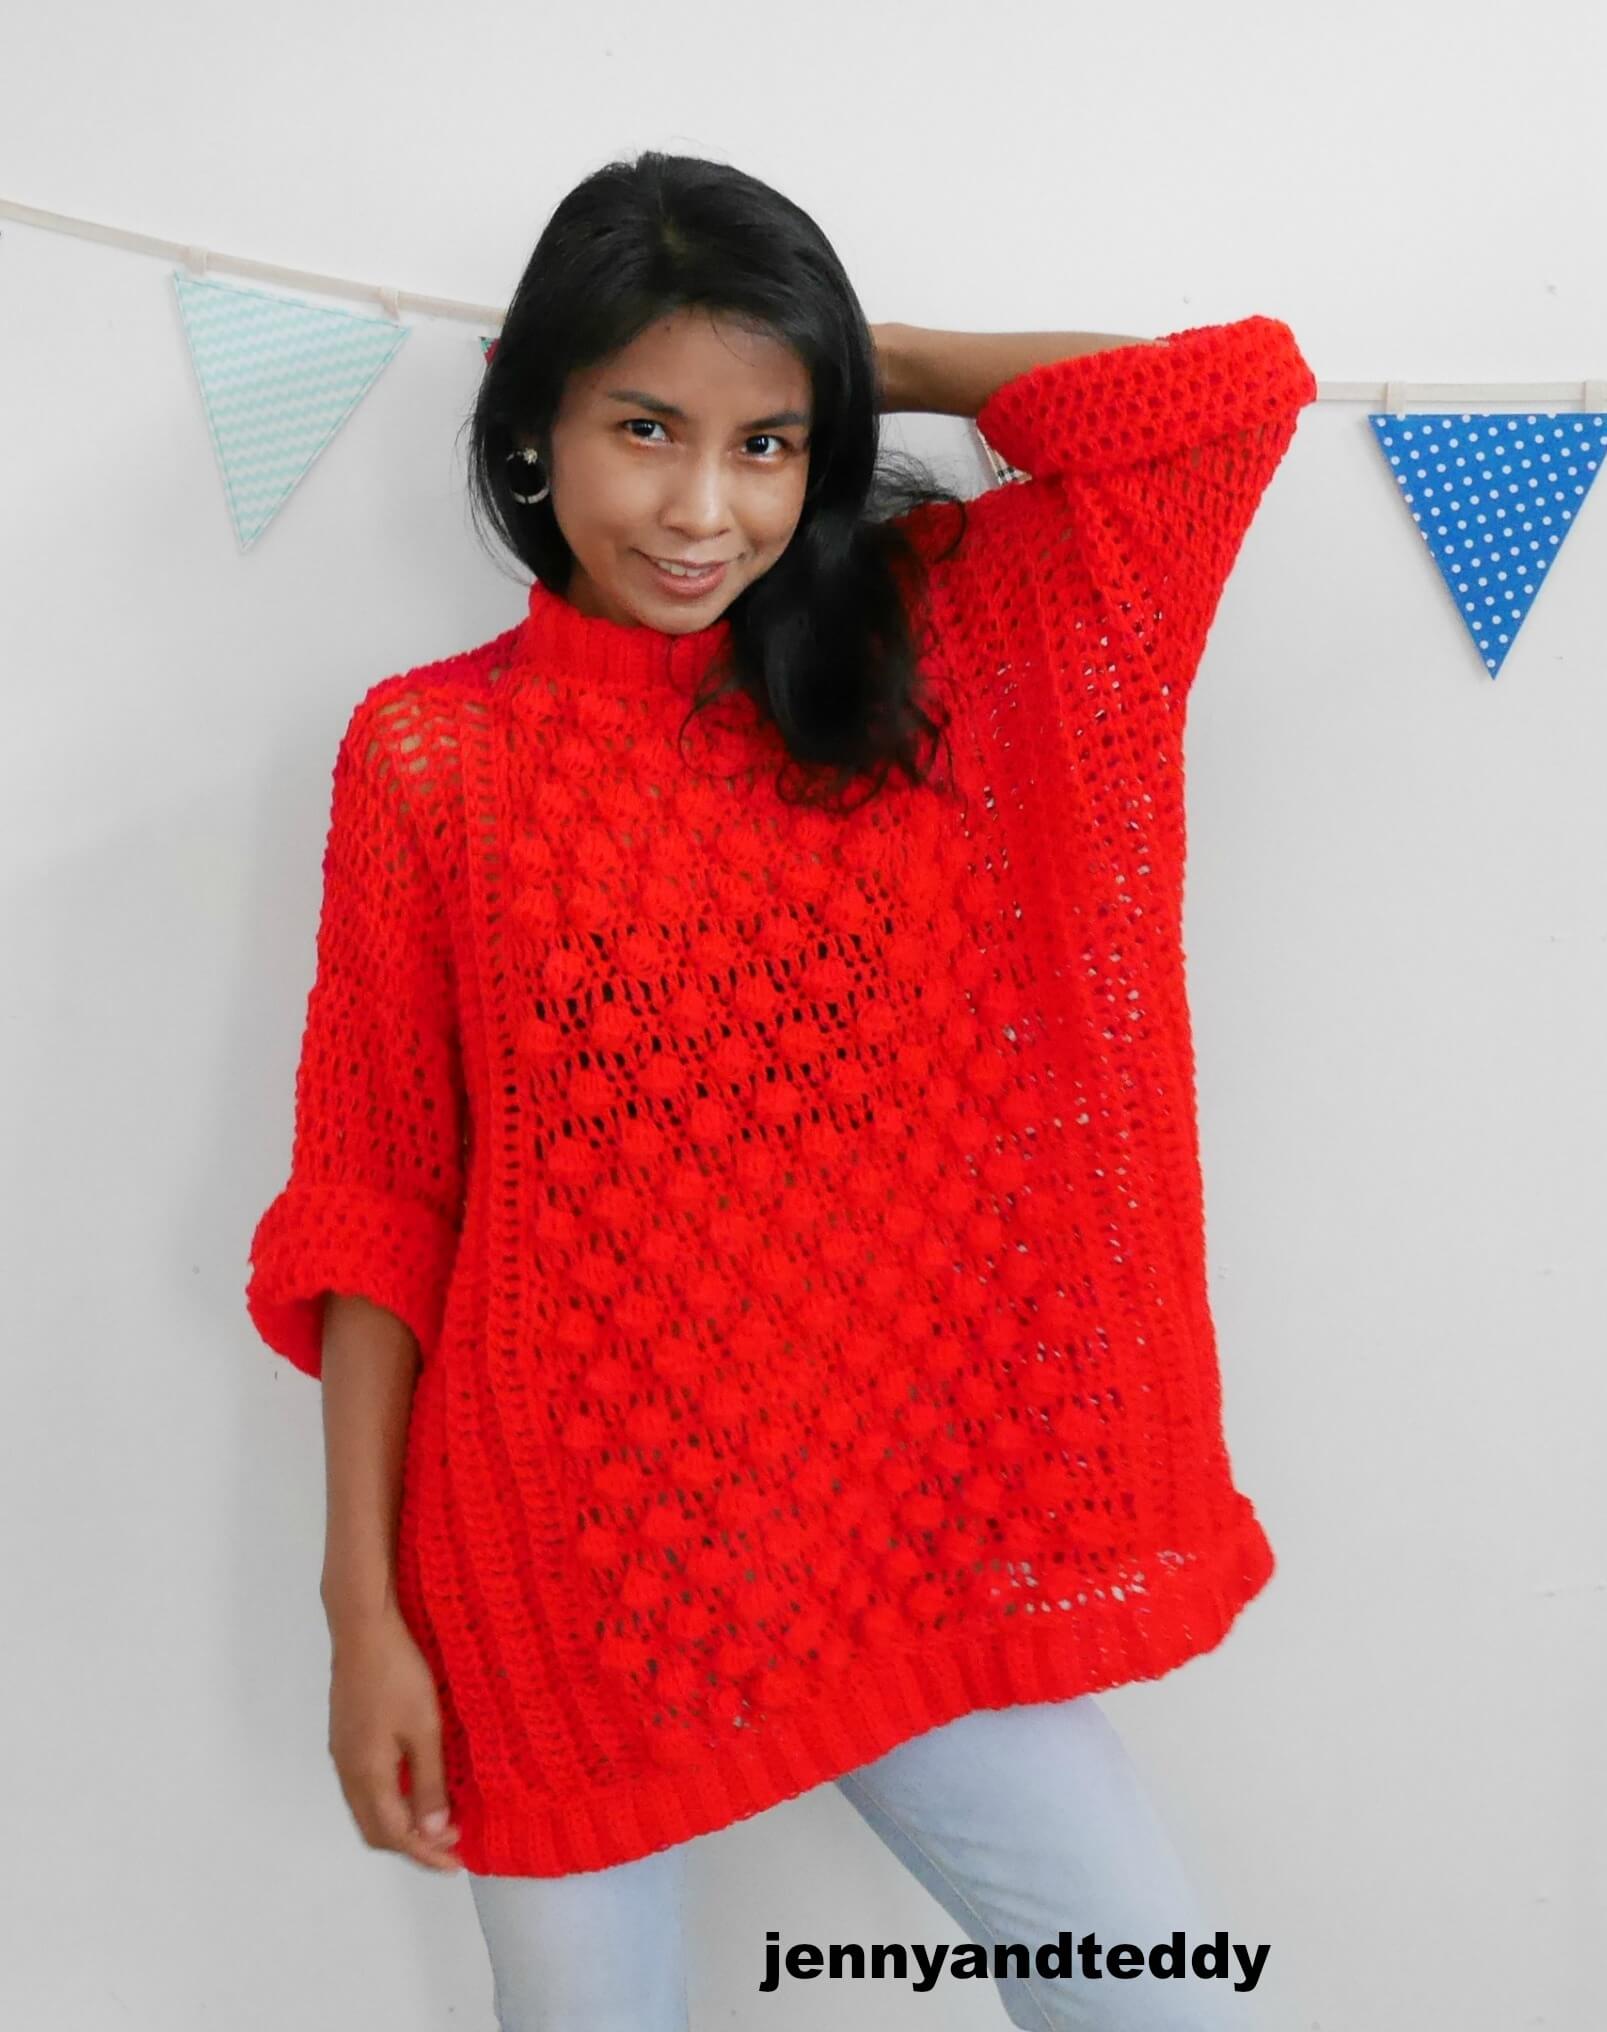
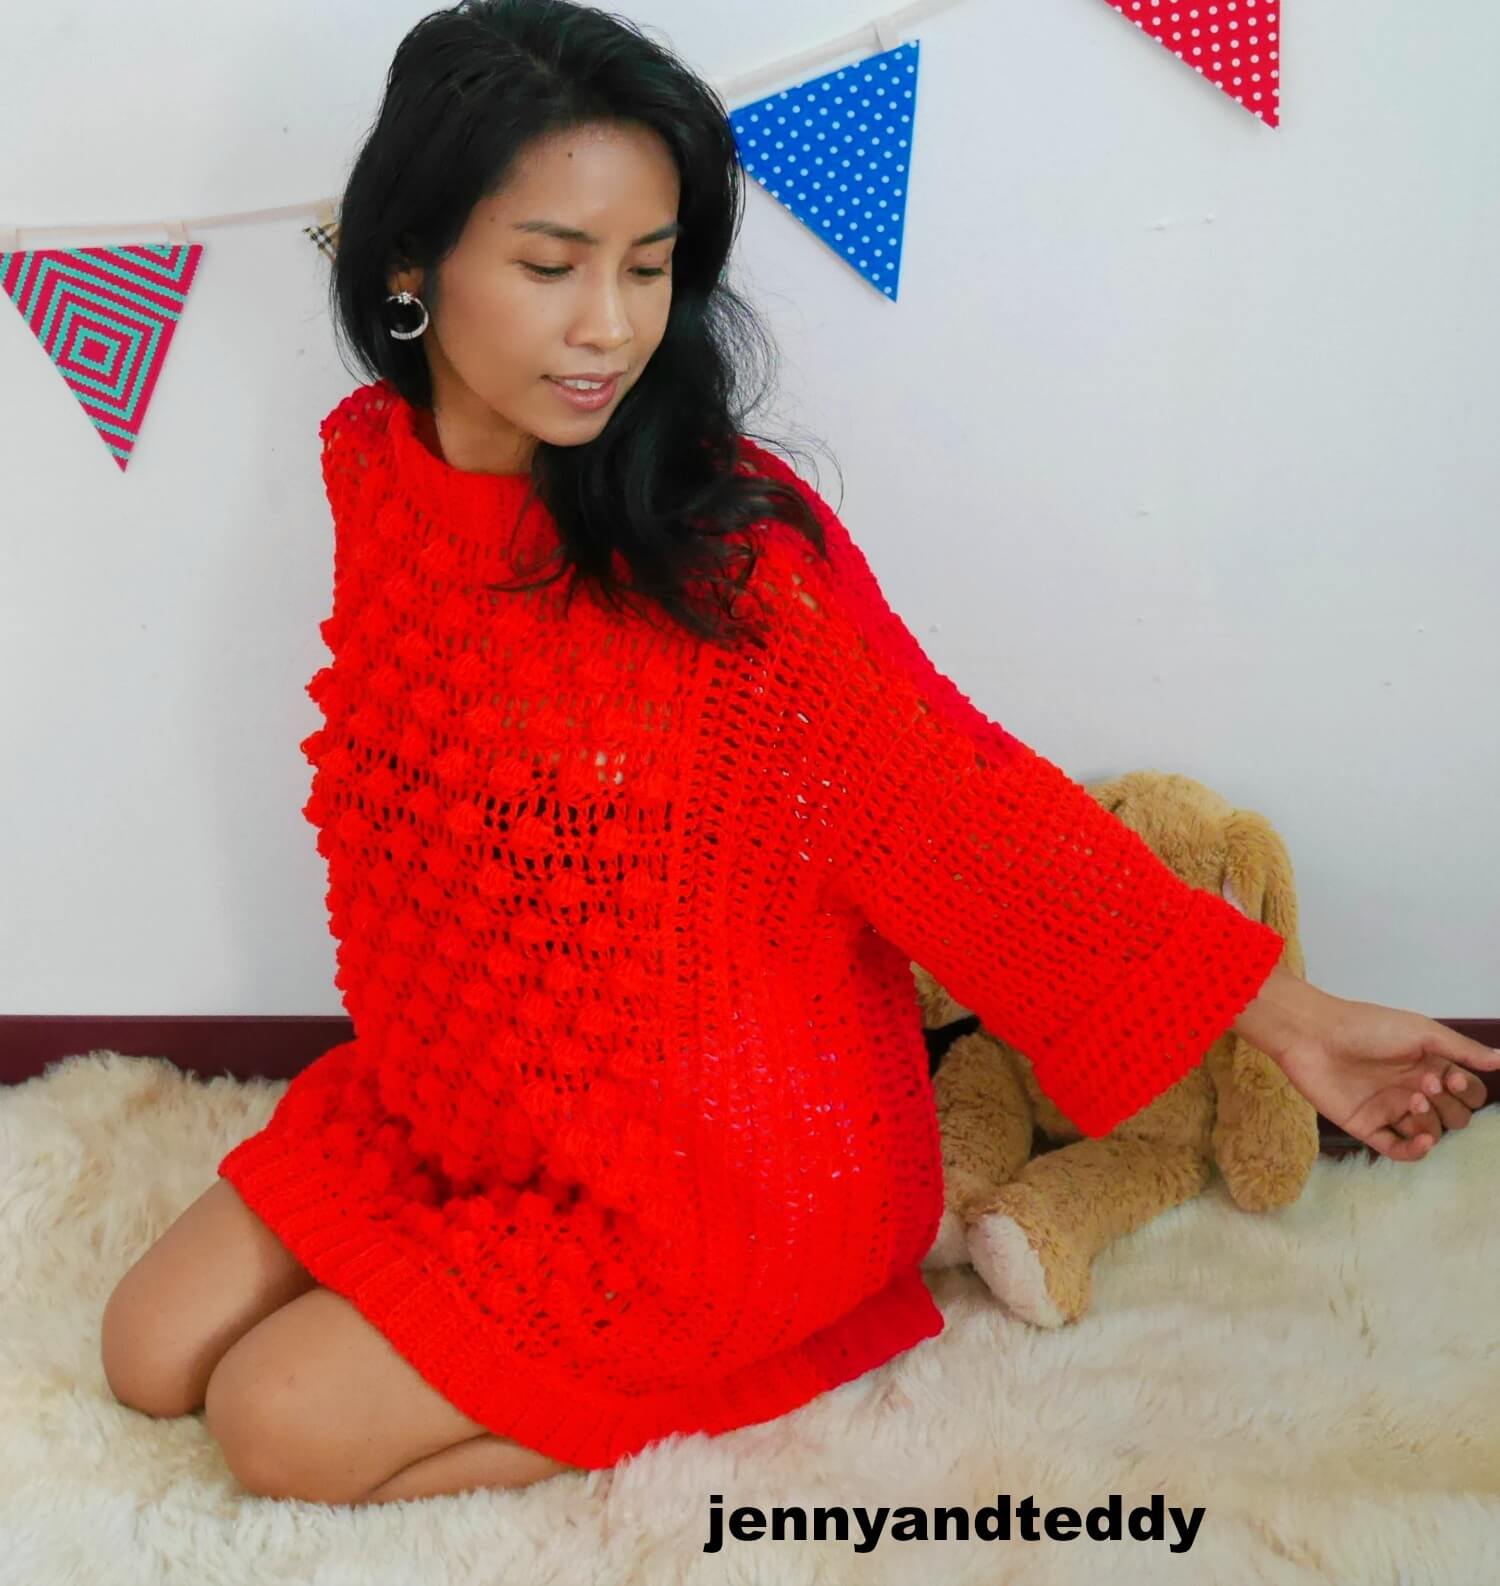
This bubble pop oversized crochet sweater free pattern is here for you guy to enjoy! Just from the name of the sweater can you guess which stitch I use?
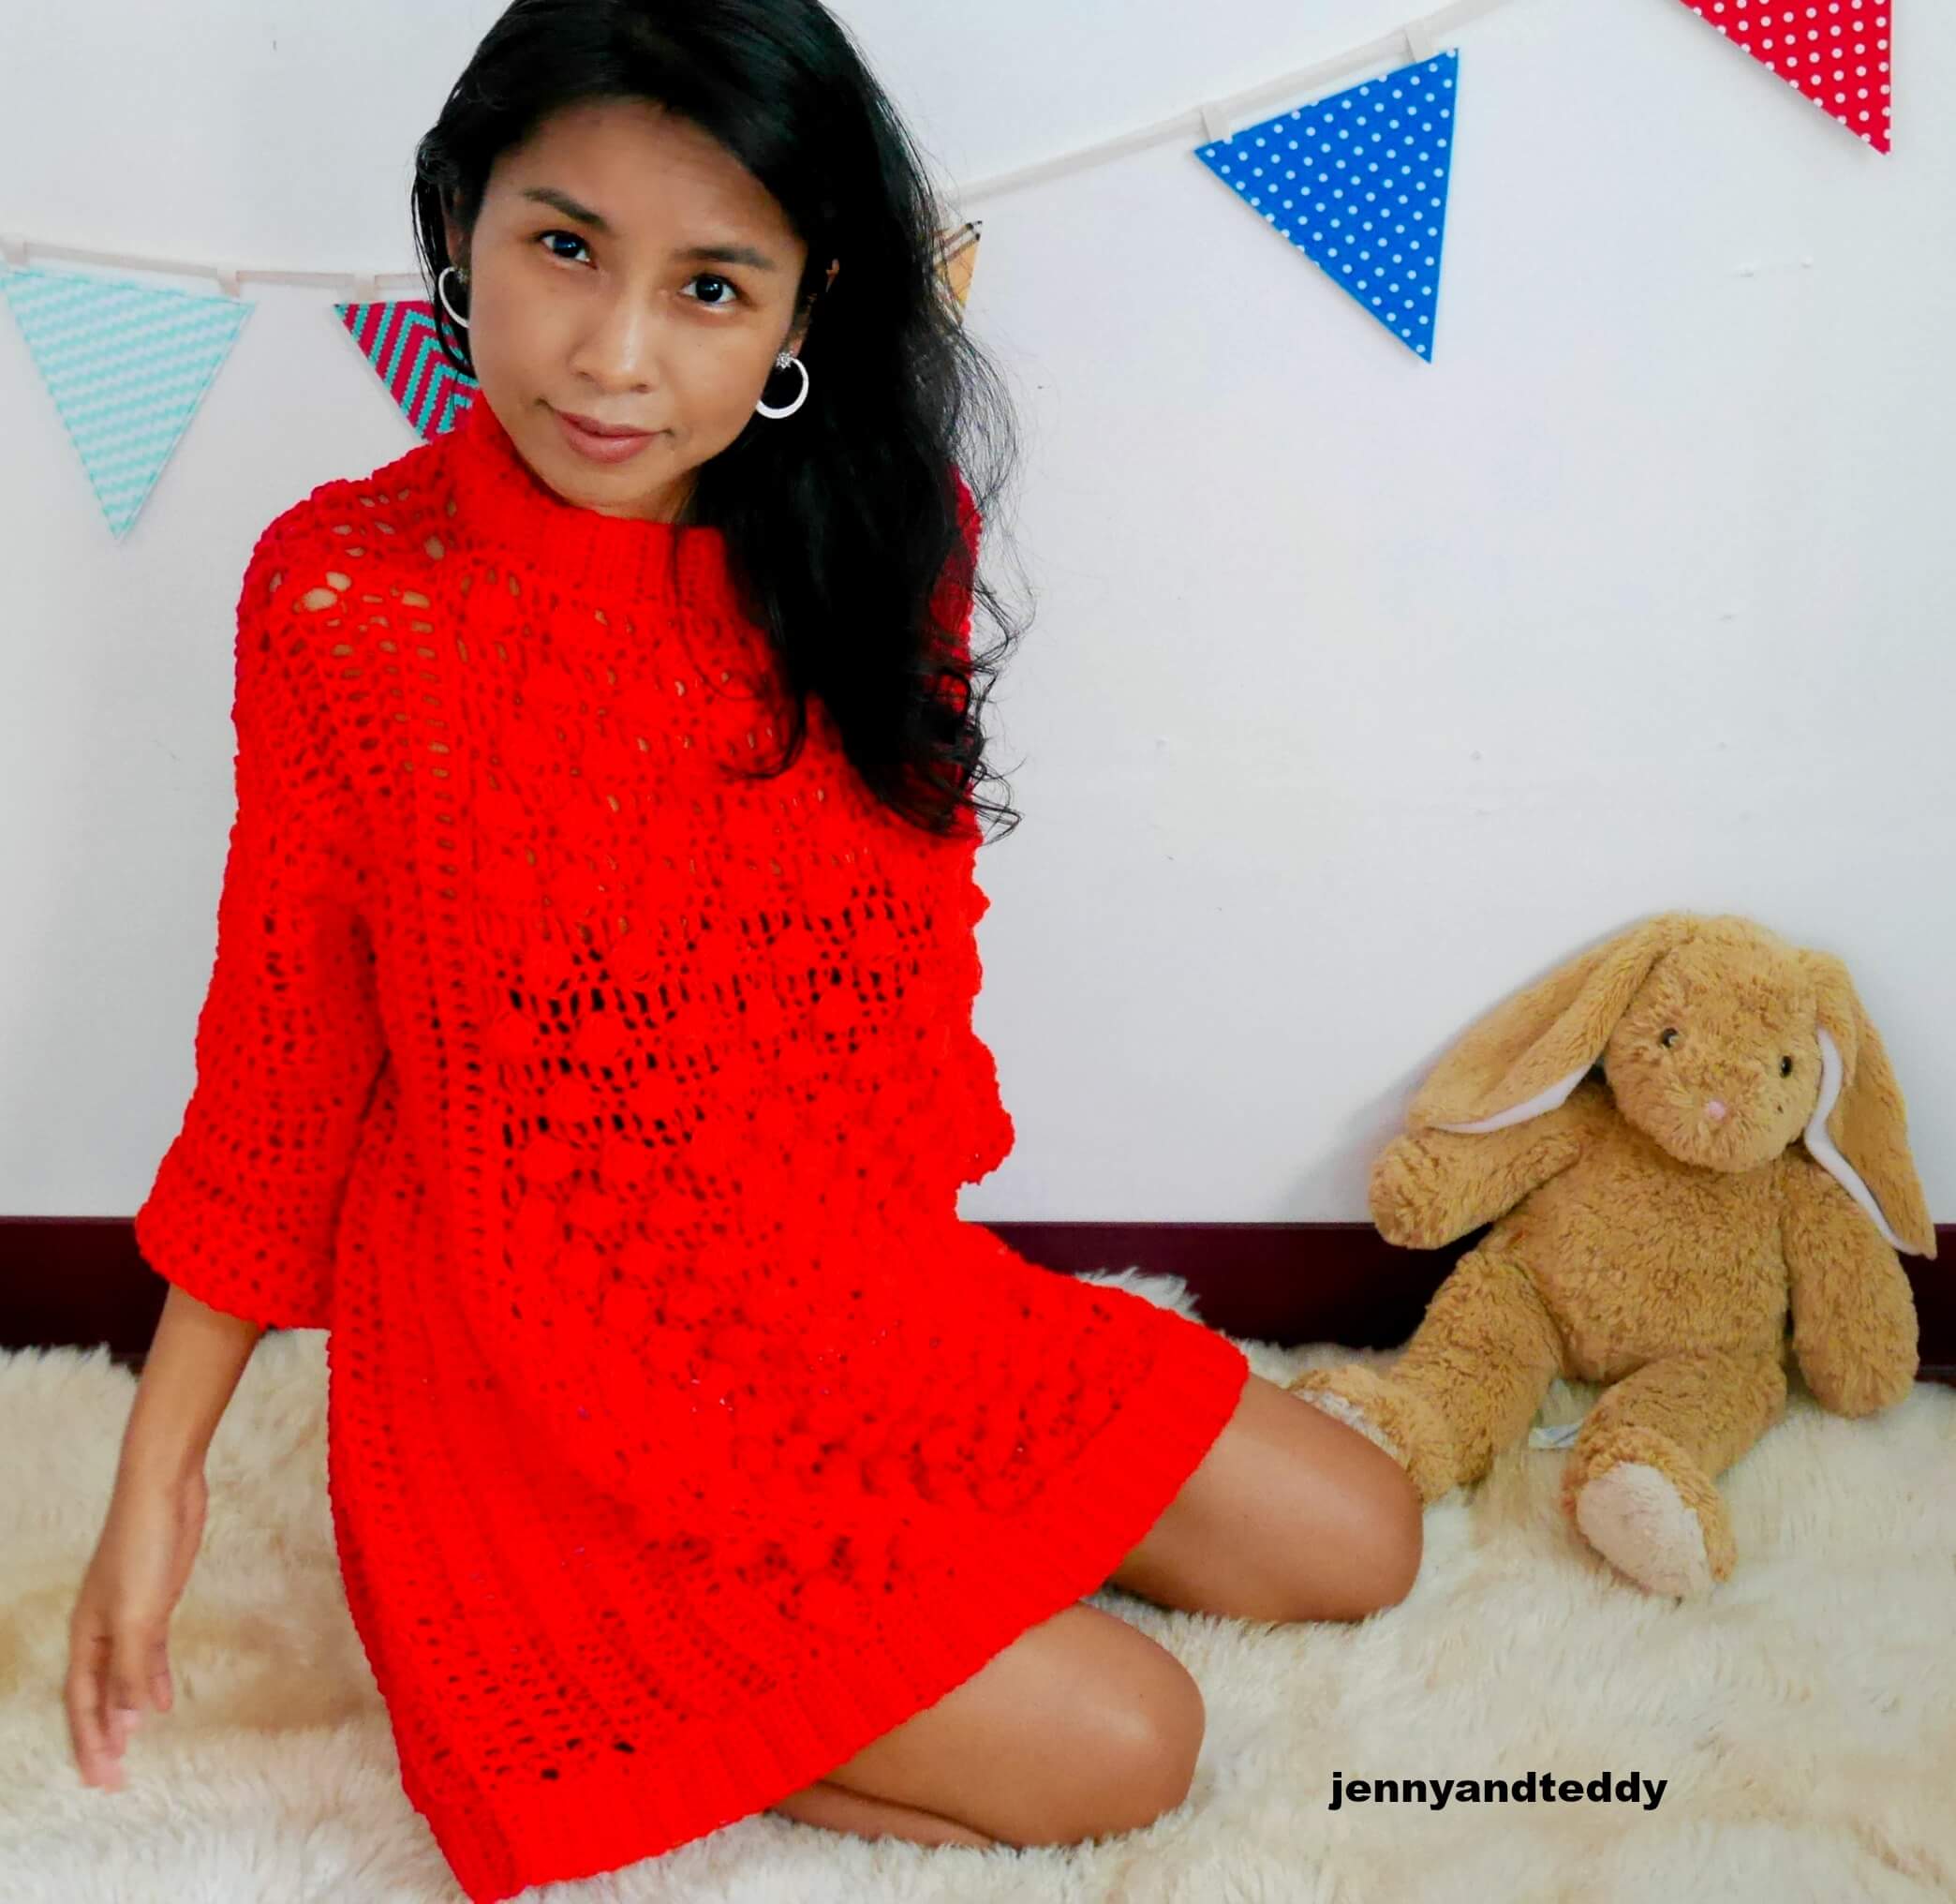
Yess The bobble stitch or similar to popcorn stitch , this stitch give a nice texture like a popcorn so I did incorporate this bobble stich in this oversized crochet sweater.
I also have a tutorial for the bobble stitch too!
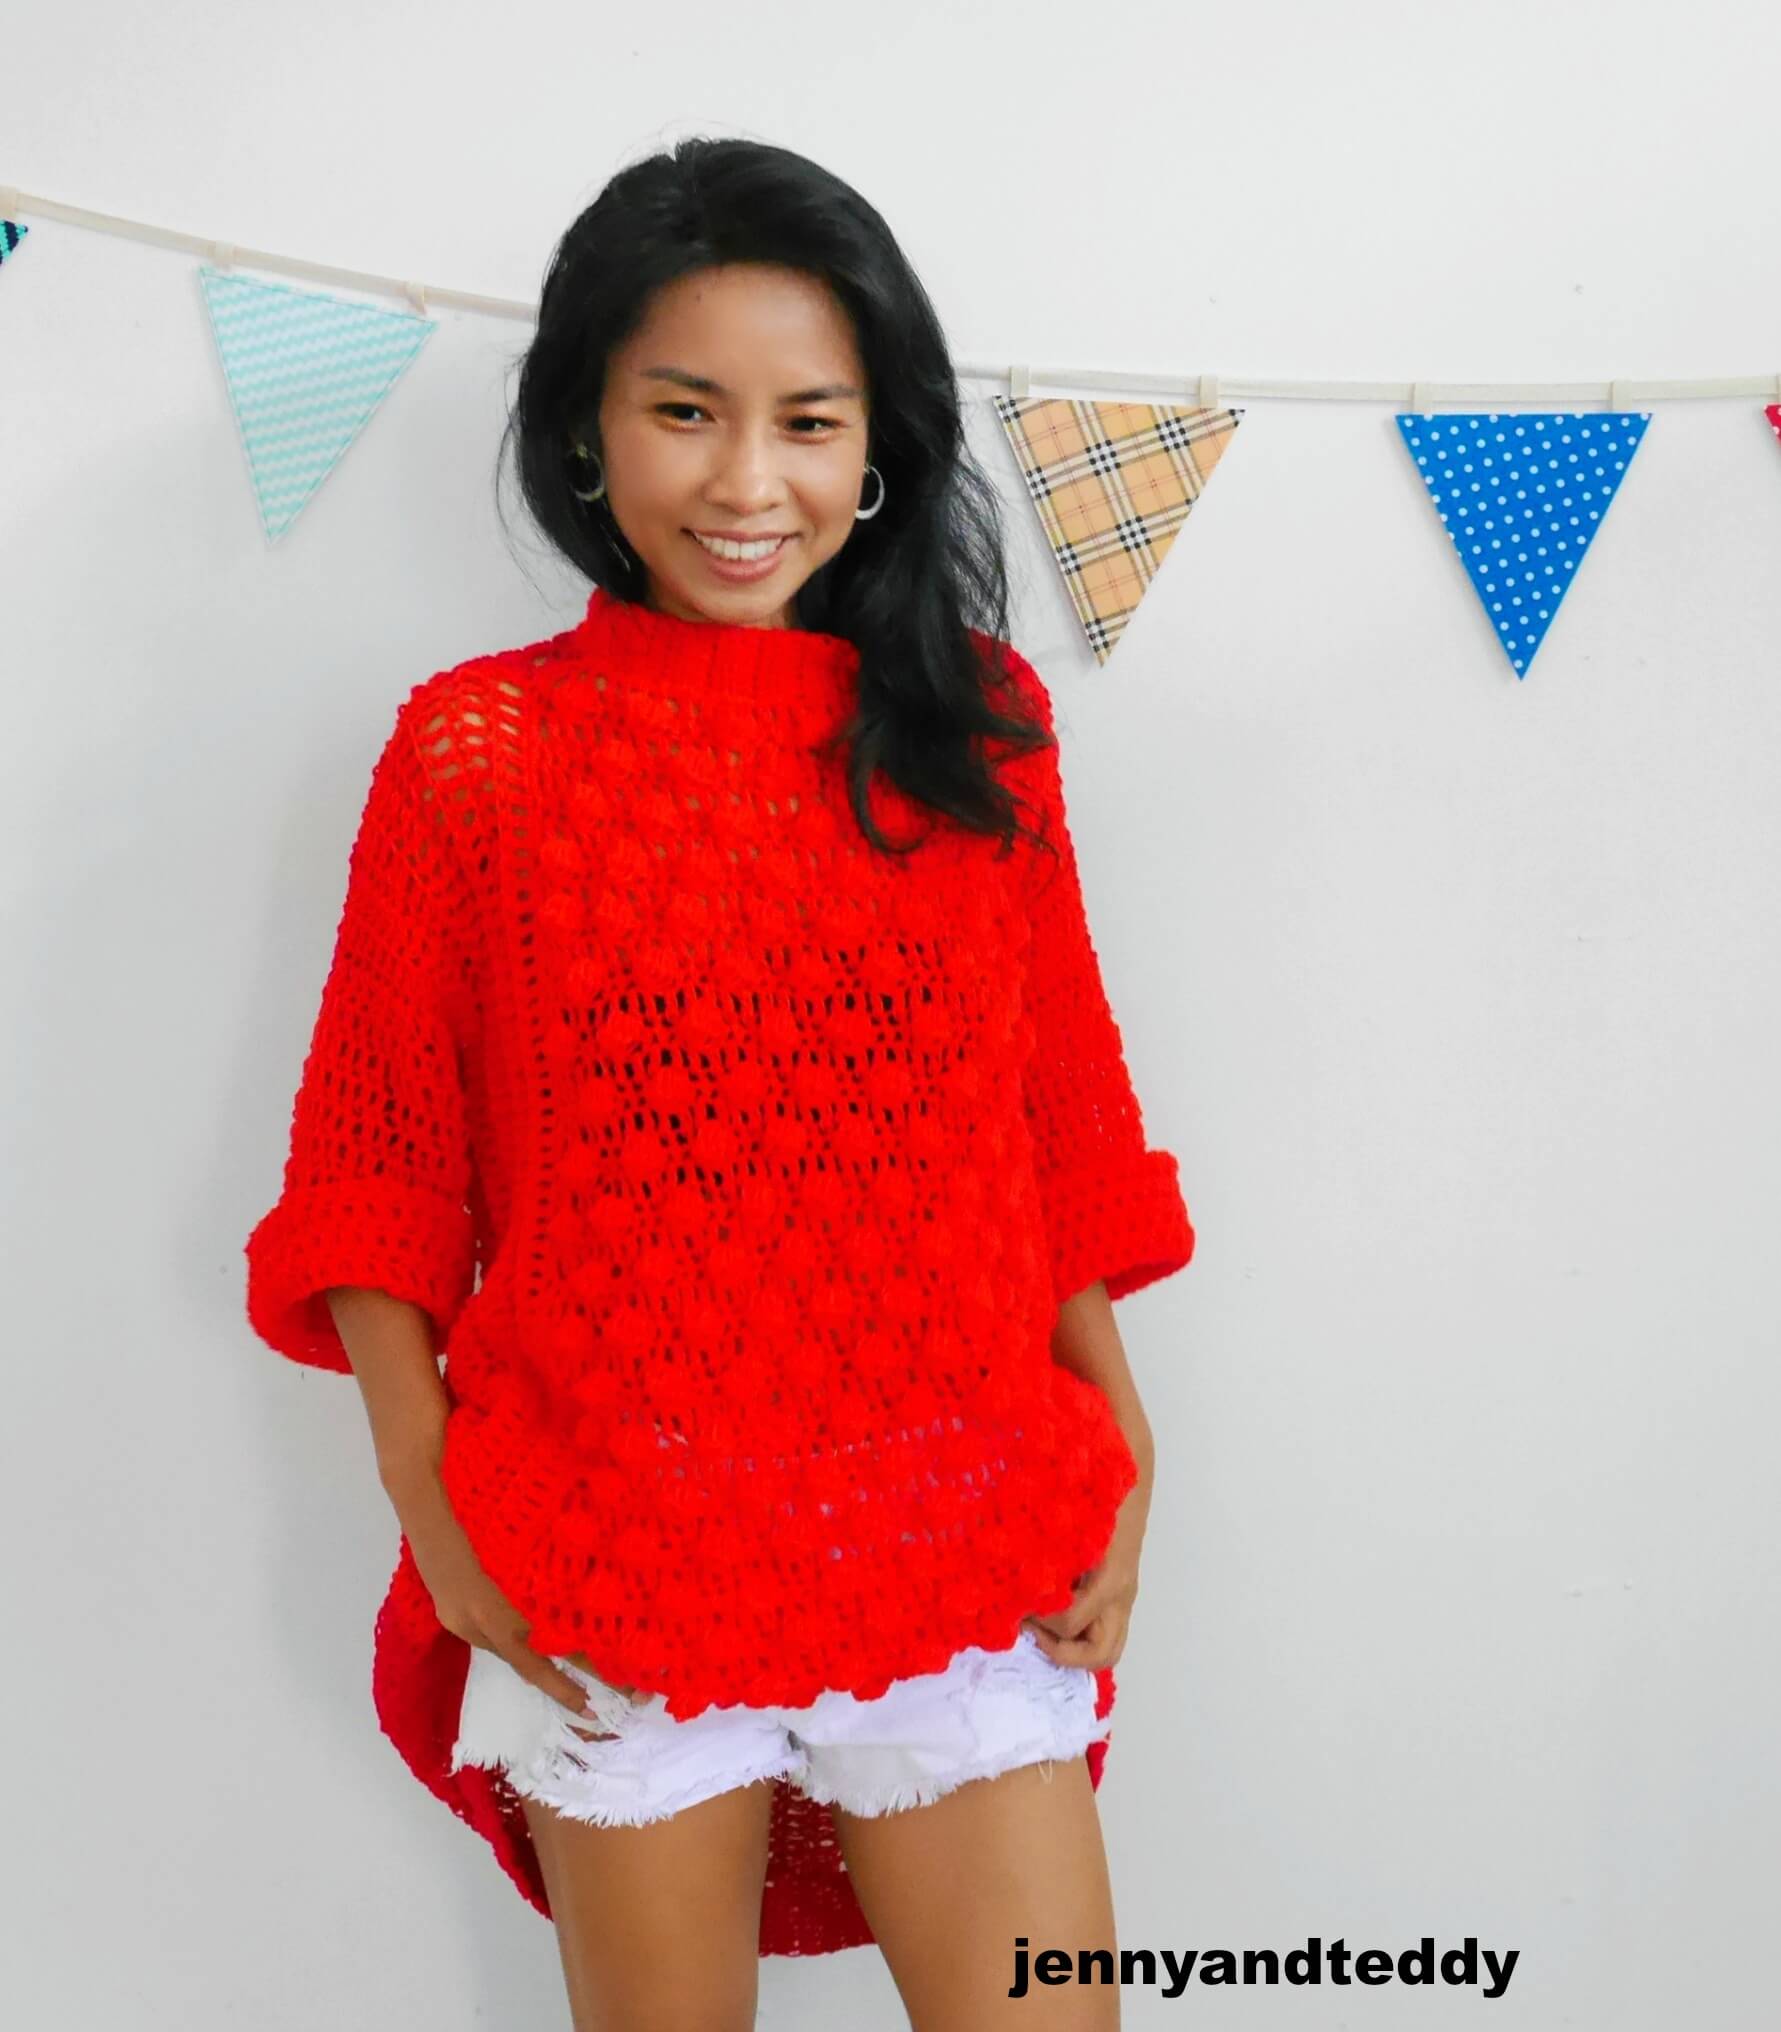
So I pick up red color for the xmas season!
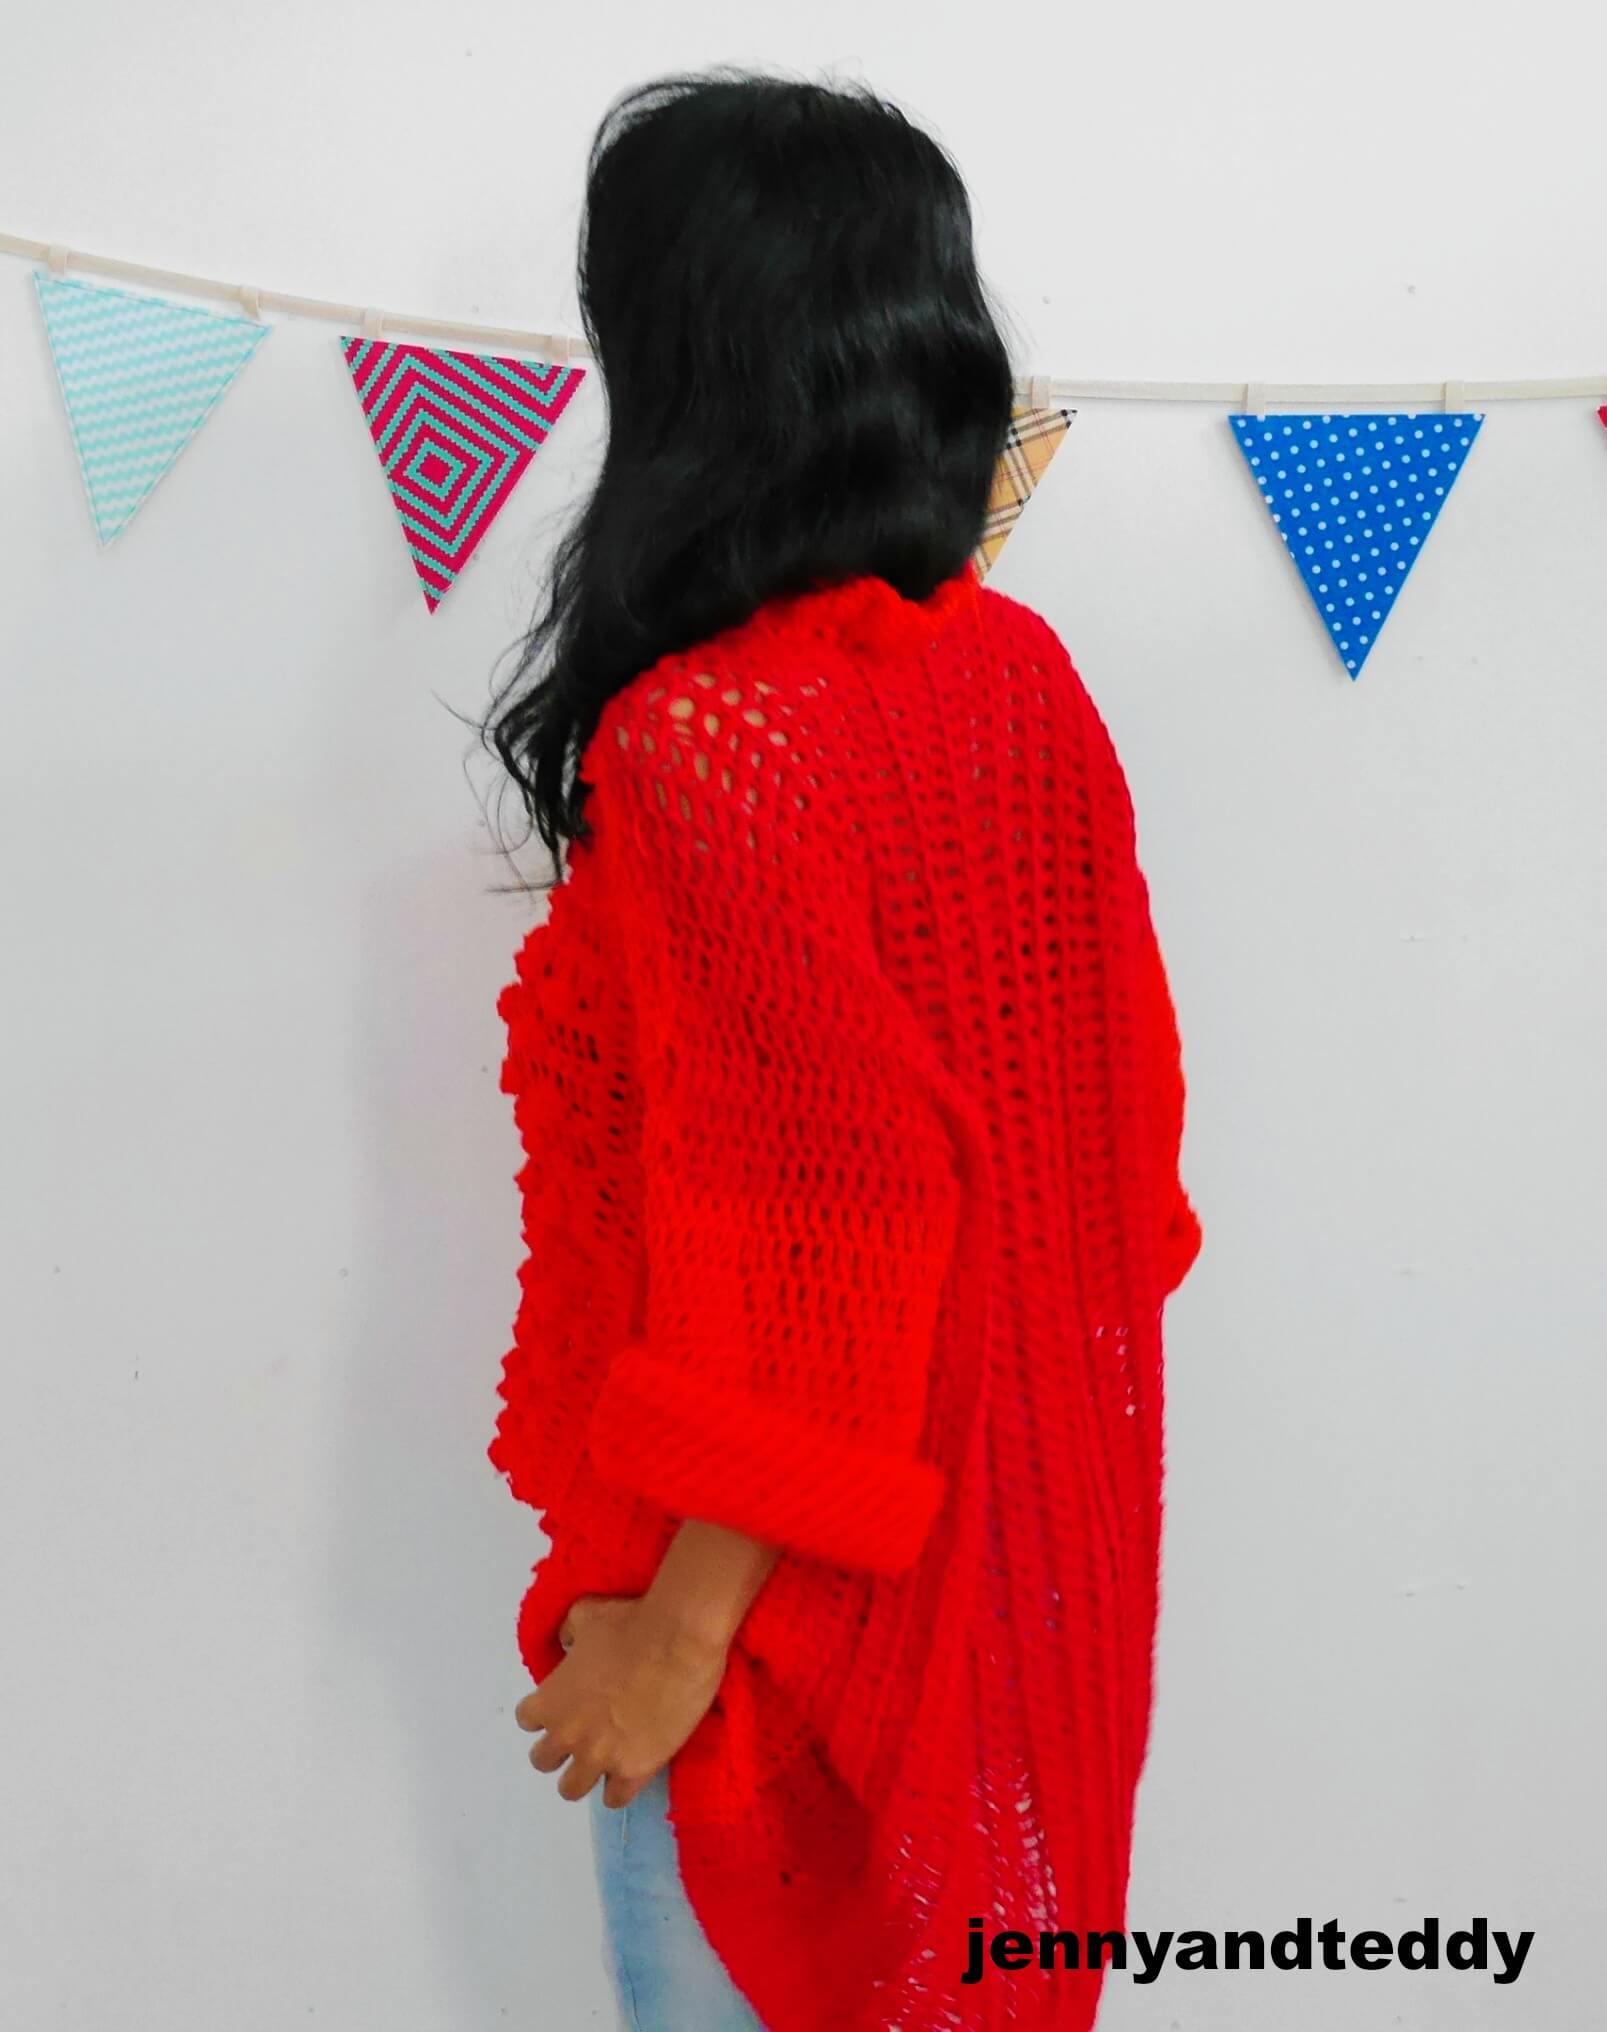
Actually this bobble crochet oversized sweater made from just 2 pieces of rectangle front and back panel.
Front panel is made from bobble stitch in the middle part and the back panel just made from double crochet n back loop all the way.
If you like this oversized crochet sweater you will love this knit look crochet oversize sweater as well.
Get the free pattern below or this pattern is also available as an inexpensive, ad-free, PDF printable instant download in my etsy shop. Thank you so much for your love and support. I am really appreciate you.
Let’s get start!
– I used 100% acrylic yarn weight 4 aran. I use around 1200 yard.
– 6 mm crochet hook and 4.25 mm crochet hook
– Sewing yarn needle
-stitch marker
Gauge: 3 double crochet = 1 inch
Skill and abbreviations
(American crochet terms)
You will need to know how to make
-St which mean stitch
-sc which mean single crochet
-dc which mean double crochet
-hdc which mean half double crochet
-Blo which mean crochet in back loop only
-ch, Chain
-slip knot
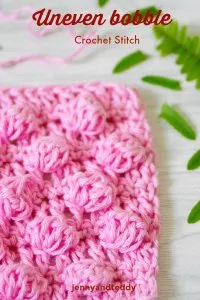
Bobble stitch:
yarn over insert your hook into the stitch that you want to make bobble then pull up a loop and yarn over pull through 2 loop then insert your hook into same stitch and repeat that 4 time until have 6 loop on your hook then yarn over pull through all 6 loop and make single in the next st, Bobble complete!

Finished Size Approximately:
Small to XL ( other size to make it bigger by add more row to the side front panel, detail in the pattern)
For me the model wearing this piece, I am 4’9 feet tall.
Video tutorial for this easy crochet oversized bobble sweater.
Measurement.
of one rectangle. (middle section)
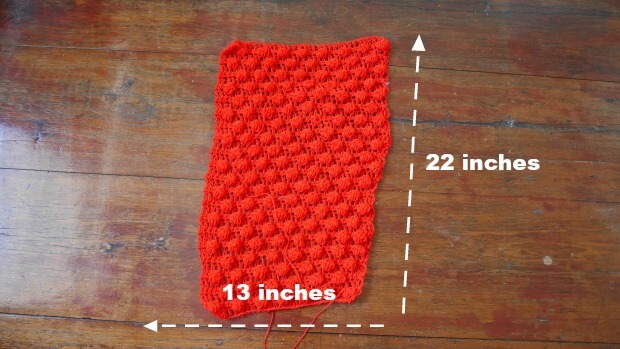
-22 inches tall
-13 inches wide
Bobble pop oversize sweater instruction.
Middle section of front panel.
Pick up crochet hook size 6 mm and Start of by making a slip knot Then make 32 chains (foundation chain multiple of 4 ).
Row1: make, dc into next chain from hook and in each chain across until the end of the row.
Row 2: ch 1 turn, sc into first 2 sts. *Bobble stitch into next stitch, sc into next 3 sts*. Repeat between * and * until you have 4 sts left then make sc in each of the last 4 sts.
Row 3: ch 1 turn, dc in each stitch until the end of the row.
Row 4: ch 1 turn, sc into first 4 sts. *Bobble stitch into next stitch, sc into next 3 sts*. Repeat between * and * until you have 2 sts left then make sc in each of the last 2 sts.
Row5: repeat row3.
Row6: repeat row2.
Row7: repeat row3.
Row8: repeat row4.
Keep Repeating row 5-8 until you get 22 inch long.
After you finished the middle section then
Row1. sc along the edge of each side for 1 row to prepare for the body part.
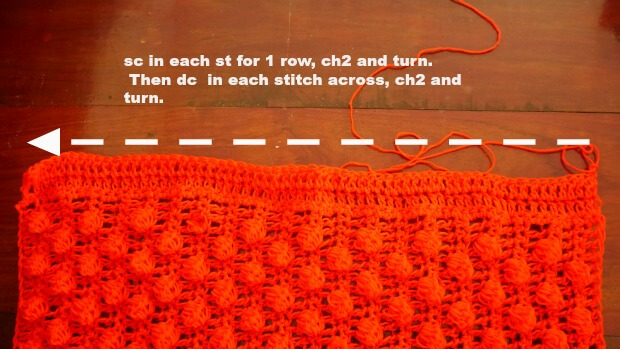
Row2. ch2 turn, and dc in back loop only and in each sts across until the end of the row.
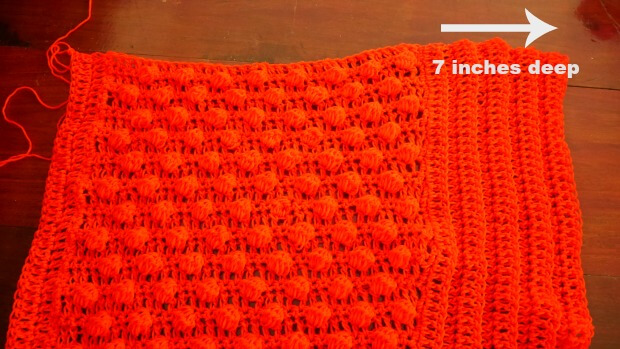
Row3. repeat row 2 until we get 7 inches deep..
If we want to make it bigger size just simple add more row. For example, For size 2XL from 7 inches deep we can add more row to get it to 8 to 9 inches deep for each side.
After we finished one side we will repeat for the other side.
Back panel.
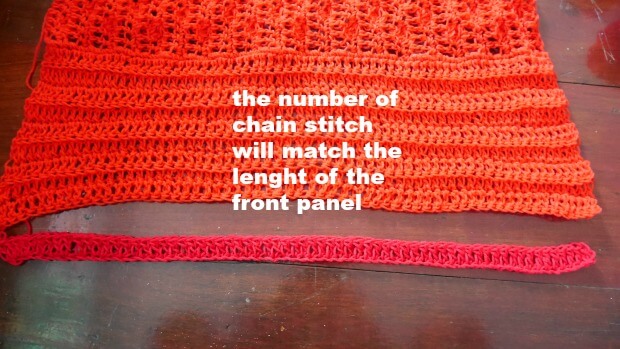
Pick up crochet hook size 6 mm and Start of by making a slip knot Then make chains, the number of chain that we will make will match the side of the front panel as pic show (foundation chain )
Row1: make, dc into next chain from hook and in each chain across until the end of the row.
Row 2: ch 2 turn, dc back loop only in each sts across until the end of the row.
Row3: repeat row2 until we get 22 inches long.
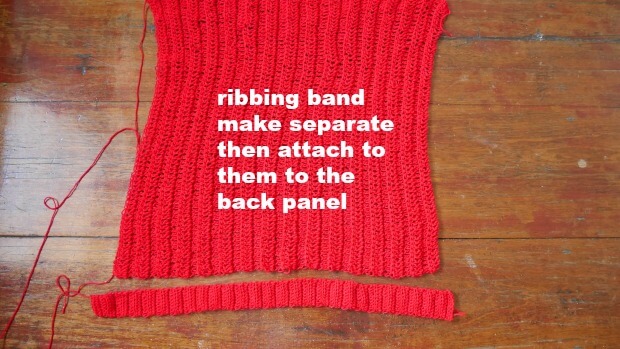
Now it’s time to make ribbing band, we will make it separate from the front panel and back panel and attached them by sewing using yarn needle.
Ribbing band 2 pieces.
Pick up crochet hook size 4.25 mm and Start of by making a slip knot Then make 9 chains
Row1: make, hdc into next chain from hook and in each chain across until the end of the row.
Row 2: ch 1 turn, make hdc in back loop only in each sts across until the end of the row.
Row3: repeat row3 until we got the length that matching the bottom part of front and back panel.
Assemble.
Lay front panel on top of back panel in flatted then using yarn needle to sew 2 pieces together as pic show.

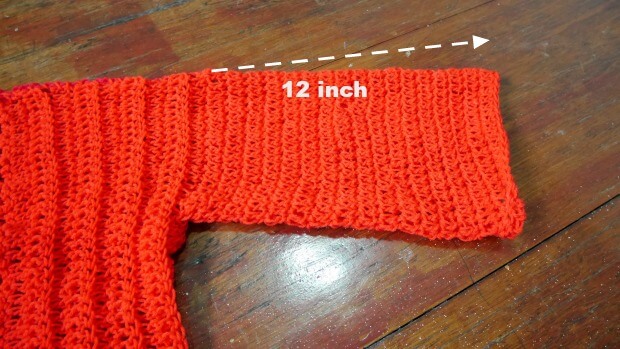
Making long sleeve.
Join new yarn at any place of the armhole and sc around the armhole for 1 round.
Round1. make dc in each sts around, we will work into spiral ,donot join yarn in each round.
Round2. repeat round 1 until we get 12 inches long.
Making the collar.
For the collar we make ribbing separate and attach them by sewing using yarn needle.
Ribbing band 1 pieces for collar.
Pick up crochet hook size 4.25 mm and Start of by making a slip knot Then make 9 chains
Row1: make, hdc into next chain from hook and in each chain across until the end of the row.
Row 2: ch 1 turn, make hdc in back loop only in each sts across until the end of the row.
Row3: repeat row3 until we got the length that matching the open neck , then attached the ribbing band to the open neck by sewing using yarn needle.
All done!

If you make one I would love to see your creation tag me on Instagram!
Hope you enjoy make this bubble pop sweater!
Happy crocheting.
Kathleen Moudry
Thursday 26th of March 2020
I am loving crocheting this lovely sweater however I have gotten to row 22 and my piece measures 13” Across which is correct.. but the length only measures 10” (?) so am I correct to just keep repeating rows until I reach 22” Following the sequence of the pattern (?) Thank You sooo much! It is my First sweater attempt and I am left handed but I have crocheted so many of your other wonderful patterns.
jane
Friday 3rd of April 2020
Kathleen, yes, let me know how it go? when u finished. tag me on instragram or add finished project to my ravely.
kaitlyn
Friday 9th of August 2019
If I were to make the sweater longer, maybe 24-26 inches, would that ruin the rest of the pattern?
jane
Friday 9th of August 2019
HI Kaitlyn, If you want to make sweater longer that ok it will not ruin the rest of the pattern.
Edith Nye
Thursday 7th of February 2019
I love the bubble pop sweater and have started making it. However, I ran into a little problem and don't know what I am doing wrong. I did the front panel and sides ok. doing the back center panel and I am stumped there. Is there a side panel that goes with the back panel so that it will be the same size as front. I can't figure out how to match front and back to sew at shoulders and down the sizes. Maybe you can post a back view of the sweater and I can figure out what I am doing wrong. Anxious to finish the sweater as I never made one before. Thanks for your help.
jane
Thursday 7th of February 2019
Hi Edith, The back panel is just simple double crochet in one piece of rectangle to matching the front panel by making foundation chain that match the length of the long side of front panel.
Inge
Tuesday 8th of January 2019
Dear Jane, thank you for this lovely pattern! I get a lot of compliments for my new sweater ? It’s a pity I can’t post a picture here...
jane
Tuesday 8th of January 2019
Aww That so sweet of you to let me know, I am so happy you just made my day, you can tag me on ig ,ravelry or facebook.
Lisa
Wednesday 26th of December 2018
I love this pattern. Thank you. Also have you thought of or tried this with a chunk yarn to go faster? Lisa
jane
Thursday 27th of December 2018
HI Lisa , I would try chunky yarn to speed up the sweater, if you try just the middle part of sweater is follow the pattern then for the side you can decrease row to make it more smaller for the chunky yarn.