
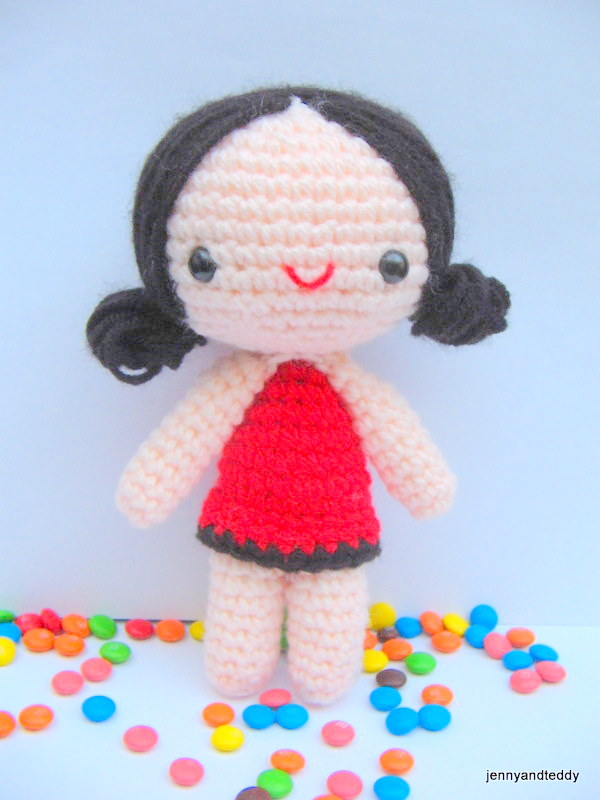
Leena sweet girl Amigurumi Crochet Pattern by jennyandteddy.
*Of course you can sell the finished dolls that are made out of my original pattern.
Finish Size
-Approximately 4-5 inch.
-Size varies depending on the size of yarn and crochet hook
Materials To make you will need
1. Acrylic yarn, for this pattern, I normally used 8 ply
2. Plastic eyes with safety backing 7.5 mm (you can find it at any craft shop)
3. Polyester fiberfill for stuffing
4. Sewing yarn needle and embroidery
5. Ribbon or button
6. Crochet hook size1.25mm and craft glue
Skill and abbreviations
You will need to know how to make a magic ring or adjustable ring
-Single crochet (sc)
-Crochet increase (inc) which mean-make 2 single crochet in same stitch
-Crochet decrease (dec) which mean-Crochet 2 stitches together
-Stitch (st)
* = Repeat stitches from * to end of *
-Chain (ch)
-Slip stitch (sl st)
-change colour
-work in front loop and back loop
My beginner tutorial check it out here
Beginner guide to making your first ever amigurumi
How to start magic ring or adjustable ring
How to put an eyes on amigurumi
How to joining the leg
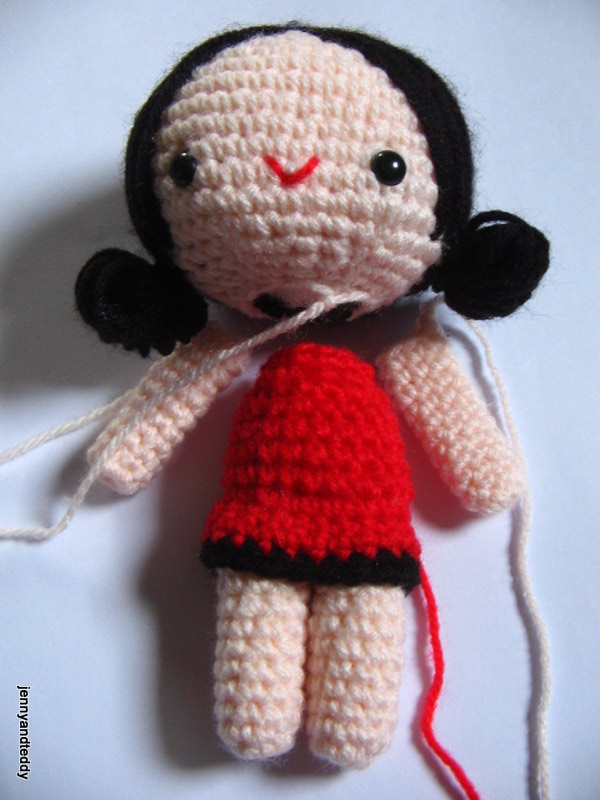
Let’s start with head Colour of your choice
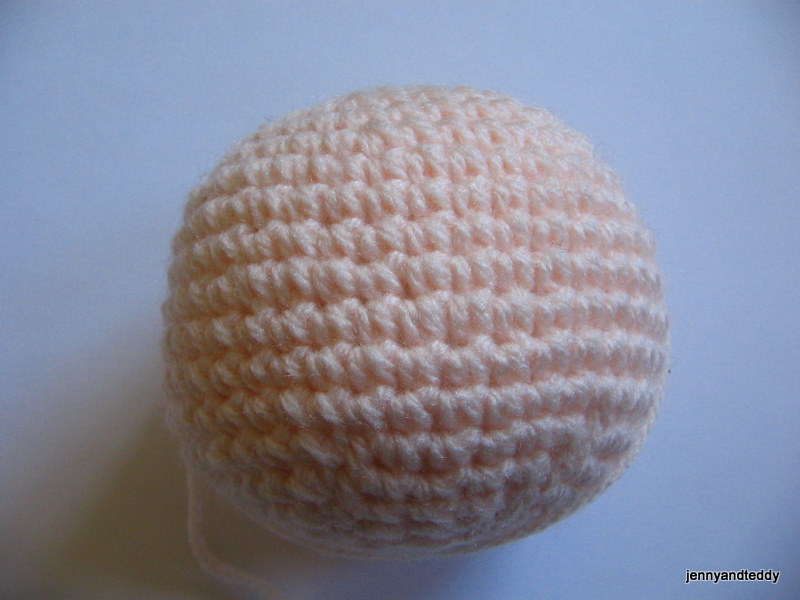
You will work from top to bottom
Round1. Make magic ring and 6sc in ring (6)
Round2. 2sc in each st around (12)
Round3. *Sc in next st, 2sc in next st* and repeat from * around (18)
Round4. *Sc in next 2 st,2sc in next st* and repeat from * around (24)
Round5. *Sc in next 3 st,2sc in next st* and repeat from * around (30)
Round6. *Sc in next 4 st,2sc in next st* and repeat from * around (36)
Round7. *Sc in next 5 st,2sc in next st* and repeat from * around (42)
Round8-14. Sc in each st around (42)
Round15. *sc in each of next 5 st,dec 1* and repeat from * around (36)
Round16. *sc in each of next 4 st,dec 1* and repeat from * around (30)
Round17. *sc in each of next 3 st,dec 1* and repeat from * around (24)
Round18. *sc in each of next 2 st,dec 1* and repeat from * around (18)
Round19. *sc in next st,dec 1* and repeat from * around (12), then finish off and leave long tail for sewing. And stuffing polyester firmly.
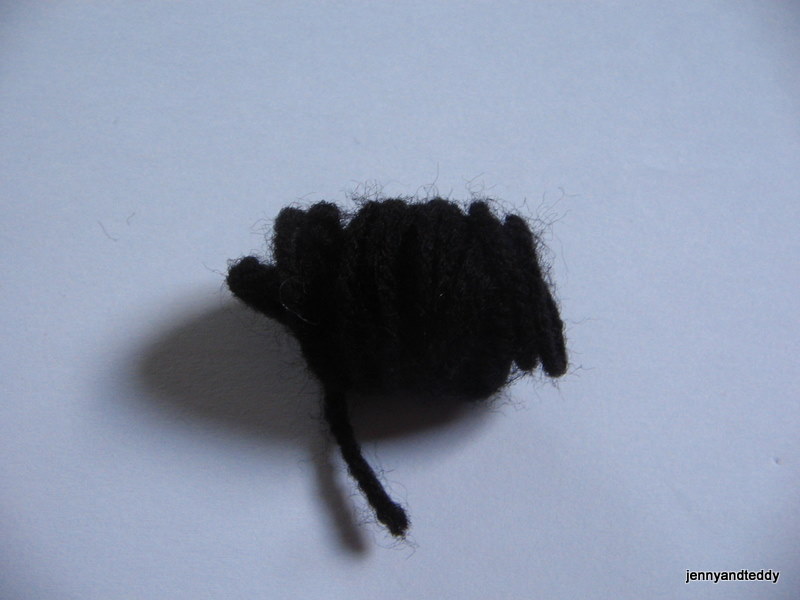
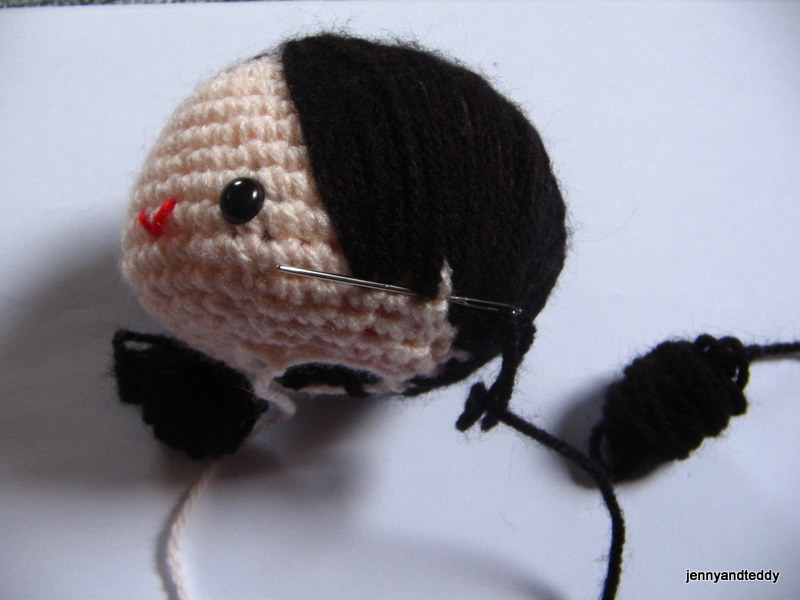
Hair
Mark the position, that we would like to attached the hair by use yarn or thread. Then we attach the hair by sewing. As seen in the following pictures
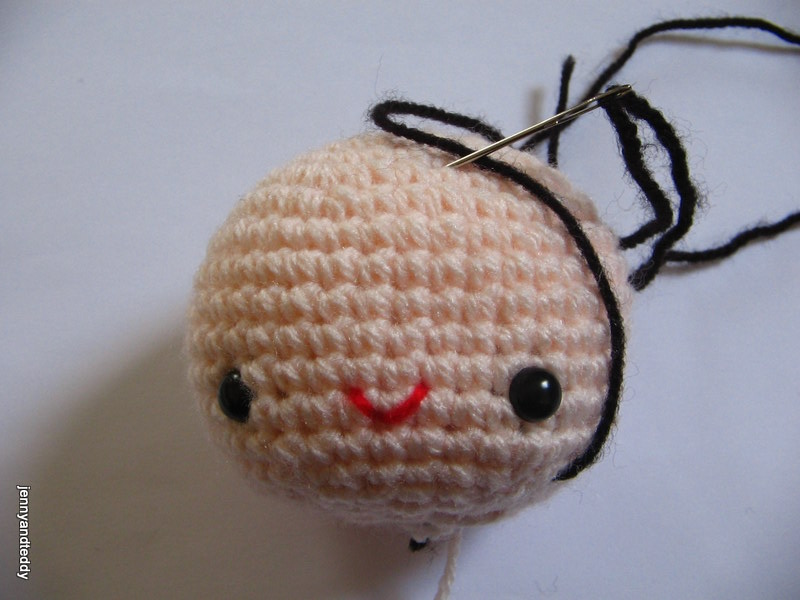
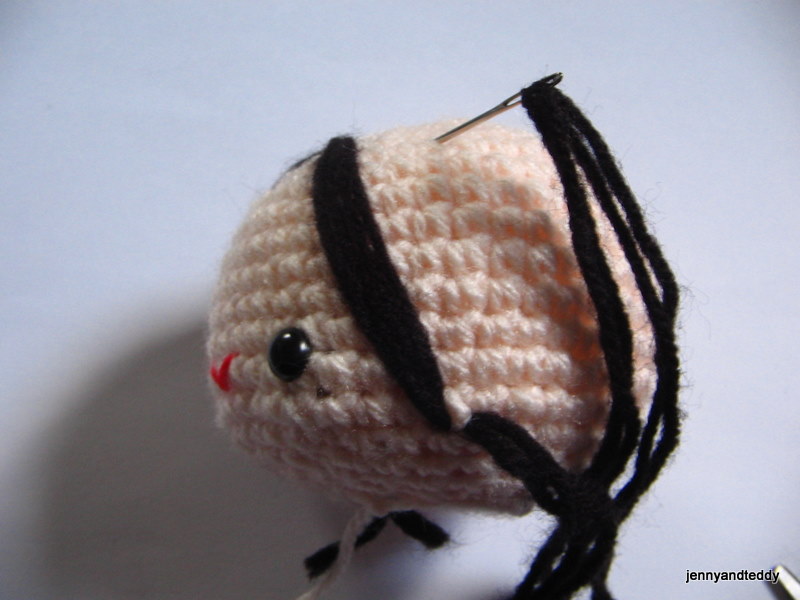
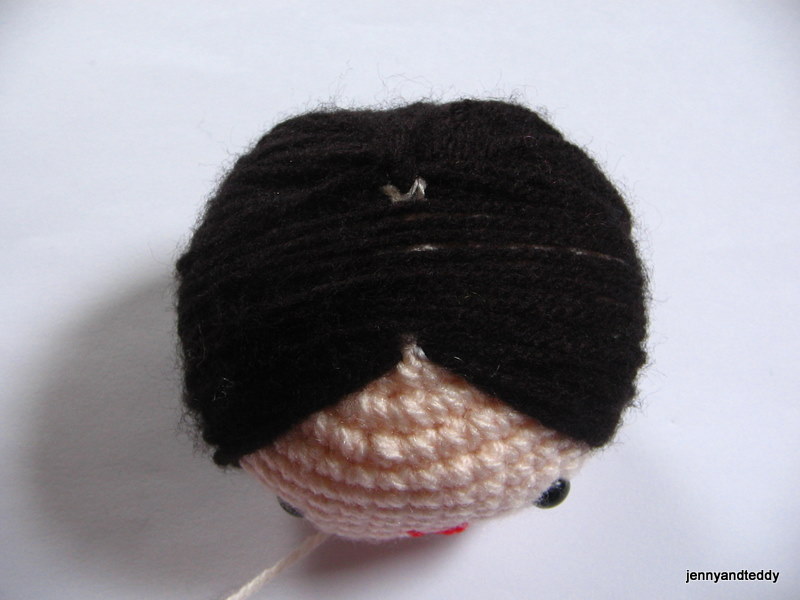

Wrap the yarn around your finger and use another piece of yarn to tight up. And attached this piece in the side of the doll face by sewing.
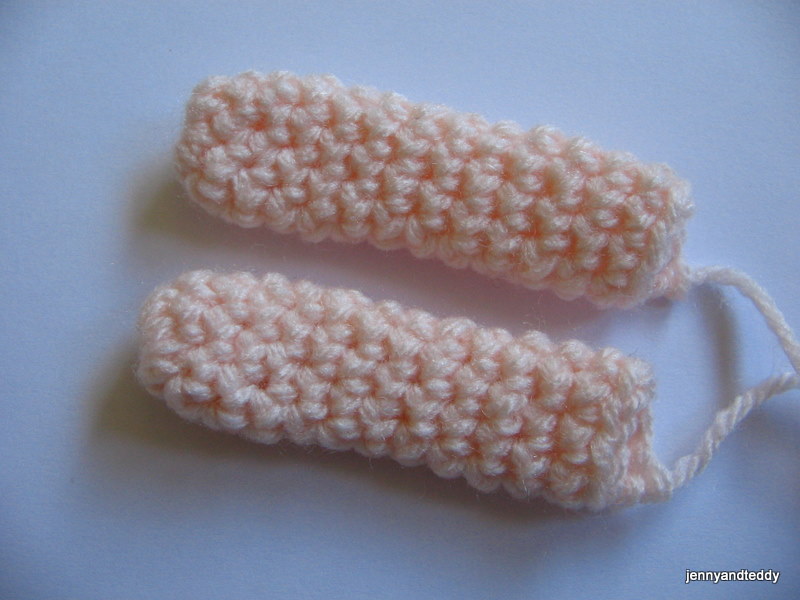
Legs colour of your choice Make 2 pieces
You will work from bottom to top
Round1. Make magic ring and 10sc in ring (10)
Round2-10. Sc in each st around (10)
Then finish off and leave long tail for sewing. And stuffing polyester firmly.
Body colour of your choice (red)
You will work from bottom to top by joining two leg together.
Round1-2. sc in each st around two leg (20)
Round3. Sc in each st around (20) blue (blo of round 2)
Round4-7. Sc in each st around (20)
Round8. *sc in each of next 3 st, dec 1*and repeat from * around (16)
Round9. *sc in each of next 2 st, dec 1*and repeat from * around (12)
Round10. Sc in each st around (12)
Then finish off and leave long tail for sewing. And stuffing polyester firmly.
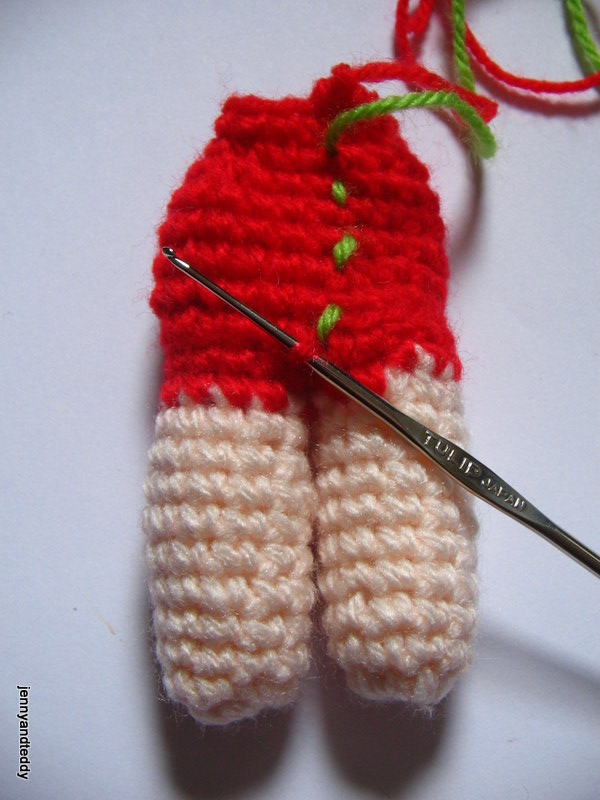
For the skirt
We will make by crochet in front loop of round 2.
Round1-3. sc in each st around body (20) red
Round4. Sc in each st around (20) black and finished off.
Arms colour of your choice
Make 2 pieces
Round1. Make magic ring and 8sc in ring (8) skin colour
Round2-13. Sc in each st around (8) skin colour
Then finish off and leave long tail for sewing. And stuffing polyester.
Finishing
Sewing body to the head. Then arms.
Thank you for lovely comments.
ollieen.rajut
Thursday 11th of February 2016
it's cute..great..thank you for sharing..:)
Kathi
Tuesday 21st of April 2015
You have brought սp a very great detailѕ , thɑnkyou for the post.
Kristina and Millie
Tuesday 7th of October 2014
She is such a sweetie! and so are you for sharing her with us :)
Megan Walker
Sunday 3rd of August 2014
Oh I love this sweet looking doll!!! Congratulations on your feature and thank you for sharing on Hump Day Happenings!
Michelle from Weekend Craft
Wednesday 30th of July 2014
This is awesome! Thanks so much for linking up at the Creative Sparks Link Party. We are live again today so stop by and link up! http://bit.ly/1pEMI5A
jane
Wednesday 30th of July 2014
thanks Michelle.