

Meet Happy peplum crochet top! This summer crochet top is so easy for beginner and all level. You will love how the flowy this top look.
This cute crochet peplum top or ruffle top is so modern and feminine with this pink pastel color will make you feel oh.. so…. goood for yourself.
I made with fingering weight yarn from scheepjes Whirlette only need 2 skeins and you girl can make in anysize! How cool is that?
 The top made from top down and crochet all in one piece and the button is useable too.
If you love this pup lum style top you will like this top also.
Jessy easy crochet lace tank top
Dolly crochet bralette summer ruffle top
Peek a boo shoulder crochet top
Granny stitch crochet tank top
Let’s get start!
– I am using about 600 yard fit under bust size 30 inch ( easy to adjust the size see pattern instruction below).
– I used scheepjes whirlette 2 skein
– 3.5 mm crochet hook
– Sewing yarn needle
-4 stitch marker
Skill and abbreviations
(American crochet terms)
You will need to know how to make
-St which mean stitch
-sc which mean single crochet
-dc which mean double crochet
-Blo which mean crochet in back loop only
-ch, Chain
-slip knot
-sk which mean skip stitch
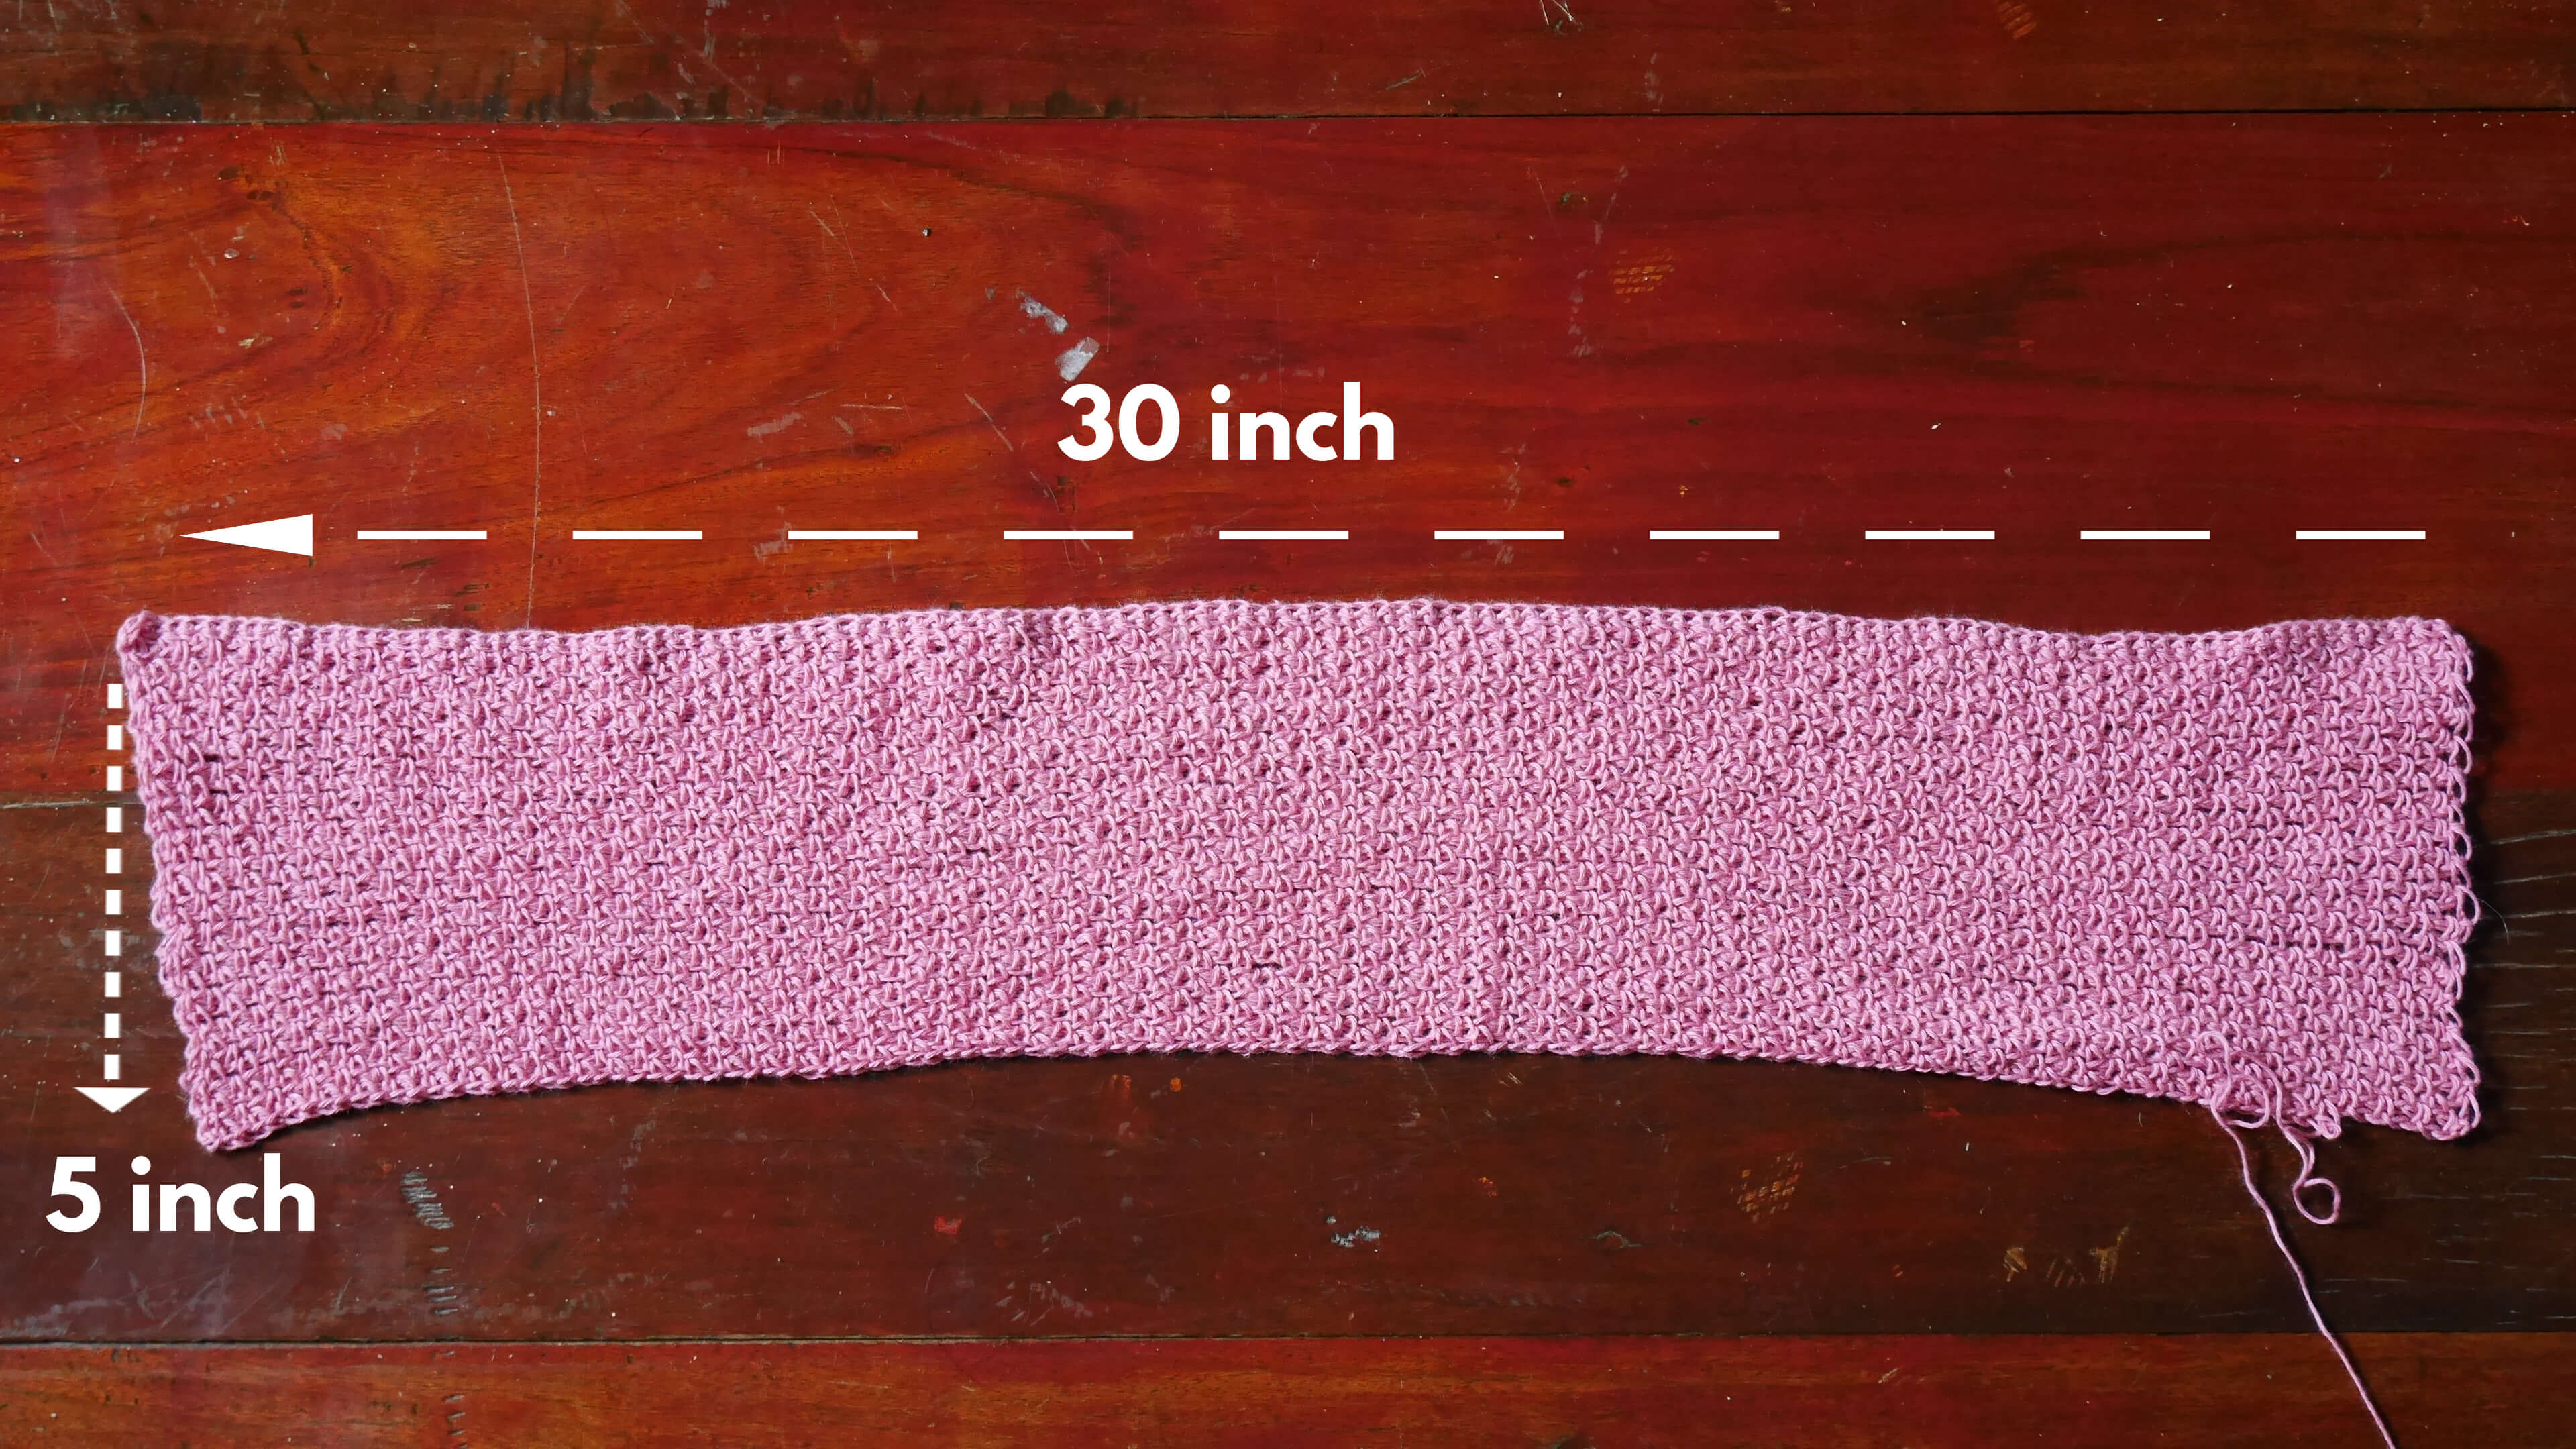
Finished Size of example piece Approximately: example size under bust 30 inch.
For me the model wearing this piece, I am 4’9 feet tall.
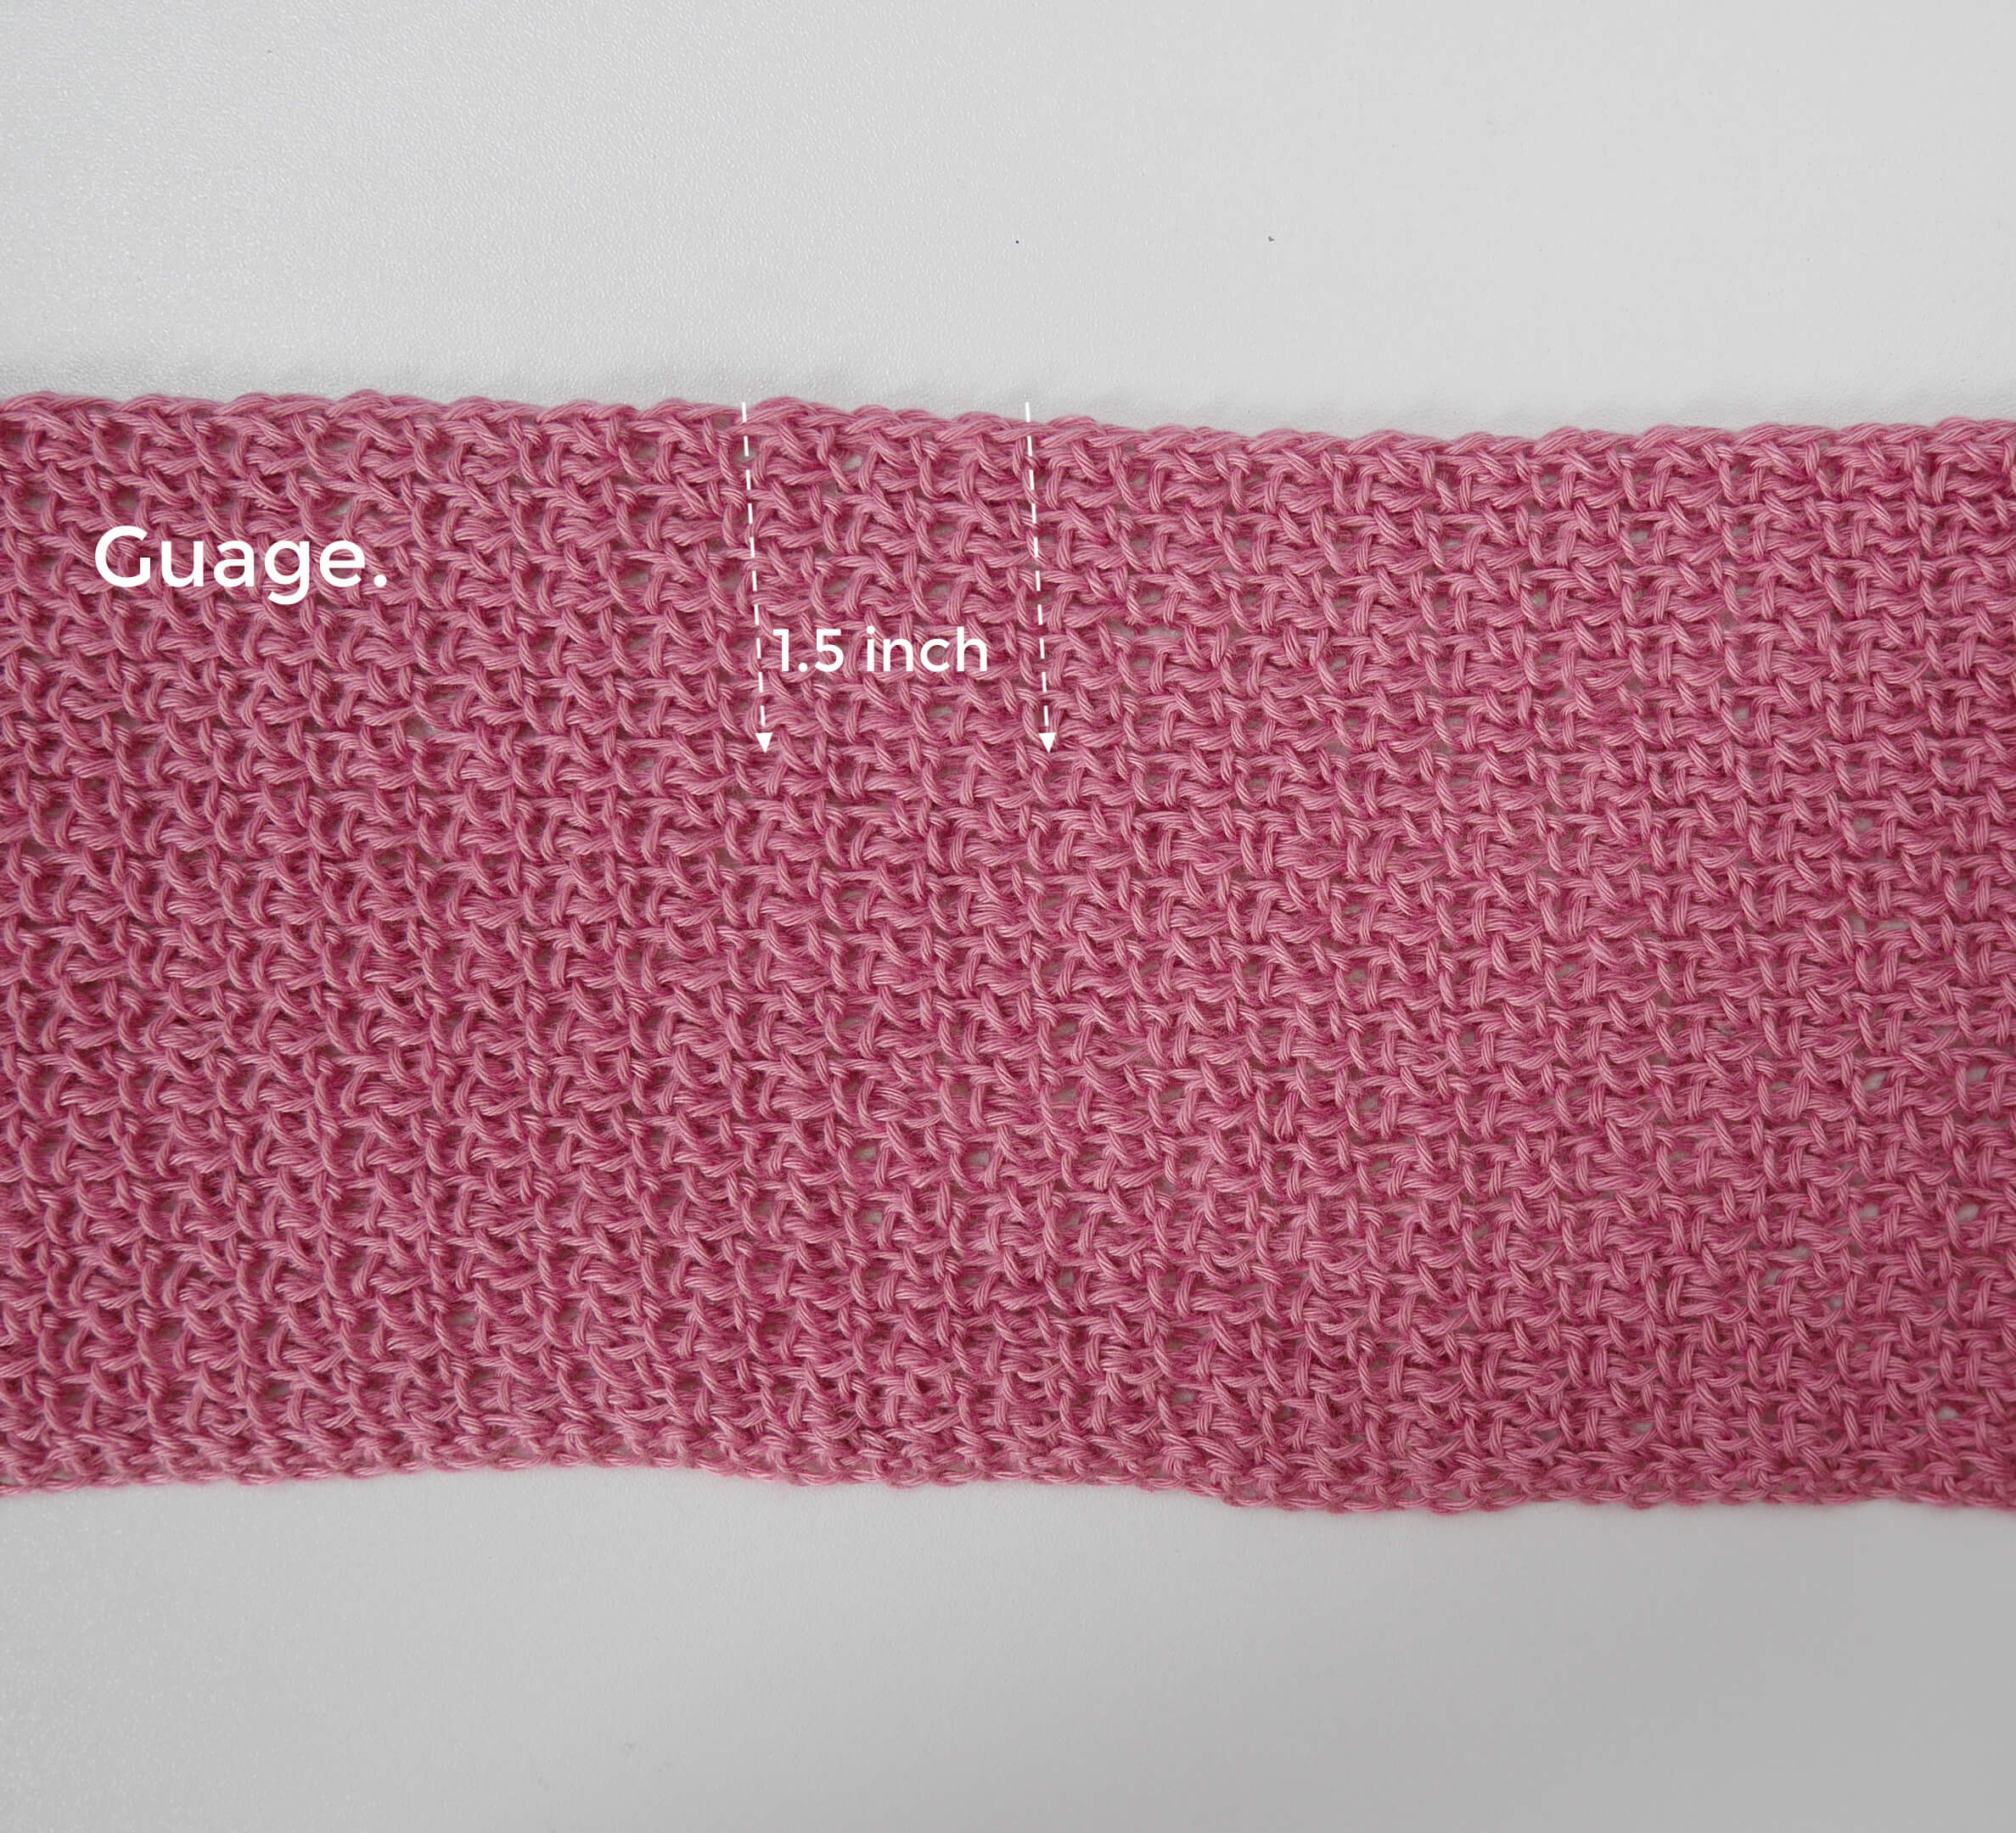
Gauge:
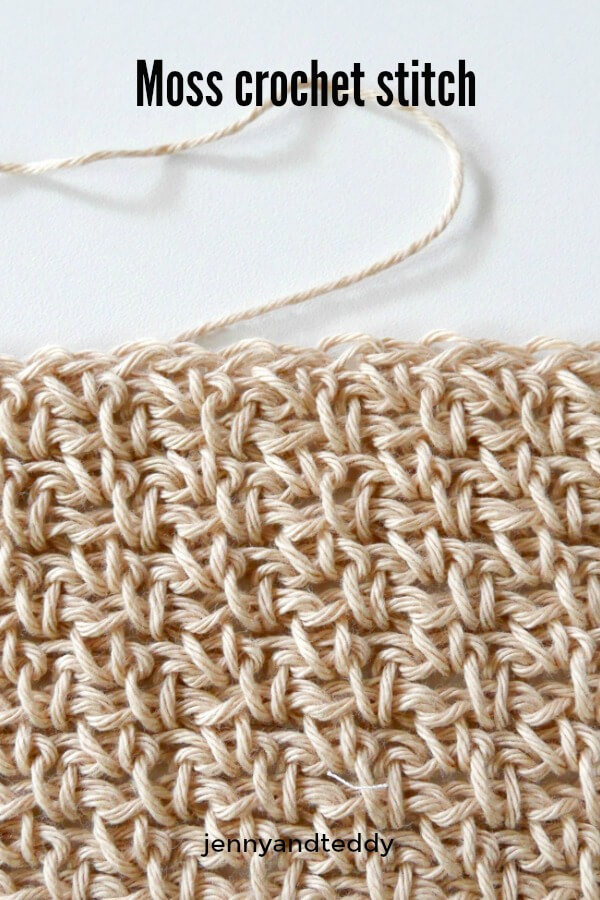
3 crochet moss stitch = 1.5 inch
Measurement of one rectangle.
5x 30inches.
For the length: If you need to make it bigger size simply add more chain to the foundation chain.
Video tutorial.
Go to ravelry pattern page.
happy peplum top
Get the free pattern below or this pattern is also available as an inexpensive, ad-free, PDF printable instant download in my etsy shop. Thank you so much for your love and support. I am really appreciate you.
Get the free pattern below or this pattern is also available as an inexpensive, ad-free, PDF printable instant download in my etsy shop. Thank you so much for your love and support. I am really appreciate you.
Happy peplum crochet top instruction.
Top part make 1 pieces.
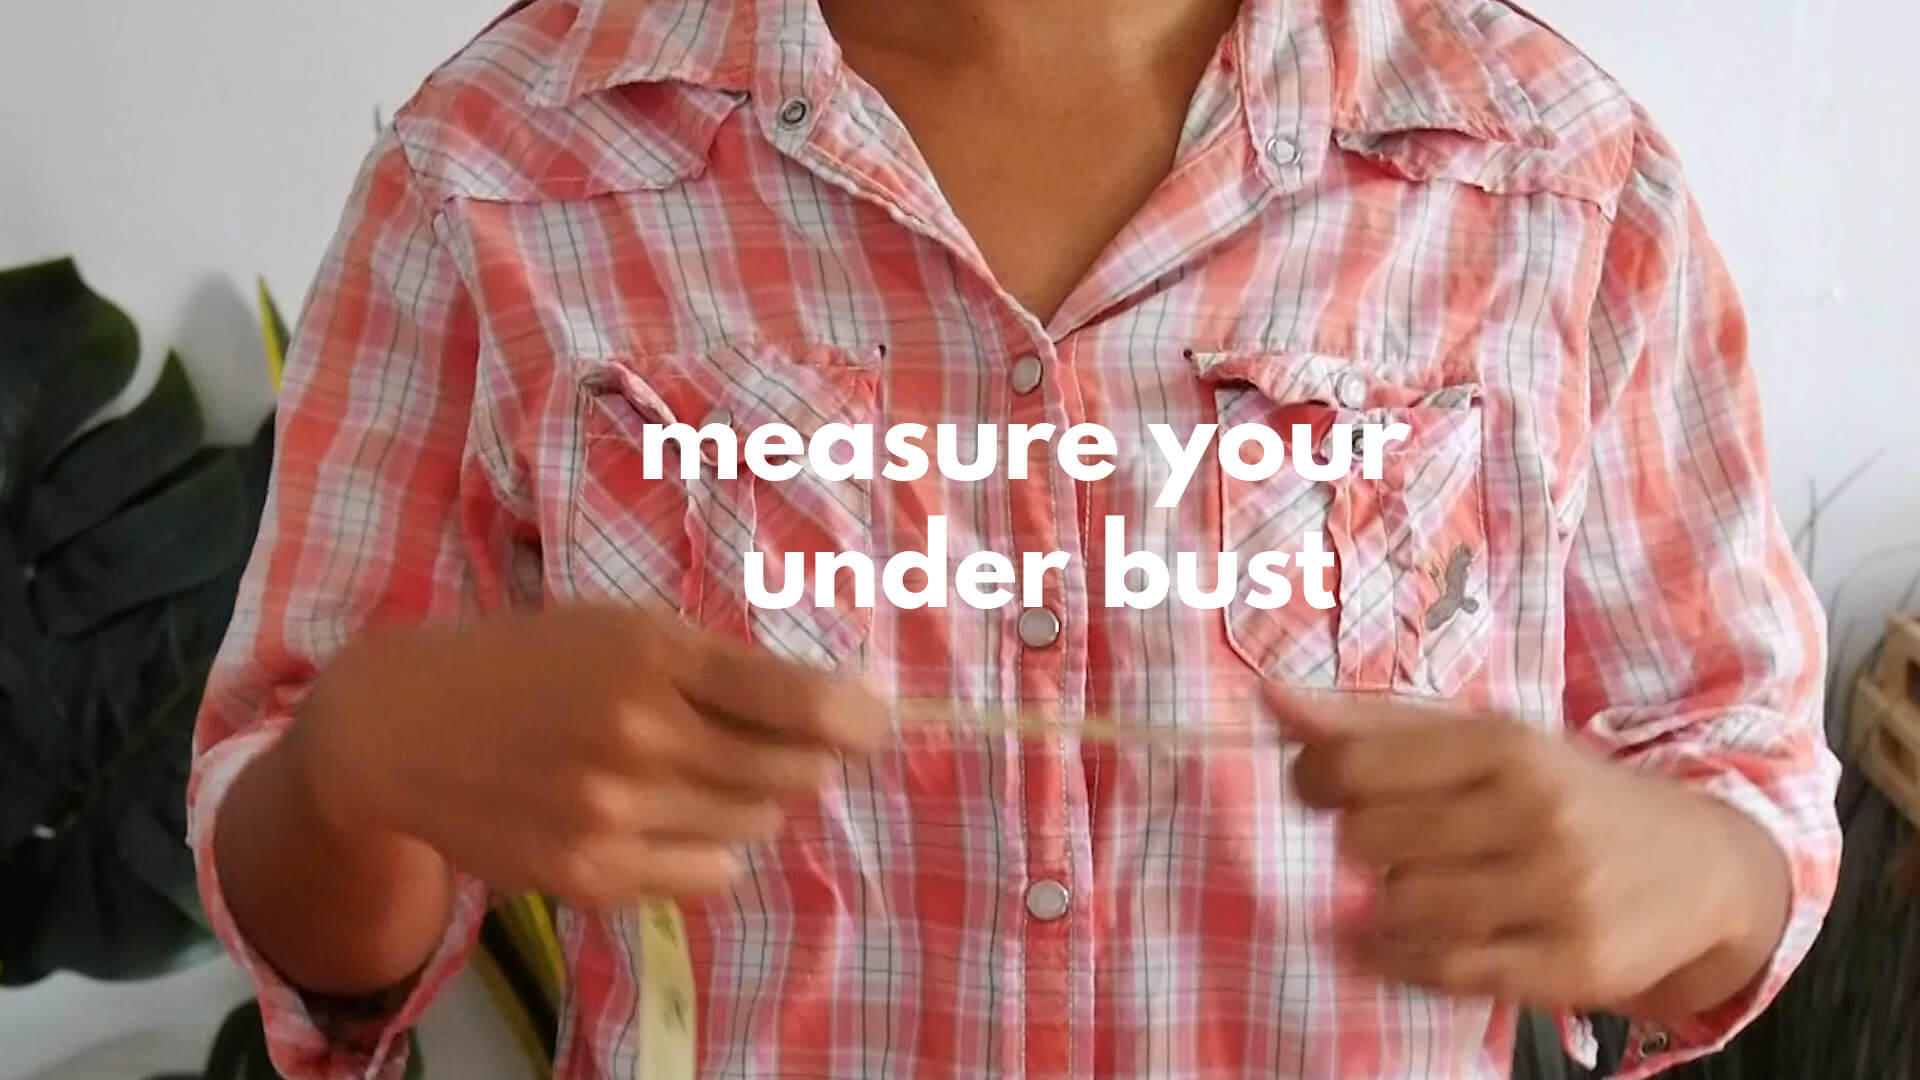
First you will need to measure your under bust size..
Pick up crochet hook size 3.5 mm hook and Start of by making a slip knot Then make chains .
(foundation chain multiple of 2) or even number.
my size underbust is 30 inch so I need 120 chain.
After we finished with foundation chain then Sc in each chain across, ch 1, turn.
Row 1: sc in the next stitch from hook * ch1, skip 1 st, sc in next st * repeat * to * across until the end of the row. Ch1 turn
Row 2: sc in the first ch space * ch1, skip 1 st, sc in next ch space * repeat * to * across until the end of the row and make sc on the turning ch. Ch1 turn
Row3: Repeat row 2 until you has reached 5 inch or your desired length.
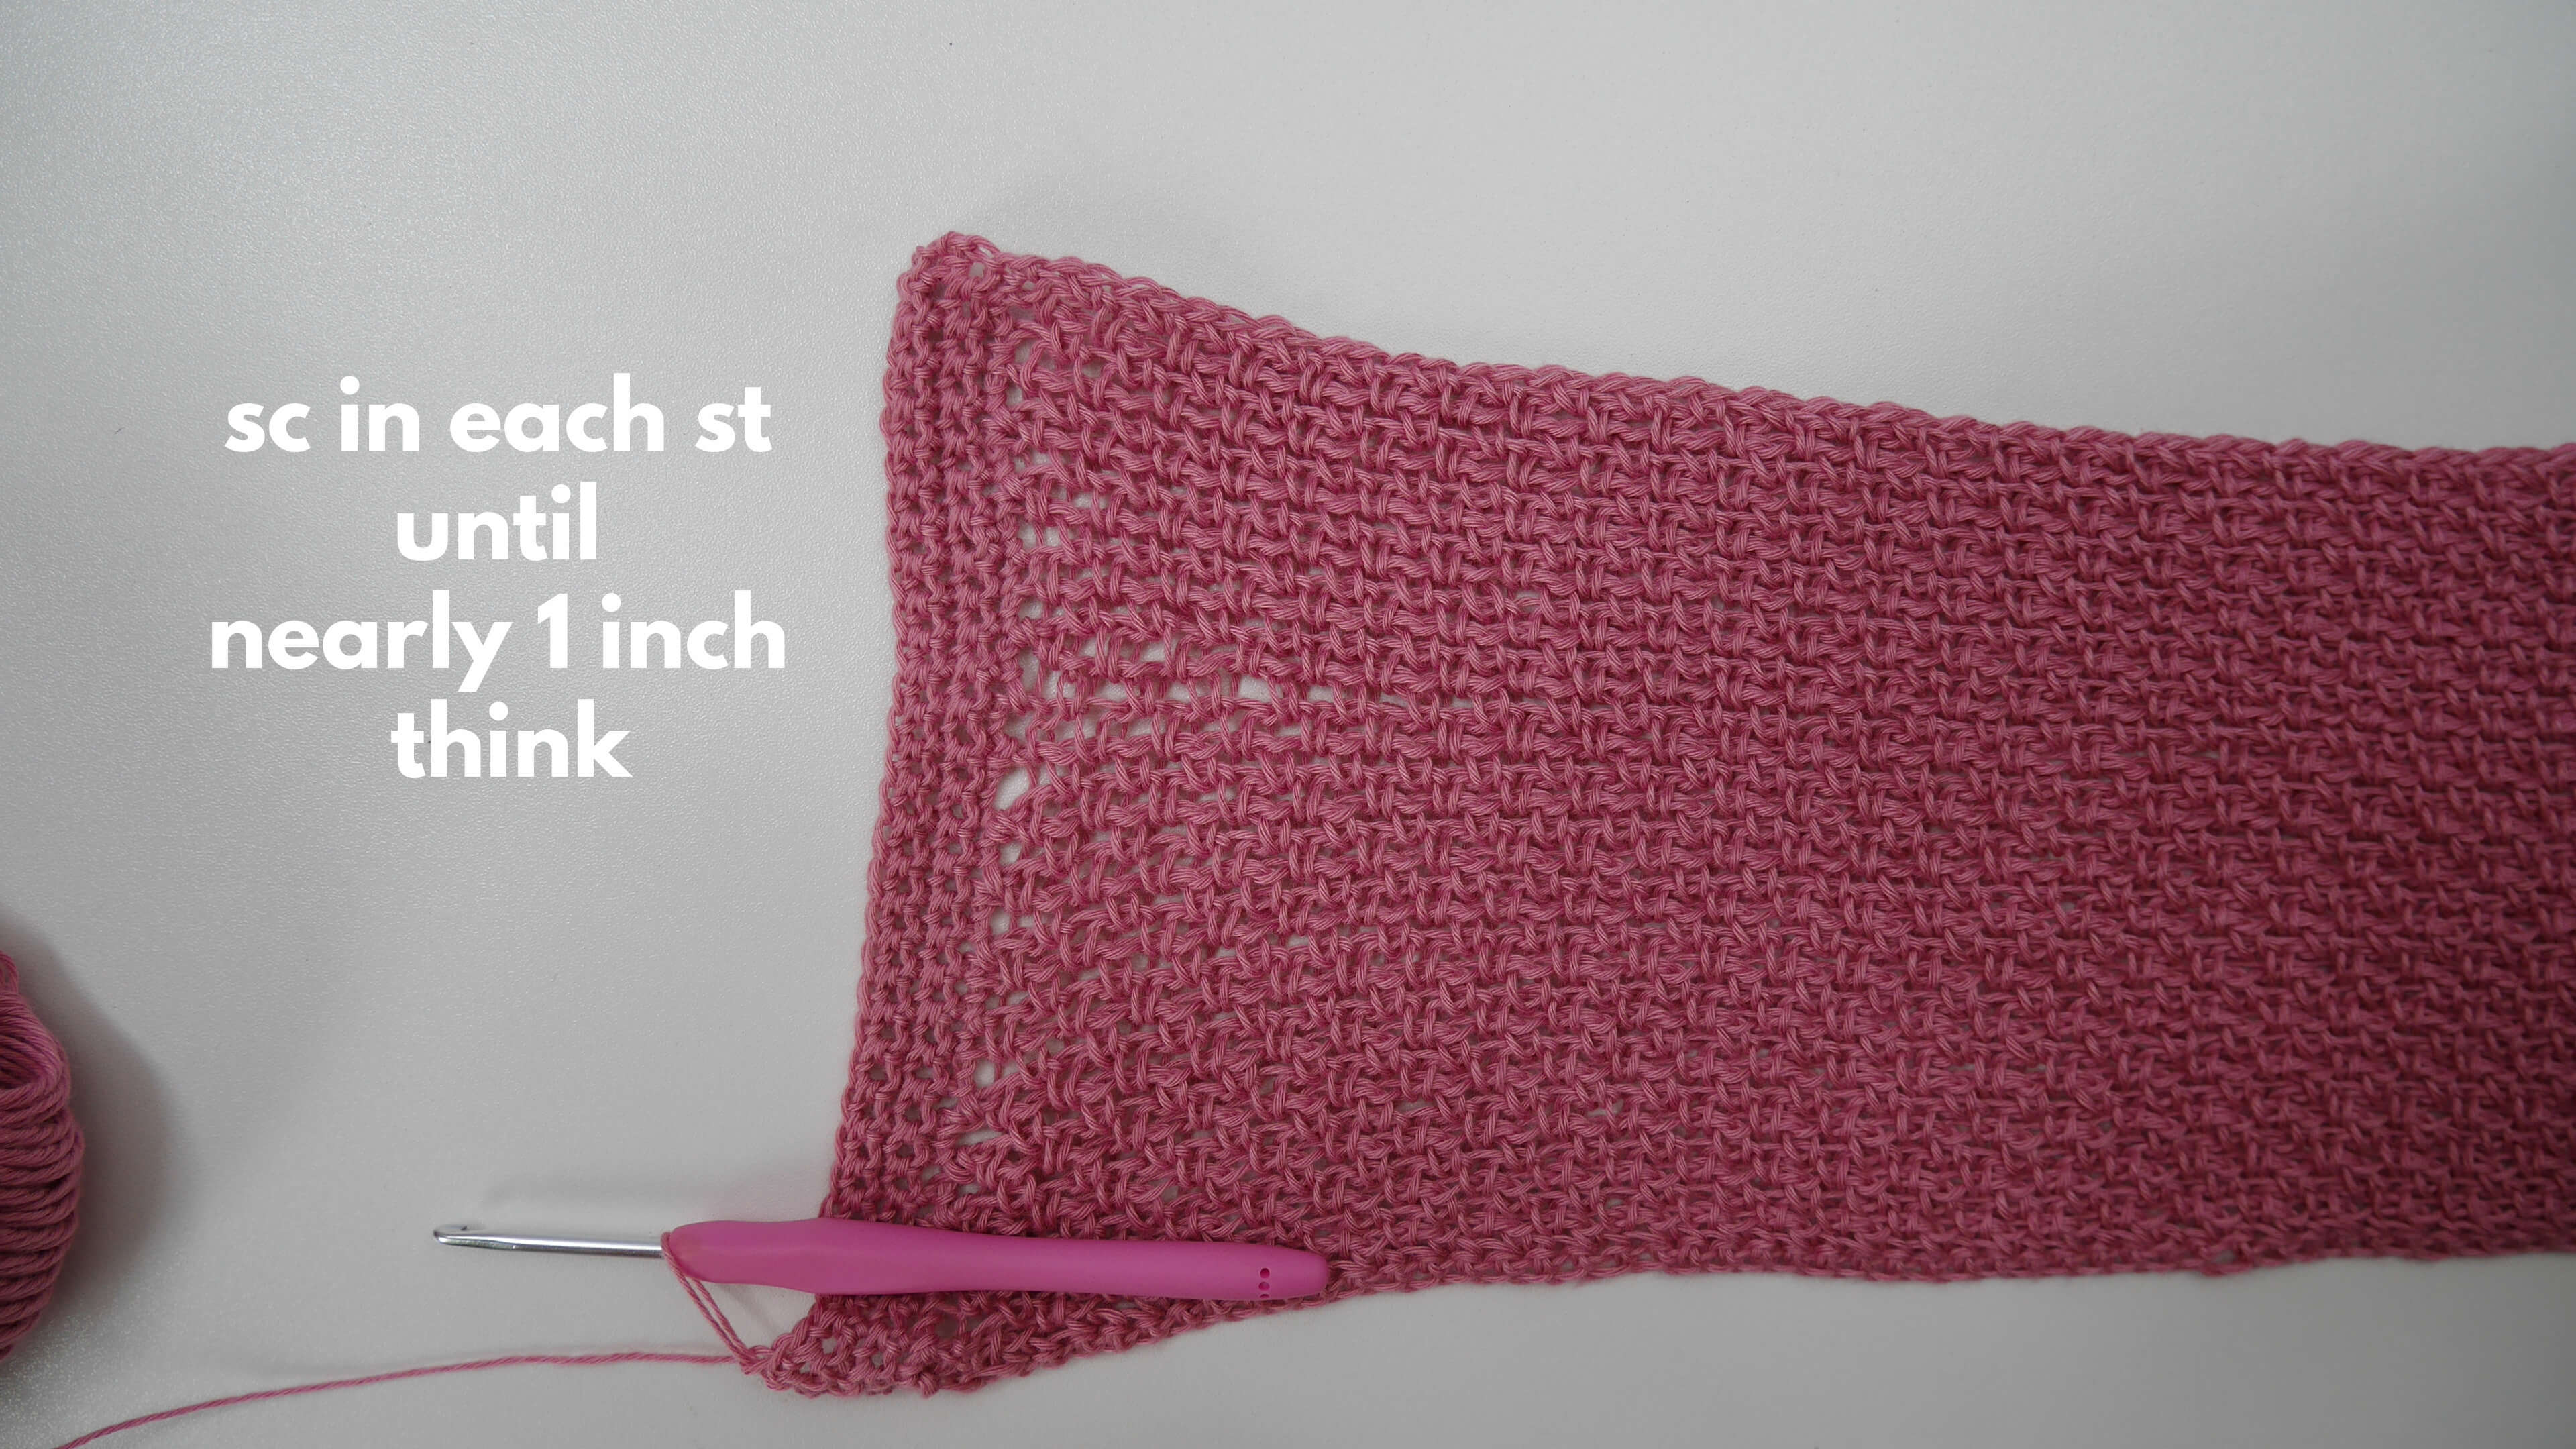
After we finished 1 pieces of rectangle, time to add base for the button.
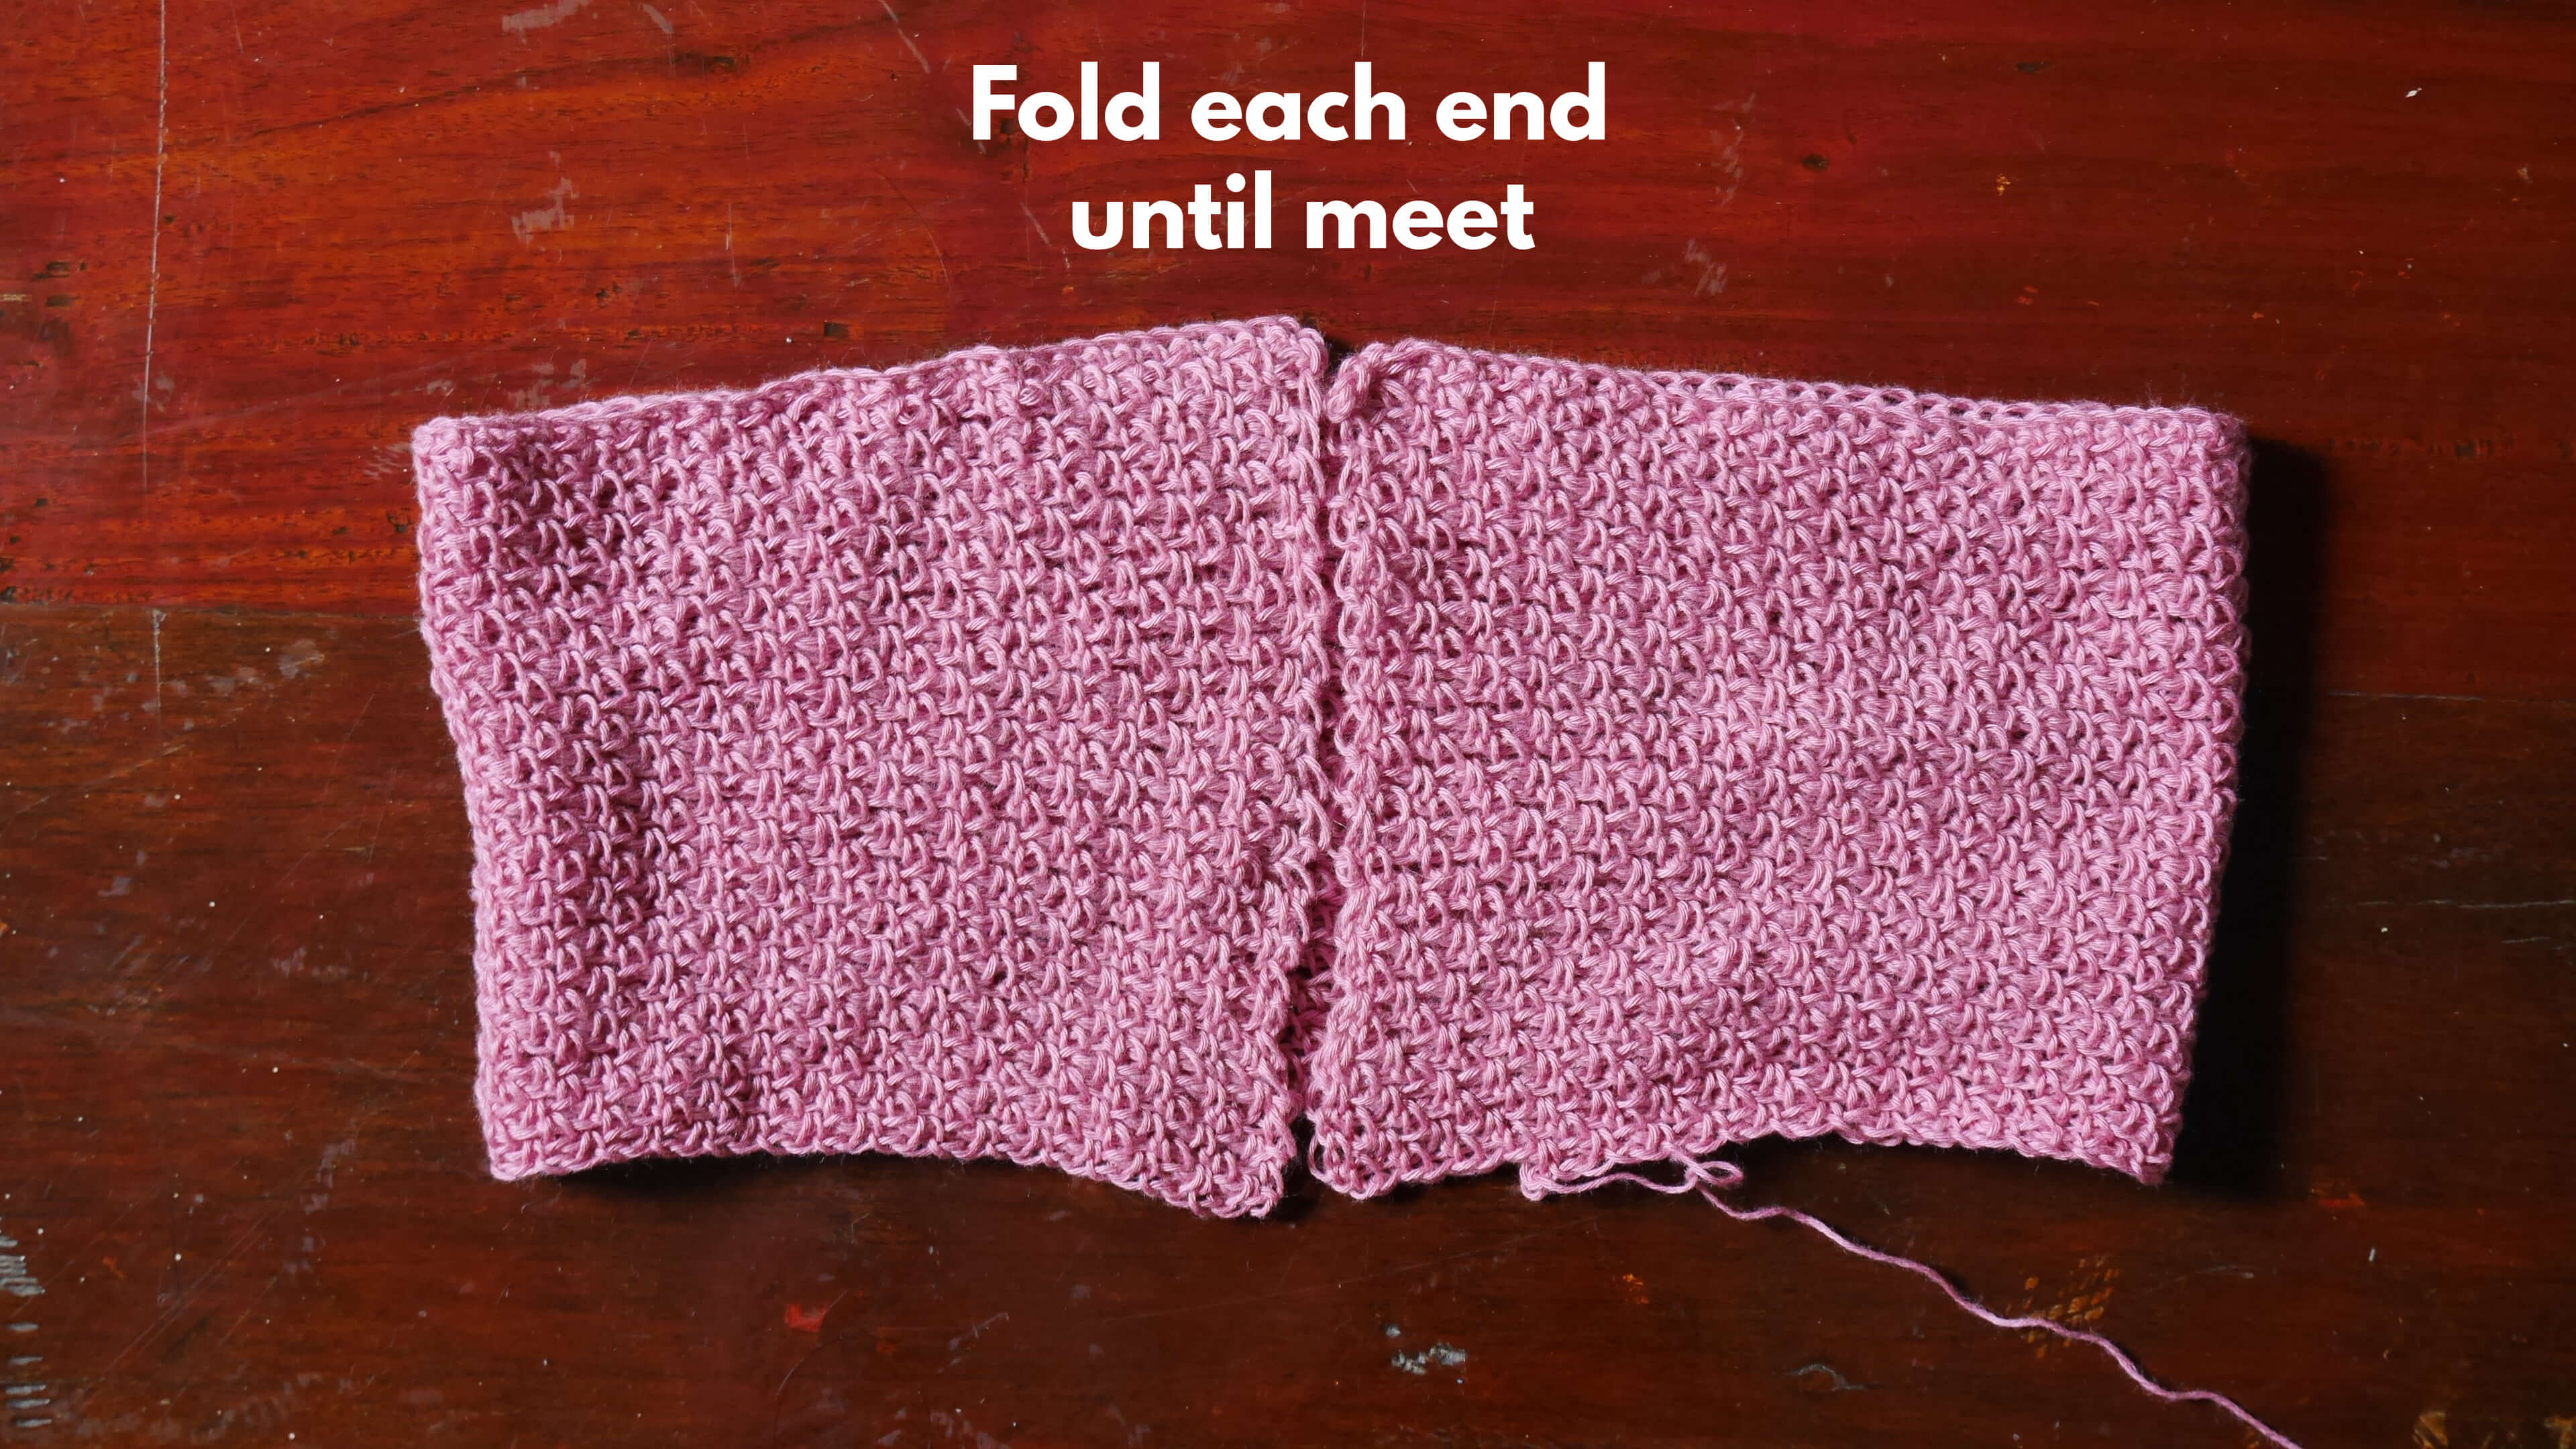
Then sc in each st or space on the edge end of the top see pic below until u got nearly 1 inch thick or half inch.
 Then do the same on the other side.
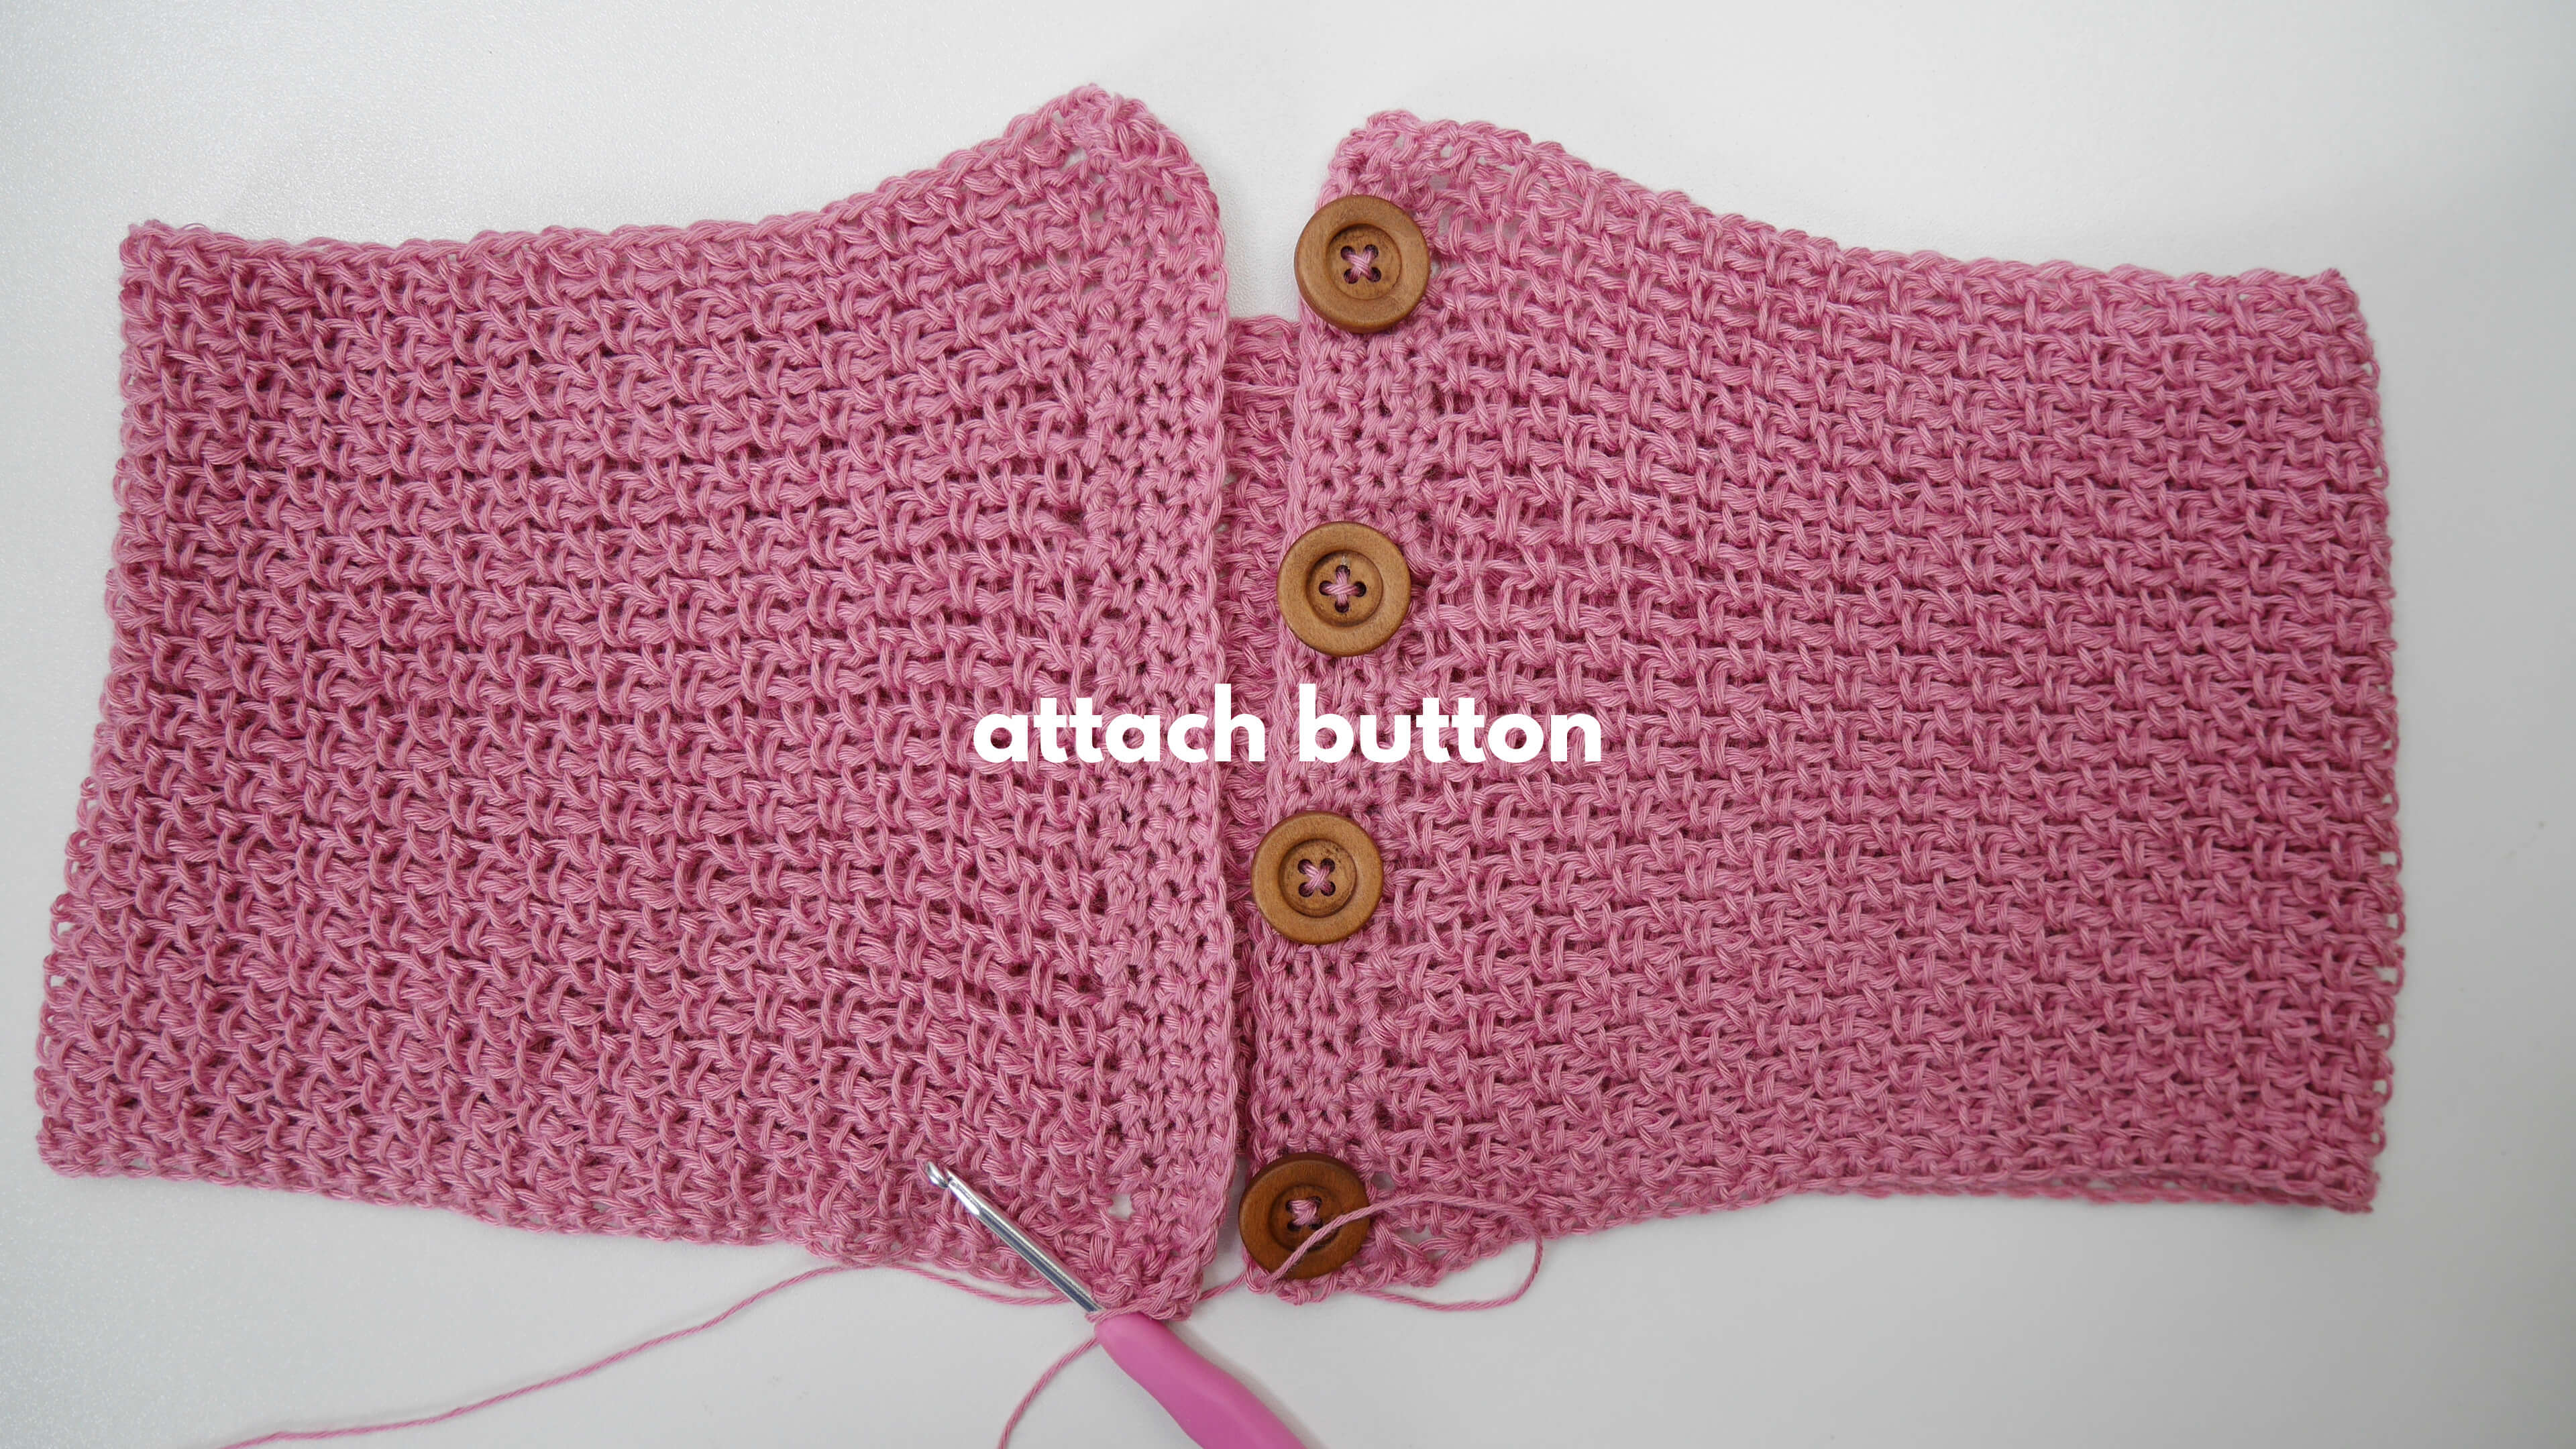
Then attach buttun by sewing.
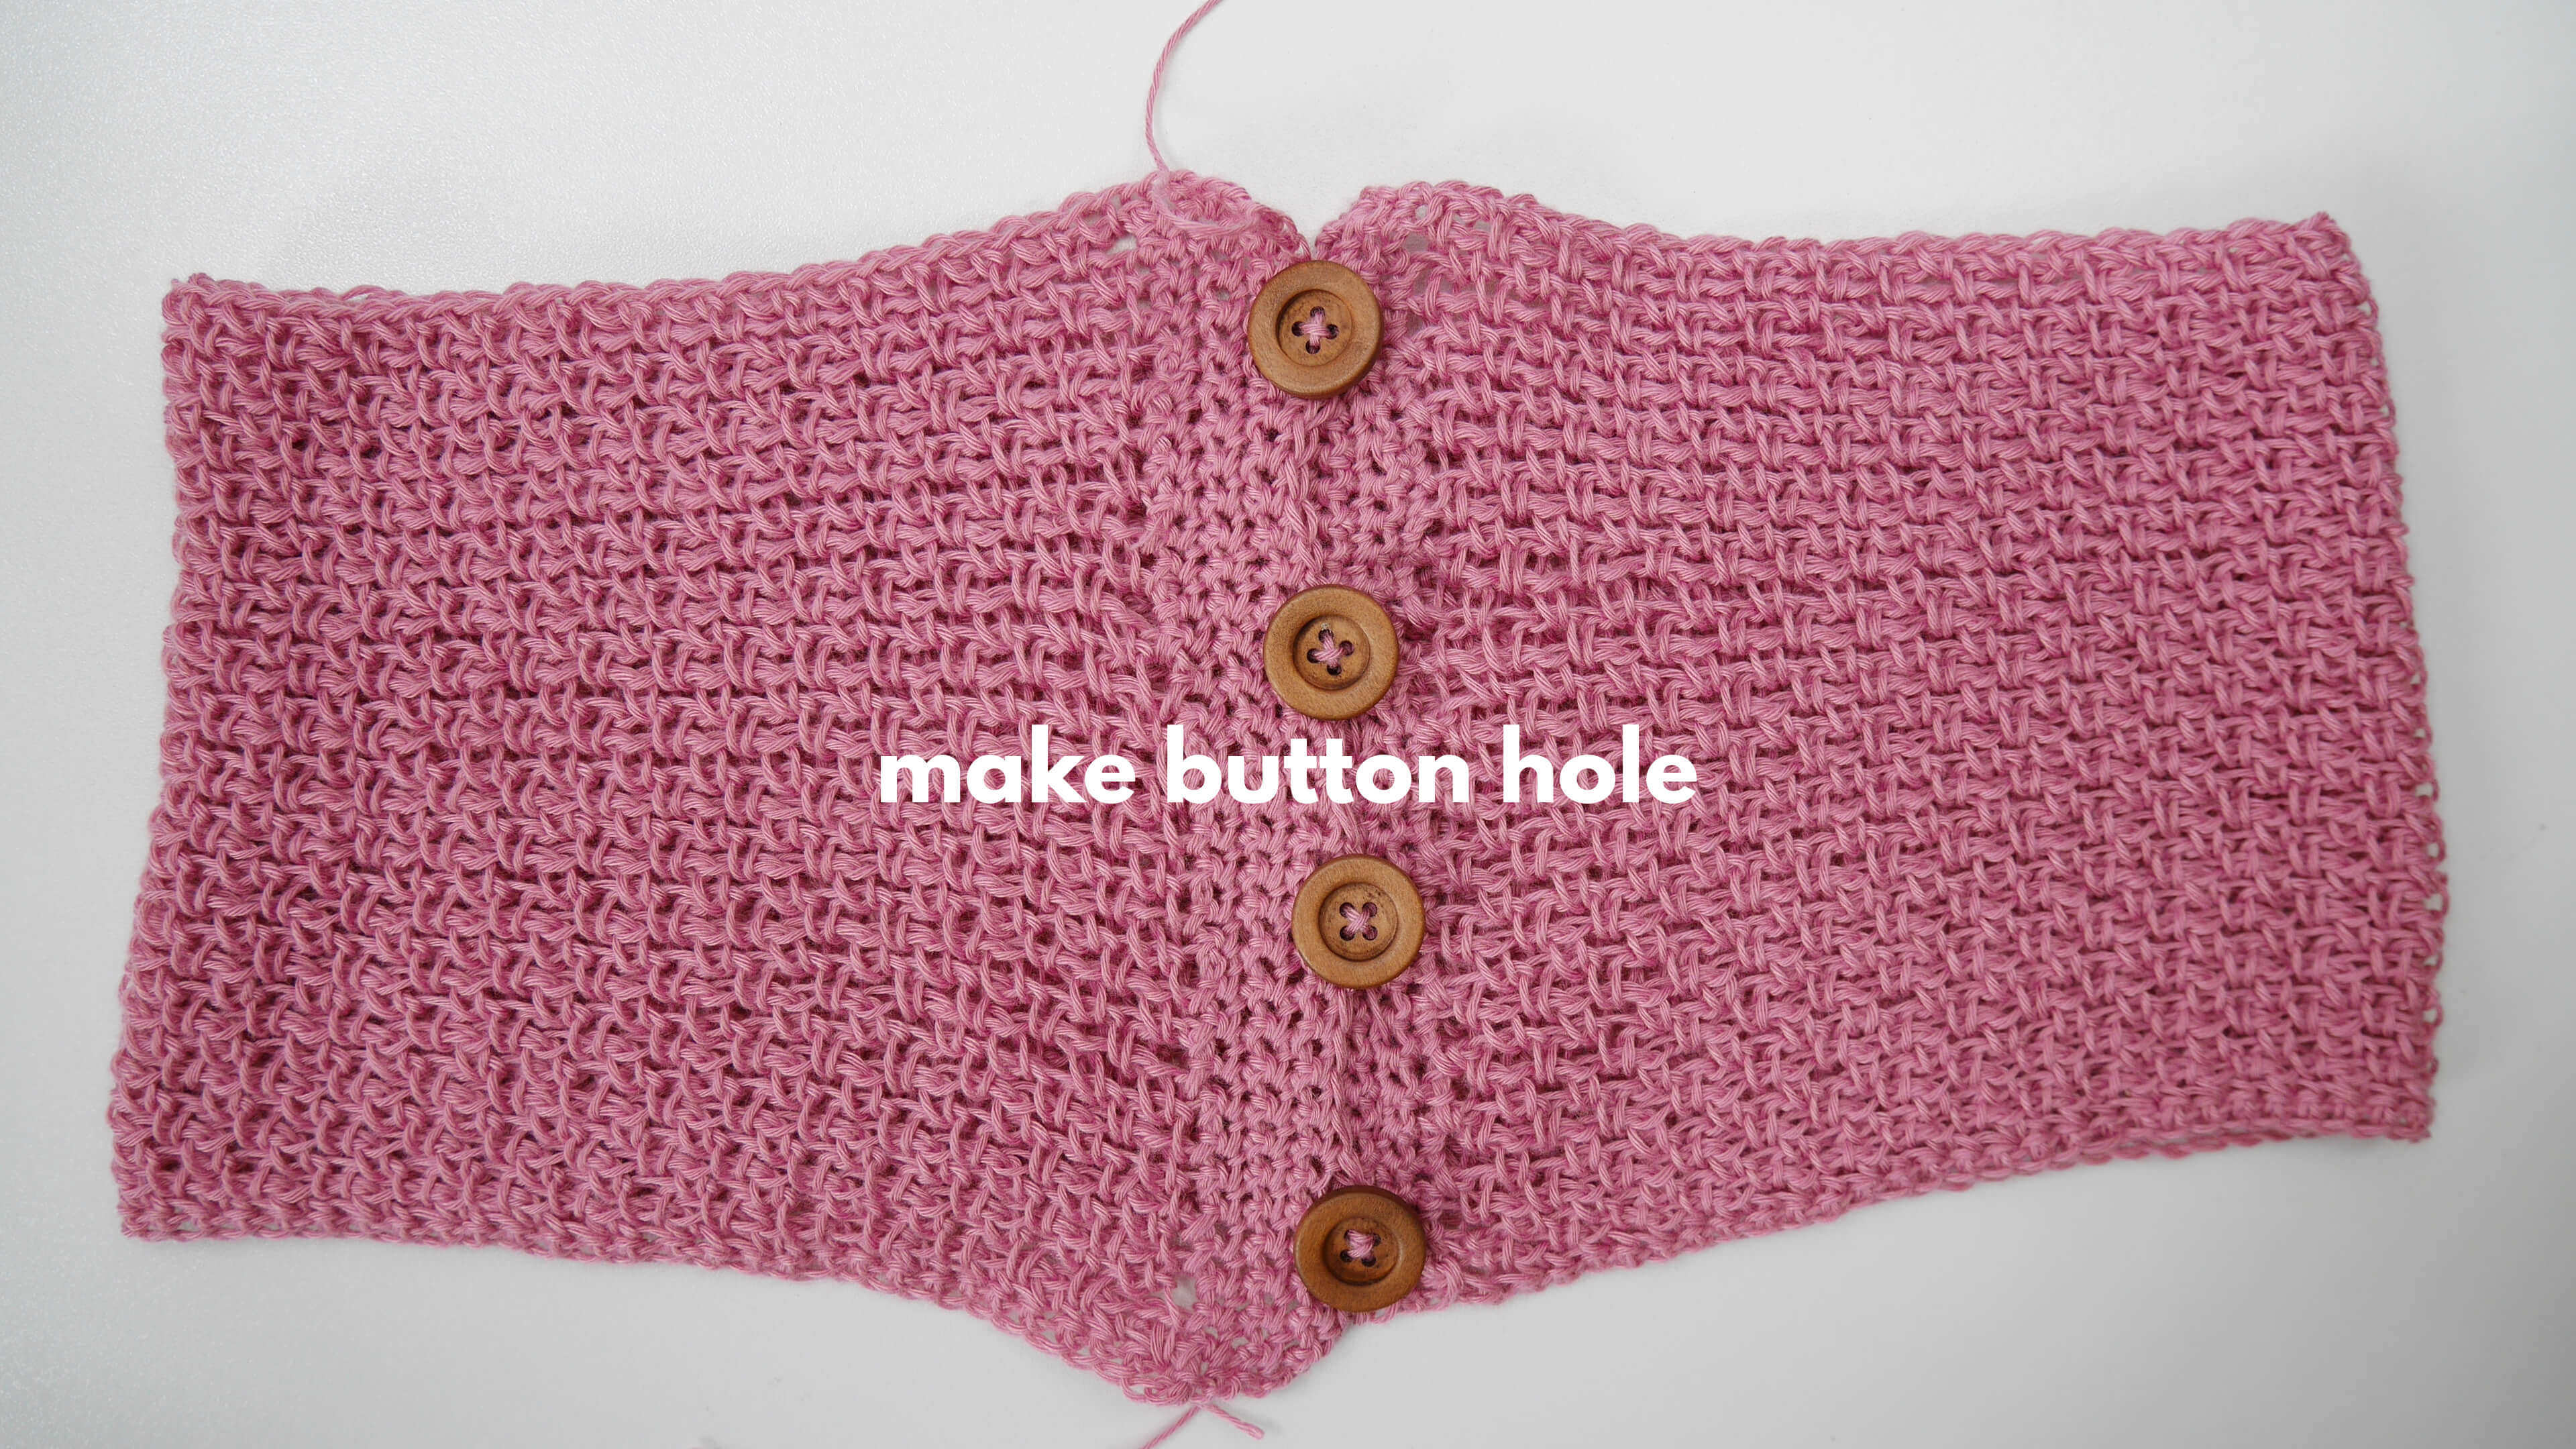
Make button hole.
After finished attach button then on the other side we will make a buton hole. See video tutorial on 16-19.10 minutes.
On the other side adding button hole by sc until u reach the center of buttton then chain 3 skip 2 stitch then sc until you reach the next button.
Add the bottom part.
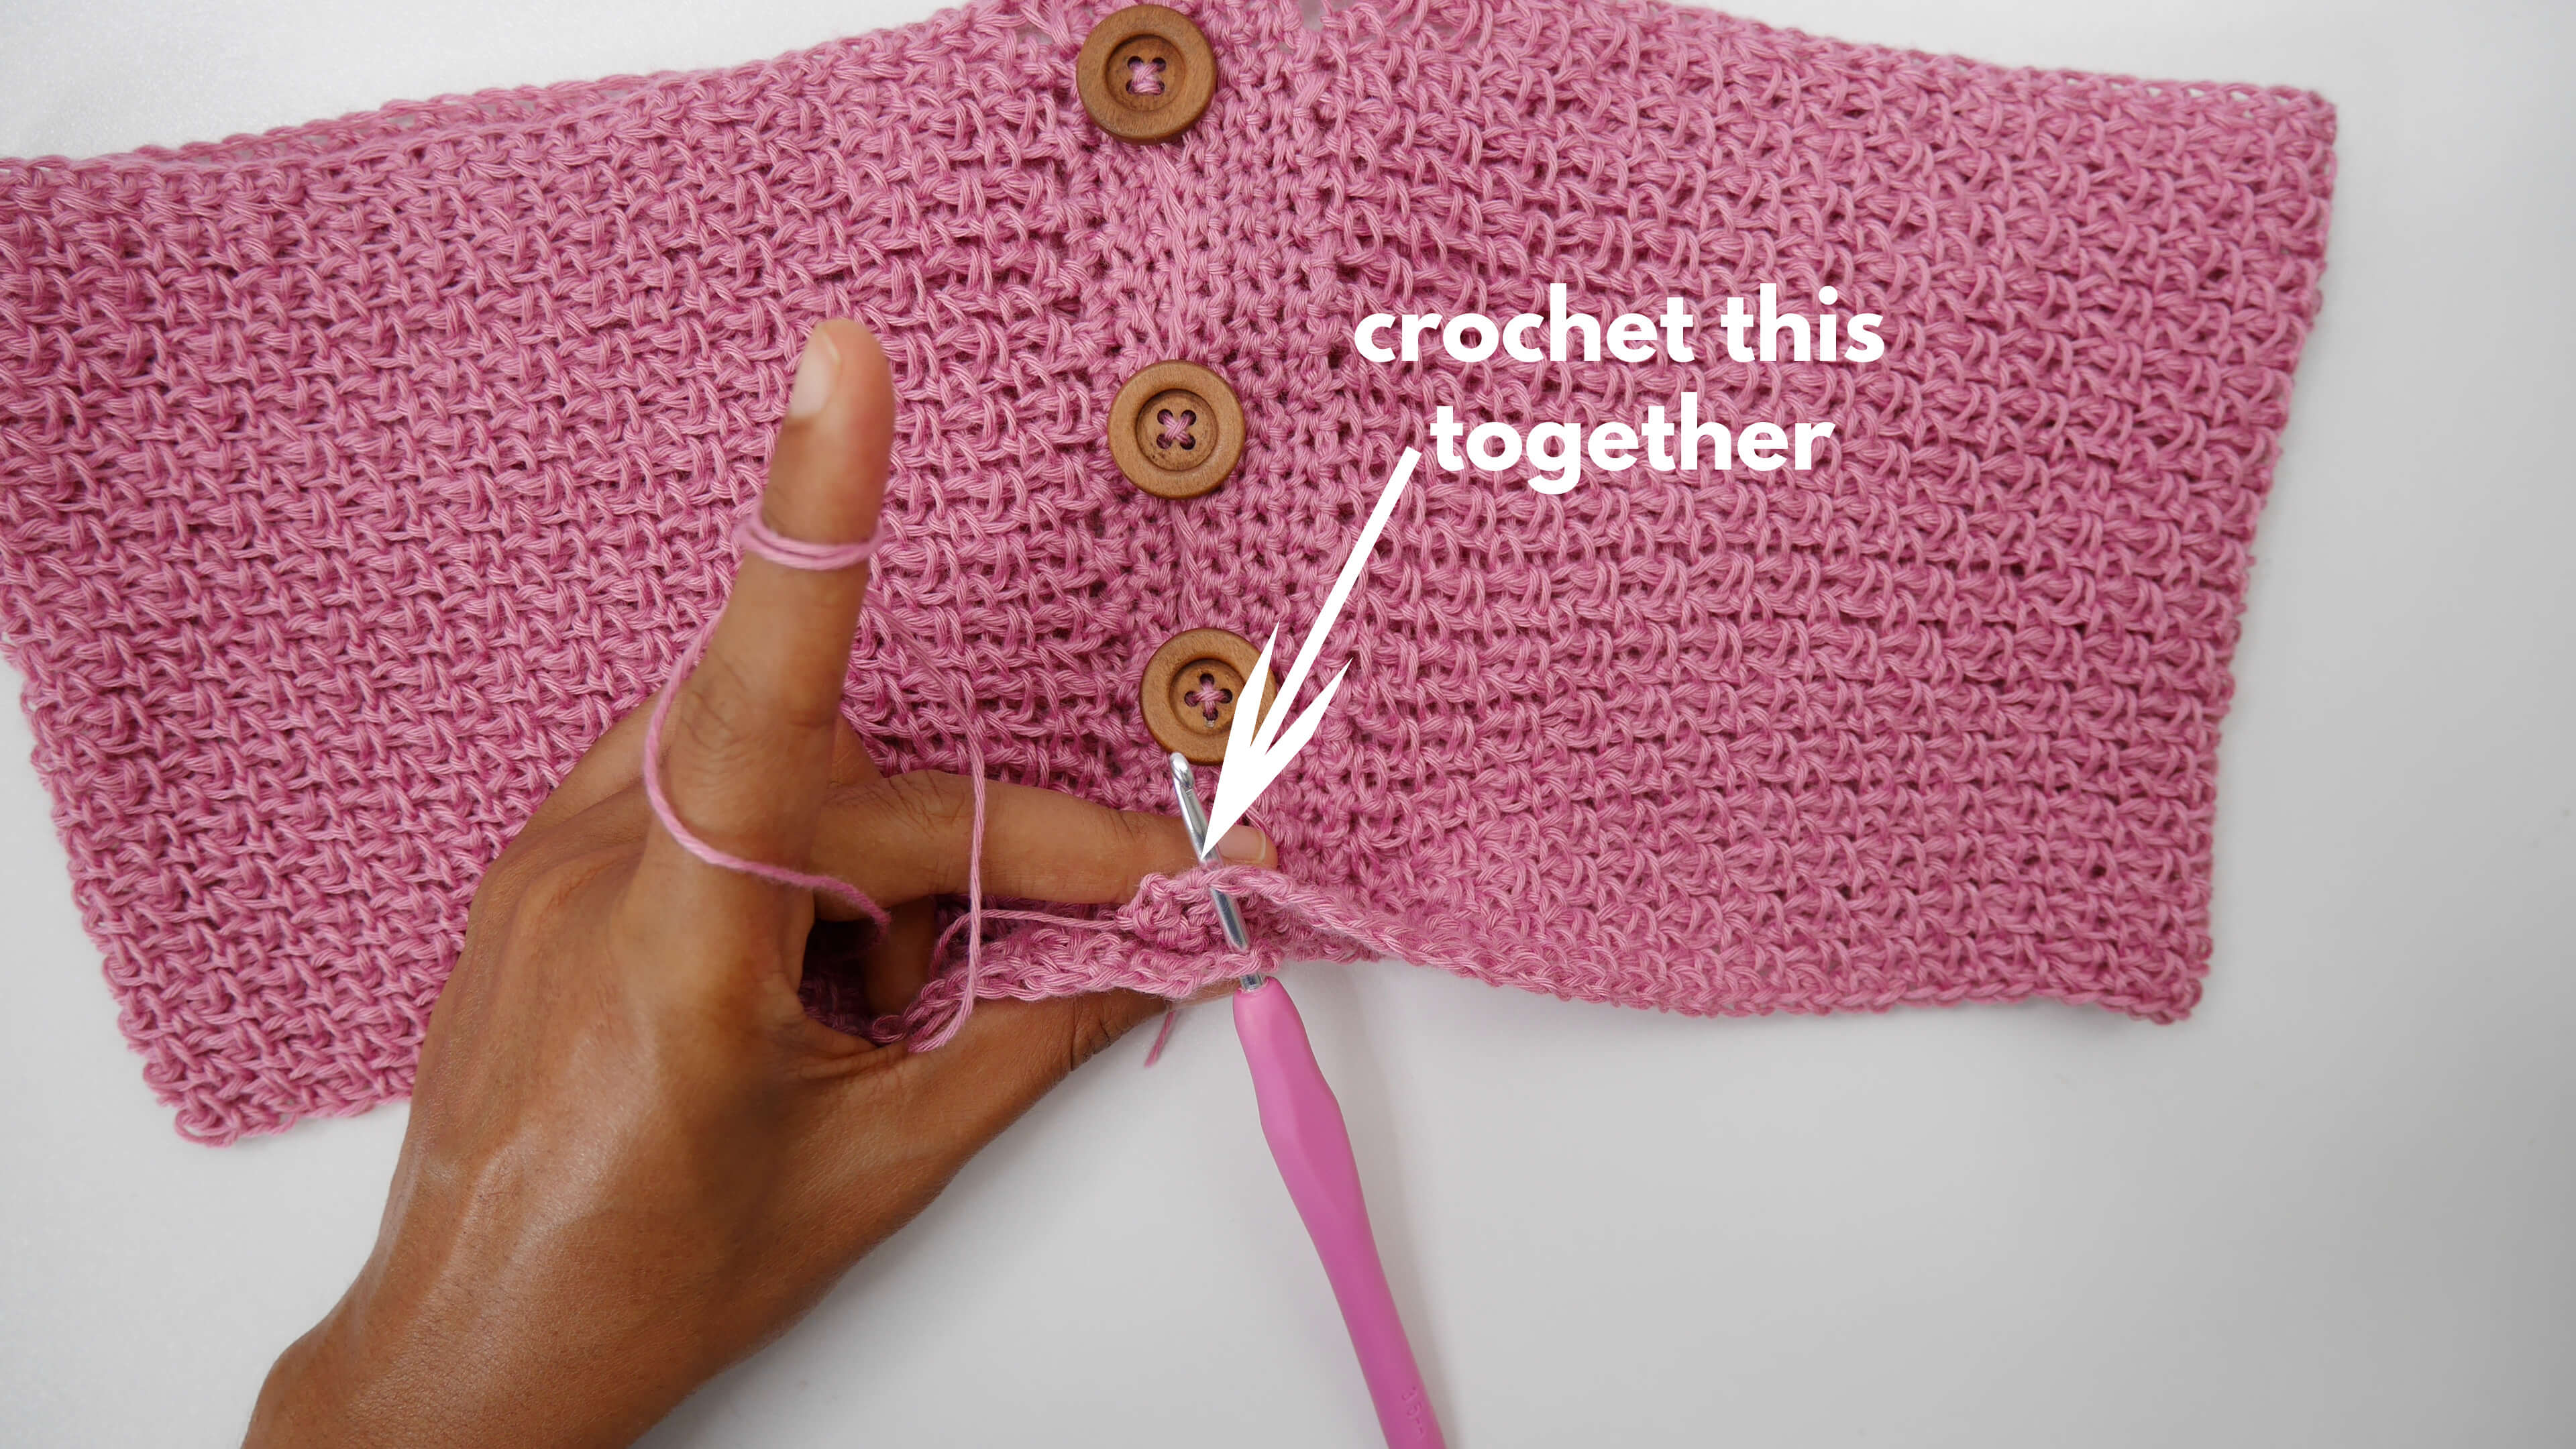
Then we will add the bottom part by crochet this point together and sc around the bottom part for 1 round.
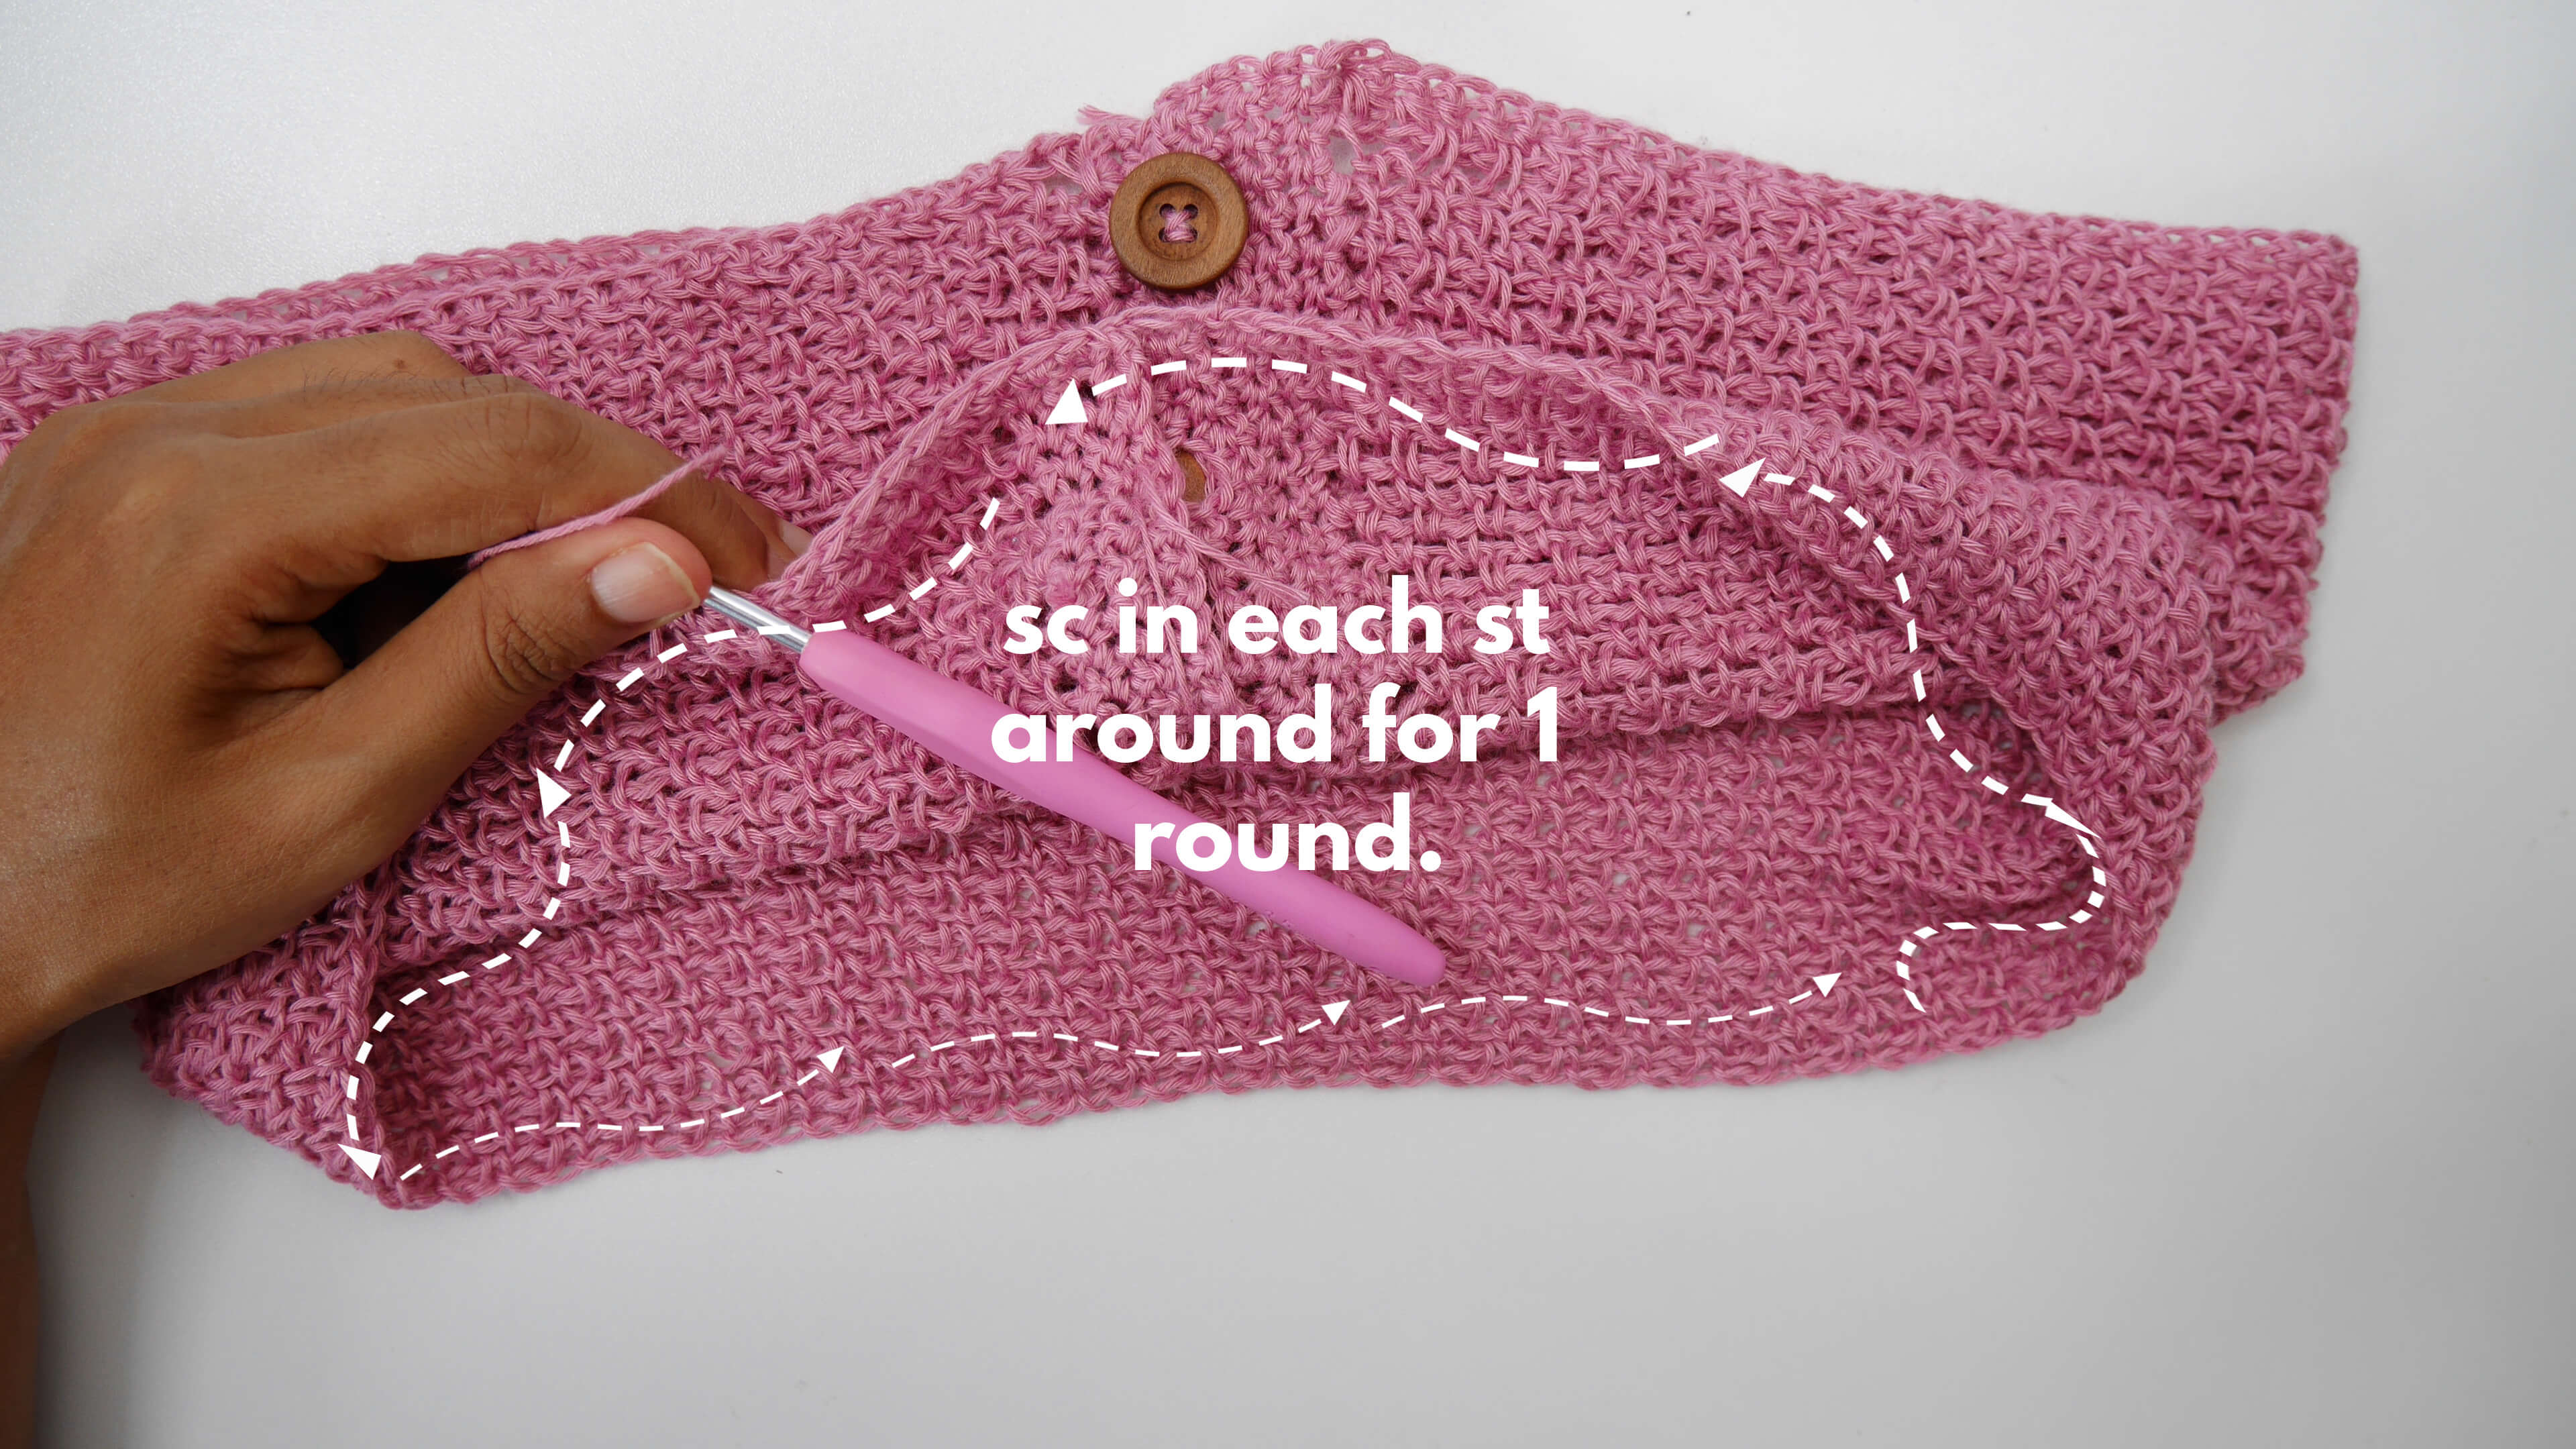
Then we will make 1sc in the first st, then 2sc in next stitch crochet in both loop just for 1 round.
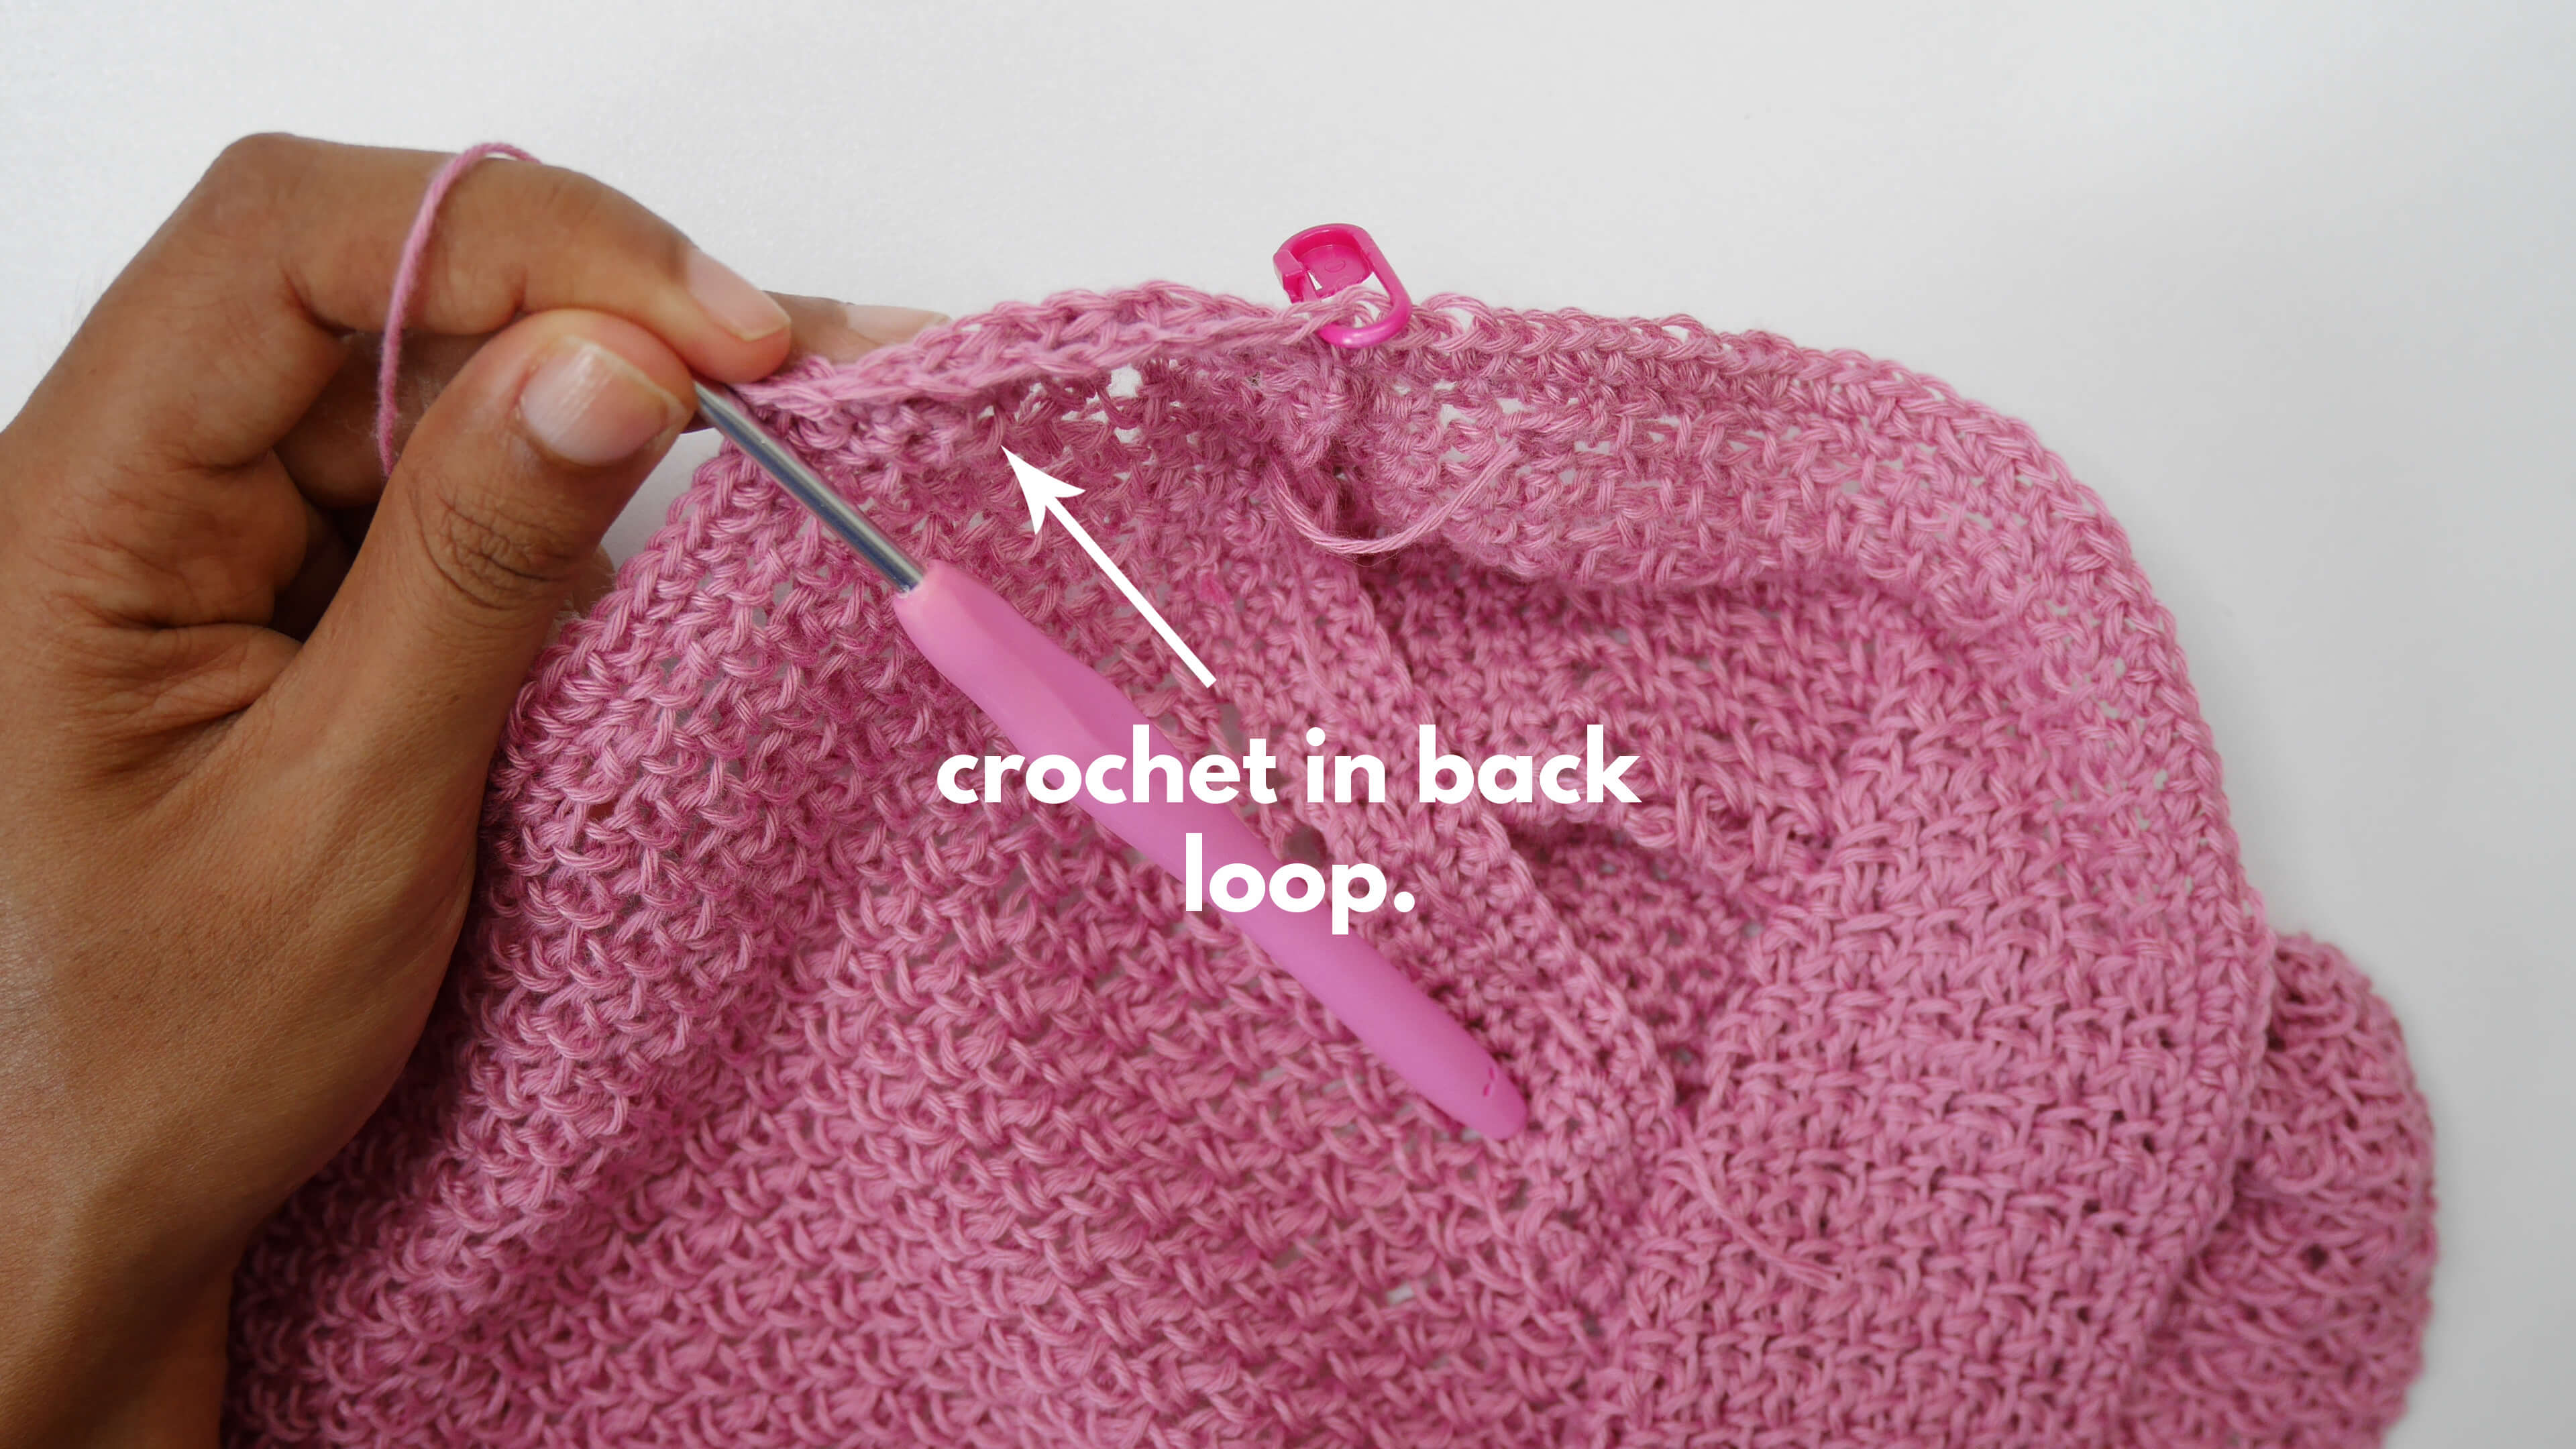
Then we will crochet first round of moss stitch in back loop only.
Then we will continue on round 2 ,3 and beyond of crochet moss stitch in both loop.
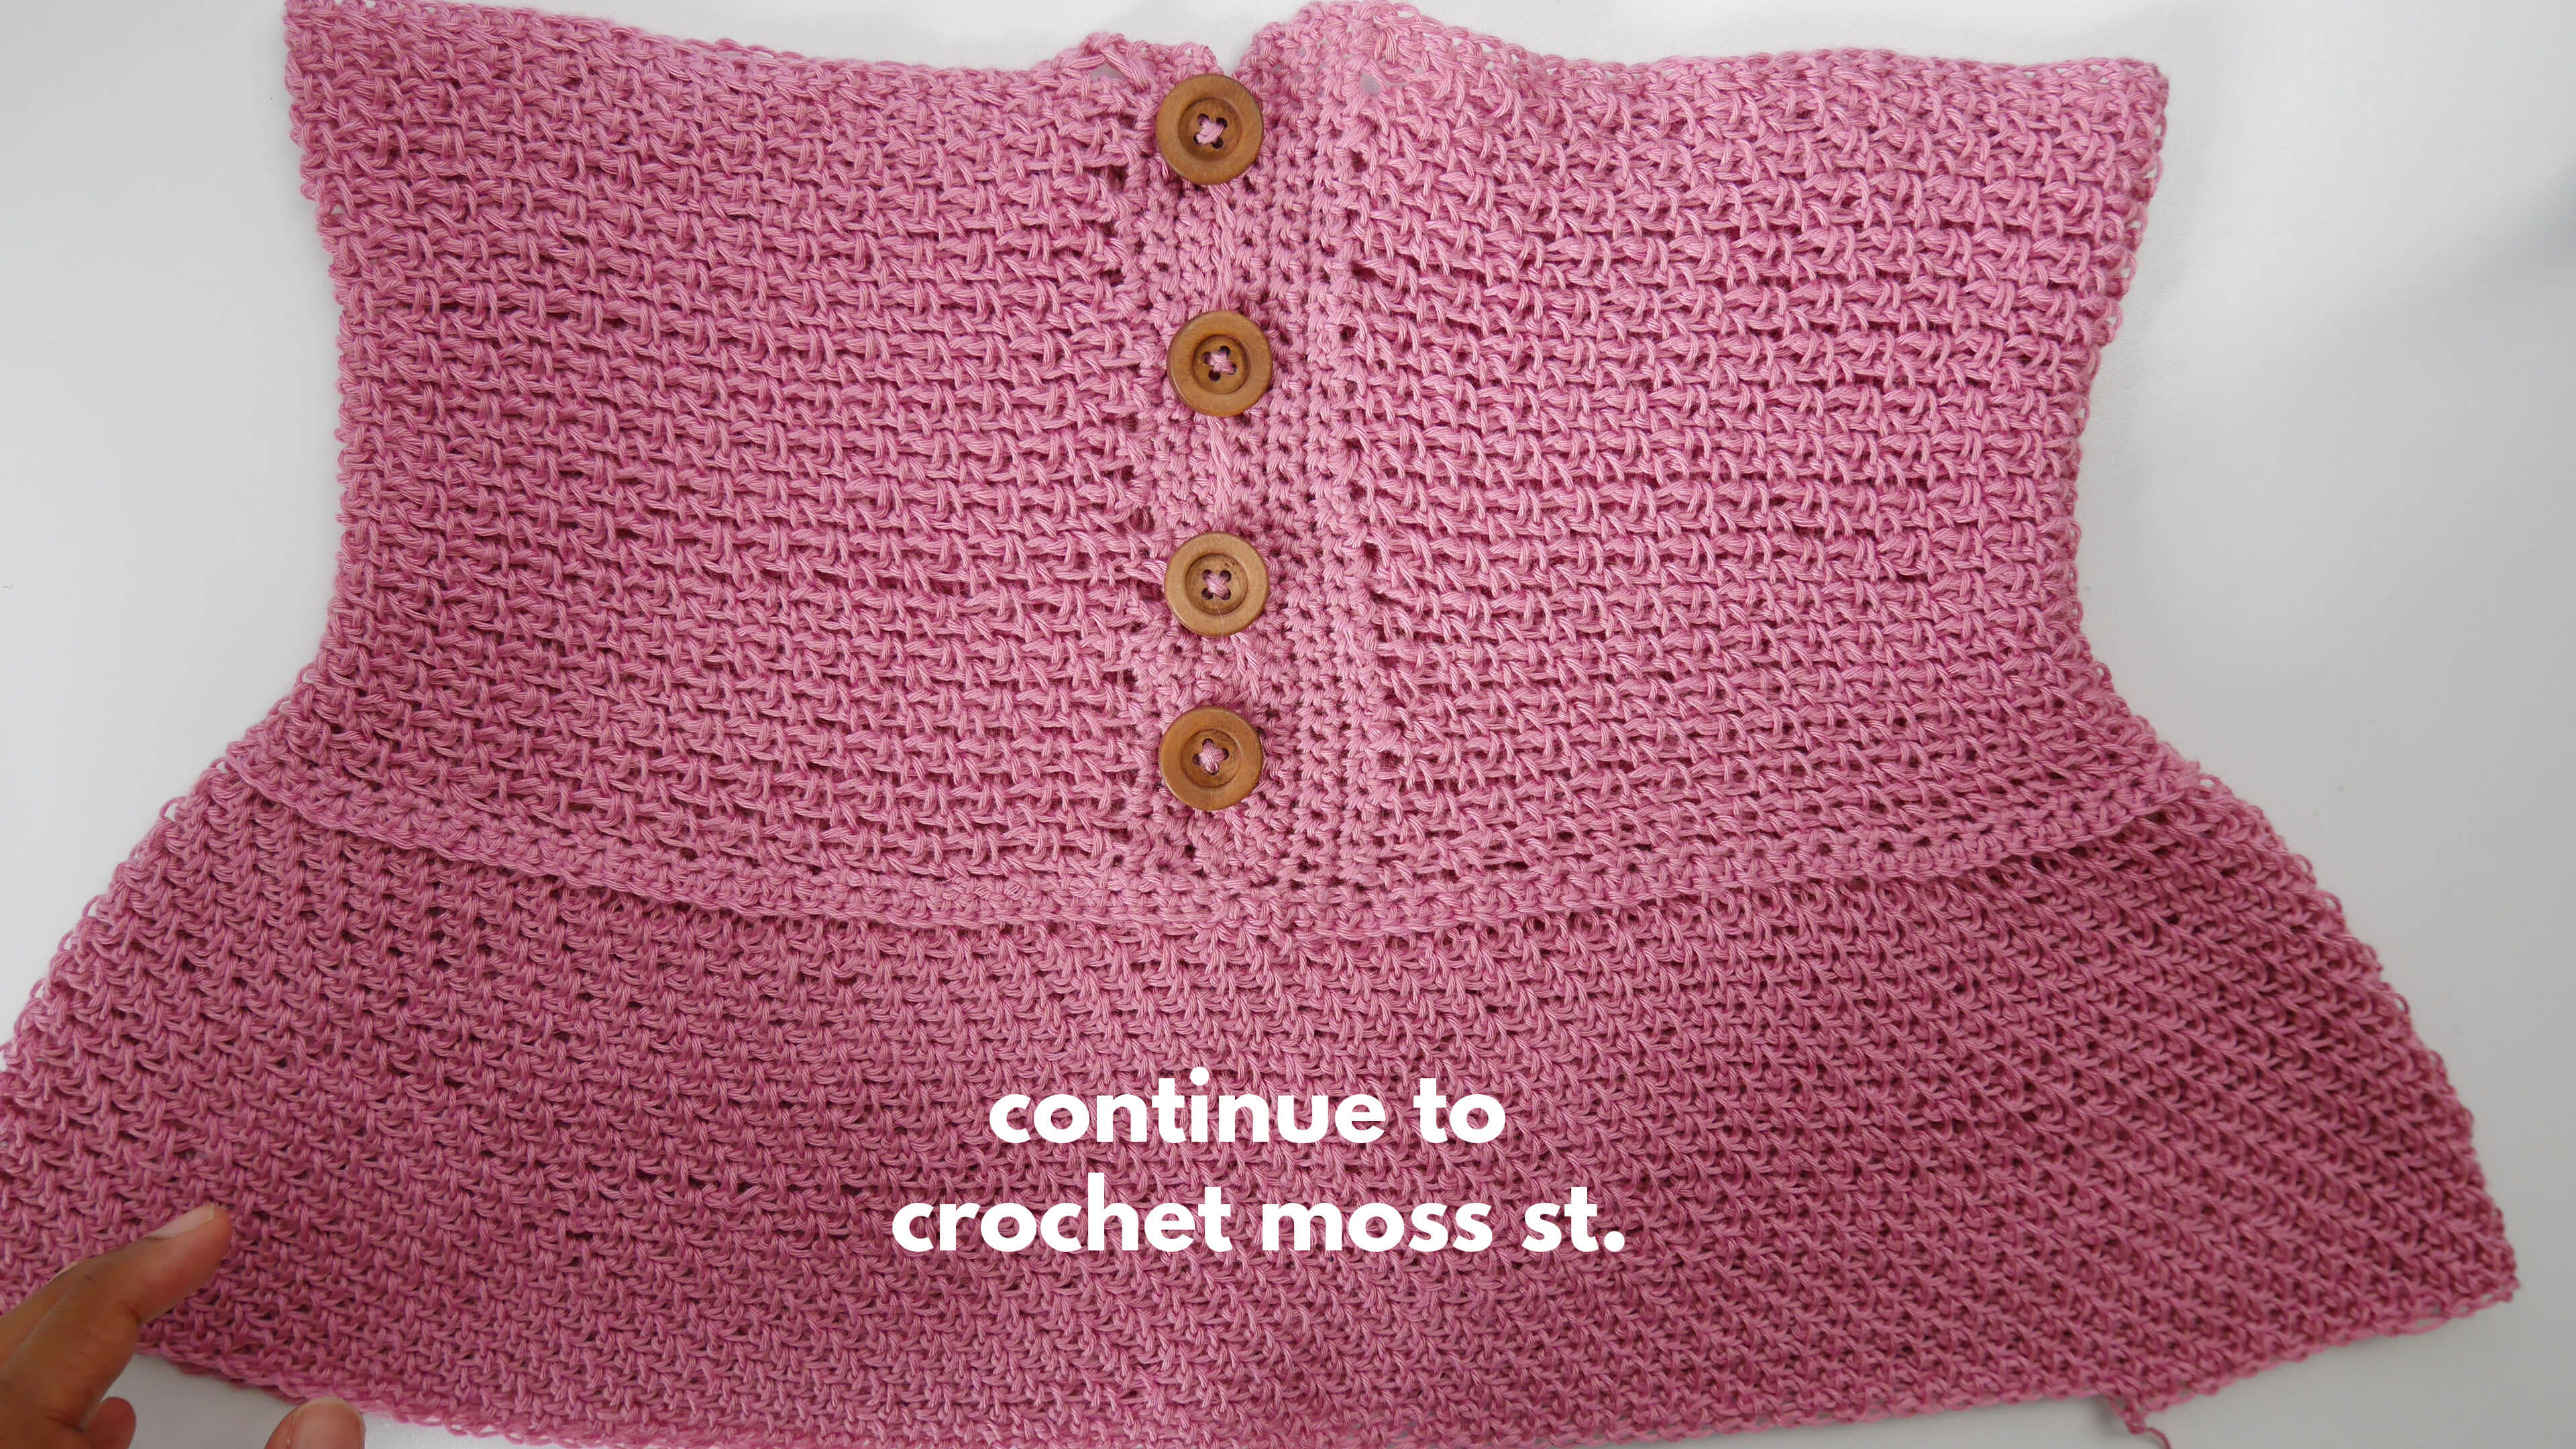
After we add crochet moss stitch until we got about 4.5-5 inch.
Add second layer for the bottom part.
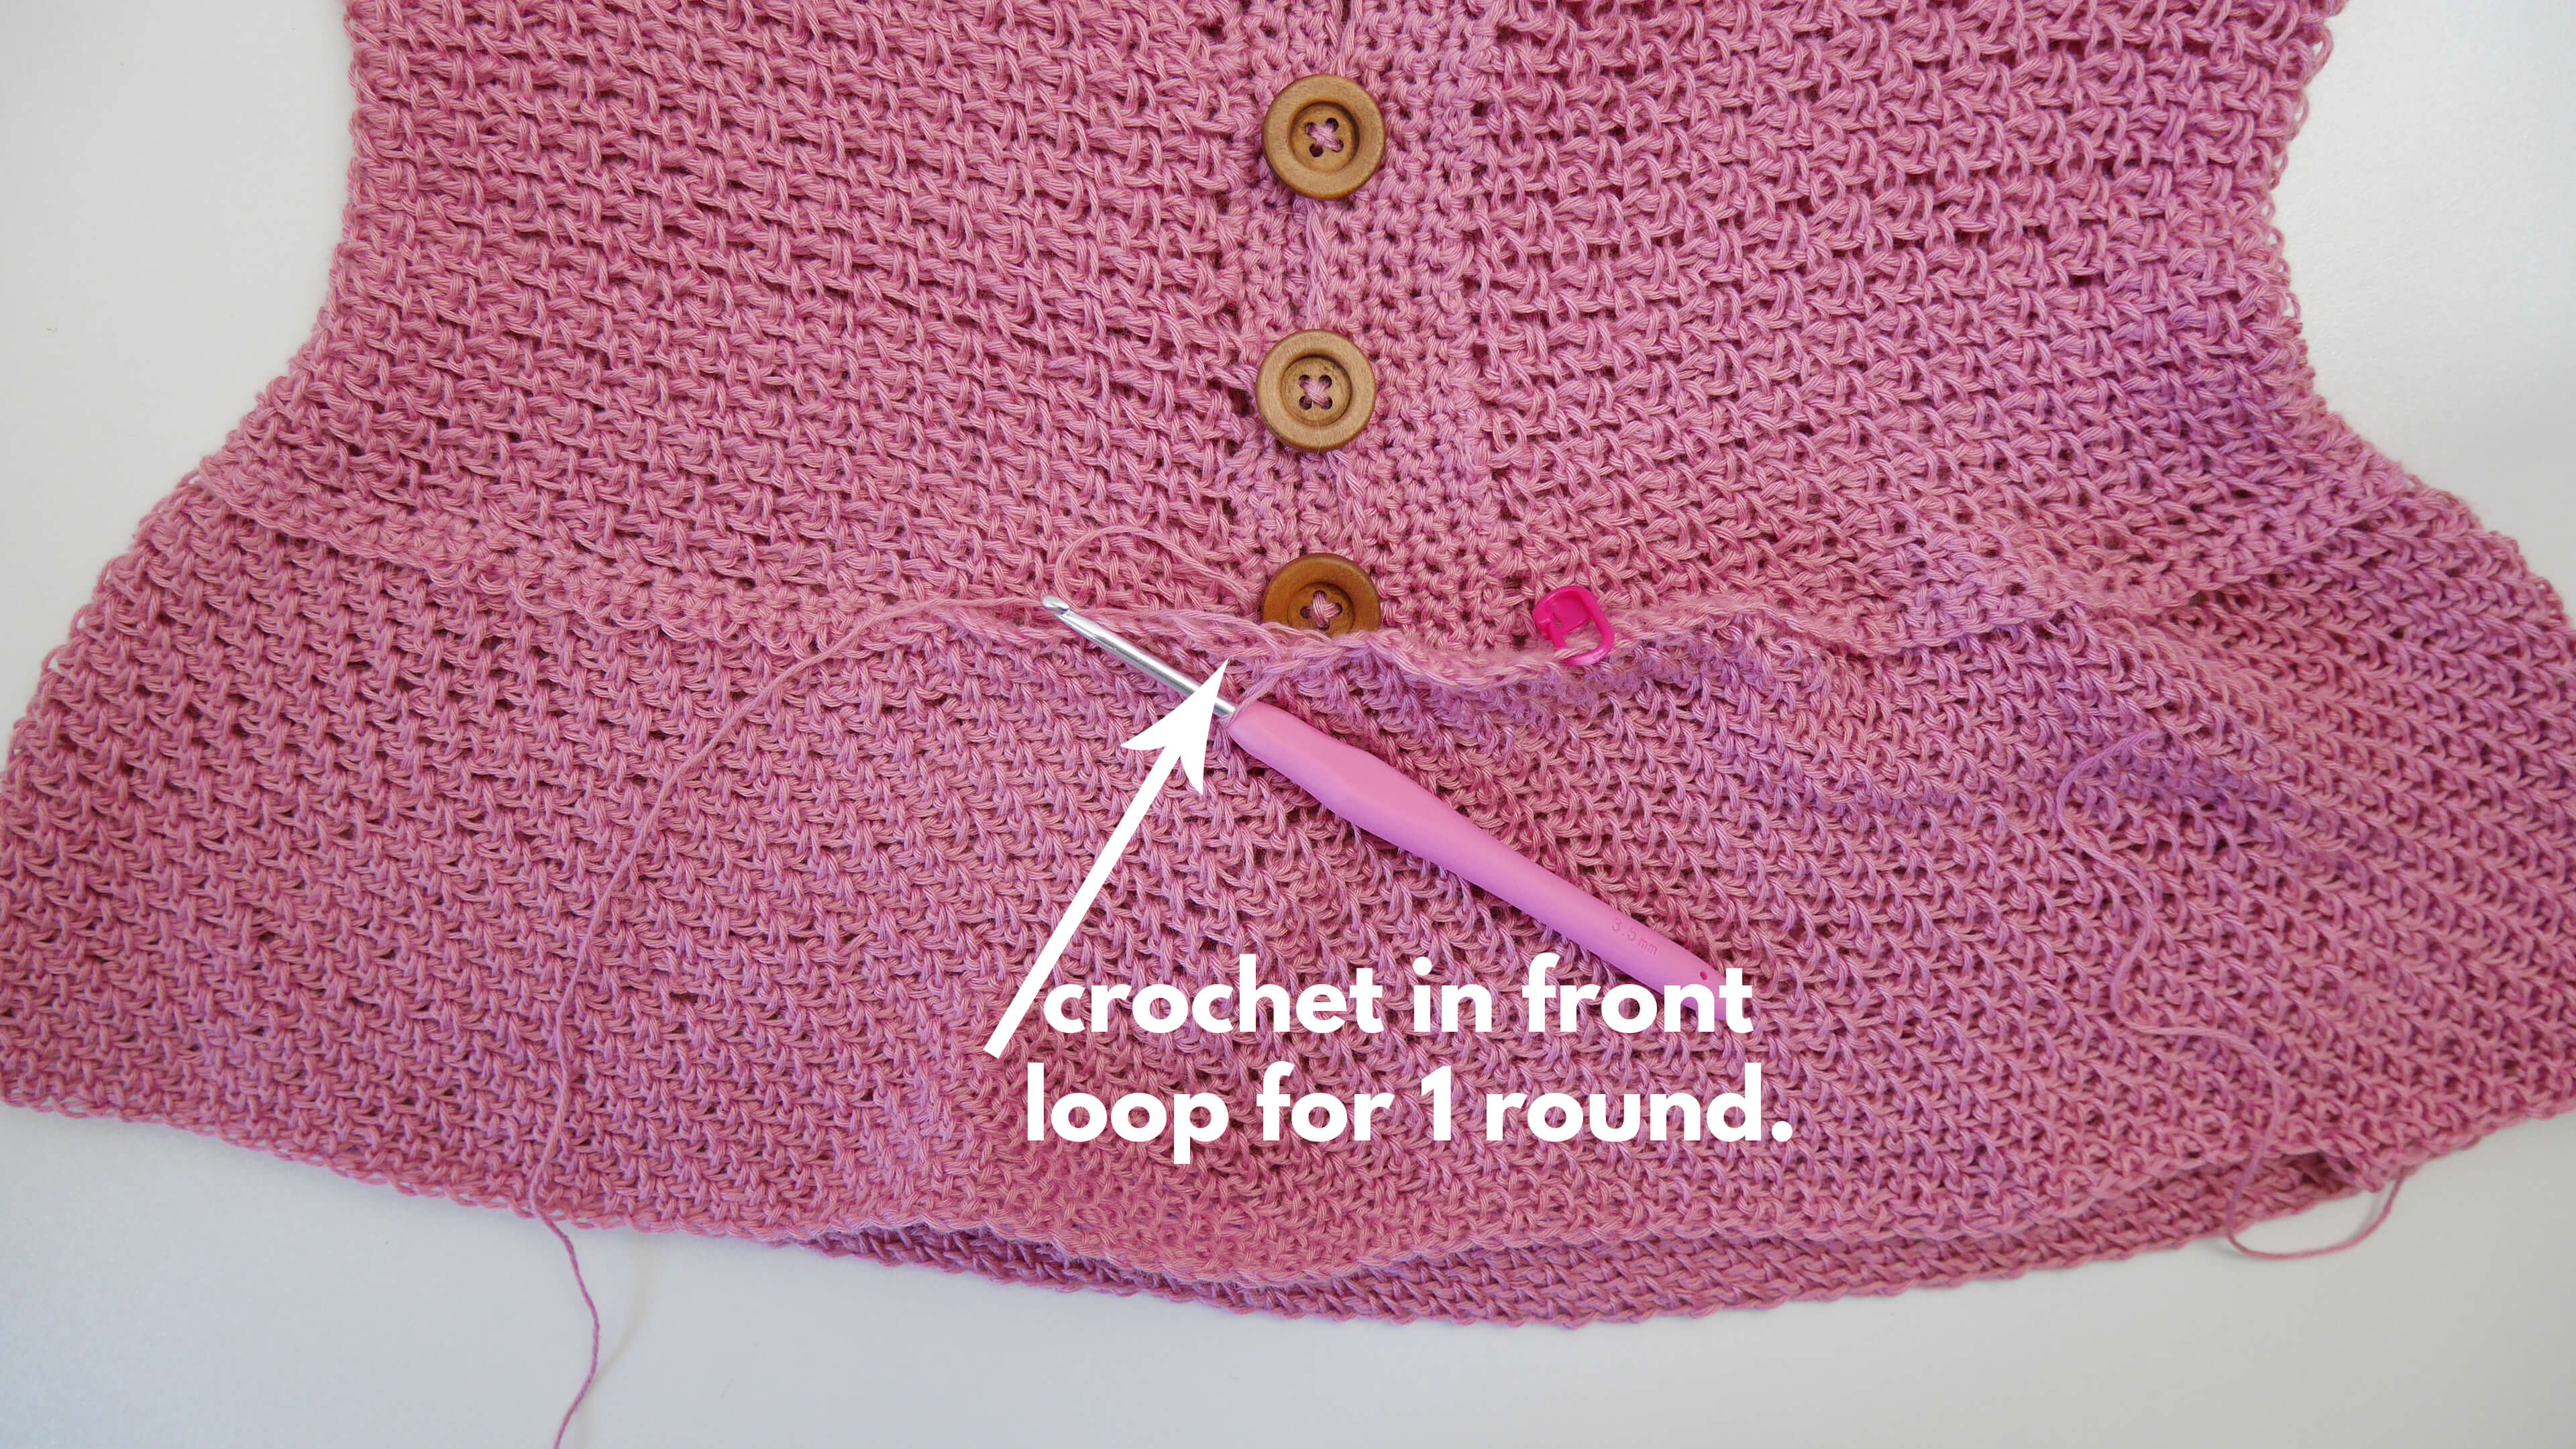
We will add the second layer by make sc in front loop only for 1 round.
Then we will make 1sc in the first st, then 2sc in next stitch crochet in both loop just for 1 round.
Then we will continue crochet in both loop all the rest for crochet moss stitch.
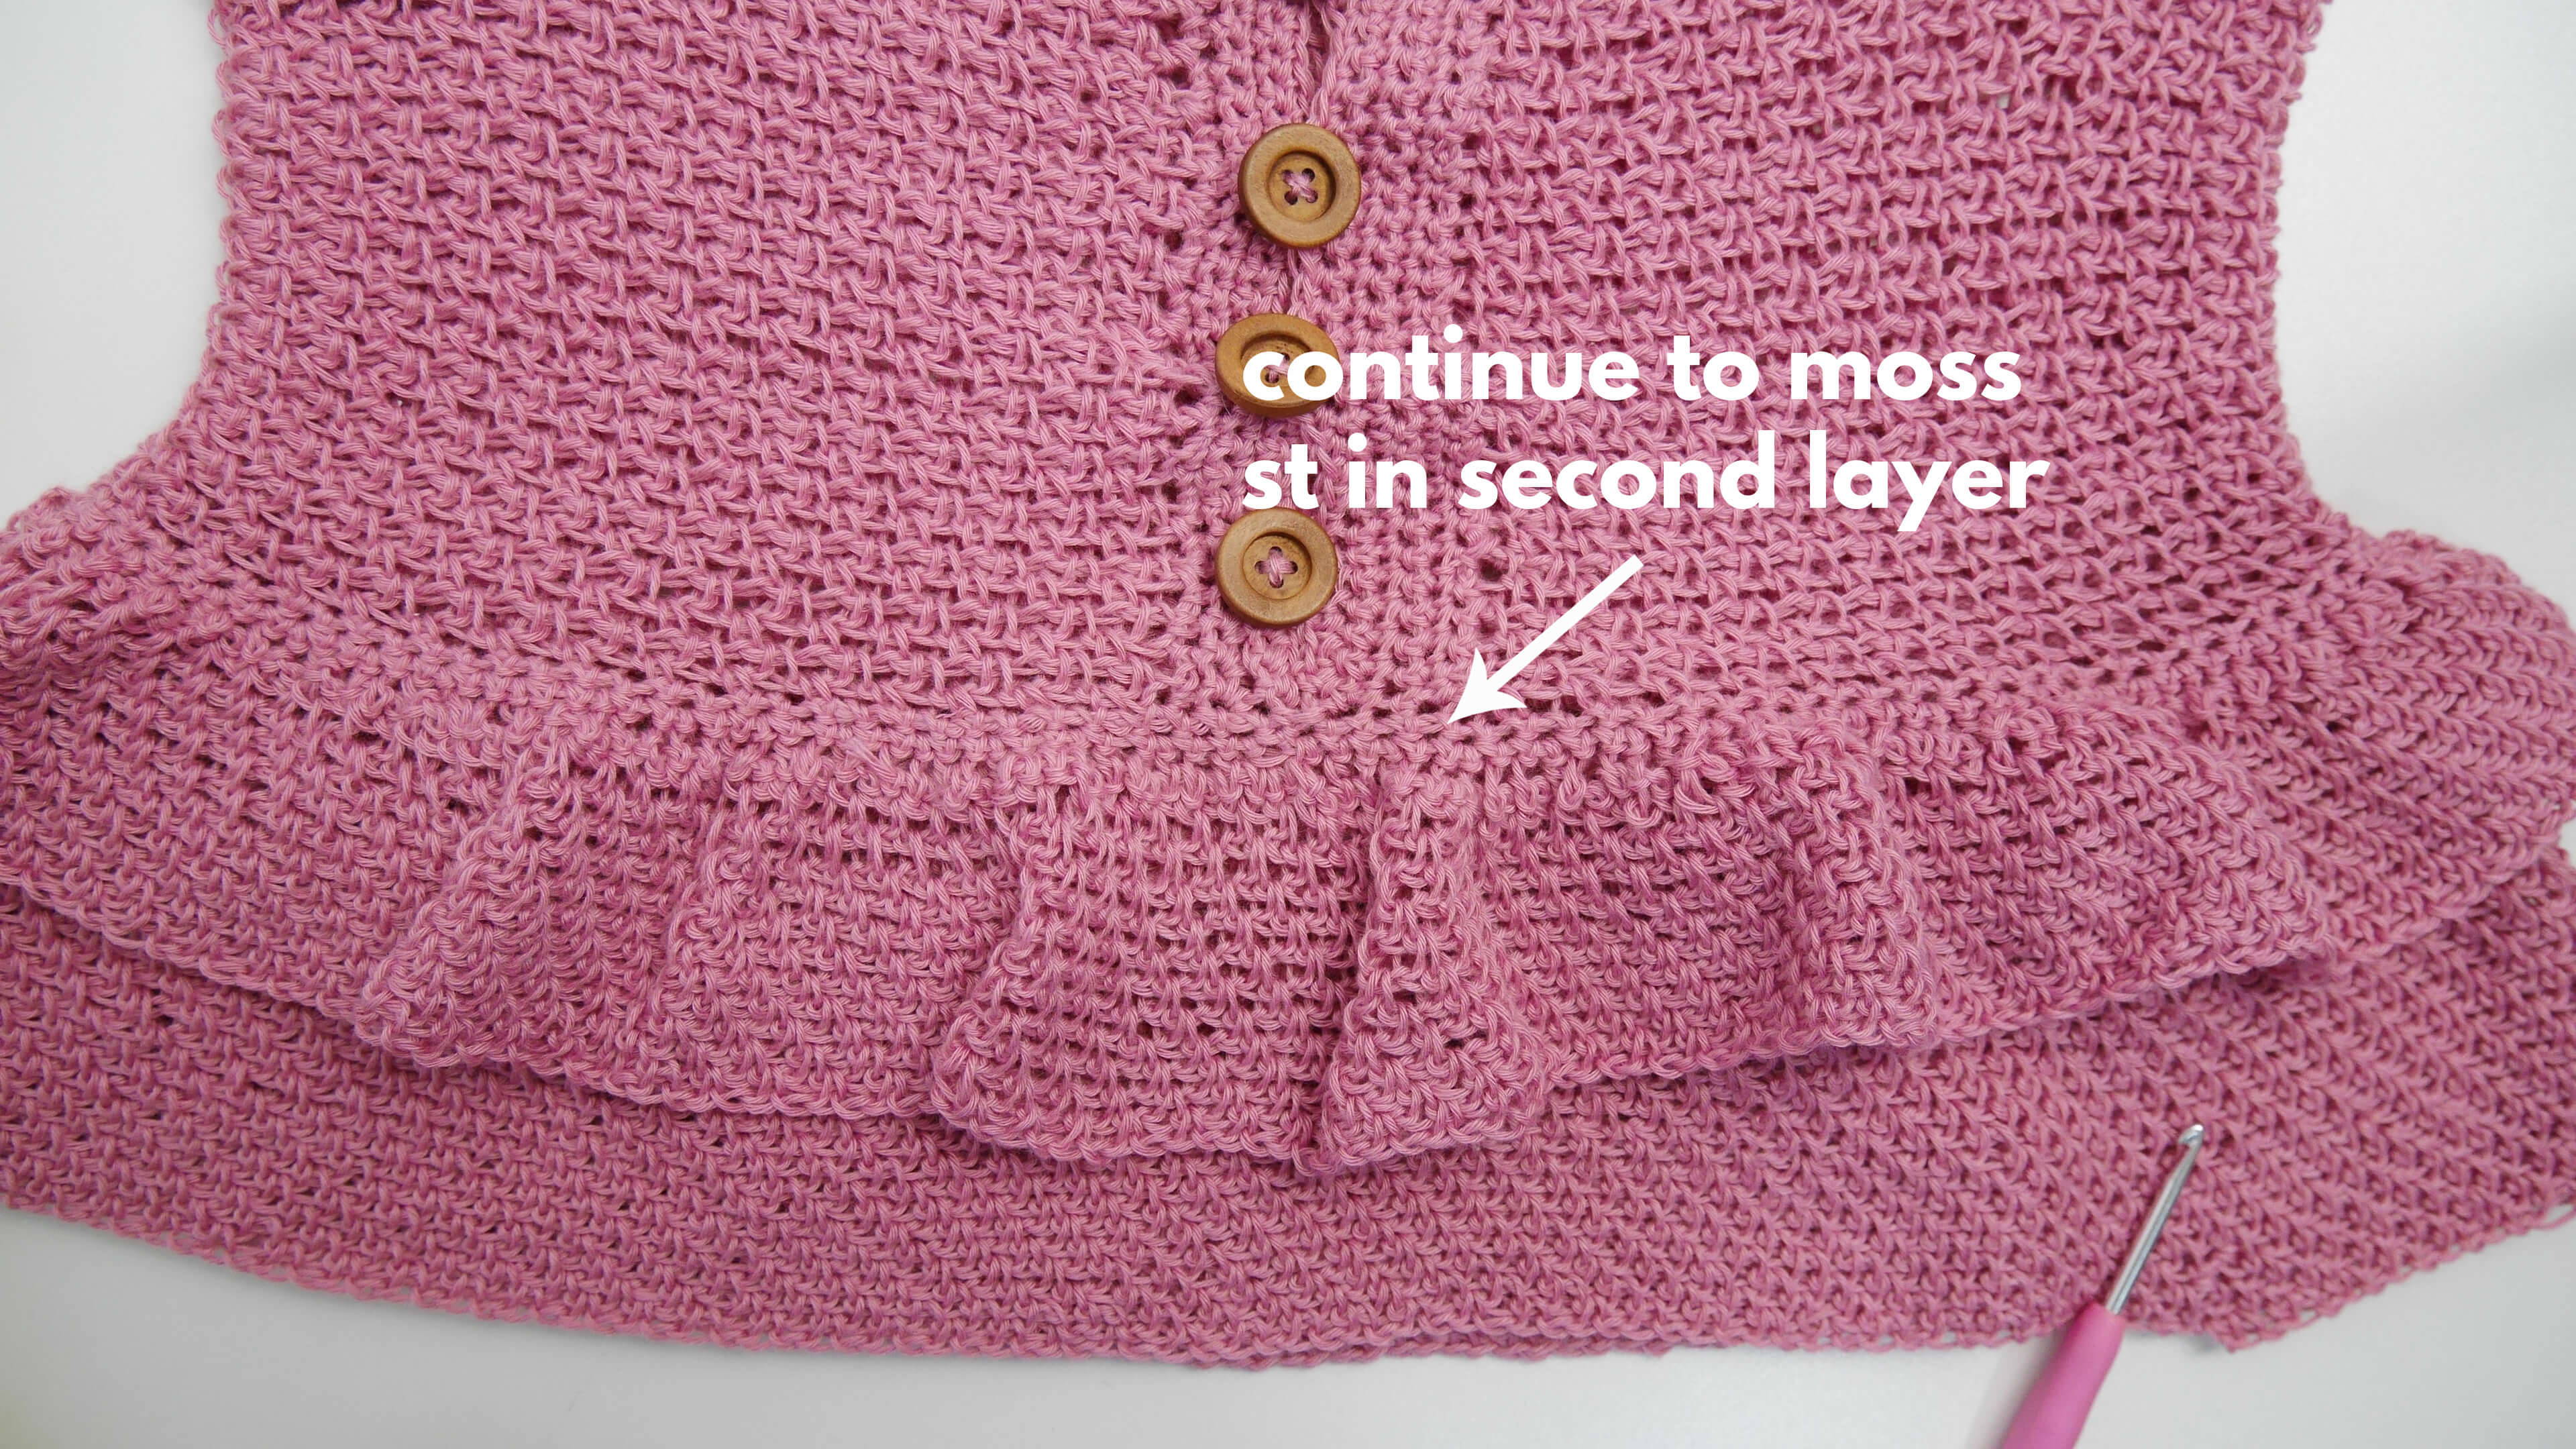
After we finished and got the desired lenght of the second layer my one is about 3 inch then we will finished off.
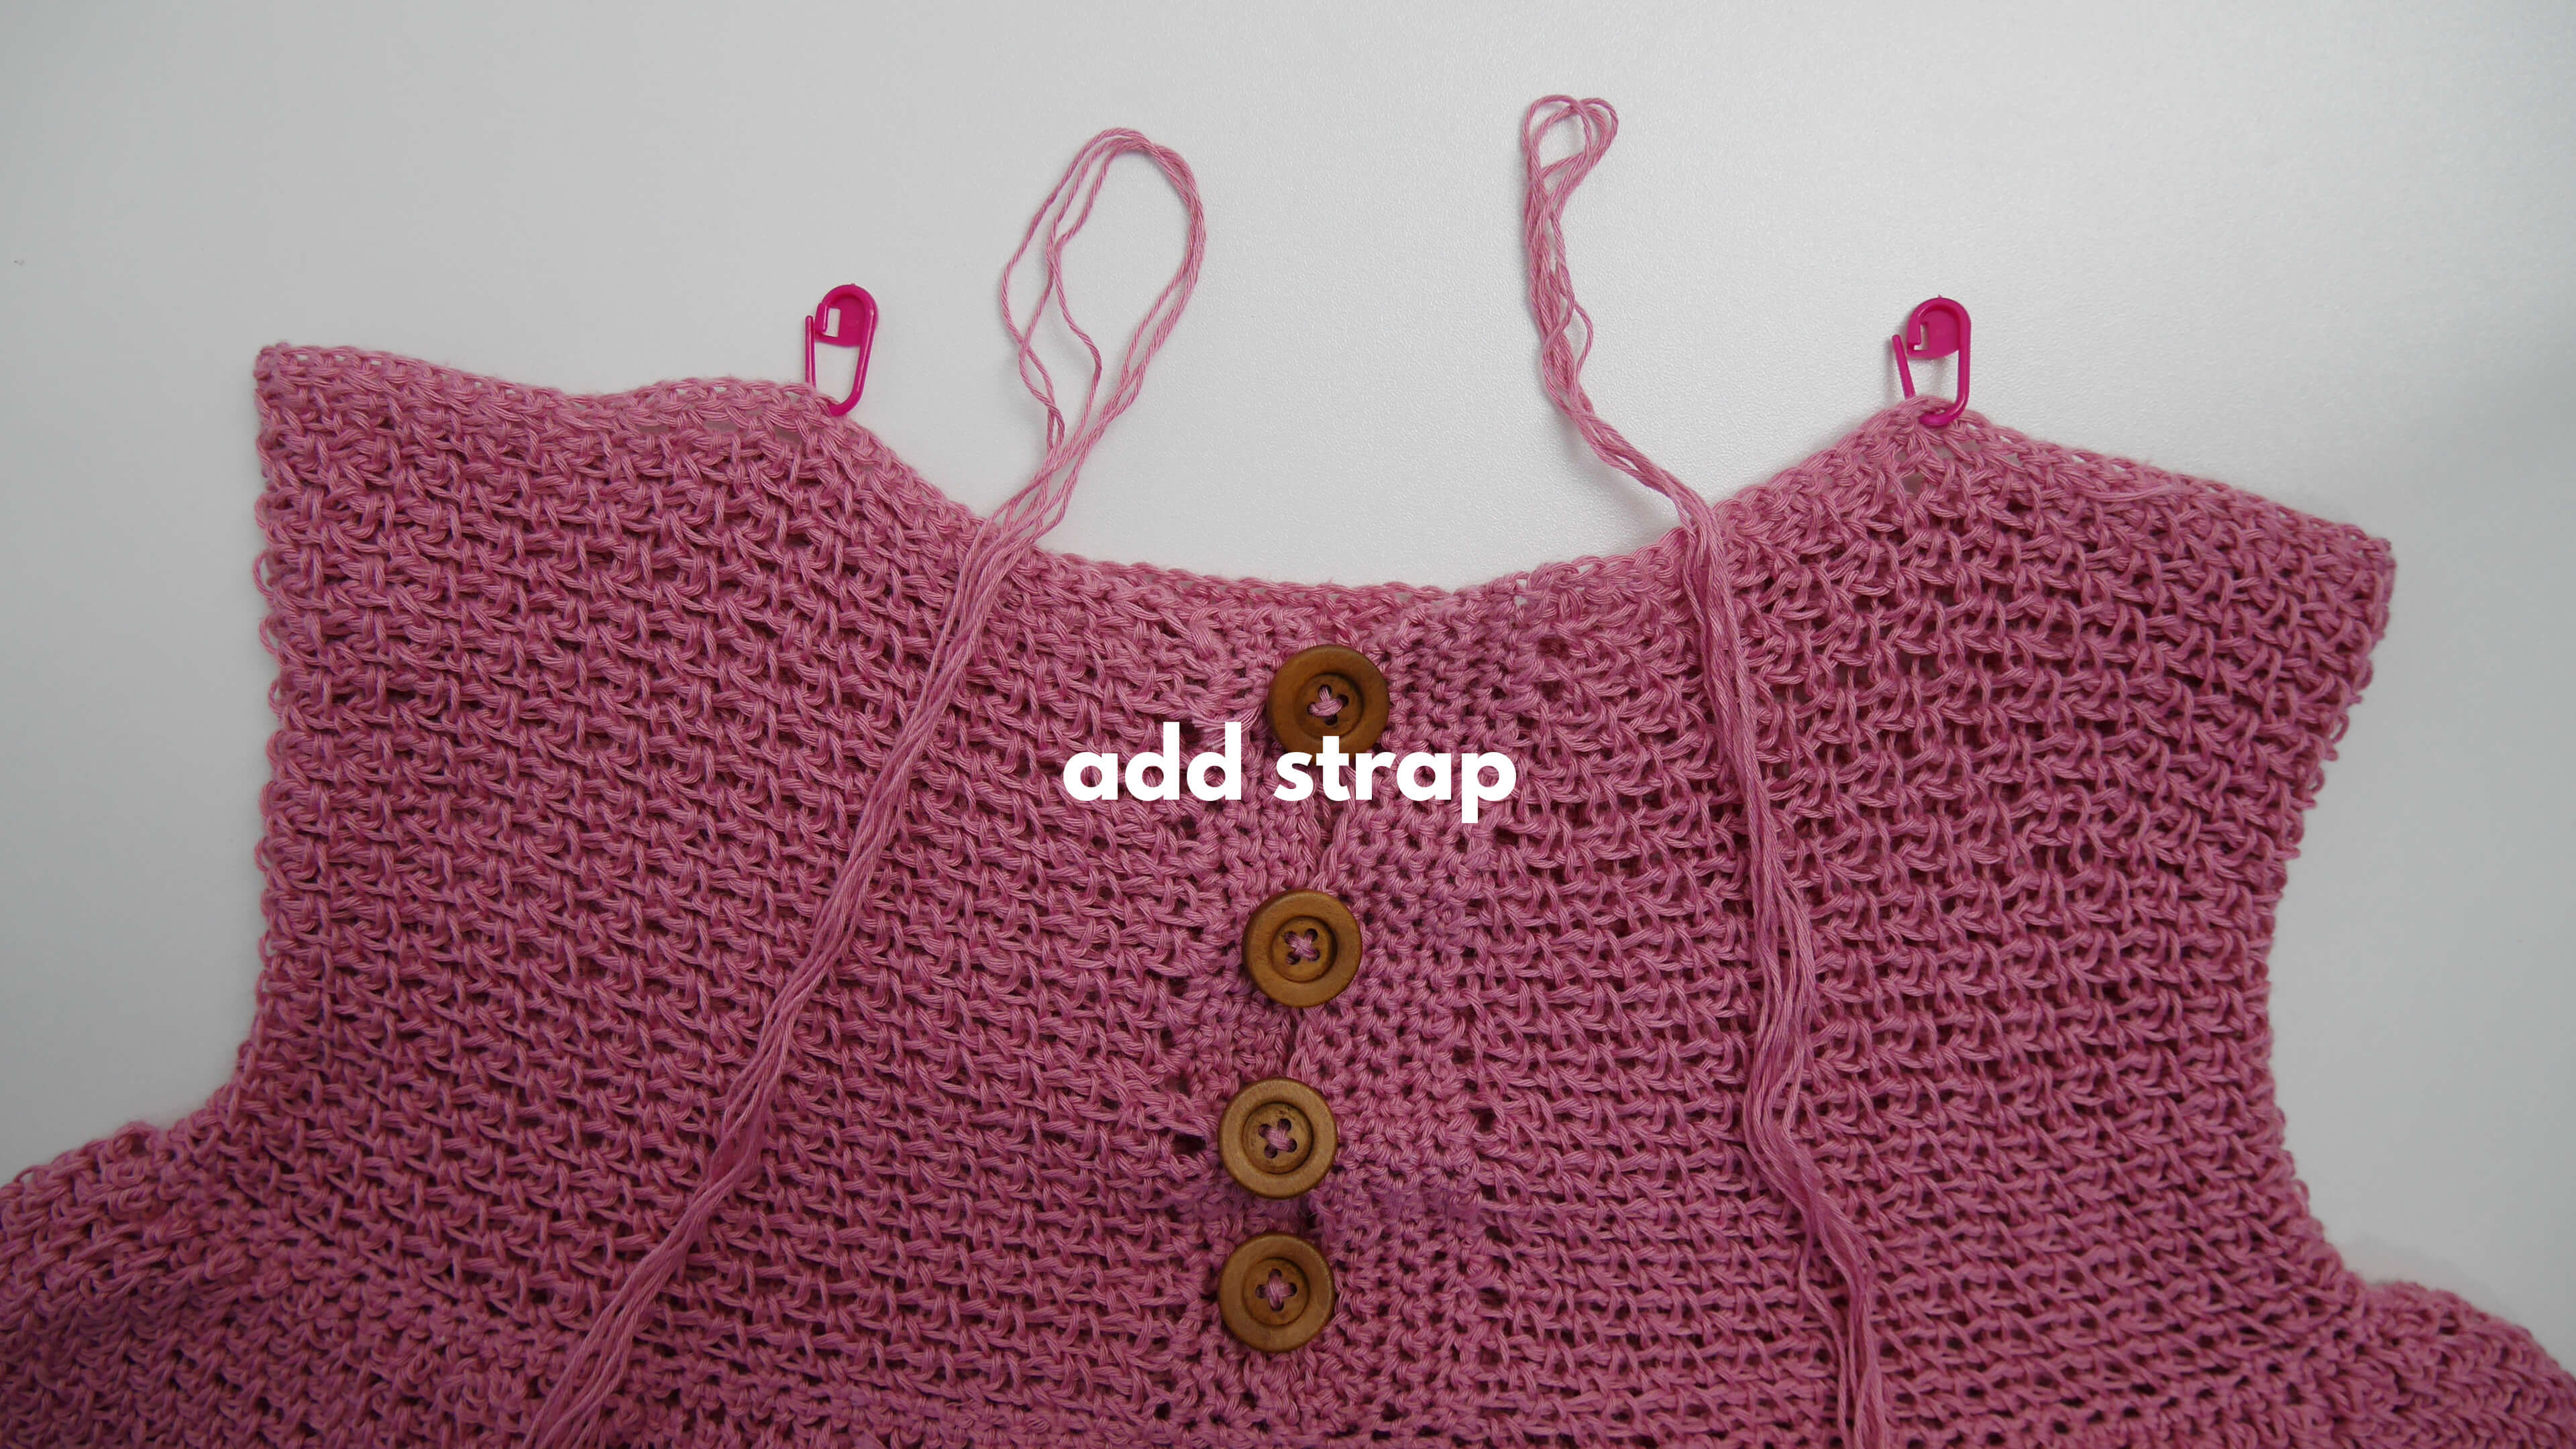
Attach straps.
Grab 3 strand of yarn that long enough then fold in half and insert yarn onto the top edge and strat braiding then do the same for the other side.

All done happy crocheting!
If you make one I would love to see your creation tag me on Instagram!