

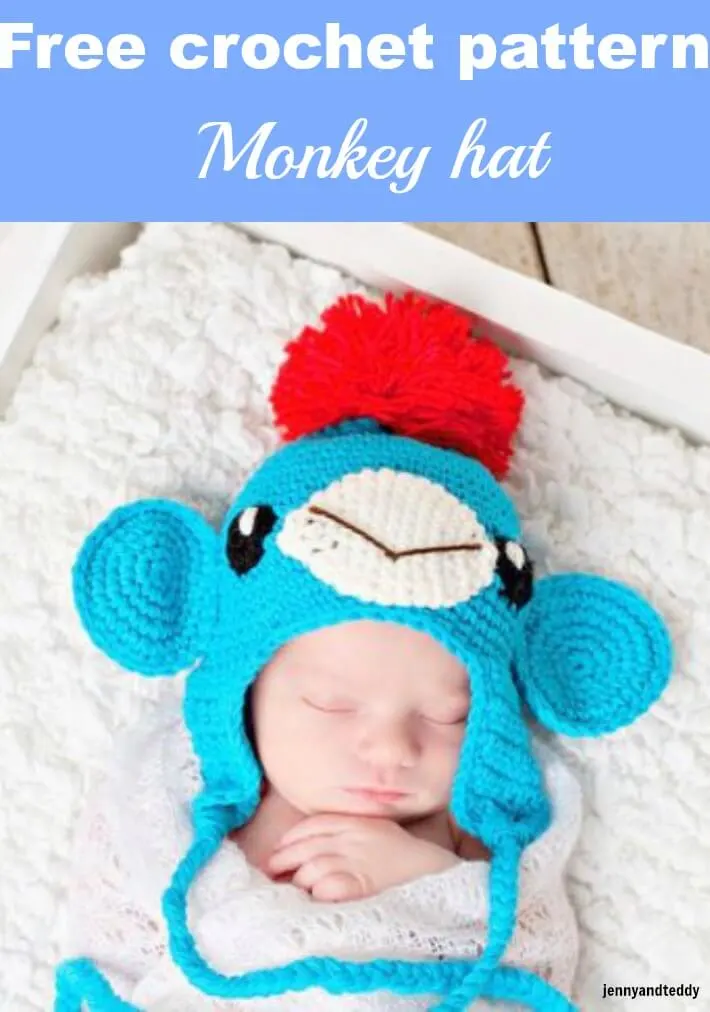

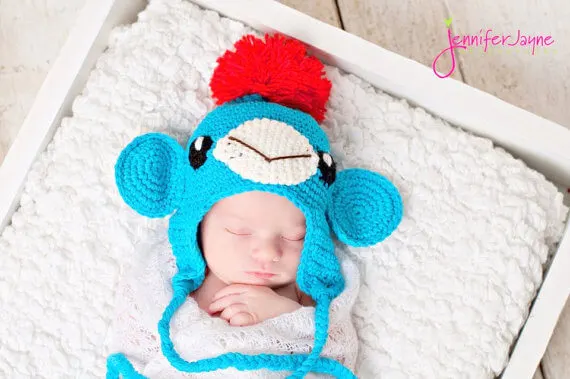
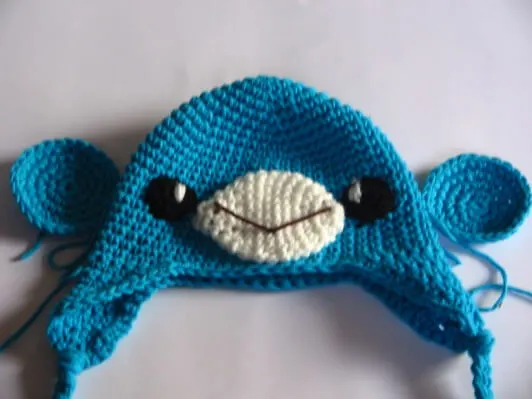
For you guys who are Monkeys and sock monkeys lovers! This project is perfect for you. Crochet this cute monkey hat with my easy free crochet patterns. Give them as gifts or made them for your child. And have some fun with your little one by dressing him up in this monkey hat.
Special thanks to Jennifer Jayne for this super photo!
Sizes:
Newborn-3 months (fits up to 14 inch)
3-6 months (fits 14- 17 inch)
6 months-1 year (fits 16- 19 inch)
Materials:
You will need
MC (shown here in blue colour): 50 grams/110 meters of BEETLE Brand Moda Vera 50% acrylic, 50% cotton)
White: small amount
Black: small amount
Red: small amount
Crochet hook size 3.5 mm
Sewing yarn needle
Removable stitch markers or contrasting coloured yarn
Gauge: 4 single crochet stitches x 4 rows = 1 square inch
Skill and abbreviations:
You will need to know how to make:
Chain (ch)
Slip stitch (sl st)
Single crochet (sc)
Magic ring or adjustable ring
My beginner tutorial check it out here
How to start magic ring or adjustable ring
Note:
In this pattern, you will work in the round continuously. You may use a removable stitch marker or a short piece of yarn of contrasting colour to mark the beginning of each round. At the end of each round, you will not join, but begin the next round in the next stitch.
The stitch counts at the end of each round are given.
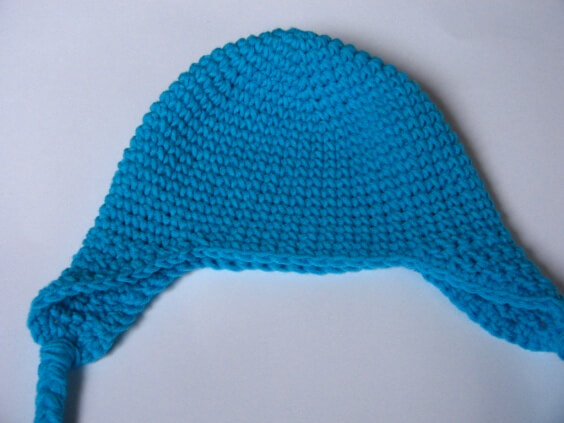
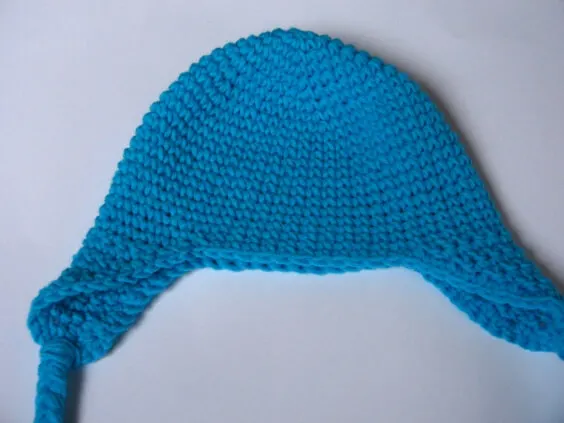
Hat body (All size)
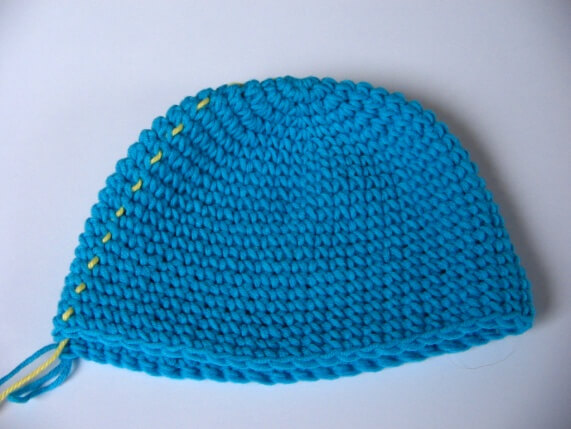

You will work from top to bottom
Round1. Make magic ring or adjustable ring and 10sc in ring (10 sts)
Round2. *Sc in next st, 2sc in next st*, repeat from * around (15 sts)
Round3. *Sc in next 2 st, 2sc in next st*, repeat from * around (20 sts)
Round4. *Sc in next 3 st, 2sc in next st*, repeat from * around (25 sts)
Round5. *Sc in next 4 st, 2sc in next st*, repeat from * around (30 sts)
Round6. *Sc in next 5 st, 2sc in next st*, repeat from * around (35 sts)
Round7. *Sc in next 6 st, 2sc in next st*, repeat from * around (40 sts)
Round8. *Sc in next 7 st, 2sc in next st*, repeat from * around (45 sts)
Round9. *Sc in next 8 st, 2sc in next st*, repeat from * around (50 sts)
0 – 3 months only:
Rounds 10 – 22. Sc in each st around (50 sts). Finish off.
3 – 6 months and 6 months – 1 years sizes:
Round10. *Sc in next 9 st, 2sc in next st*, repeat from * around (55 sts)
3 – 6 months only:
Round11-24. Sc in each st around (55 sts). Finish off.
6 months – 1 years sizes:
Round11. *Sc in next 10 st, 2sc in next st*, repeat from * around (60 sts)
Round12. *Sc in next 11 st, 2sc in next st*, repeat from * around (65 sts)
6 months – 1 years only:
Round13-27. Sc in each st around (65 sts). Finish off.
Shape earflap:
Use two stitch markers to mark the stitch in the middle of each side of the hat. Join MC at the first marker with sl st.

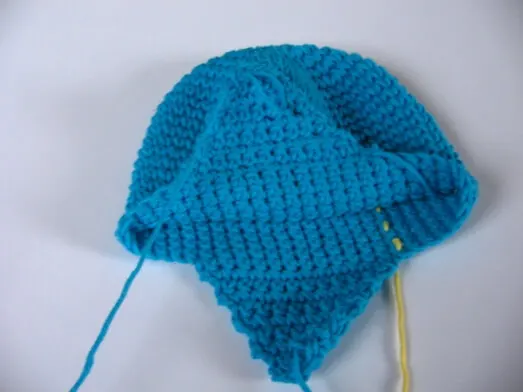
Row1. Ch 1 (counts as first sc here and throughout), sc 12, ch1, turn (13 sts)
Row2. Sc in next 11 sts, ch1, turn (12 sts)
Row3. Sc in next 10 sts, ch1, turn (11 sts)
Row4. Sc in next 9 sts, ch1 turn (10 sts)
Row5. Sc in next 8 sts, ch1 turn (9 sts)
Row6. Sc in next 7 sts, ch1, turn (8 sts)
Row7. Sc in next 6 sts, ch1, turn (7 sts)
Row8. Sc in next 5 sts, ch1, turn (6 sts)
Row9. Sc in next 4 sts, (5sts) fasten off. Join MC at second marker with sl st and repeat as above for second earflap.
Edging:
Join MC at any st along the edging with sl st and work one round of sc around the edge, going around the earflaps. Fasten off.
Nose:
Make 1 pieces with (white colour)

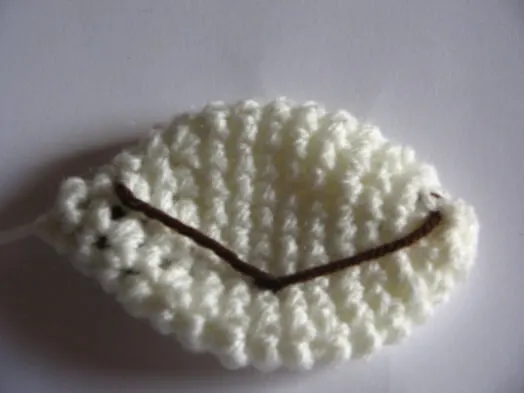
Round1. Make magic ring and 7sc in ring (7sts)
Round2. sc in each st around (7sts)
Round3. 2sc in each st around (14sts)
Round4. sc in each st around (14sts)
Round5. *Sc in next st, 2sc in next st* and repeat from * around (21sts)
Round6. sc in each st around (21 sts)
Round7-10. Sc in each st around (21sts)
Round11. *sc in next st,dec 1* and repeat from * around (14sts)
Round12. Sc in each st around (14 sts)
Round13. *dec 1* and repeat from * around (7 sts)
Round14-15. Sc in each st around (7sts).Then finish off and leave long tail for sewing.
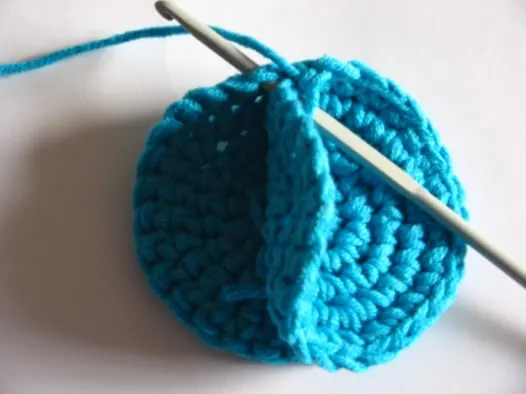
Ears:
Make 4 pieces with MC
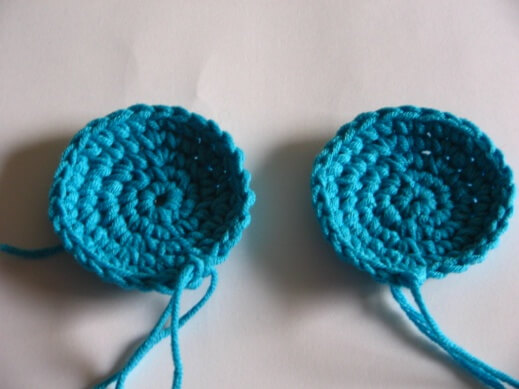
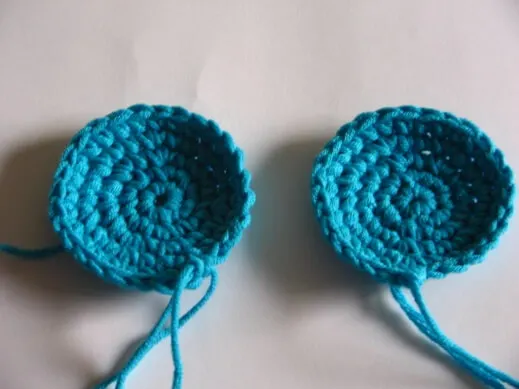
Round1. Make magic ring, work 7sc in ring (7 sts)
Round2. 2sc in each st around (14 sts)
Round3. *Sc in next st, 2sc in next st*, repeat from * around (21 sts)
Round4. *Sc in next 2 st, 2sc in next st*, repeat from * around (28 sts)
Round5. Sc in each st around (28 sts).Then finish off and leave long tail for sewing.
Now we will joining two pieces together.
Round1. With MC yarn and holding together the two pieces right side out, sc through both pieces around the edge, and fasten off, leaving a long tail for sewing.

Eyes:
Make 2 pieces in Black
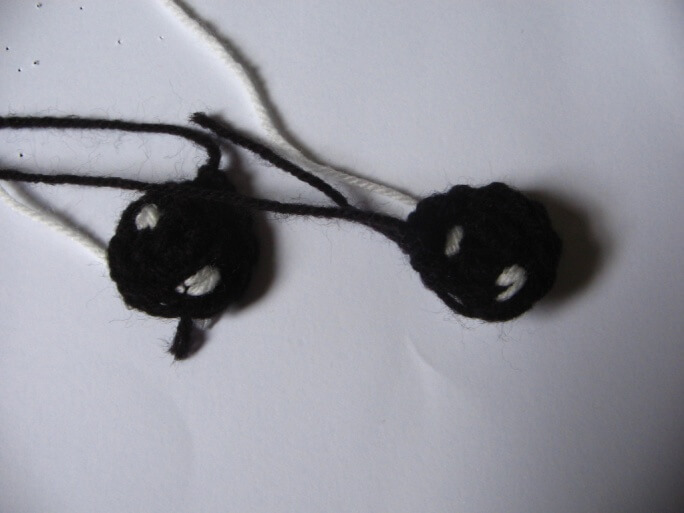
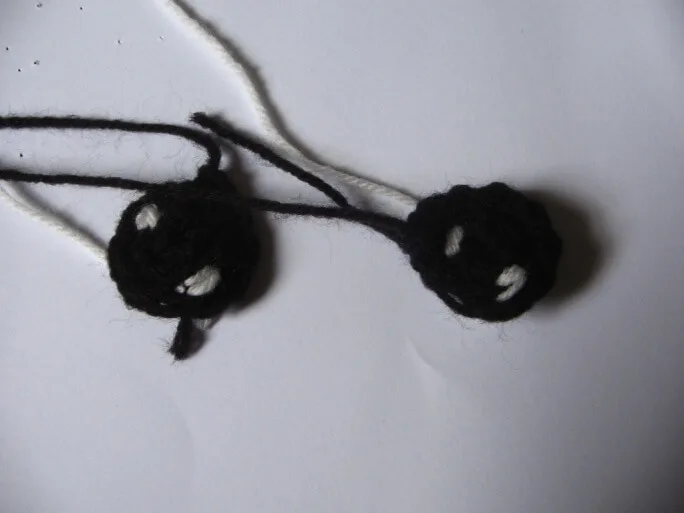
Round1. Make magic ring and 6sc in ring (6 sts)
Round2. 2sc in each st around (12 sts)
Fasten off, leaving a long tail for sewing.
Inner whites of the eyes
Use White yarn and sewing needle, sew a couple of stitches anywhere inside the eyes, and fasten off.
Pom Pom:
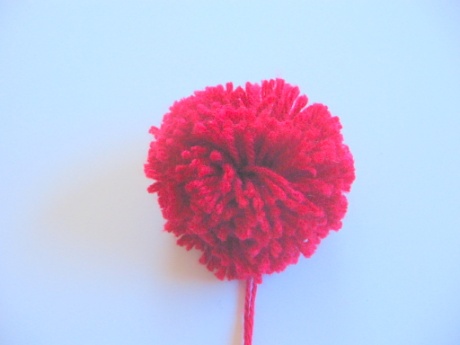
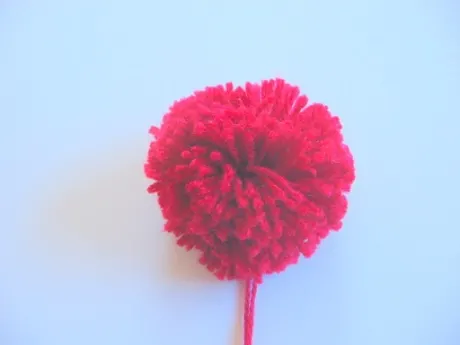
Make 1 pieces with Red colour .There are many way to make pom pom,choose the way you like to make.
Tutorial link.
http://www.domestifluff.com/2008/10/how-to-make-pom-pom-flowers/
http://www.dana-made-it.com/2010/12/pom-poms-simple-tutorial.html\
Finishing
Attach ears first, then nose, eyes and finally red pom pom.

donna
Wednesday 13th of July 2016
wonderful
Erin @ Making Memories
Monday 29th of December 2014
Your hats are absolutely adorable. And your pictures? So dang cute!!!!
jane
Thursday 1st of January 2015
thank you. Erin
Jann Olson
Monday 22nd of September 2014
Oh my gosh, I have a granddaughter that is sock monkey crazy. She would go 'ape' over this! Too young to be married of course, but I wish I crocheted and I'd make one for her future baby. For now, I found some sock monkey mink and I am making her a quilt for Christmas. Thanks for sharing with SYC. hugs, Jann
Mommy the Maid
Friday 5th of September 2014
So cute. Thank you for the pattern. My daughter is in need of one.
Glenna @ My Paper Craze
Tuesday 26th of August 2014
This is so adorable! I need to make one of these for my granddaughter. Thanks for sharing with Creative Spark Link Party. Hope you join us again tomorrow. Glenna @ My Paper Craze