
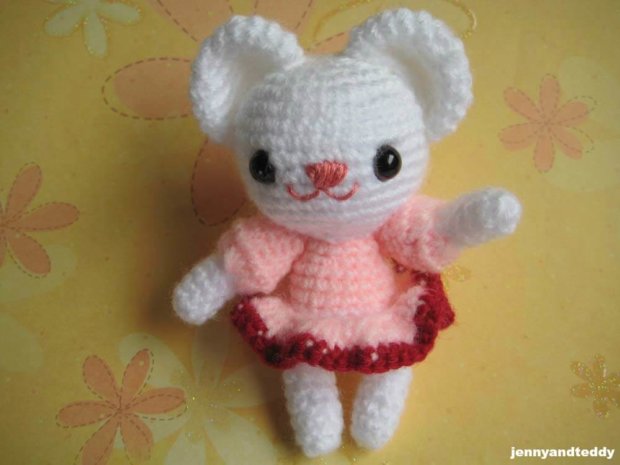

Hey guys! I am so happy to be able to share another cute amigurumi teddy bear today. Let’s meet Polly the bear! She is sure to keep you inspire and motivated in this summer season!
I can’t tell you enough how much I love Polly the bear. She used to go everywhere with me coz she so Tiny and small perfect fit for my jacket pocket. I used crochet hook size 1.25 mmm to make her,

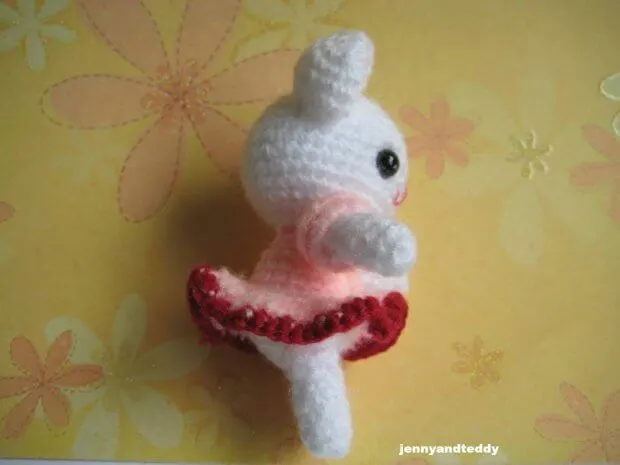
If you guys not familiar with small crochet hook, you could use 3.0mm hook size instead but Polly will be bigger thought. Doesn’t she adorable? And oh don’t forget to check out my other free teddy bear pattern!
Have you make them yet?
Let’s get going to the pattern!
Finish Size
-Approximately 4 inch tall (without counting ear)
-Size of baby Polly may varies depend on size of yarn and crochet hook
Materials
To make you will need
- Acrylic yarn or Worsted weight in this pattern, I normally used 8 ply
- Plastic eyes with safety backing 7.5mm (you can find it at any craft shop)
- Polyester Fiber fill for stuffing
- Sewing yarn needle and embroidery
- Ribbon or button
- Crochet hook size1.25mm and craft glue
Skill and abbreviations
You will need to know how to make a magic ring or adjustable ring
-Single crochet (sc)
-Crochet increase (inc) which mean-make 2 single crochet in same stitch
-Crochet decrease (dec) which mean-Crochet 2 stitches together
-Stitch (st)
* = Repeat stitches from * to end of *
-Chain (ch)
-Slip stitch (sl st)
Work in front loops only (flo)
Work in back loops only (blo)
Change colour
My beginner tutorial check it out here
Beginner guide to making your first ever amigurumi
How to start magic ring or adjustable ring
How to put an eyes on amigurumi
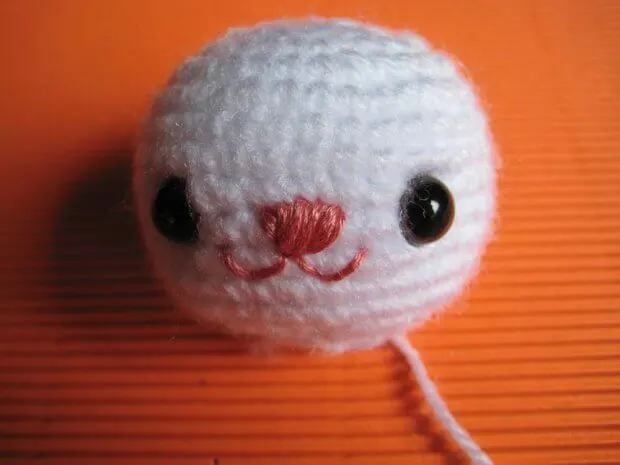
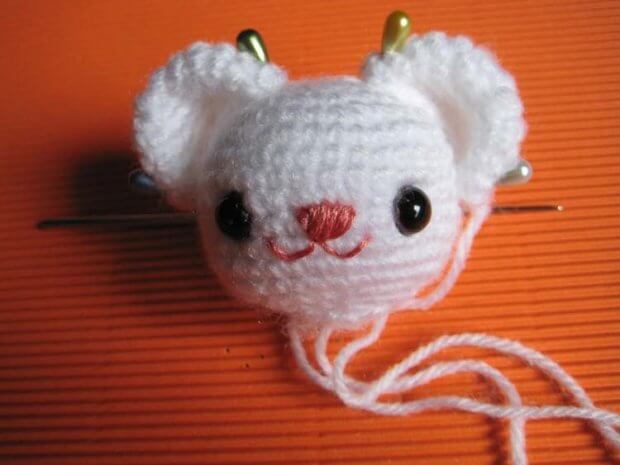
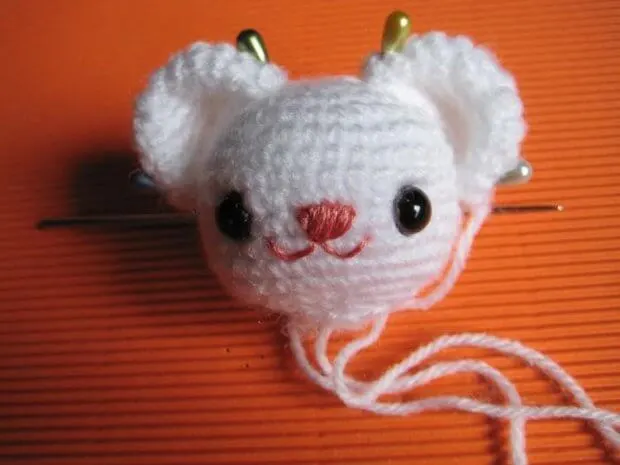
Let’ start with head (colour white)

You will work from top to bottom.
Round1. Make magic ring and 7sc in ring (7)
Round2. 2sc in each st around (14)
Round3. *Sc in next st, 2sc in next st* and repeat from * around (21)
Round4. *Sc in next 2 st,2sc in next st* and repeat from * around (28)
Round5.* Sc in next 3 st,2sc in next st* and repeat from * around (35)
Round6-13. Sc in each st around (35)
Round14. *sc in each of next 3 st,dec 1* and repeat from * around (28)
Round15. *sc in each of next 2 st,dec 1* and repeat from * around (21)
Round16. *sc in each of next st,dec 1* and repeat from * around (14)
Round17. *sc in each of next st,dec 1* and repeat from * around,then have last 2 st free make sc on that st and finish of leave long tail for sewing(10).
And stuffing polyester firmly.
Body

You will work from bottom to top
Round1. Make magic ring and 5sc in ring (5) white
Round2. 2sc in each st around (10) white
Round3. *Sc in next st, 2sc in next st * and repeat from * around (15) white
Round4.* Sc in next 2 st, 2sc in next st* and repeat from * around (20) white
Round5. *Sc in next 3 st, 2sc in next st* and repeat from * around (25) white
Round6. Sc in each st around (25) white
Round6.1 Sc in each st around (25) pink (flo of round 6) skirt
Round6.2 3 Sc in each st around (75) pink (flo of round 6.1) skirt
Round6.3 Sc in each st around (75) red skirt
Round7. *sc in each of next 3 st,dec 1* and repeat from * around (20) pink (blo of round 6)
Round8-10. Sc in each st around (20) pink
Round11. *sc in each of next 2 st,dec 1* and repeat from * around (15) pink
Round12. sc in each of st and around (15)pink
Round13.* sc in each of next 2st,dec 1* and repeat from * around ,then have last 3st make sc in each st and finish of leave long tail for sewing and stuffing polyester firmly (12)
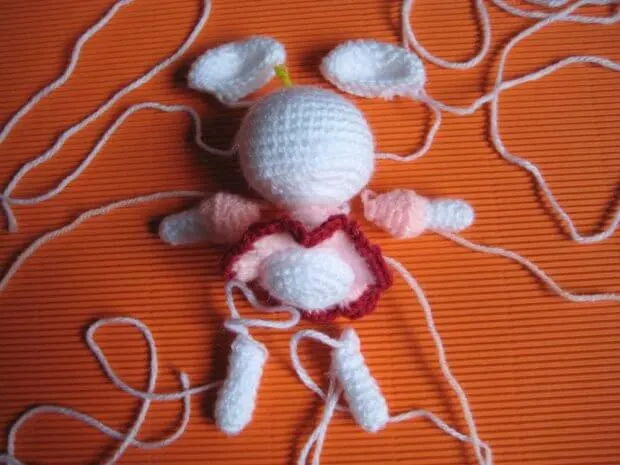
Arms make 2 pieces
You will work from bottom to top
Round1. Make magic ring and 7sc in ring (7) white
Round2-6. sc in each st around (7) white
Round7. 3Sc in each st around (21) pink
Round8. sc in each of st and round (21) pink
Round9. *sc in each of next st,dec 1* and repeat from * around (14) pink
Round10. *sc in each of next 2 st,dec 1* and repeat from * around (11) pink
Round11. *sc in each of next st,dec 1* and repeat from * around (8) pink
Then finish of leave long tail for sewing and stuffing polyester just a little.
Ears (colour white)
Make 2 pieces
Round1. Make magic ring and 8sc in ring (8)
Round2. 2sc in each st around (16)
Round3. *Sc in next st, 2sc in next st* and repeat from * around (24)
Round4-6. Sc in each st around (24)
Then finish of leave long tail for sewing and do not stuffing polyester in the ears.
Legs (colour white)
Make 2 pieces
Round1. Make magic ring and 7sc in ring (7)
Round2-8. sc in each st around (7)
And finish of leave long tail for sewing.
Finishing

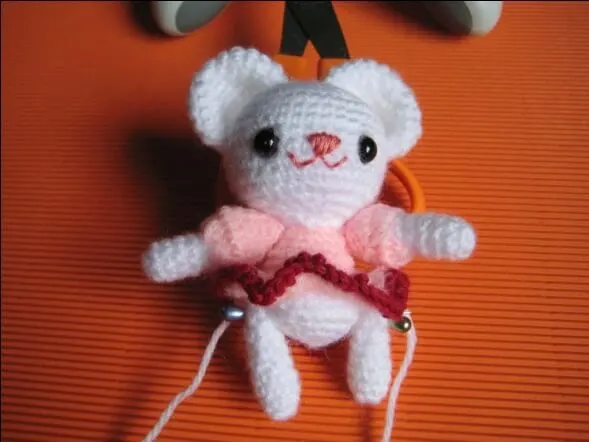
Sew ears to the head and sew body to the head after finish the face and ears
Then sew arms and attach legs to body so that baby bear is in a stand position
Note-use pin to adjust and fix position of arm and leg for sewing
Jennifer
Thursday 28th of July 2016
This is so adorable, Jane! Thank you for making and sharing this little cutie ~ I love that she's so tiny too!
jane
Thursday 28th of July 2016
Thank you Jennifer for stopping by.