

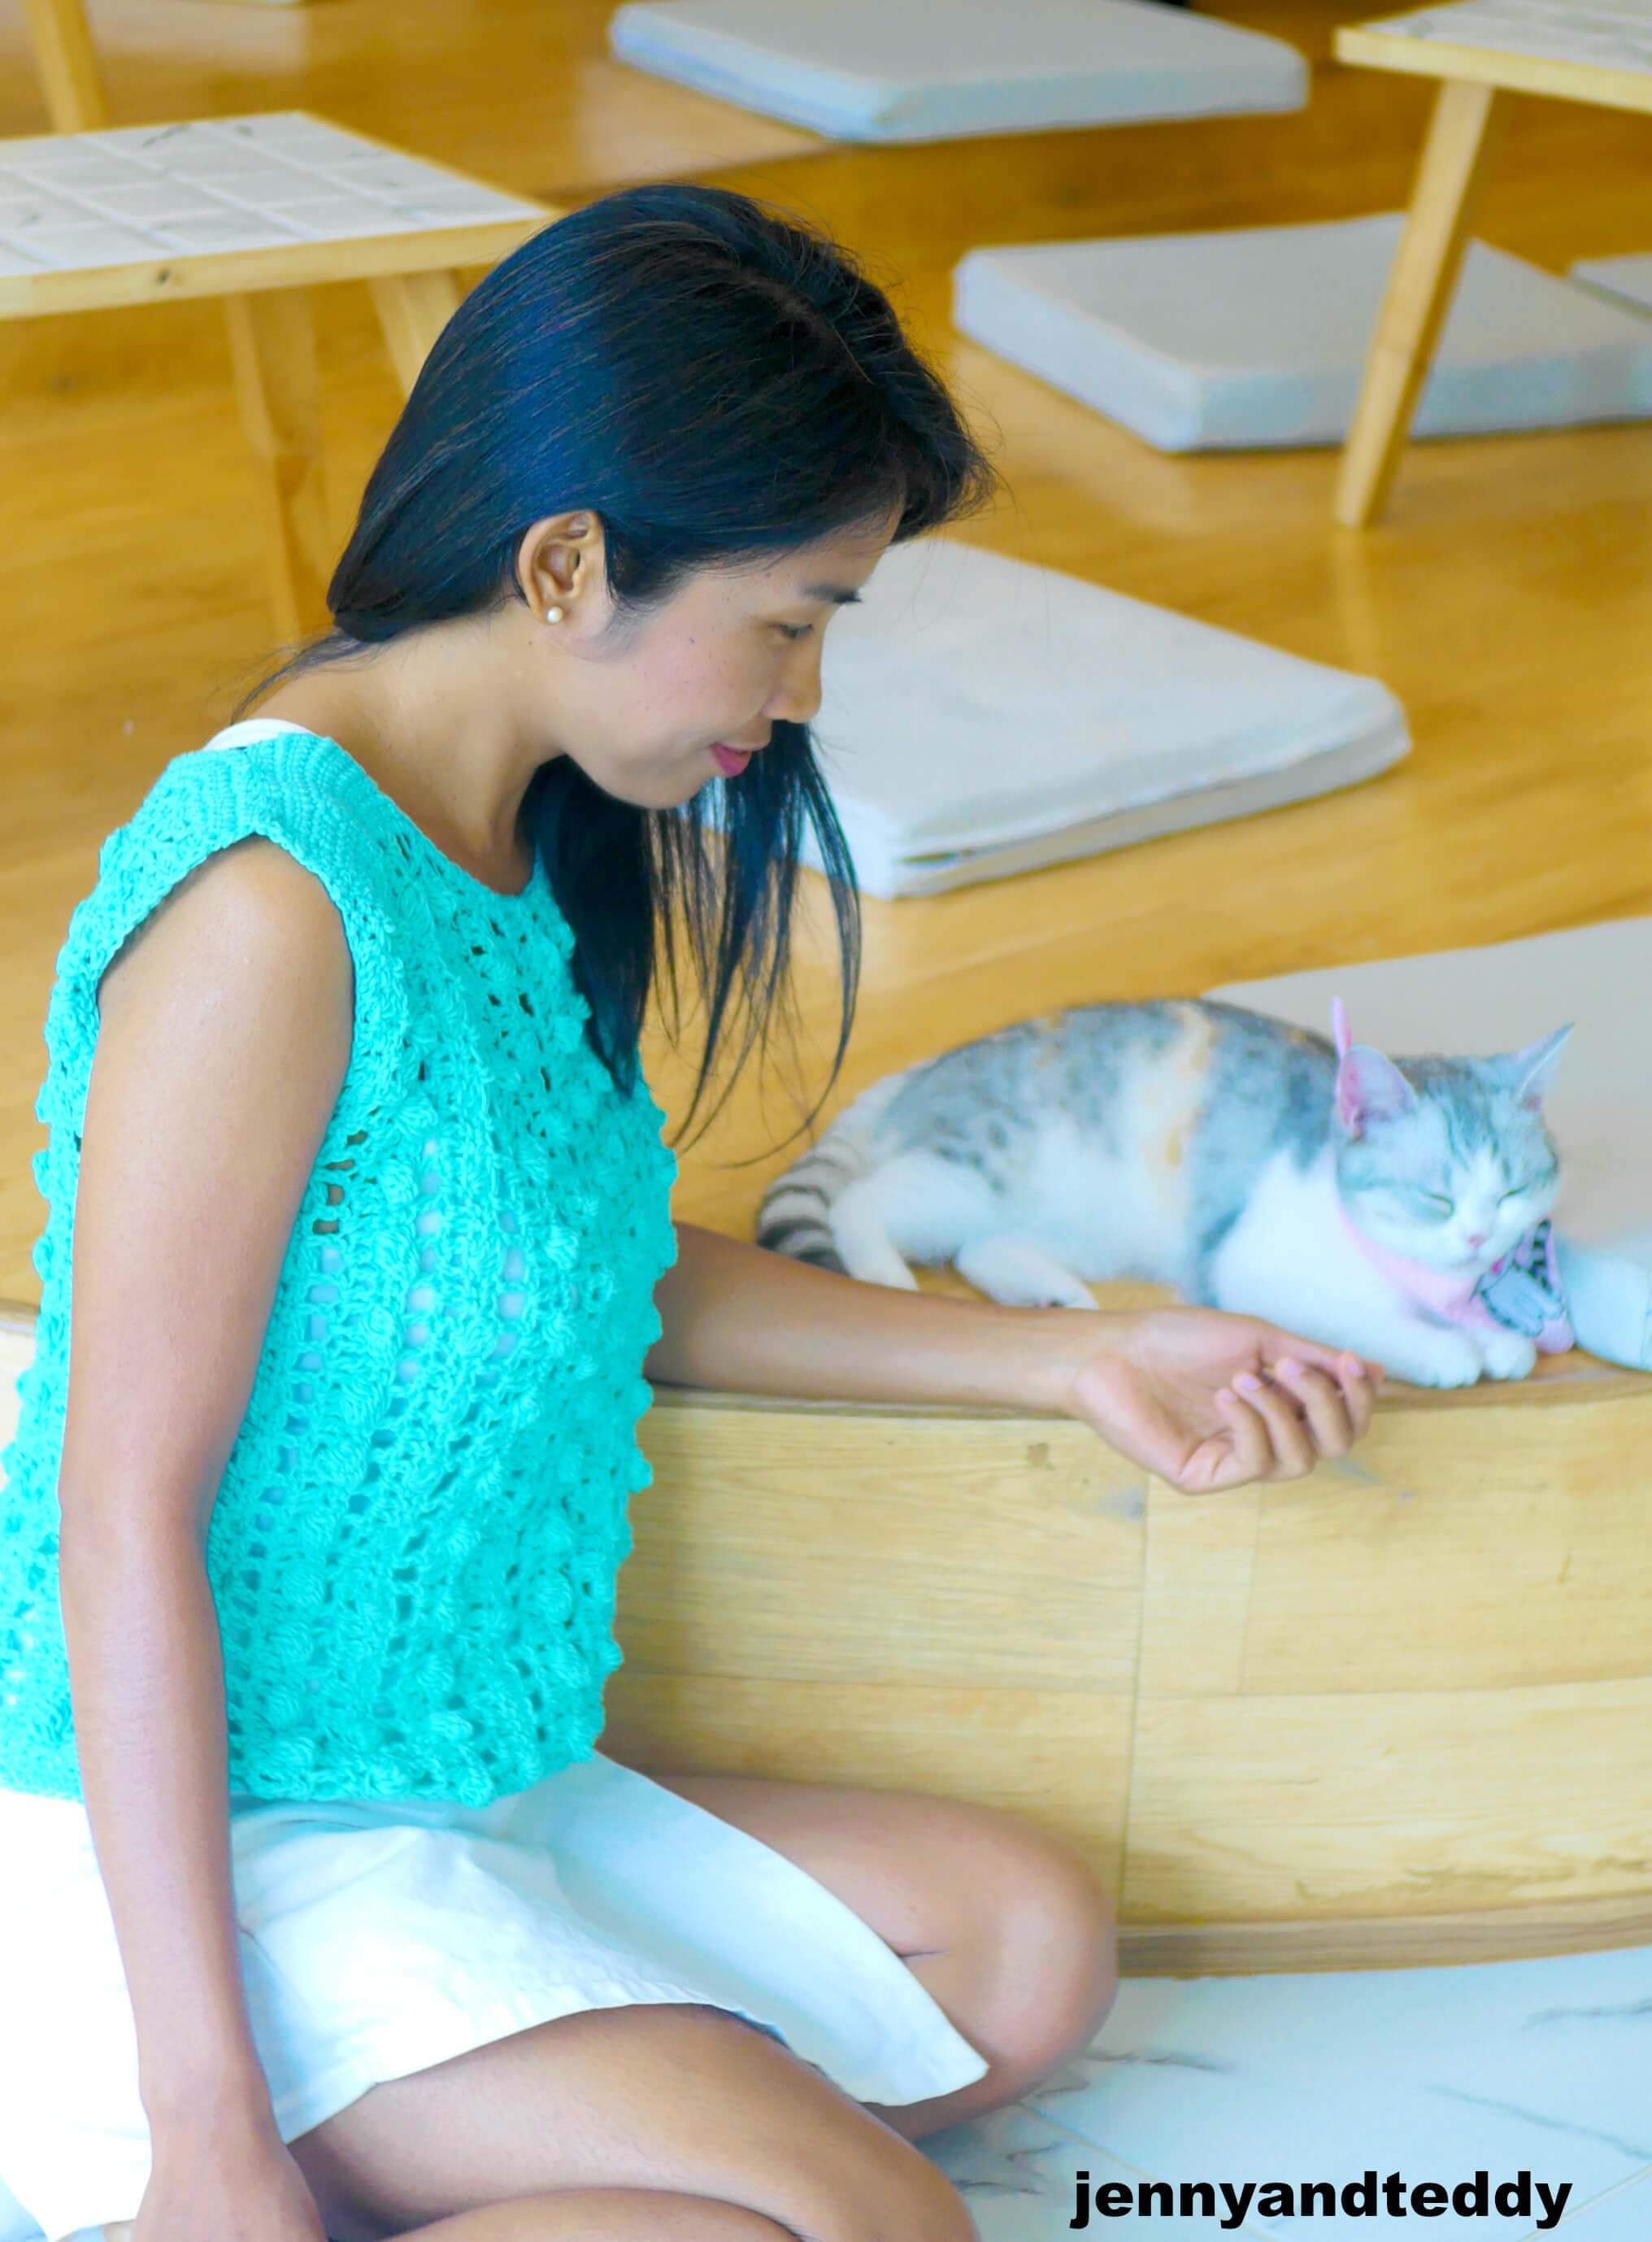
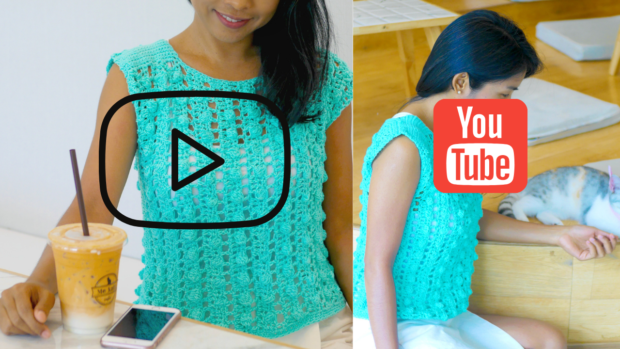
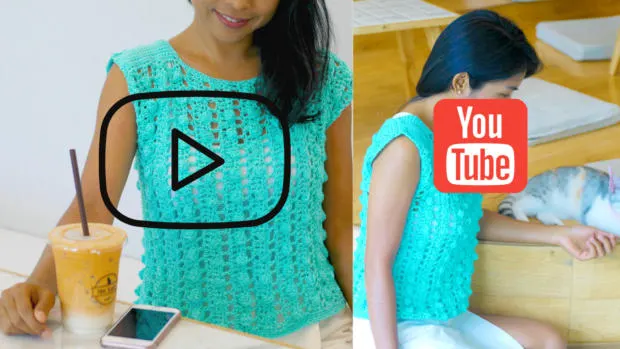
Meet bobble stitch top free crochet pattern with video tutorial on youtube. if you guys obsessed with all thing that make with bobble stitch like me !
You are going to love this bobble top!
The bobble crochet stitch, they always give the rich and lovely texture to the crochet clothes so I make this crochet top into a kind of summer season, they are also easy and fun to make only 1 row of bobble stitch repeat!
The bobble stitch crochet top pattern is very similar to crochet bobble stitch poncho.
I made this easy bobble stitch crochet top or a summer blouse with pure cotton yarn and they are only made just from 2 rectangles.
This is a quick crochet summer top lacy tee to whip up! And donot worry about the size they are very easy to adjust to bigger size by add more row to the rectangle to match your bust size.

Let’s get start!
– I used cotton DK weight yarn. I am using about 1-2 skein around 500–600 yard fit size small ( easy to adjust the size see pattern instruction below) yarn weight 3 light.
– 4.0 mm crochet hook
– Sewing yarn needle
Gauge: 3 double crochet stitch = 1 inch
Note: we are crochet this top not too tight.

Skill and abbreviations
(American crochet terms)
You will need to know how to make
-St which mean stitch
-sc which mean single crochet
-dc which mean double crochet
-Blo which mean crochet in back loop only
-ch, Chain
-slip knot

Bobble stitch: yarn over insert your hook into the stitch that you want to make bobble then pull up a loop and yarn over pull through 2 loop then insert your hook into same stitch and repeat that 4 time until have 6 loop on your hook then yarn over pull through all 6 loop and make single in the next st, Bobble complete!


Get the free pattern below or this pattern is also available as an inexpensive, ad-free, PDF printable instant download in my etsy shop. Thank you so much for your love and support. I am really appreciate you.
Watch step by step video for this bobble stitch crochet top on youtube.
Finished Size of example Approximately:
Small (other size to make it bigger by add more row to rectangle to match your bust size)
For me the model wearing this piece, I am 4’9 feet tall.
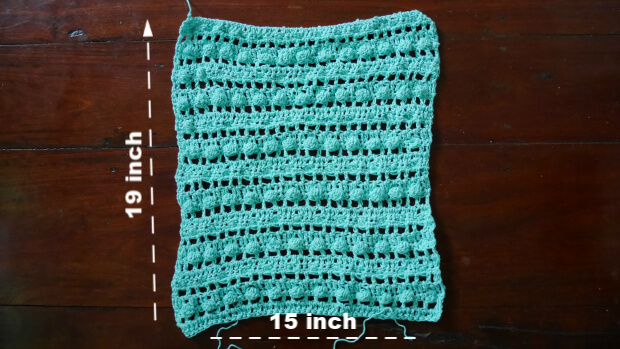
Measurement.
one rectangle of front and back panel of bobble stitch. 19×15 inch.
Bobble stitch crochet top instruction.
Front and back panel.
Pick up crochet hook size 4.0 mm and Start of by making a slip knot Then make 56 chains for all size, unless if you want the top to be longer just add more chain to the foundation chain (foundation chain multiple of 4 ).
( for bigger size just add more row to the rectangle until the rectangle match your bust size)
Row1: make, dc into next chain from hook and in each chain across until the end of the row.
Row 2: ch 1 turn, sc into first 2 sts. *Bobble stitch into next stitch, sc into next 3 sts*. Repeat between * and * until you have 4 sts left then make sc in each of the last 4 sts.
Row 3: ch 1 turn, dc in each stitch until the end of the row.
Row4: ch1, turn, *dc in next st, ch1 ,skip1 st then dc in next st* repeat this * to * until the end of the row.
Row5: ch 1 turn, *1dc in each stitch and 1dc in chain space* repeat * to * until the end of the row.
Row6 and beyond,Keep Repeating row 2-5 until you get 19 inch long.
size small 19 inch.
size medium 20 inch.
size large 22 inch.
size XL 24 inch.
size 2XL 28 inch.
Repeat the same process for back panel.
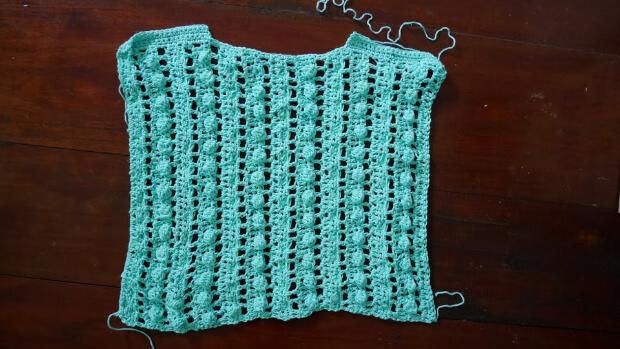
After we got 2 pieces of rectangles will look like this
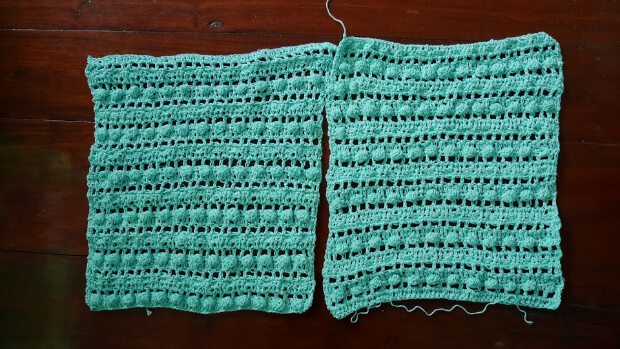
Donot worry if your rectangle is not perfect, my one is too. They will be fine when we put it all together.
Now We are going to create the shoulder for front panel.
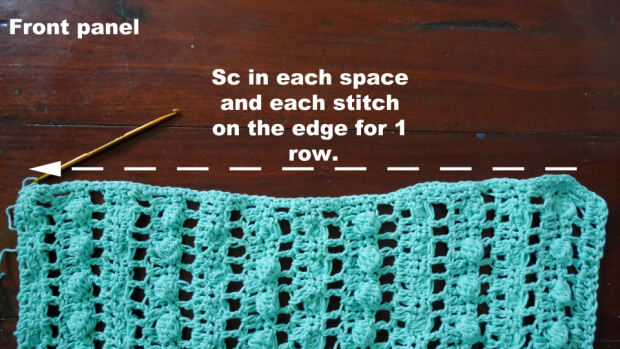
Now we are going to make sc in each space and in each stitch on the edge for 1 row see pic above.
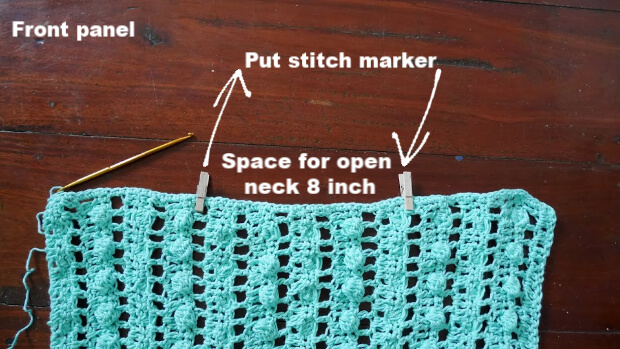
Then we put stitch marker to make the open neck.
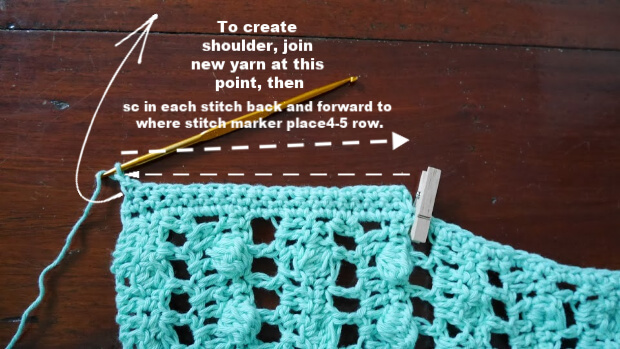
now join new yarn on the end and sc back and forward and ch1 at the end of row to where marker place about 4-5 row.
After we finished one shoulder then , we repeat the same process for the other shoulder.
After we finished both shoulder then set aside and waiting for assembly.
Now we are going to make the edge of back panel ready to assembly with front panel.
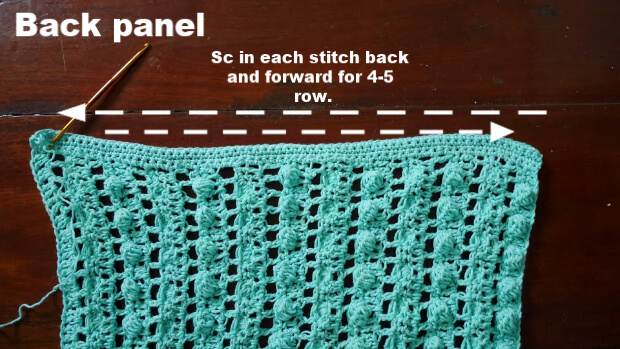
now we are going to sc in each stitch or space of the edge back and forward 4-5 row and ch1 in the end of the row.
And finished off.
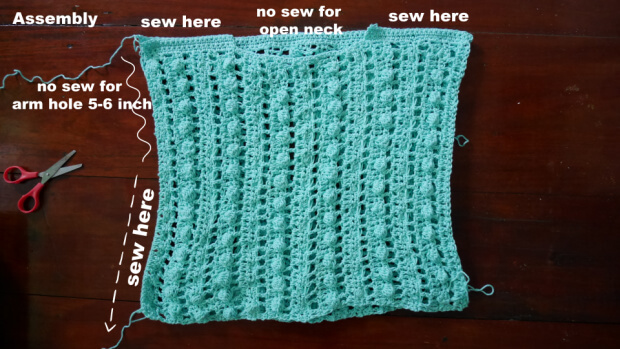
Assembly.
lay front and back panel on top of each other and sew along as the photo show with leaving no sew for the arm hole about 4-5 inches.
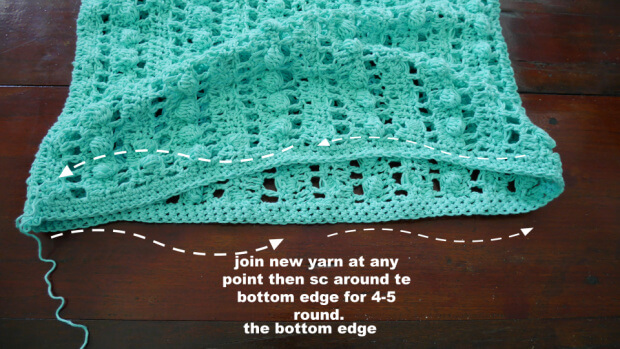
After we finished assembly the top, then we will tidy up the bottom edge by join new yarn at any point of the bottom edge then sc around the edge for 4-5 round and finish off.
All done !
Happy crocheting!
If you make one I would love to see your creation tag me on Instagram!