
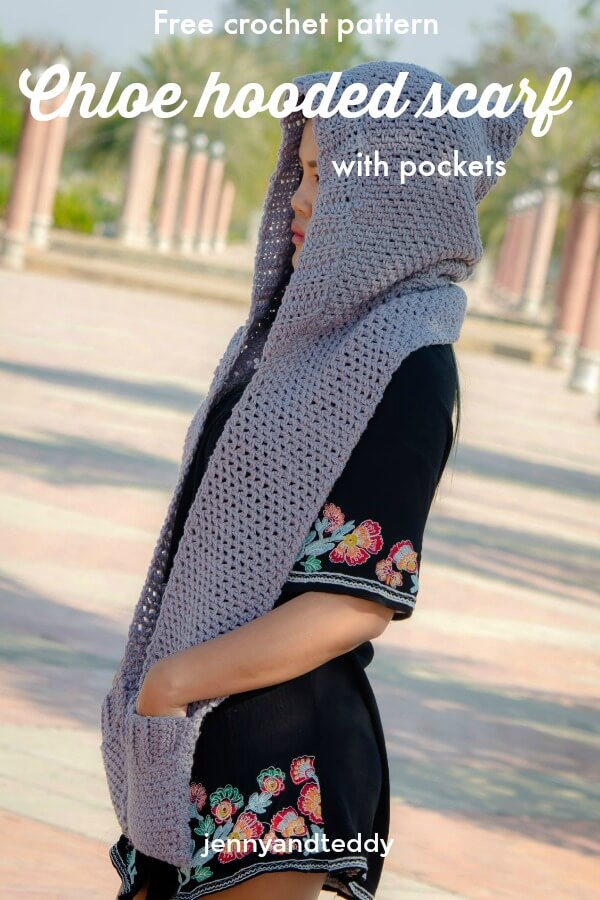
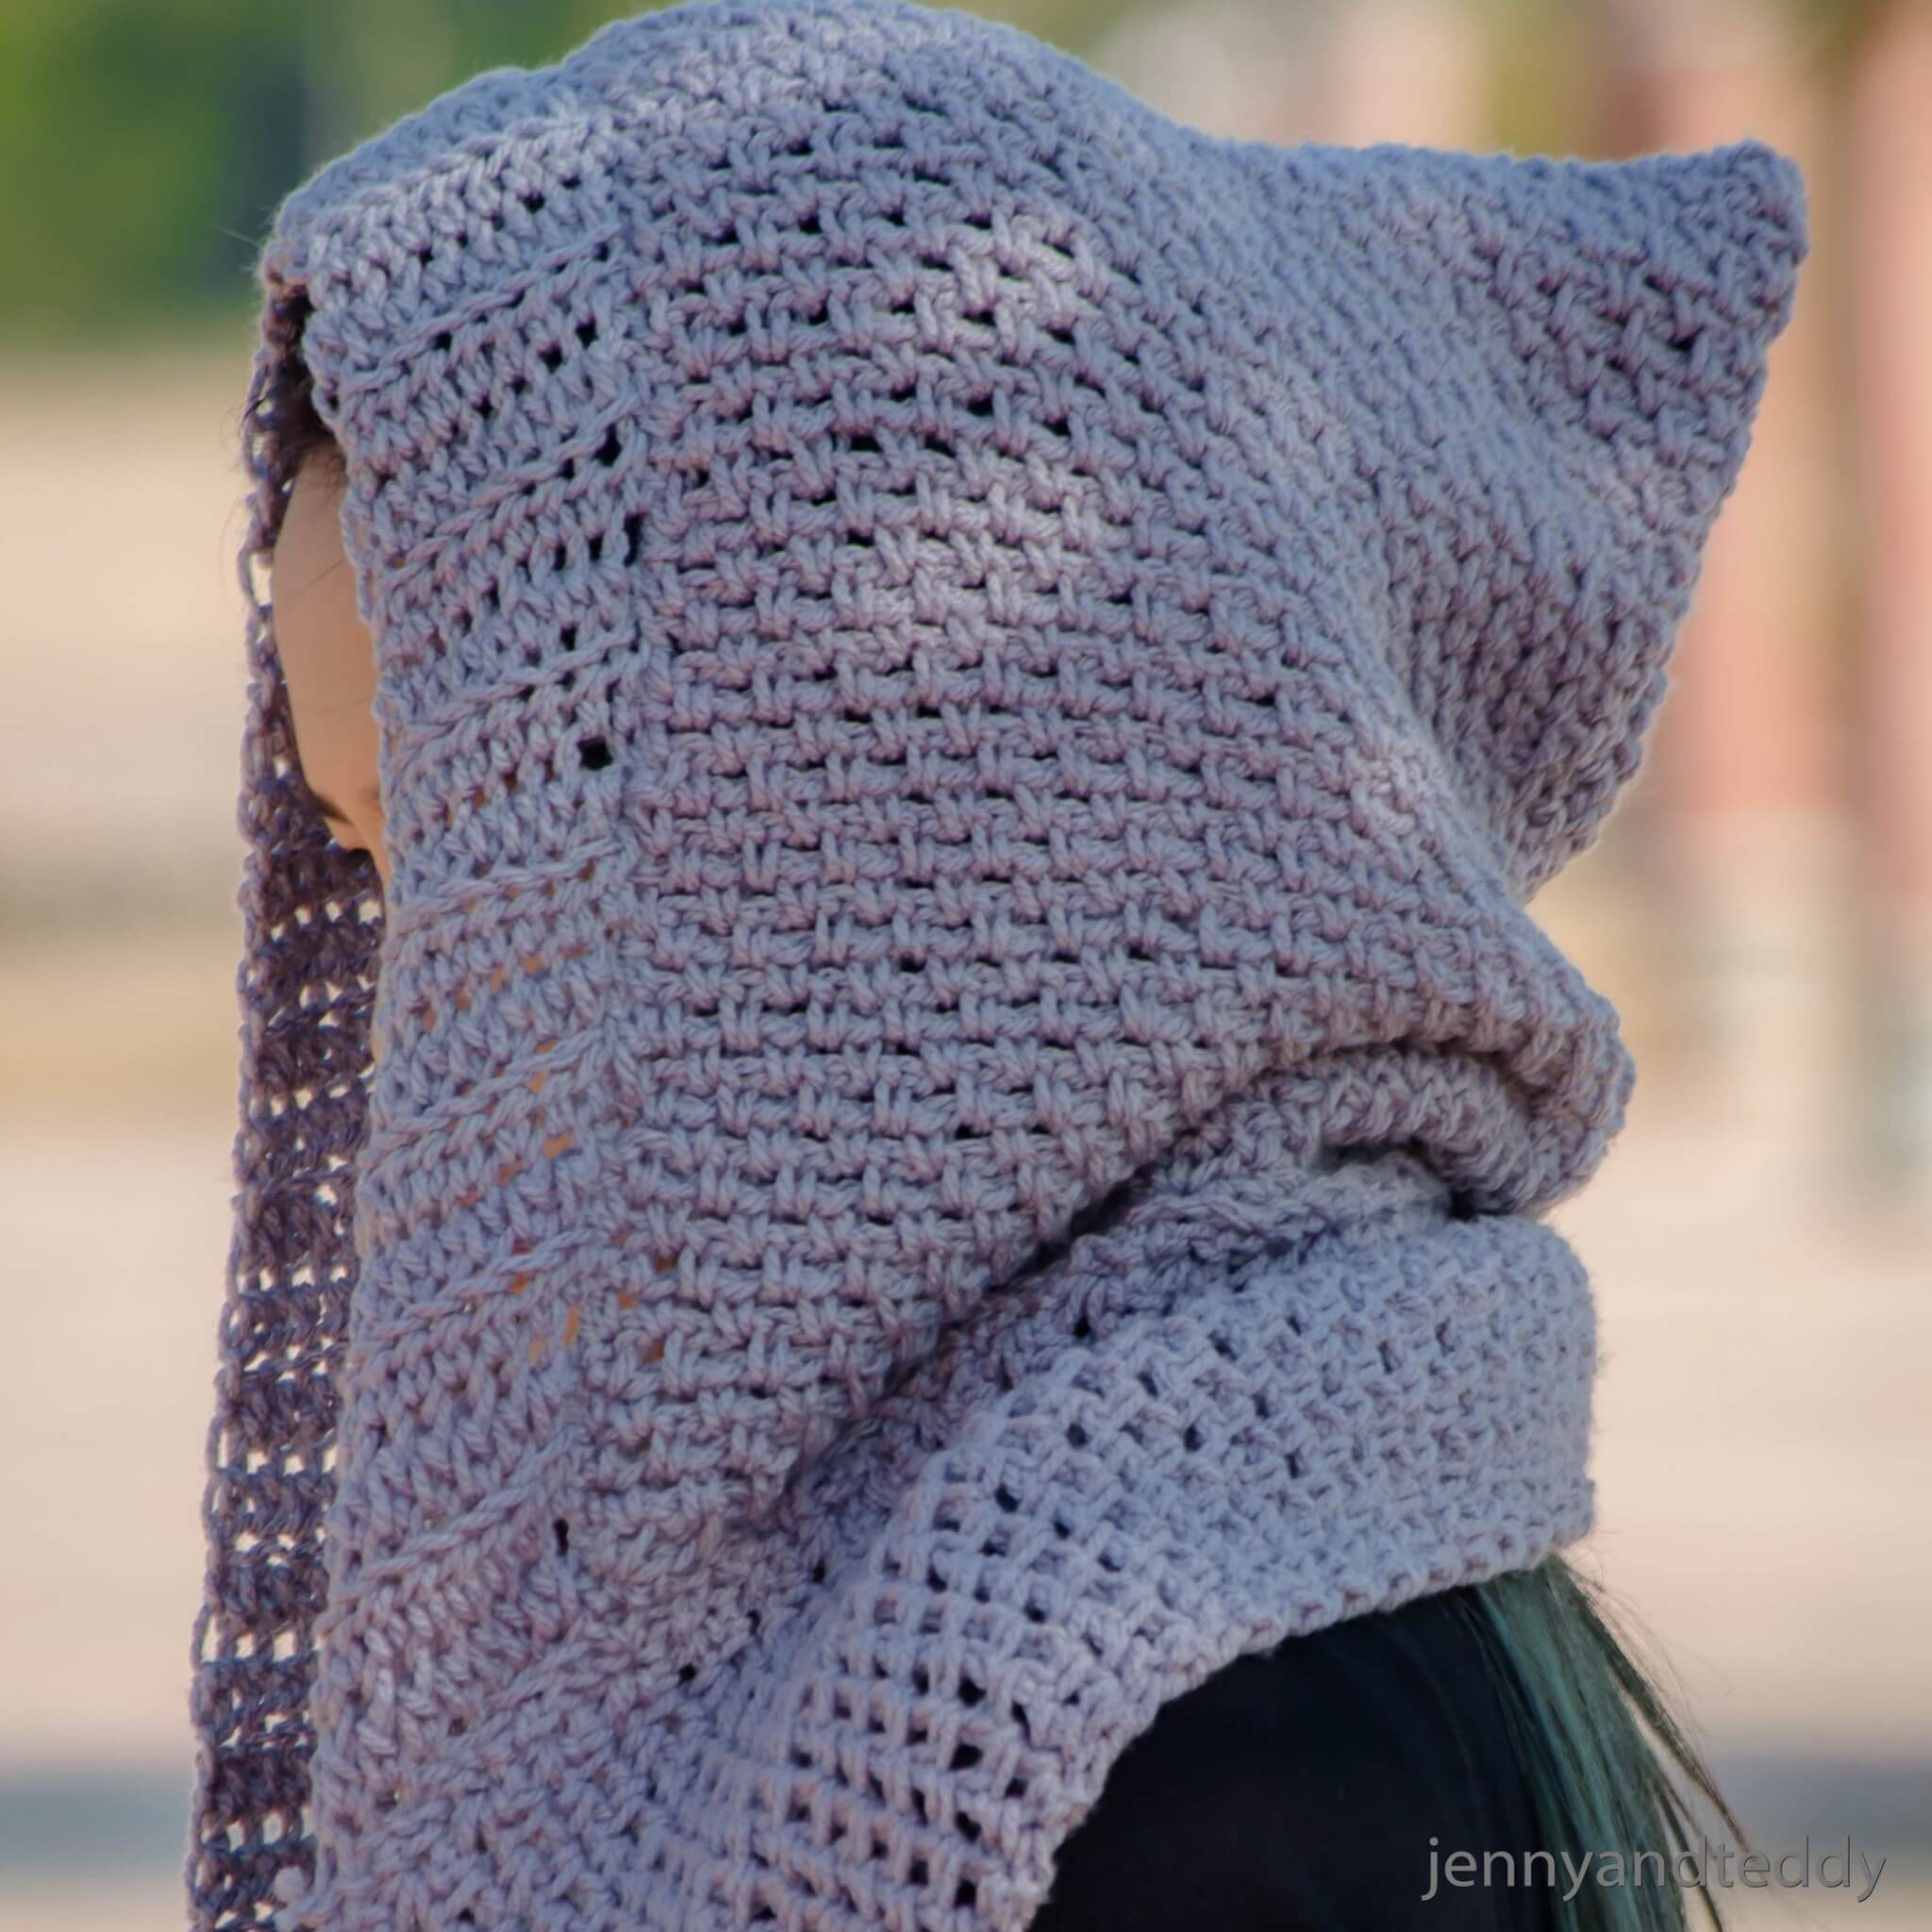
This cozy hooded scarf crochet pattern is what you need for this winter month.
The hooded scarf is fast to whip up just perfect for busy crocheters that had little time for crocheting.
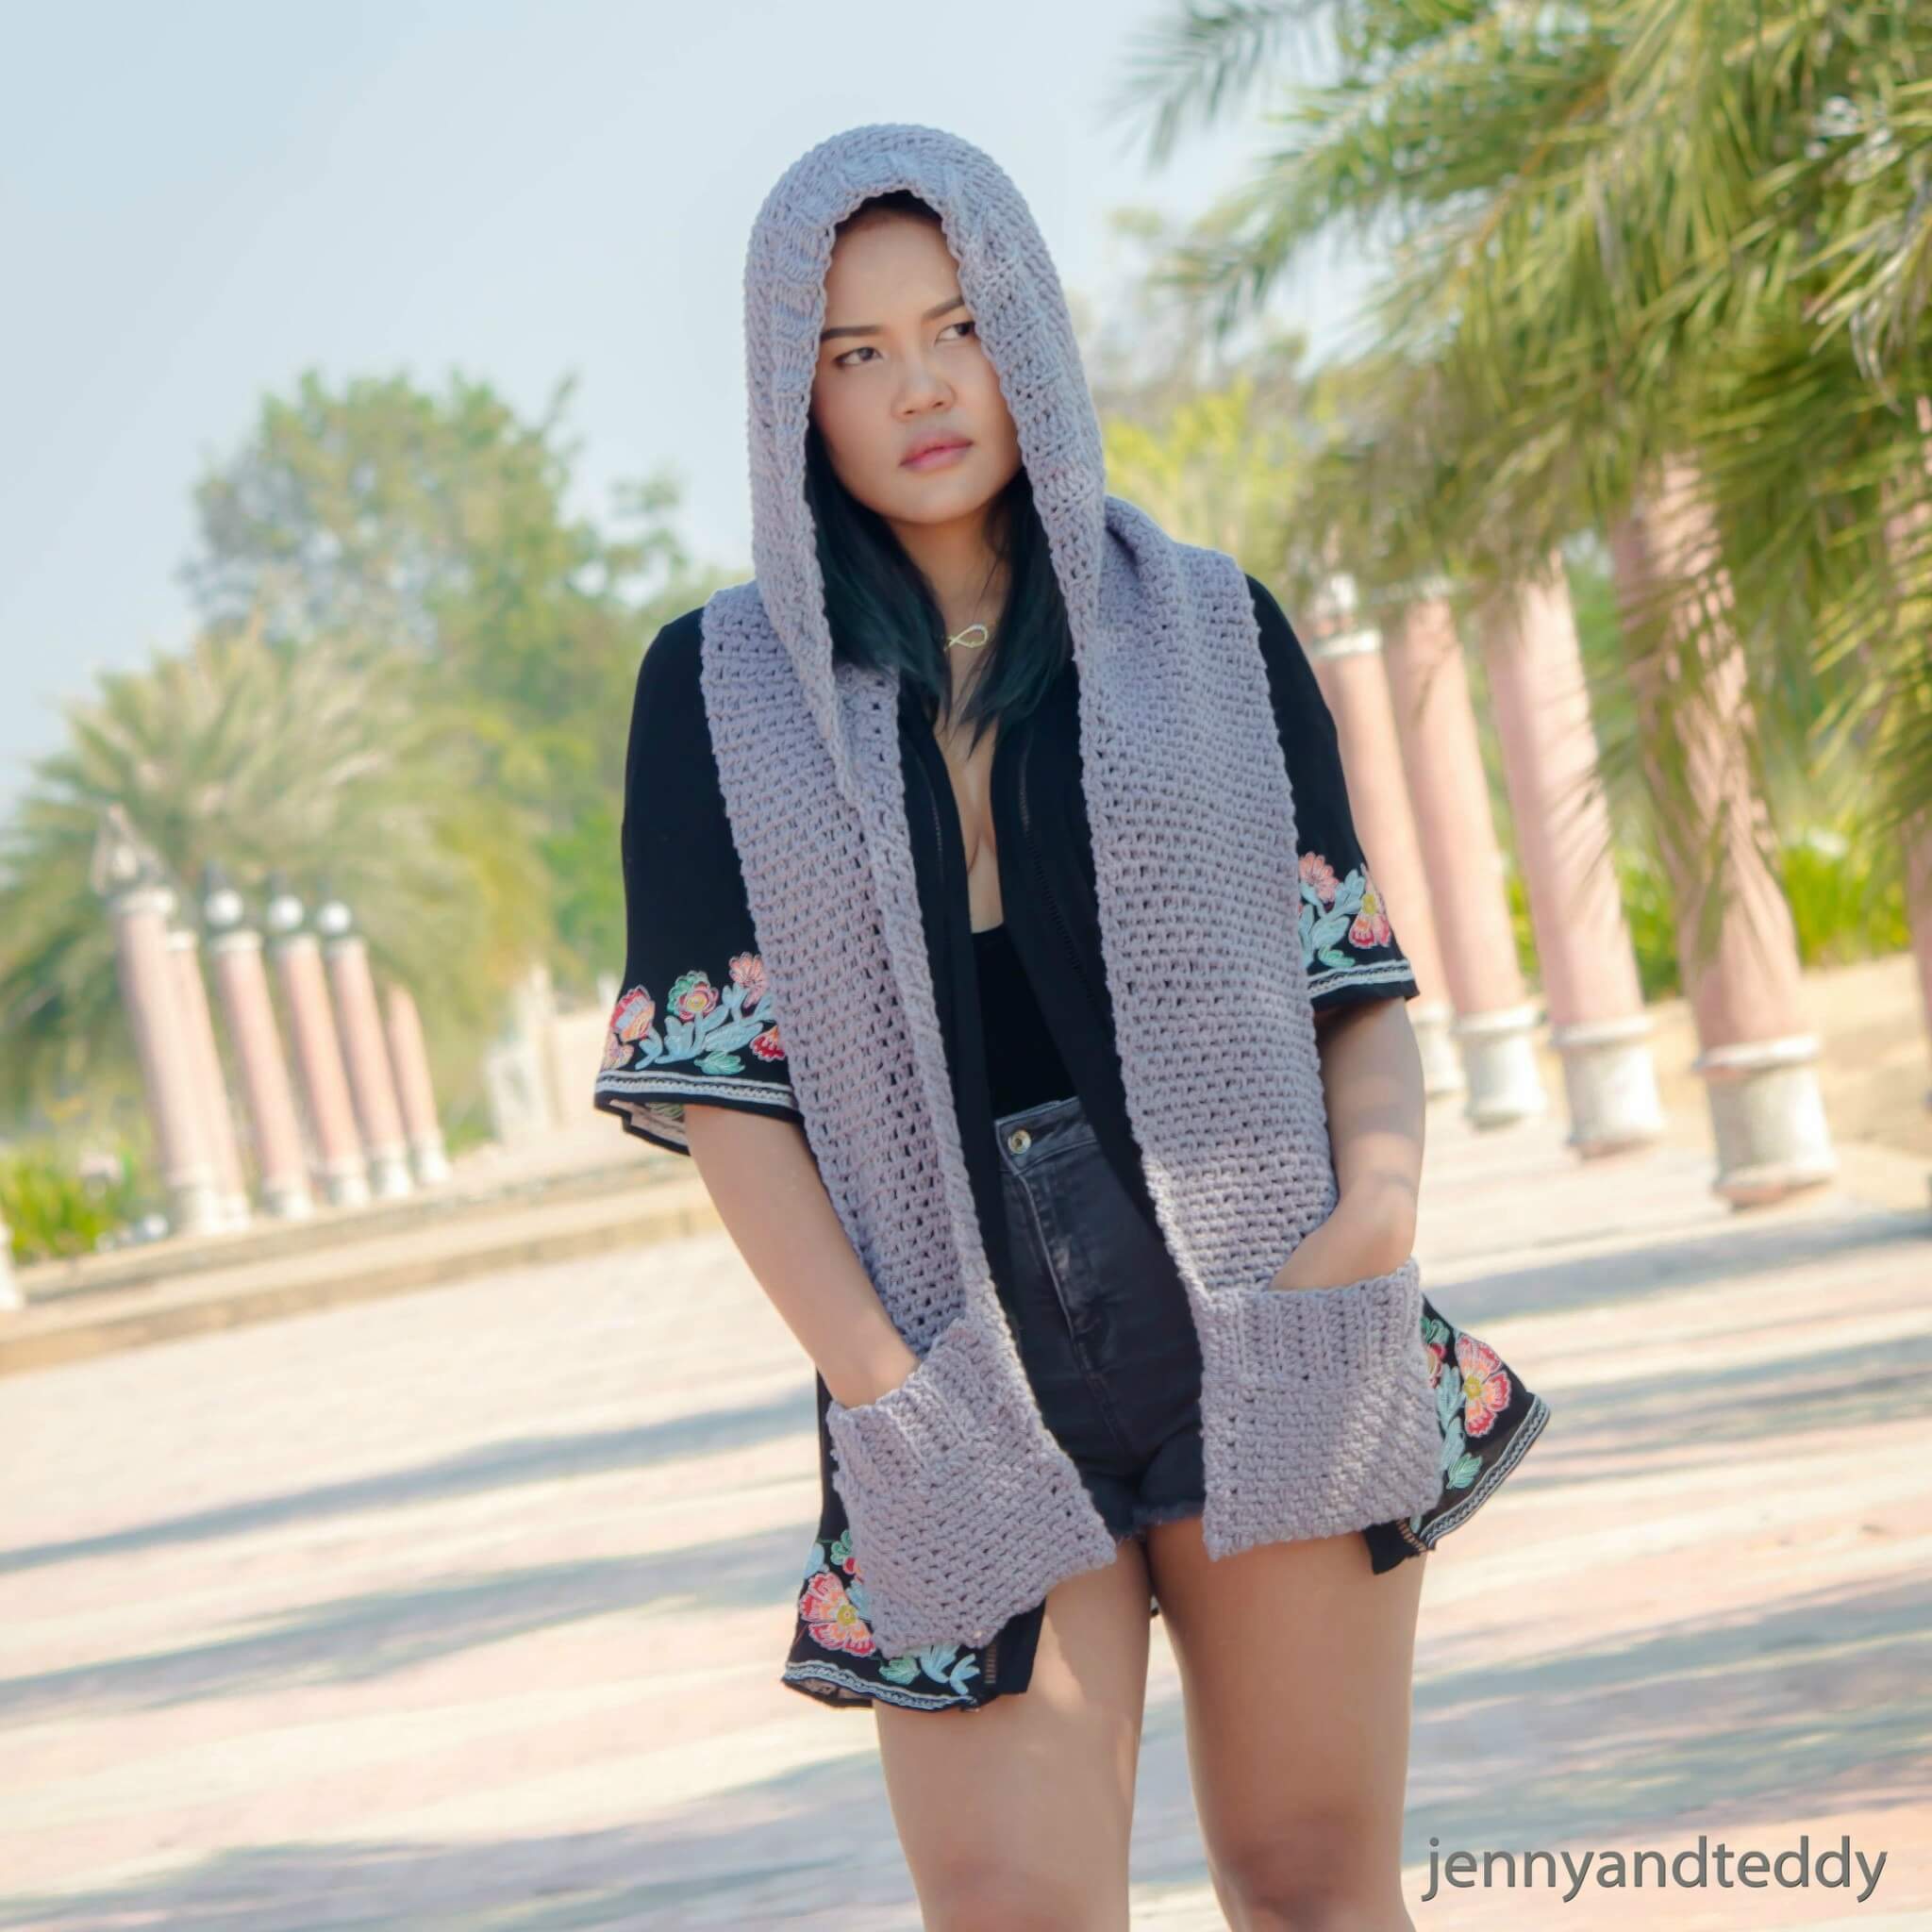
This scarf with pockets will keep your hand cozy and toasty warm on a cold day and it’s made from easy crochet stitches that you are all beginner familiar with.

About the Chole hooded scarf pattern.
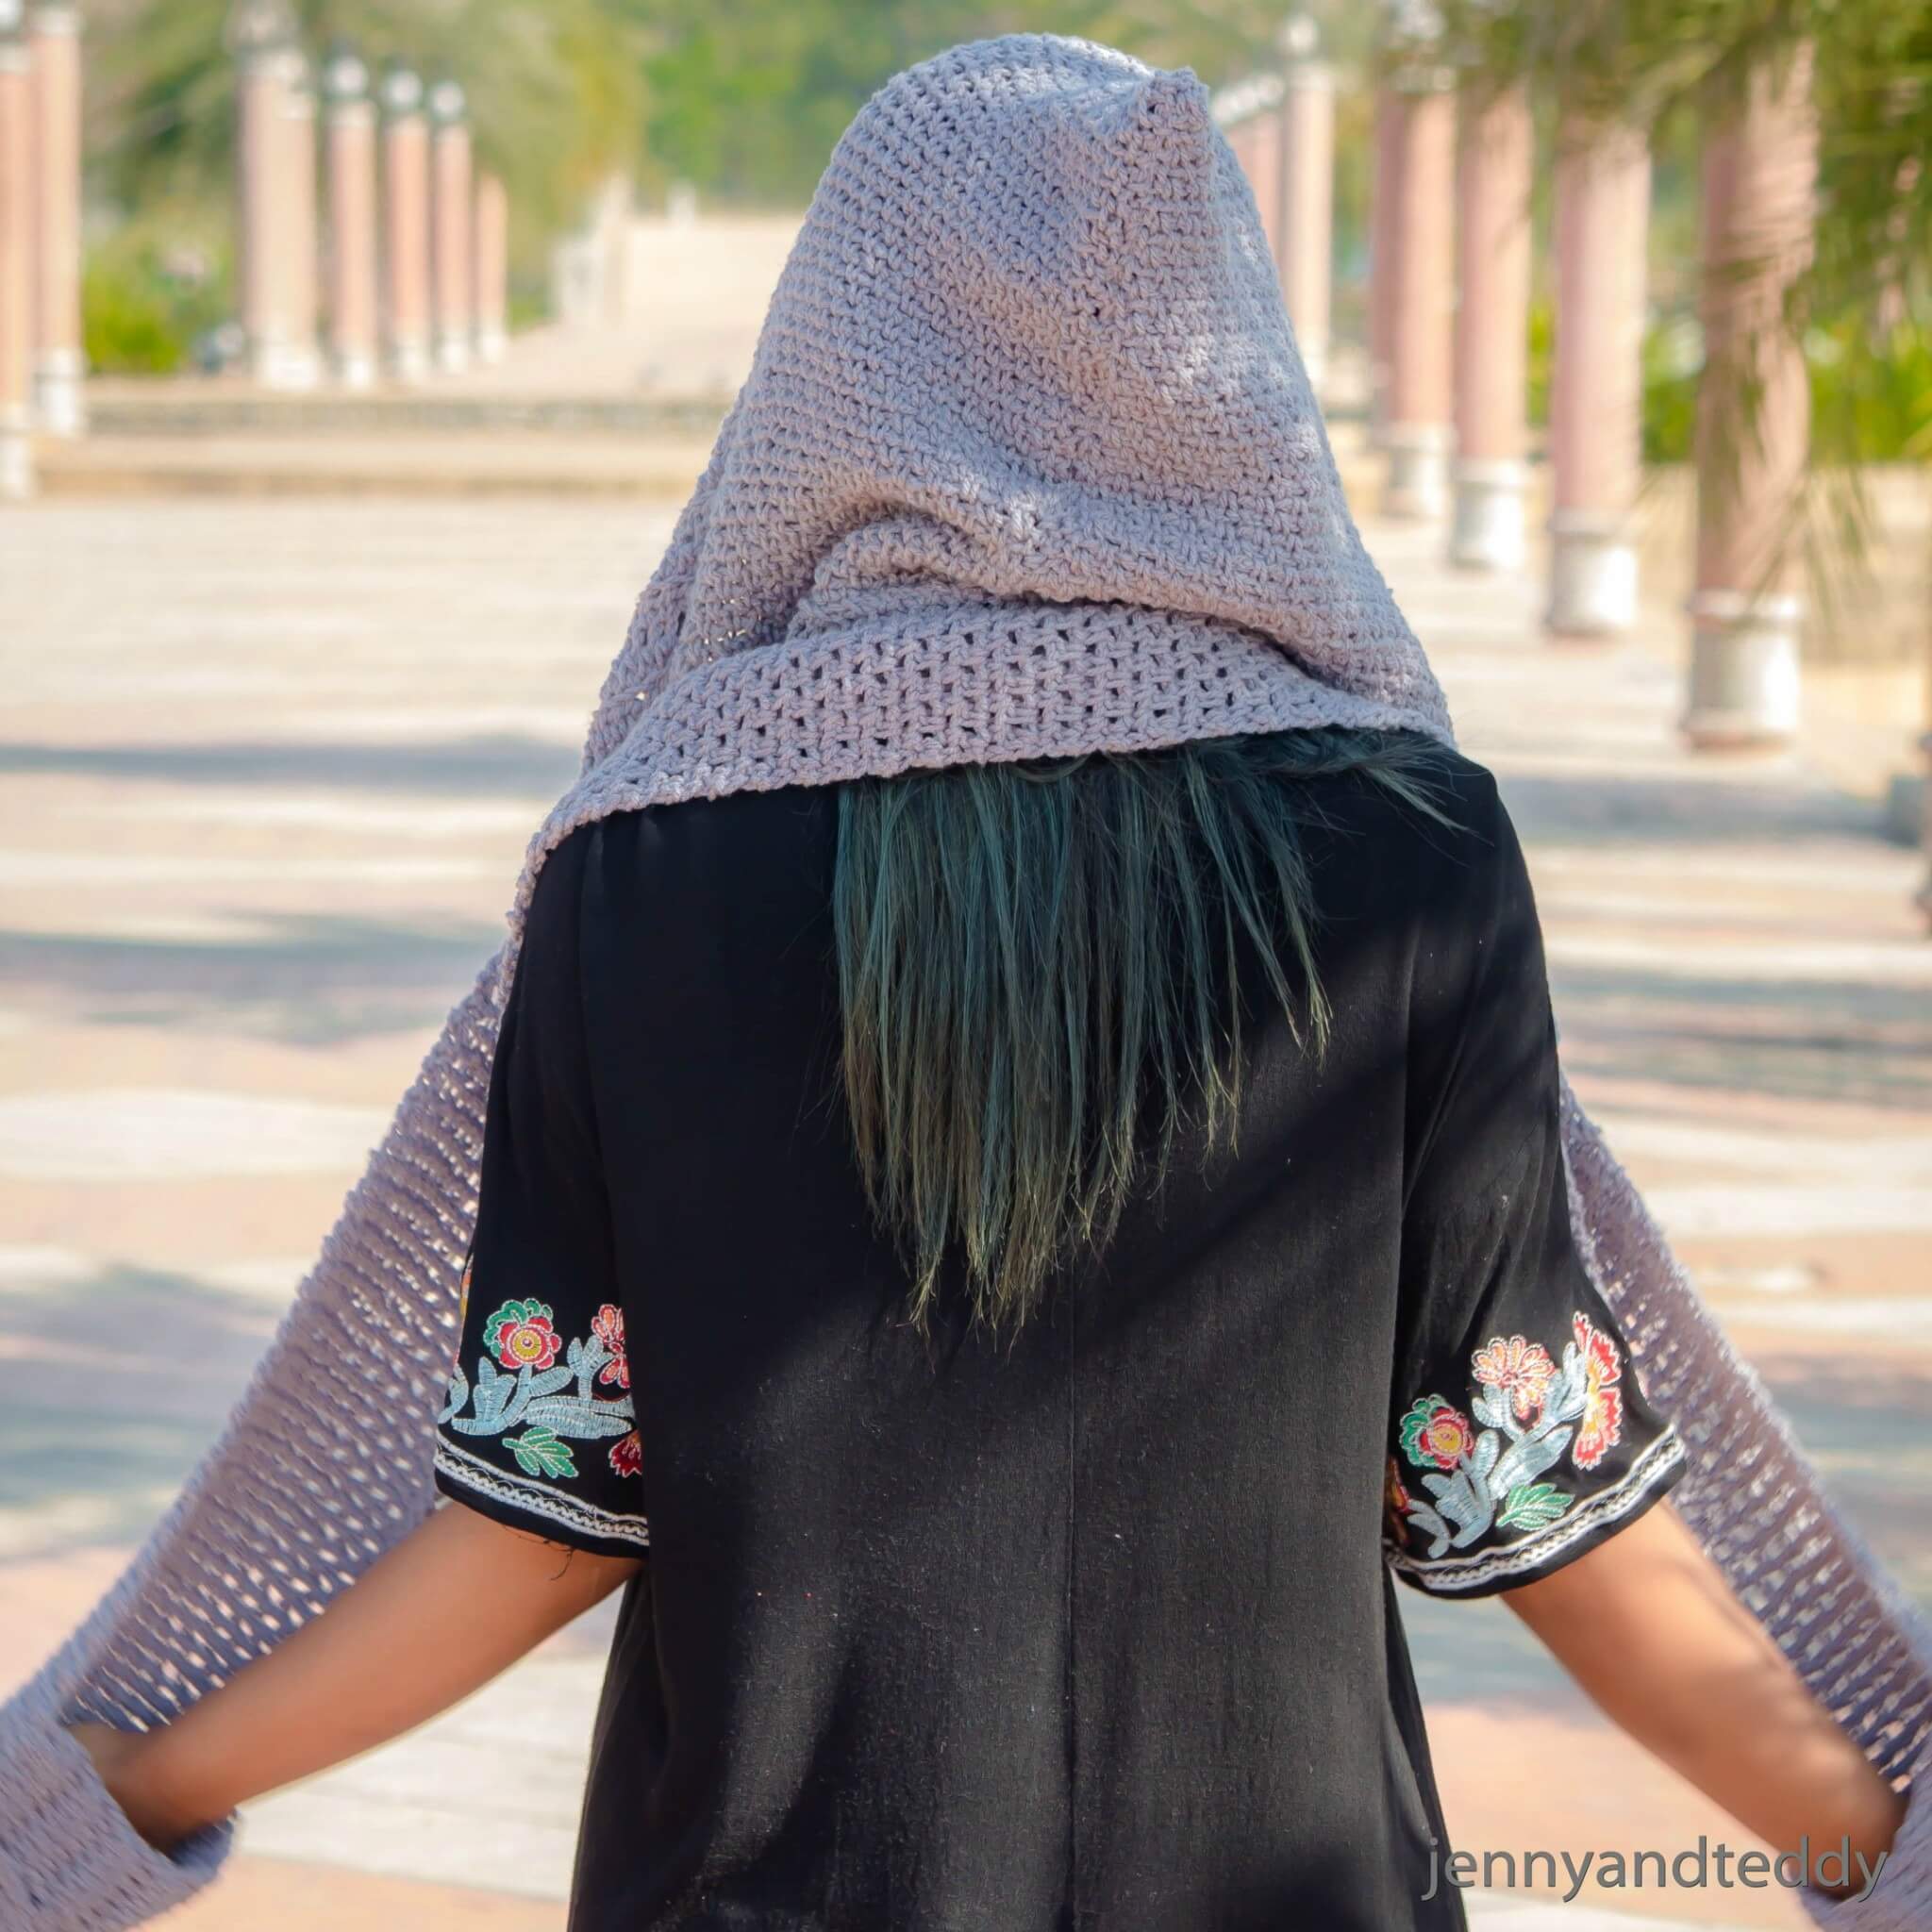
The Chole hood scarf with pocket is an effortless winter accessory for everyone to enjoy.
I hand-pick the timeless grey color which is a neutral shade that would go with any color of your outfit.
This scarf can be made for bigger sizes or smaller sizes from child size to adult by adding more chains to the foundation chain.
If you are new to crochet you could achieve this scarf easily.
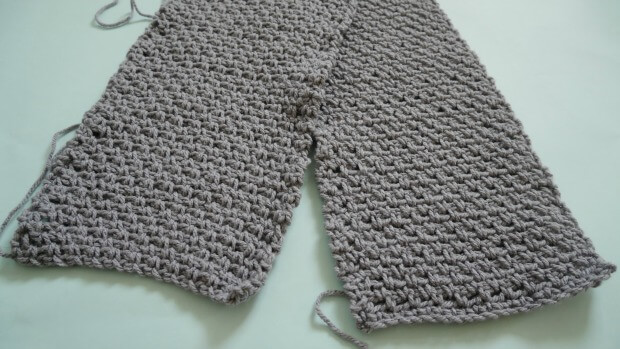
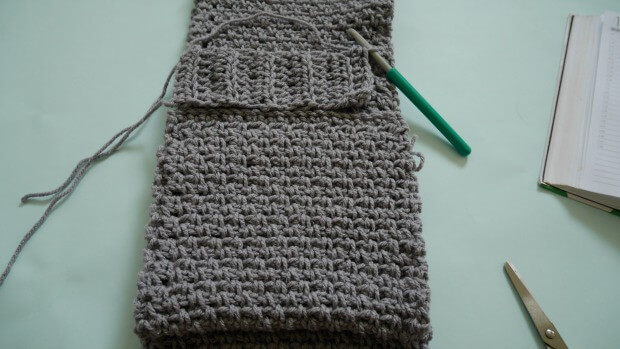
The scarf is made from a crochet moss stitch AKA called linen stitch which is created from single crochet and chain that is a one-row repeat on the entire scarf pattern.
Need more hooded scarf free crochet patterns?
This fairytale-inspired, the red ridding hood easy crochet pocket scarf might be the one that you looking for.
Yarn and yarn substitute for this easy hooded scarf crochet pattern.
In this pattern, I use 100 % acrylic yarn 5 chunky weight or 10 ply you can switch from acrylic yarn to wool for warmer or cotton yarn for cooler and breathable on the warmer day.
Get the free pattern below or this pattern is also available as an inexpensive, ad-free, PDF printable instant download in my etsy shop. Thank you so much for your love and support. I am really appreciate you.
Let’s get started crocheting the Chole hood scarf, shall we?
Material for this hooded scarf pattern.
- I used Lion brand wool Ease chunky yarn or for non-wool, I recommend Brava Bulky yarn from knit pick.
- Yarn weight 5 chunky or 10 ply
- 6 mm crochet hook or J/10 US hook size
- Sewing yarn needle
Skill and abbreviations
- (American crochet terms)
- You will need to know how to make
- Sl st (slip stitch)
- sc which mean single crochet
- hdc which mean half double crochet
- Blo which mean crochet in back loop only
- ch, Chain
- slip knot
Gauge: 3 stitches x 3 rows = 1 square inch
Finished Size Approximately: one size fits all
Measurement of the scarf.
- 7 inches wide
- 70 inches long lay flatted without a pocket and the band
Add to your ravelry queue.
Chloe crochet hooded scarf pattern instruction.
The body part of the scarf.
Start off by making a slip knot Then make 22 chains foundation chain.
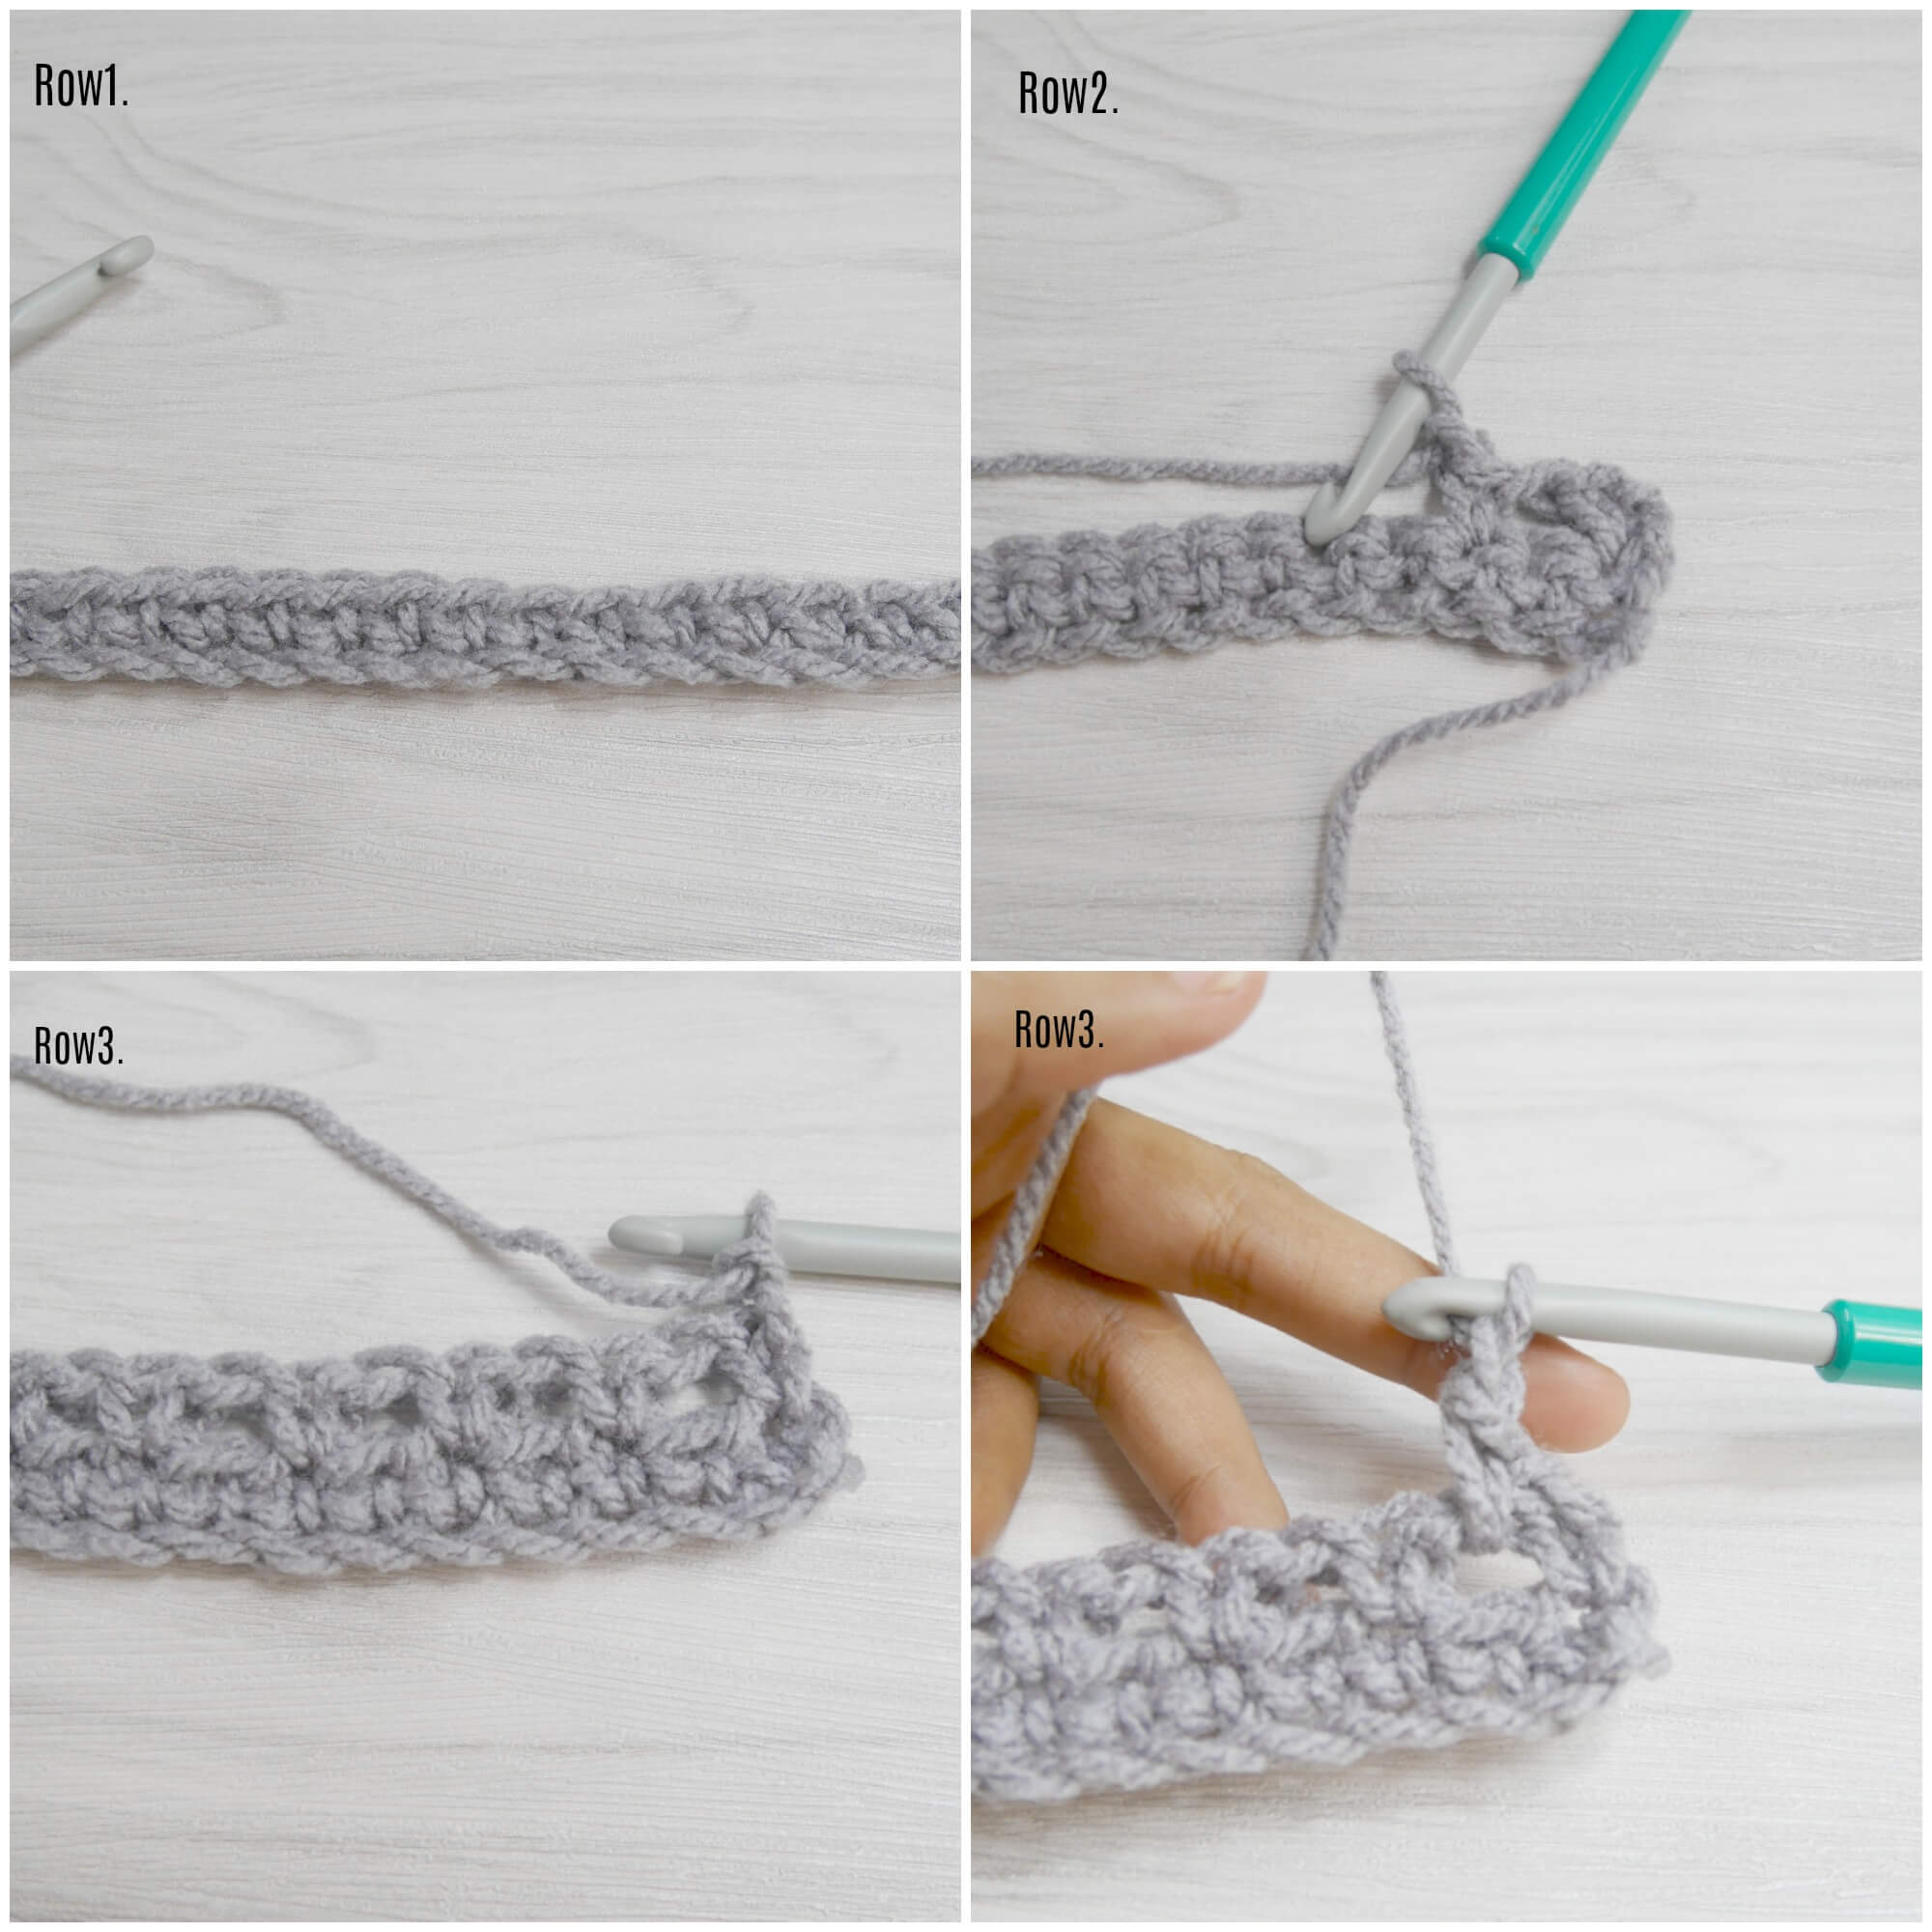
Row 1: sc in each chain across, ch1 turn
Row 2: sc in the next stitch from hook * ch1, skip 1 st, sc in next st * repeat * to * across until the end of the row. Ch1 turn
Row 3: sc in the first ch space * ch1, skip 1 st, sc in next ch space * repeat * to * across until the end of the row and make sc on the turning ch. Ch1 turn
Row 4: Repeat row 3 until you have reached the desired length.
For my scarf, I measure about 70 inches long and 7 inches wide.
Finish off and leave the long tail for sewing,
Time to crochet the hoodie.
Start off by making a slip knot Then make 28 chains foundation chain.
Row 1: sc in each chain across, ch1 turn
Row 2: sc in the next stitch from hook * ch1, skip 1 st, sc in next st * repeat * to * across until the end of the row. Ch1 turn
Row 3: sc in the first ch space * ch1, skip 1 st, sc in next ch space * repeat * to * across until the end of the row and make sc on the turning ch. Ch1 turn
Row 4: Repeat row 3 until you have reached the desired length.
For my hood, I measure about 13 inches deep and 10 inches wide ( without a ribbed band).
and Measure in one piece of a rectangle.
26 inches long and 10 inches wide.
Assemble the crochet hood part of this pocket scarf pattern.
Lay the long rectangle flat then fold them in half and we stitch up the back of the rectangle to form the hoodie by using a yarn needle.
If you guys can’t picture how I did this then have a look at how I made my teddy bear hoodie hat have more detail on it.
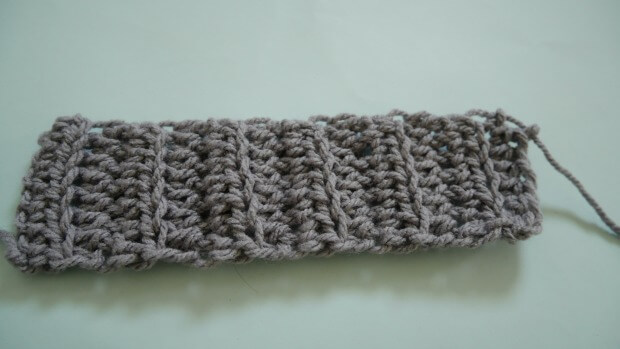
Crochet a ribbed band.
A ribbed band We make separate from the scarf and hoodie.
So we make 2 pieces for each side of the pocket and 1 piece for the hoodie hat.
Start off by making a slip knot Then make 8 chains (foundation chain) .
Row1. hdc in the next chain from hook, then 1hdc in the next all across until the end of the row, Turn chain 1
Row 2. Blo, hdc in the next stitch from hook, then 1hdc in the next all across until the end of the row, Turn chain 1
Repeat row 2 until you have reached the length that matches the width of the scarf.
The ribbed band for the hoodie I measure mine is 26 inches long and 2 inches wide.
For the pocket part of the scarf the ribbed band I measure mine is 7 inches long and 2 inches wide.
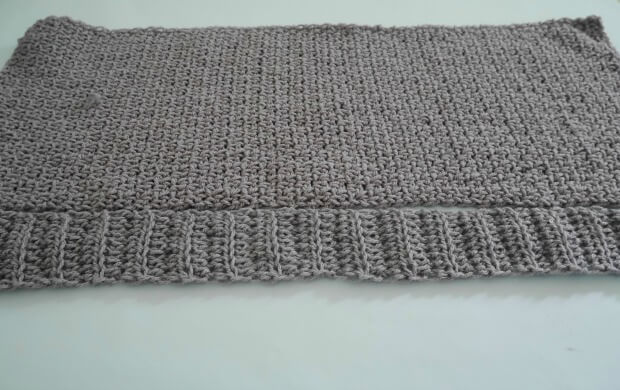
Now we are ready to create the pockets for Chloe’s hood scarf.
We attach the ribbed band to each end of the scarf by sewing using a yarn needle after we finished attaching the ribbed band.
Then we take one end of the scarf and fold it back 7 inches on top of the scarf ( including the ribbed band).
This will create the pocket.
Repeat on the other end of the scarf.
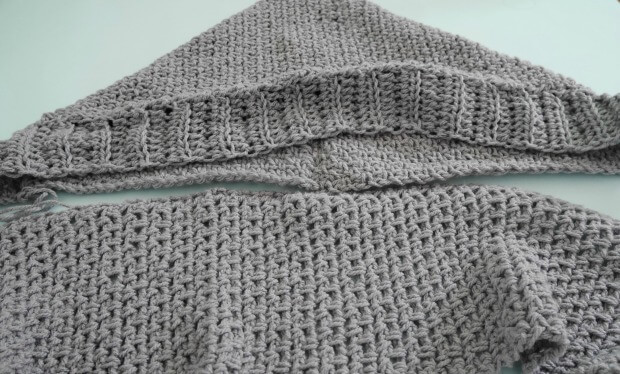
For the ribbed band of the hood, we attached them by sewing.
After we have done with 1 piece of the hoodie and the pocket scarf then we attach the hoodie to the pocket scarf by sewing using a yarn needle.
That’s all we did!
Now you have your very own Chloe scarf.
Visual learner? see more step-by-step photo tutorials of how I assemble the hooded scarf.
have a look at the red riding hood scarf with pockets they have the exact same method.
If you make one I would love to see your creation tag me on Instagram!
I would love to see your creation.
Happy crocheting.
Stephanie
Sunday 18th of December 2022
Thank you so much for this pattern! It was my first time ever attempting to sew crocheted pieces together and this pattern has given me confidence that I can create more complex patterns. I've just been doing simple blankets for years and years.
Tia
Thursday 26th of August 2021
How much yarn does it require?
Cheryl
Tuesday 7th of January 2020
I don’t see a pattern here for the pockets since this is s “pocket hooded scarf”. Am I missing it somewhere in the pattern?
jane
Saturday 11th of January 2020
Hi cheryl, the pocket is just fold the scarf up at sew it to the scarf body, instruction is in the assembly.
Stanette Cavazos
Saturday 2nd of February 2019
I wish u had a knitted version of this since I don't crochet. Thank you.
Andrea
Friday 30th of November 2018
How many skeins of lion brand thick and quick would you recommend?
Pam
Wednesday 26th of January 2022
@jane, 200 grams? One skein of Lion Wool ease is 140 grams so that would mean only 2 skeins were needed. That doesn't seem like enough. I'd love to make this but I'd like to buy enough for the yarn to be from the same dye lot. I'm also retired, on a fixed income and would be making it as a gift so I don't want to buy 5 skeins if I only need 2.
jane
Sunday 2nd of December 2018
HI Andrea , I use about 200 gram but not sure in how many yard.