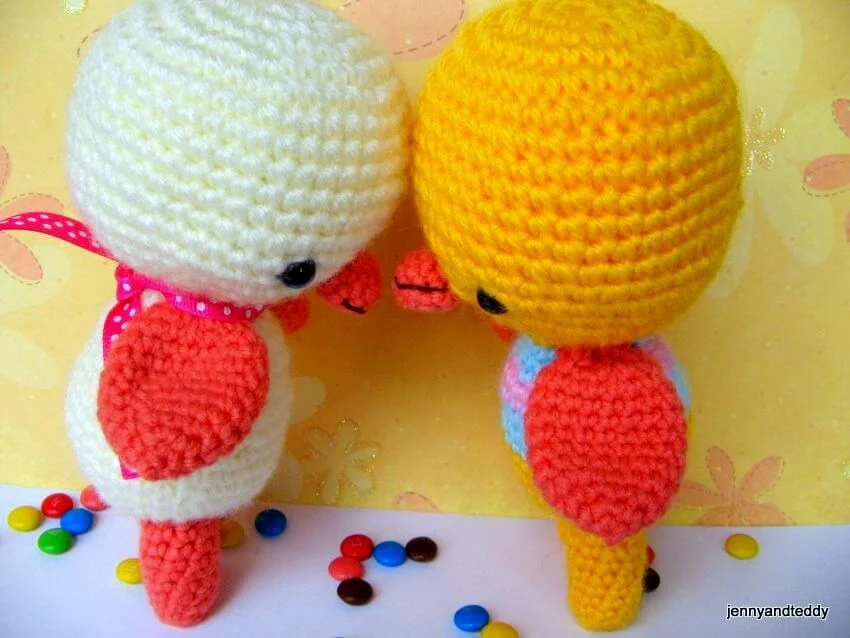
Hello beautiful one, welcome back to another cute crochet duck pattern! Let’s Meet two little duck amigurumi.
These two little ducks will bring you joy with the bright cheerful color of the happy spring season.
I had picked the perfect yellow shade for these two boys.
They were born into a loving family, caring and cheerful.
These two boys are a perfect travel size you guys can put them in your backpack to adventure with you, they are a great size as they can fit in your hand.
To be honest, when I made these two tiny ducks, I was having the idea to make another version of this tiny crochet duck applique pattern and the easy duckling pattern that had a 3D effect like a soft toy for my boy.
Oh well, here they come the twin ducky! So tell me what you think about them.

How to crochet a duck step by step.
Well, this duck amigurumi had a round shape for the head, a flat wing, and cute tiny legs.
The body of the duck has an oval shape which creates by a crochet decrease.
This two-boy duck is created from exactly the same pattern but the body color is just used different color yarn to spice them up a bit.
The ribbon collar is optional.
Easy Crochet duck amigurumi free pattern instruction.
Finish Size.
- Approximately 6.5-7 inches tall
- The size of them may vary depending on the size of the yarn and crochet hook
Materials.
To make you will need.
- Acrylic yarn in this pattern, I normally used 8 ply
- Plastic eyes with safety backing 7.5mm (you can find it at any craft shop)
- Fiberfill polyester for stuffing
- Sewing yarn needle and embroidery
- Ribbon or button
- Crochet hook size1.25mm ‘or 3.0 mm hook and craft glue
Pattern Note.
This pattern works in rounds continuously, you may use a contrasting color short piece of yarn to mark the beginning of each round.
When round one ends. Do not join at the end of each round; you will begin the second round in the next stitch.
At the end of each round, I have given the number of stitches you should have. If you are off by 1 or 2 stitches, do not worry about it.
Skill and abbreviations.
American crochet term.
You will need to know how to make a magic ring or adjustable ring
- Single crochet (sc)
- Crochet increase (inc) which mean-make 2 single crochet in the same stitch
- Crochet decrease (dec) which mean-Crochet 2 stitches together
- Stitch (st)
- * = Repeat stitches from * to end of *
- Chain (ch)
- Slip stitch (sl st)
- change color
A beginner guide for crocheted your first amigurumi tutorial is here check it out.
- Beginner guide to making your first-ever amigurumi
- How to start a magic ring or adjustable ring
- How to put eyes on amigurumi
- How to join the amigurumi leg
Let’s start with crocheting a duck head Colour of your choice.

You will work from top to bottom
Round1. Make magic ring and 7sc in ring (7)
Round2. 2sc in each st around (14)
Round3. *Sc in next st, 2sc in next st* and repeat from * around (21)
Round4. *Sc in next 2 st,2sc in next st* and repeat from * around (28)
Round5. *Sc in next 3 st,2sc in next st* and repeat from * around (35)
Round6. *Sc in next 4 st,2sc in next st* and repeat from * around (42)
Round7-14. Sc in each st around (42)
Round15. *sc in each of next 5 st,dec 1* and repeat from * around (36)
Round16. *sc in each of next 4 st,dec 1* and repeat from * around (30)
Round17. *sc in each of next 3 st,dec 1* and repeat from * around (24)
Round18. *sc in each of next 2 st,dec 1* and repeat from * around (18)
Round19. *sc in each of next st,dec 1* and repeat from * around (12) then finish off and leave long tail for sewing. And stuffing polyester firmly.
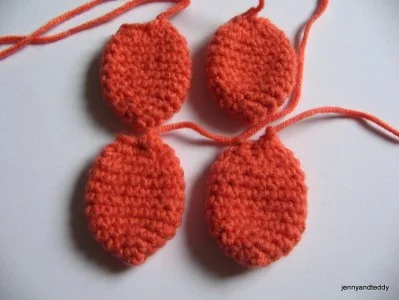
Duck Wings color of your choice.

Make 4 pieces
Round1. Make magic ring and 4sc in ring (4)
Round2. 2sc in each st around (8)
Round3. *Sc in next st, 2sc in next st* and repeat from * around (12)
Round4. *Sc in next 2 st,2sc in next st* and repeat from * around (16)
Round5-10. Sc in each st around (16)
Round11. *sc in each of next 2 st, dec 1* and repeat from * around (12)
Round19. *sc in each of next st, dec 1* and repeat from * around (8) then finish off and leave long tail for sewing. And do not stuff polyester.
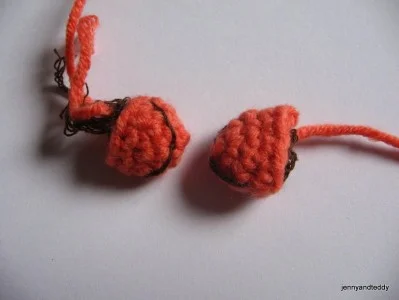
Crocheted the tiny ducky Mouths.

Make 2 pieces (color of your choice)
Round1. Make magic ring and 4sc in ring (4)
Round2. 2sc in each st around (8)
Round3-4. Sc in each st around (8)
Finish off and leave the long tail for sewing. And do not stuff polyester.
Crochet the Legs color of your choice.

Make 2 pieces
Round1. Make magic ring and sc in ring (9)
Round2-8. sc in each st around (10)
Then finish leaving a long tail for sewing and stuffing polyester just a little.
Crocheting the Body color of your choice.

You will work from bottom to top
Round1. Make a magic ring and 6sc in ring (6) Yellow.
Round2. 2sc in each st around (12) yellow.
Round3. *Sc in next st, 2sc in next st* and repeat from * around (18) yellow
Round4. *Sc in next 2 st,2sc in next st* and repeat from * around (24) yellow
Round5. *Sc in next 3 st,2sc in next st* and repeat from * around (30) yellow
Round6-9. Sc in each st around (30) Yellow
Round10-11. Sc in each st around (30) blue
Round12. *sc in each of next 4 st,dec 1* and repeat from * around (25) blue
Round13-14. Sc in each st around (25) pink
Round15. *sc in each of next 3 st,dec 1* and repeat from * around (20) blue
Round16. *sc in each of next 2 st,dec 1* and repeat from * around (15) blue
Round17. Sc in each st around (15) blue
Then finish off and leave the long tail for sewing. And stuffing polyester firmly.
Assemble this cute crochet duck.

Sew mouth to the face and body to the head.
Then wings and legs.
All done!

Thank you for reading and enjoy making them!


Melanie
Thursday 18th of October 2012
HI Jane, Thank you for sharing these cute little duckies, I want to make for my neice, she is going to love it, so lovely .
jane
Friday 19th of October 2012
I am glad you like them and thank you for stopping by my blog.