I am just in loved with this super easy and oh so simple mini mesh crochet stitch and I want to make something with this beautiful stitch. So I end up with making more cardigan again! I am just love making them so much!
The mini mesh stitch is very simple and absolutely beginner friendly, the mesh effect will give the cardigan light and airy at the same time and it because hot and humid here in Thailand so I love to use cotton yarn for everything including this pretty mini mesh cardigan as well. This cardigan also work well with acrylic yarn or wool yarn to keep you a bit warmer in cold weather.
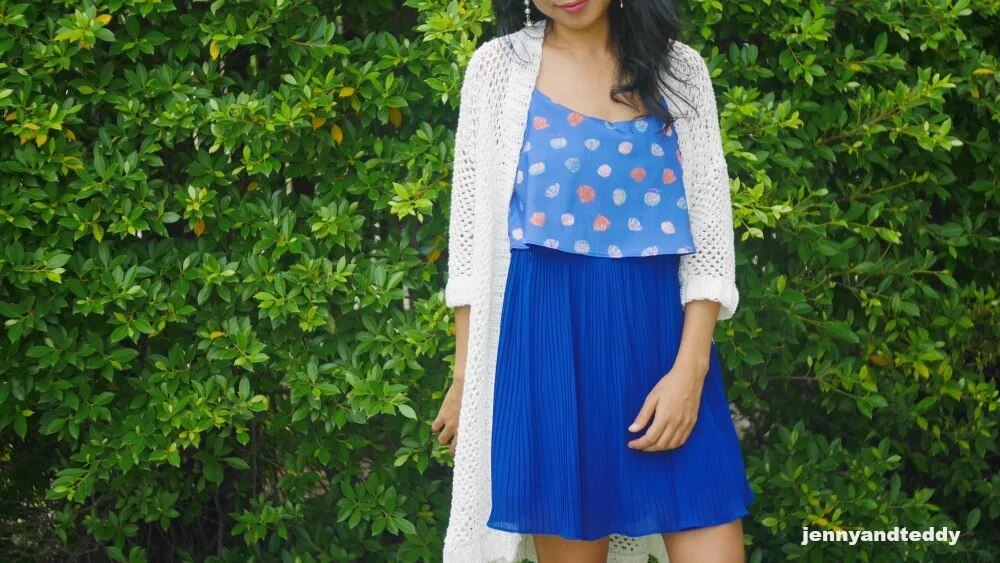
Mini mesh cardigan, They are made up from just 3 rectangles and the ribbing collar are work separately and attach them to the cardigan body. The cuff for the arm they are work separate as well.
at the back.
Have you guy seen my other simple and beginner cardigan yet?
here they are Bluelagoon cardigan with basic granny stitch and trendy to wear.
Lemonade cardigan with super simple single and double crochet stitch combination!
The vacation cardigan , the most popular cardigan right here right now on jennyandteddy blog.
Let’s get start!
– I used Lion brand 24/7 cotton yarn weight 4 aran. I use around 1500 yard.
– 6 mm crochet hook oe J/10 US hook size and 4.0 mm crochet hook
– Sewing yarn needle
-stitch marker
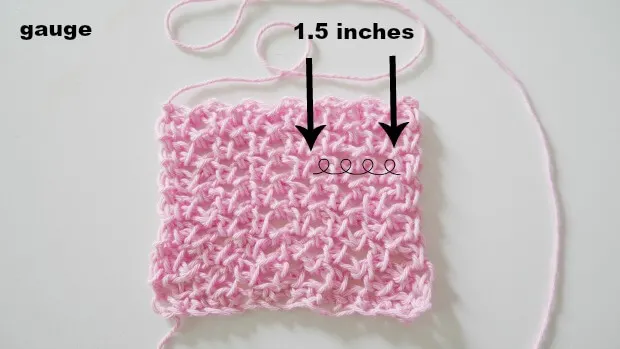
Gauge: 2 group of mini mesh = 1.5 inch
Skill and abbreviations
You will need to know how to make (American crochet term)
-sc which mean single crochet
-hdc which mean half double crochet
-blo which mean back loop only
-ch Chain
-slip knot
-sl st mean slip stitch
This pattern is made for beginners! There is a basic skill level required to make.
Get the free pattern below or this pattern is also available as an inexpensive, ad-free, PDF printable instant download in my etsy shop. Thank you so much for your love and support. I am really appreciate you.
Finished Size Approximately:
This cardigan is made in size small to medium. the other sizes are easy to adjust by just add more chain to the foundation chain to make it bigger. see pattern below.
For me the model wearing this piece, I am 4’9 feet tall.
Video tutorial.
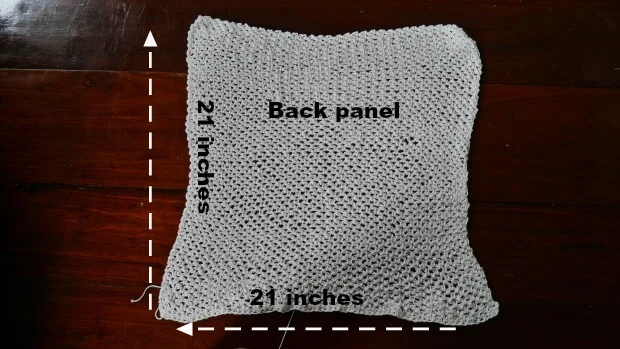
Back panel.
Measurement.
of one rectangle. (back panel)
-21 inches long
-21 inches wide
Pick up crochet hook size 6 mm and Start of by making a slip knot Then make 70 chains for size small and medium (foundation chain multiple of 2).
( size L 80 chain) , ( size XL 90 chain) and ( size 2XL 100 chain).
Row 1: Sc across, ch 2, turn.
Row 2: then skip the first stitch and sl st in the next stitch * ch 2, skip next stitch, sl st in next stitch* repeat * to * across until end of the row. ch2 and turn.
Row3. now you will make sl st in the first group of chain2 of the previous row * ch2, make sl st in the next group of ch2 of the previous row* repeat * to * across until end of the row. ch2 and turn.
Repeat row 3 until you get 21 inch long.
After you finished the back panel then set aside waiting for assembly.
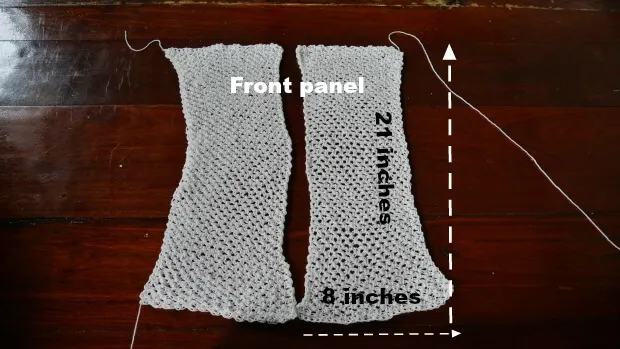
Front panel both side.
-21 inches long
-8 inches wide
Pick up crochet hook size 6 mm and Start of by making a slip knot Then make 30 chains for size small and medium (foundation chain multiple of 2).
( size L 36 chain) , ( size XL 40 chain) and ( size 2XL 50 chain).
Row 1: Sc across, ch 2, turn.
Row 2: then skip the first stitch and sl st in the next stitch * ch 2, skip next stitche, sl st in next stitch* repeat * to * across until end of the row. ch2 and turn.
Row3. now you will make sl st in the first group of chain2 of the previous row * ch2, make sl st in the next group of ch2 of the previous row* repeat * to * across until end of the row. ch2 and turn.
Repeat row 3 until you get 21 inch long.
After you finished the front panel both side then set aside waiting for assembly.
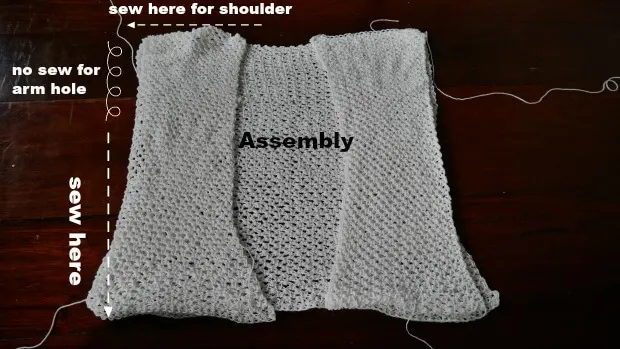
Assembly.
Side Seams to create the arm hole:
Lay back panel first then front panel on top then , Seam up each side of the cardigan with a whip stitch or your prefer stitch method. Leave for the arm hole about 5 inch long at the top upper end . You may adjust the how long of the arm hole to fit your size.
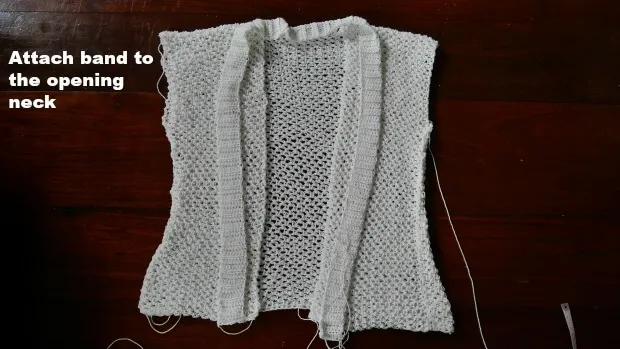
Next we will make the band by crocheting them separate from the body of the cardigan.
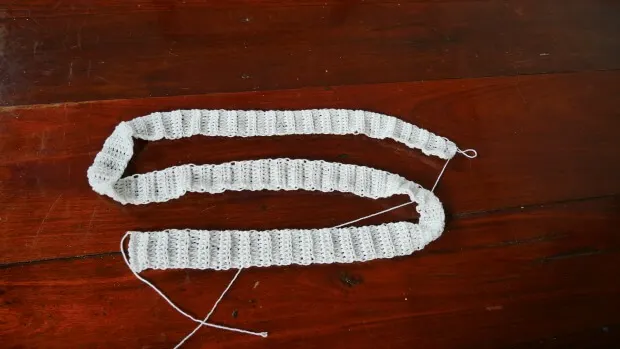
Pick up your 4.0 mm crochet hook and start with making a slip knot and 9 chains and crochet row by row the back loop only until you get the length that matches the length of the opening neck of the cardigan.
Row1. crochet 1hdc in each of the next 8 chains from hook, ch1 turn
Row2. crochet 1hdc in each of the next stitches from hook ( blo only), ch1 turn
Repeat round 2 until you get the length matching the opening neck!
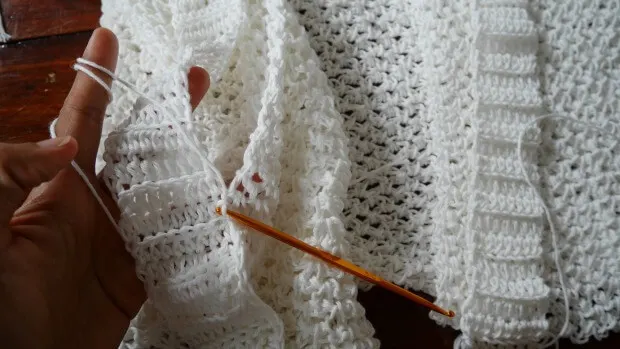
After you got the length of band that match the length of the opening neck now it time to attach them I attach them by sc or you can attach them with you favorite method ( whip stitch) or else.
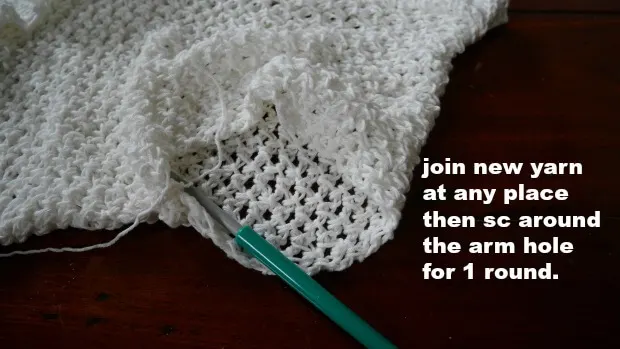
After you finished attached band to the opening neck then we will work on the arm by join new yarn at any place of the armhole then sc along the edge of the armhole for 1 round. Start one side at a time.
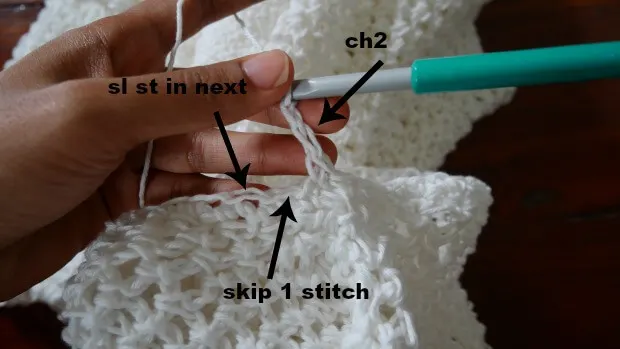
round2. we will start to make mini mesh stitch by *ch2 ,skip next stitch then sl st in the next stitch* repeat * to * and around.
round3. now you will make sl st in the first group of chain2 of the previous row * ch2, make sl st in the next group of ch2 of the previous row* repeat * to * and around.
Repeat row 3 until you get 8 inch long or your desired length of the arm.
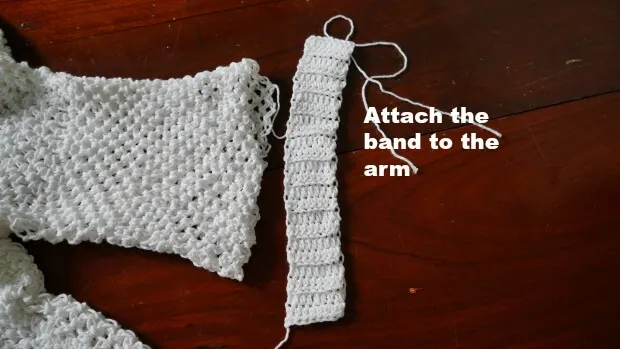
Making the cuff make 2 pieces.
Next we will make the band by crocheting them separate from the armhole.
Pick up your 4.0 mm crochet hook and start with making a slip knot and 9 chains and crochet row by row the back loop only until you get the length about 10 inches.
Row1. crochet 1hdc in each of the next 8 chains from hook, ch1 turn
Row2. crochet 1hdc in each of the next stitches from hook ( blo only), ch1 turn
Repeat round 2 until you get the length about 10 inches.
Now it time to attached the band to the armhole by sewing I use whipstitch.
Finally.
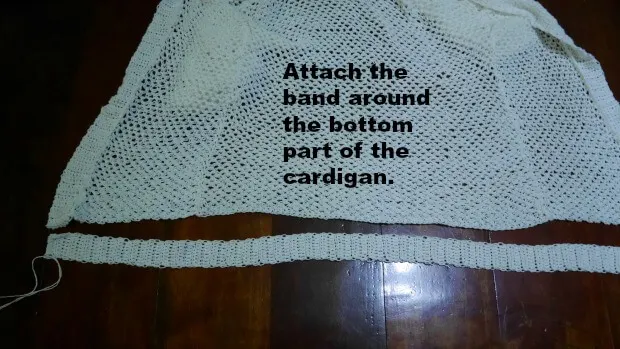
Making the ribbing band to attached to the bottom part of the cardigan make 1 piece.
Next we will make the ribbing band by crocheting them separate and attached them to the bottom part of the cardigan.
Pick up your 4.0 mm crochet hook and start with making a slip knot and 9 chains and crochet row by row the back loop only until you get the length that match the bottom part of cardi.
Row1. crochet 1hdc in each of the next 8 chains from hook, ch1 turn
Row2. crochet 1hdc in each of the next stitches from hook ( blo only), ch1 turn
Repeat round 2 until you get the length that match the bottom part of the cardigan
Now it time to attached the band to the bottom part of the cardigan by sewing I use whipstitch.
Now enjoy your new cardigan!

If you make one I would love to see your creation tag me on Instagram!




Alisa shamam
Sunday 3rd of October 2021
Hello dear, .can you please tell me the length of the cardigan for a size large?
Thank you, .alisa shsman
jane
Monday 4th of October 2021
hi aLISA ABOUT 23-24 INCH WIDE AND LONG IS DEPEND ON HOW LONG YOU WANT THE CARDIGAN TO BE.
Kimberly
Saturday 7th of August 2021
Can you tell me approximately how much yarn in yards this will take for a size large?
jane
Monday 9th of August 2021
Hi Kimberly for large size is about 1800 yard.
Hamidat
Thursday 1st of October 2020
can i sell what i make with your patterns
jane
Thursday 1st of October 2020
Hi Hanmidat yes you can sell what u make sweetie,
shayla
Tuesday 27th of November 2018
Hi Darlin Do you have a printable sheet of this pattern
jane
Wednesday 28th of November 2018
the pdf will be coming soon thanks u Shayla.