

Let me tell you why I love crochet granny stitch cardigan more than the classic granny square cardigan.
Don’t get me wrong, girl, I loove the beauty of a crochet granny square that; they are like a little fun puzzle that you can put together and seam each piece of a square to create a colorful cardigan..
But for me, sometimes, the lazyyy girl crochet version of me starts to kick in , so I don’t have the patience to seam each square together to make it into a big piece; that’s why the granny stitch comes in handy.
I couldn’t be happier with this crochet granny stitch pattern in row because I could crochet into the big piece fast with no seaming.
Moreover, the granny stitch still keeps the classic look of the granny square, in my opinion.

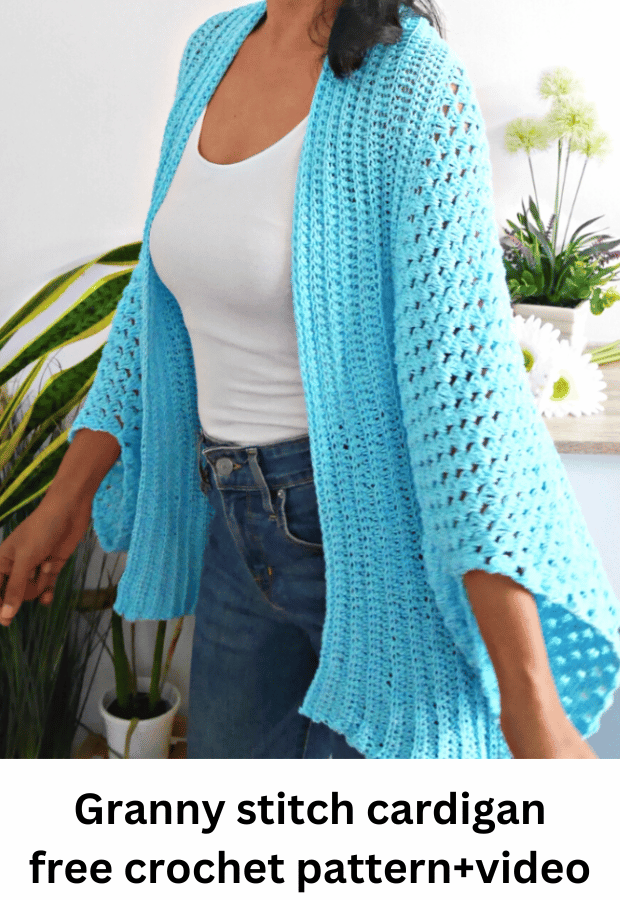
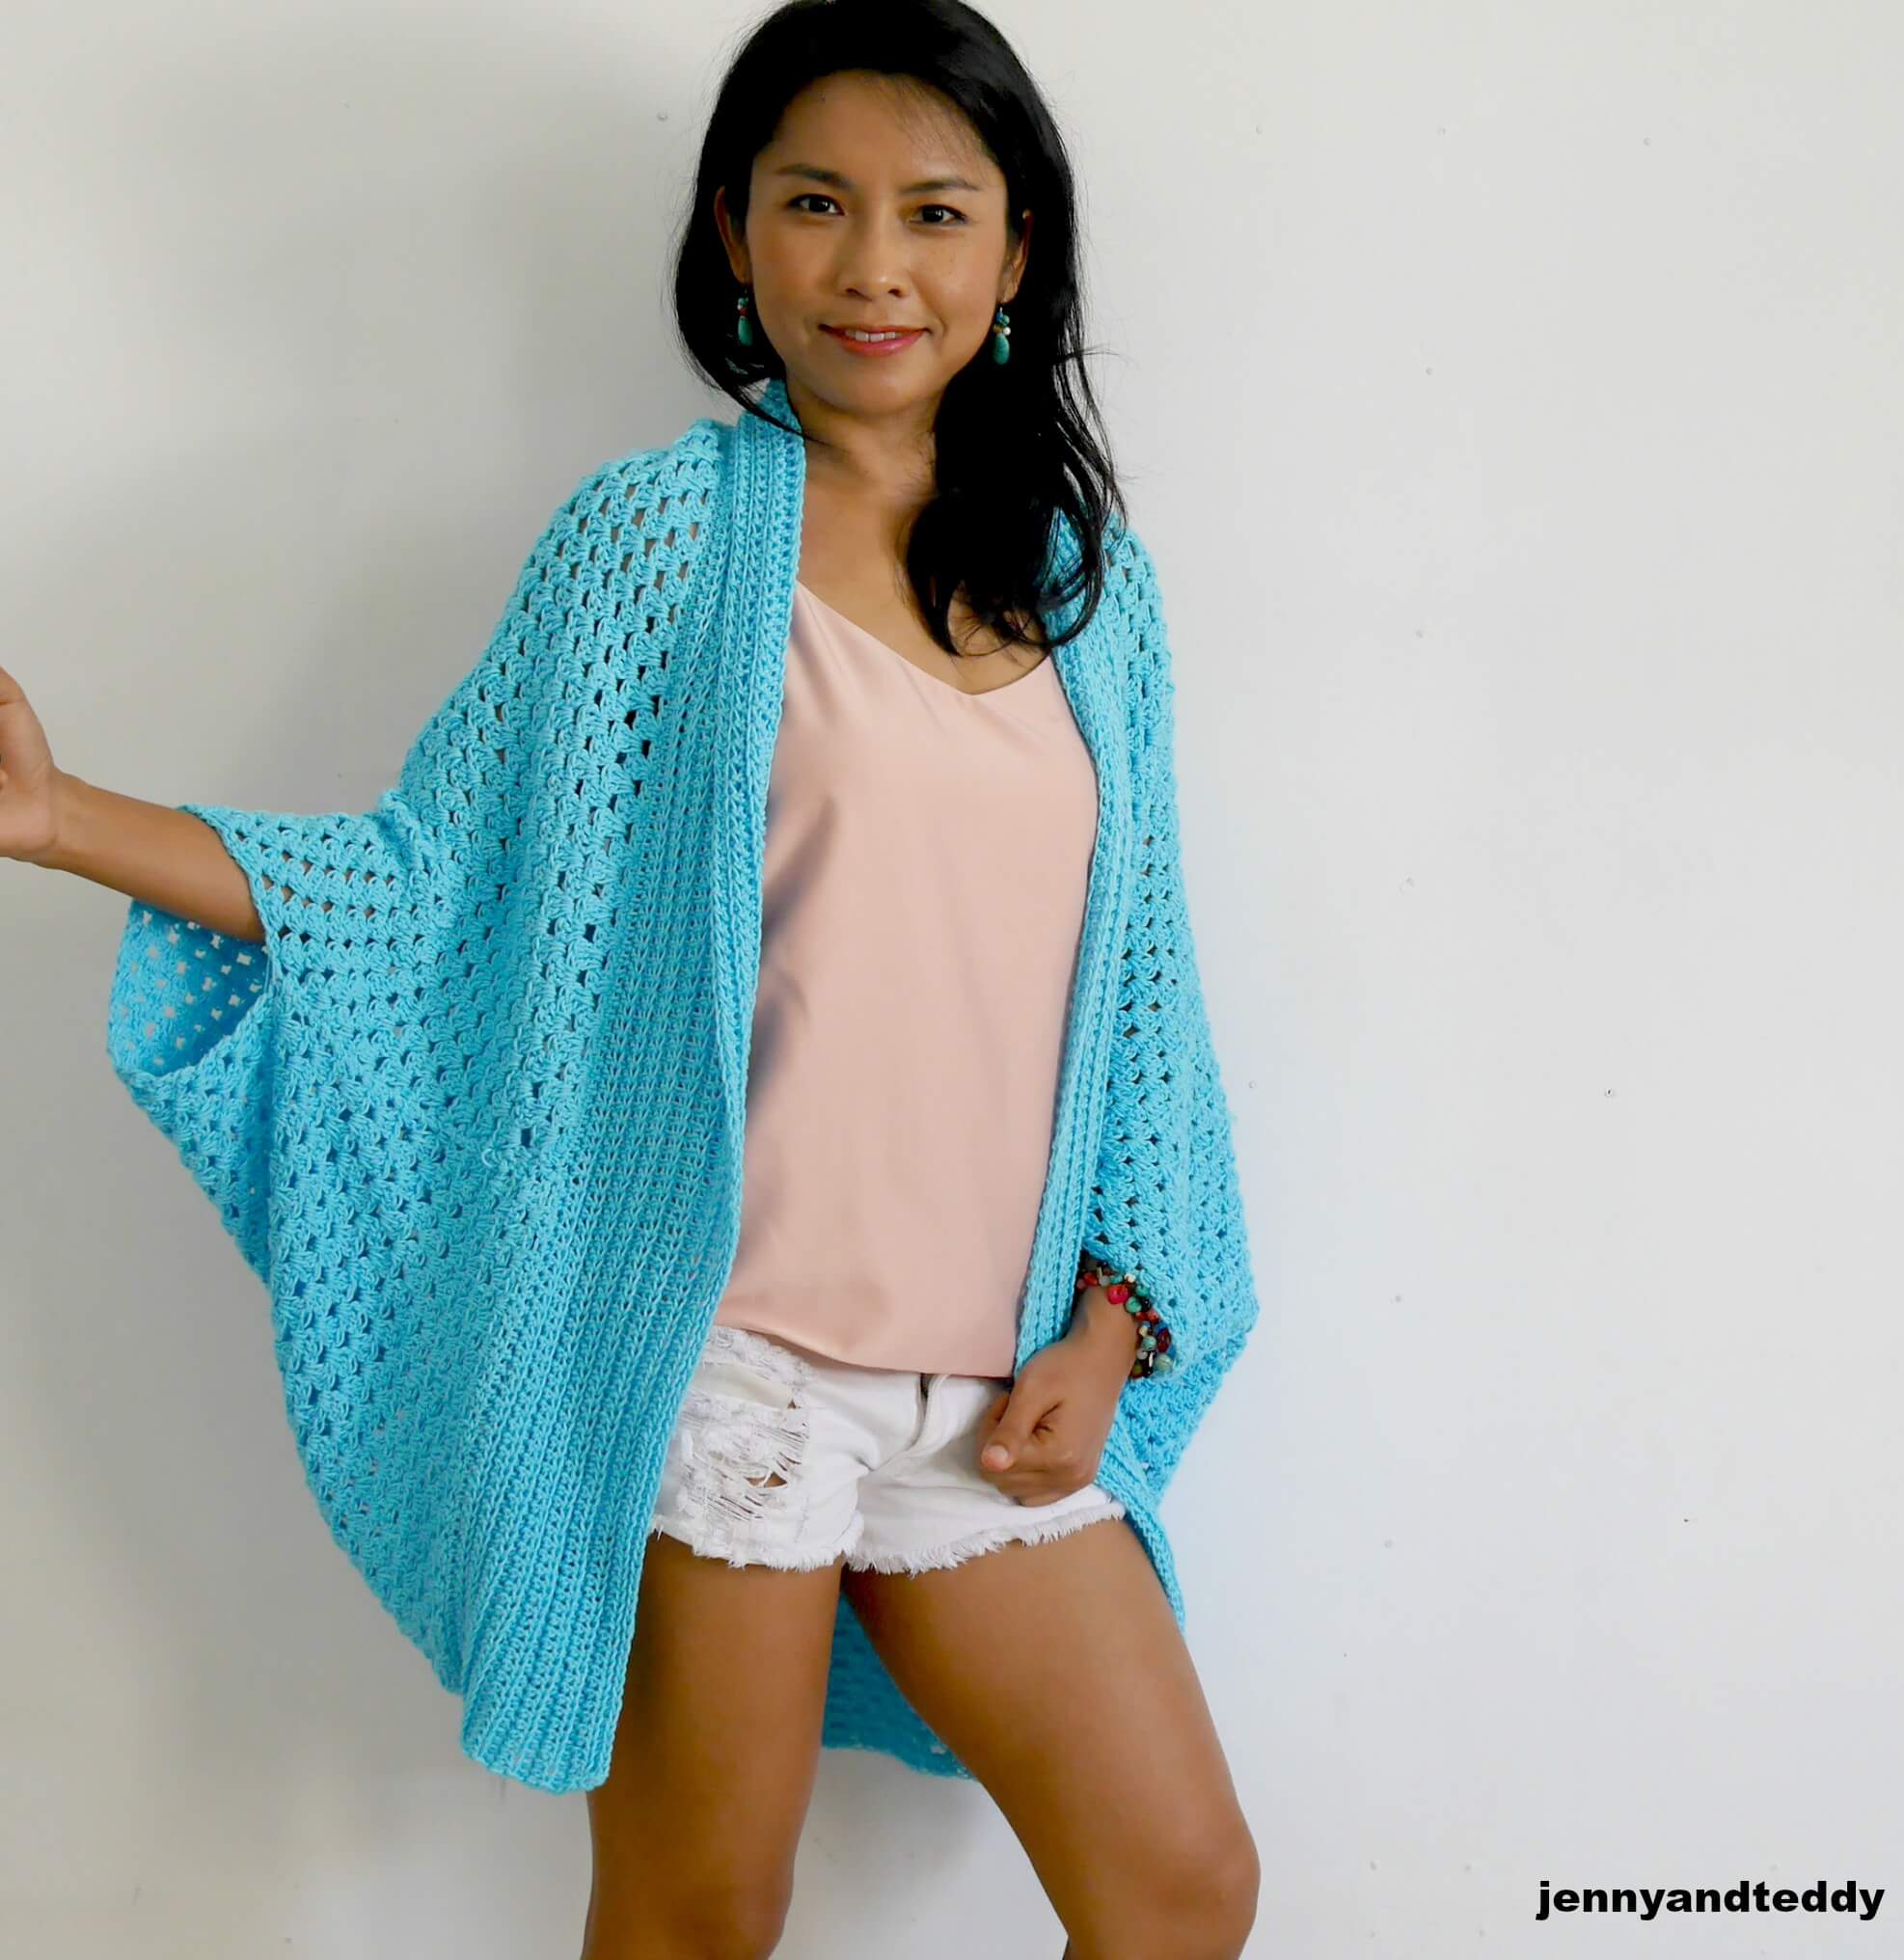
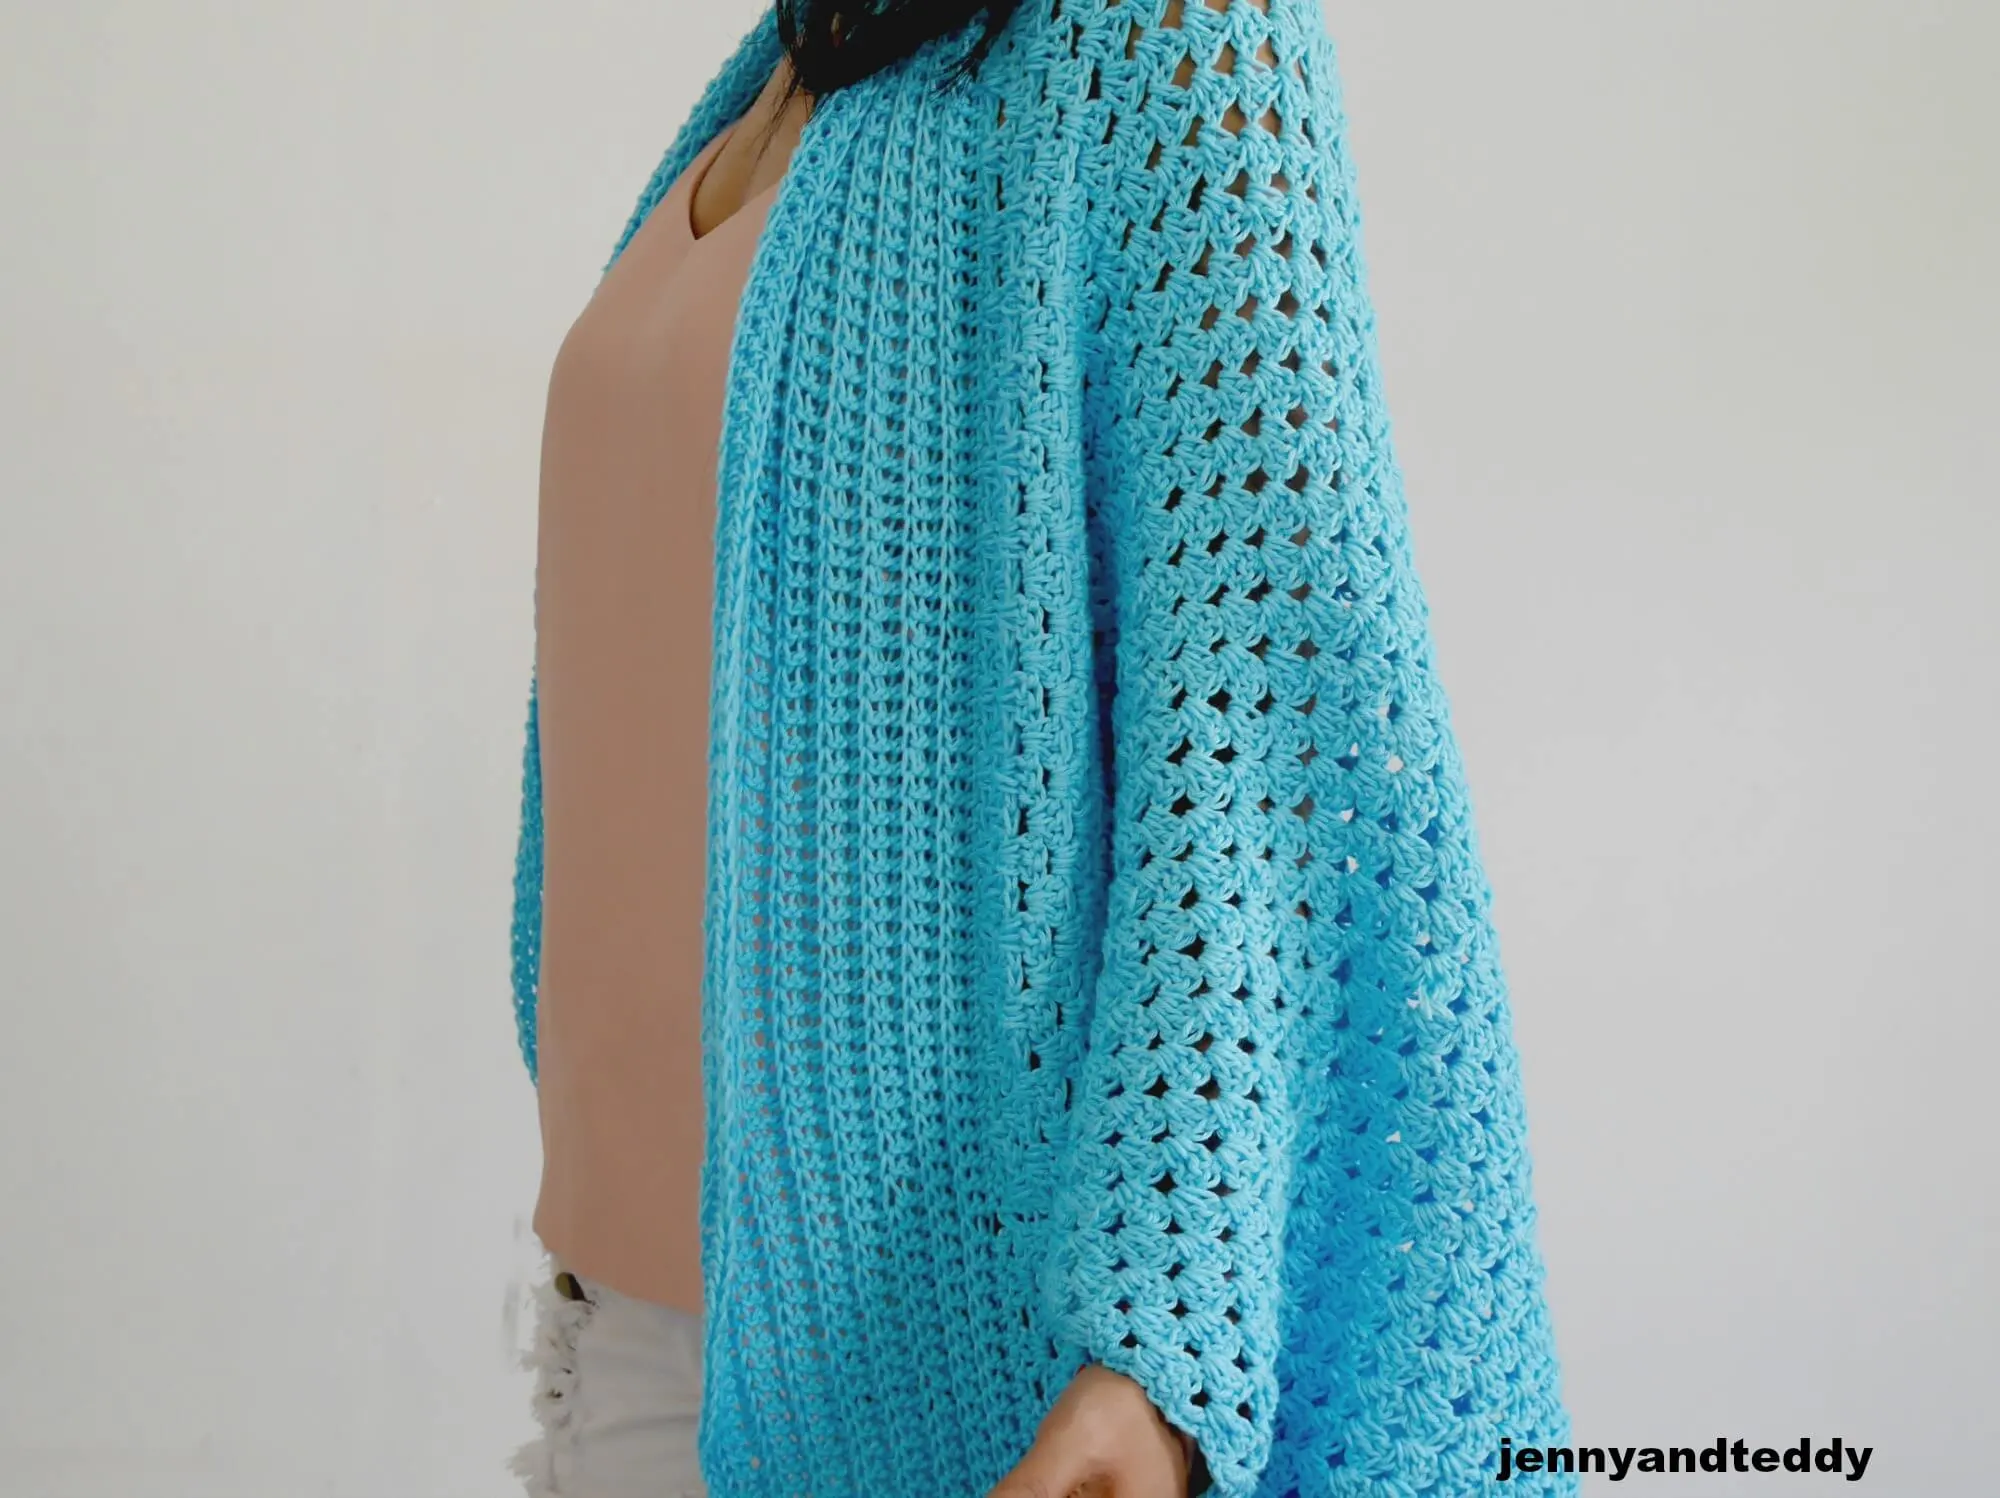
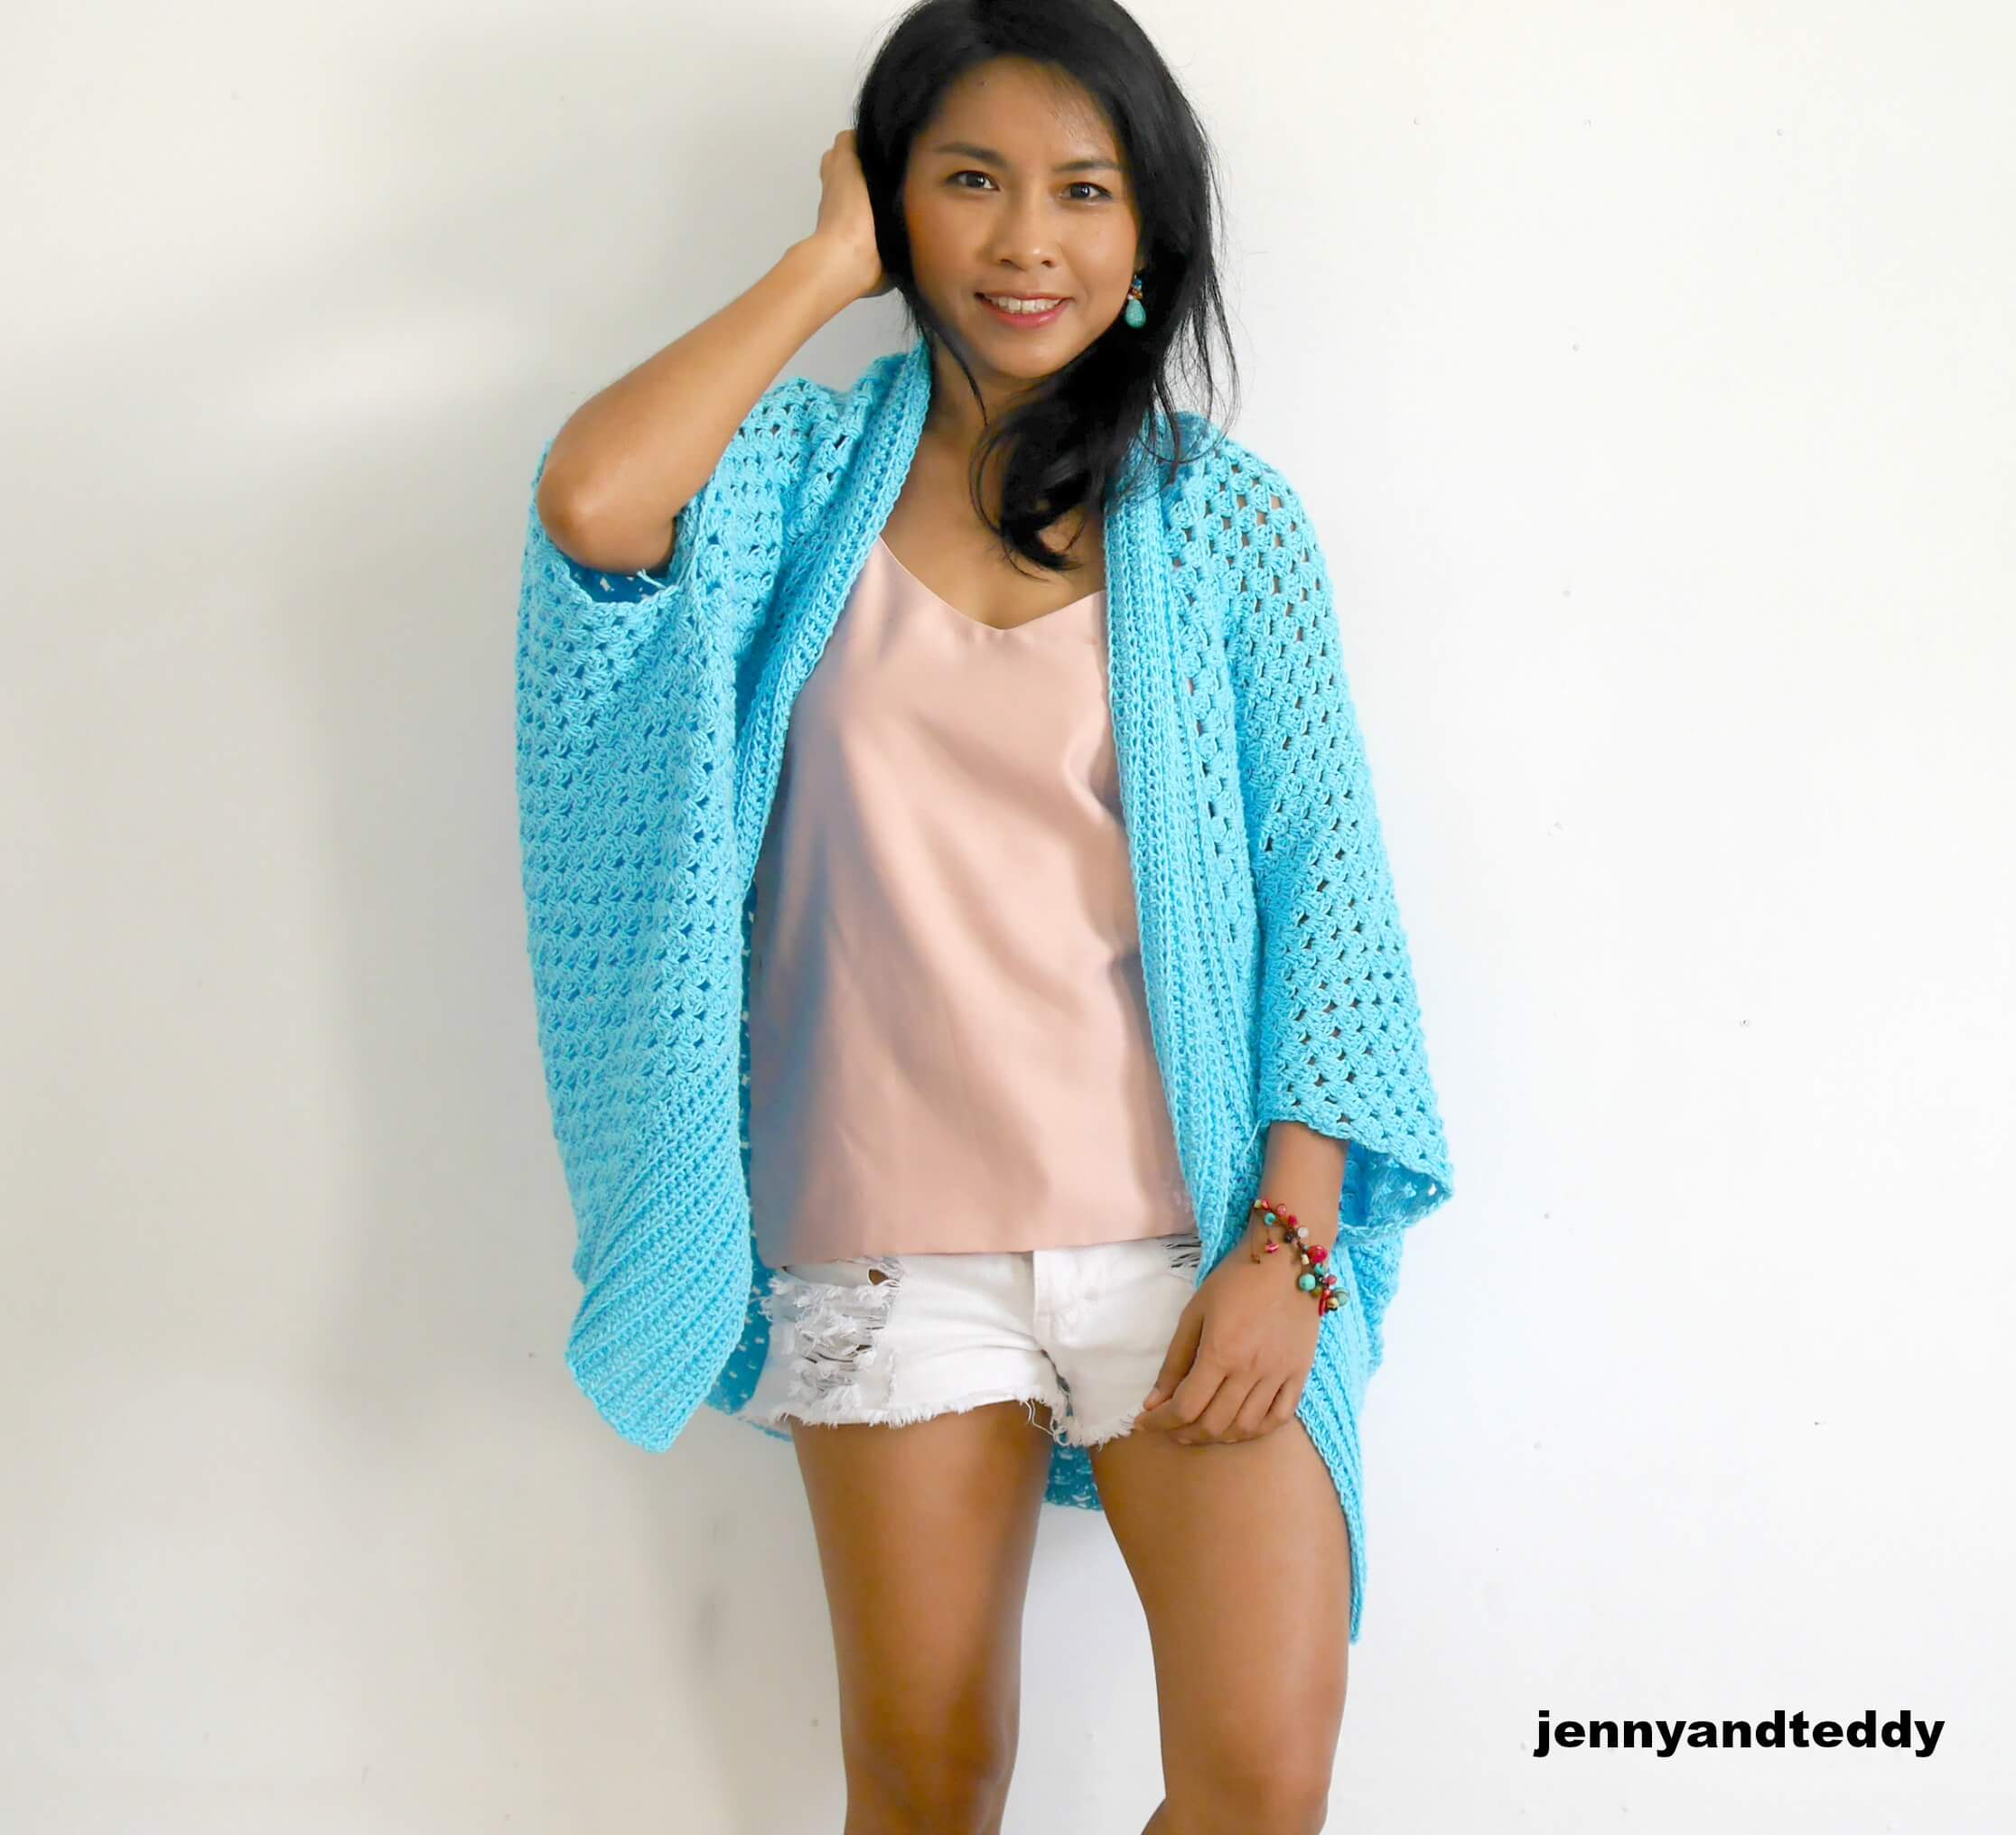
Simple crochet granny stitch cardigan that you will love.
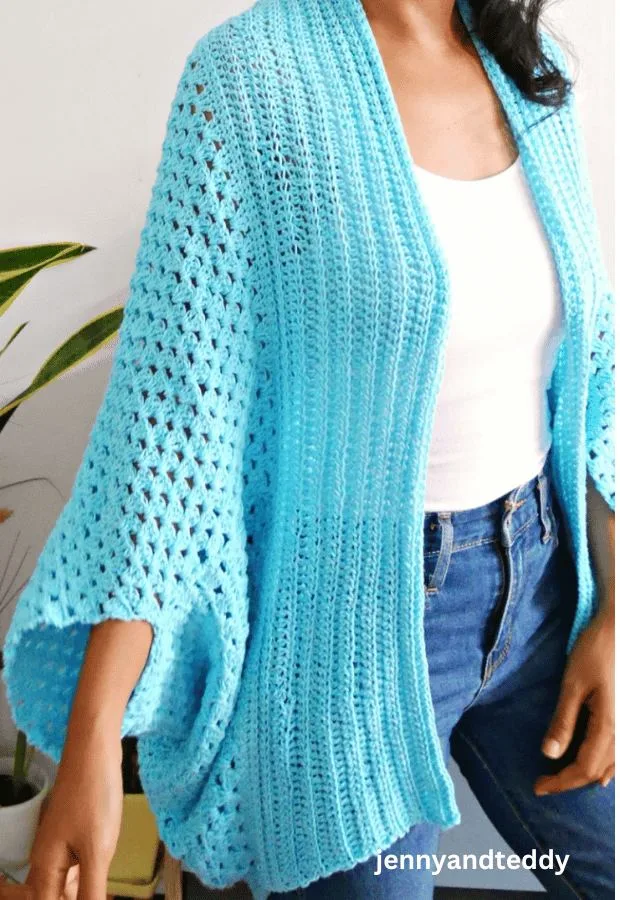
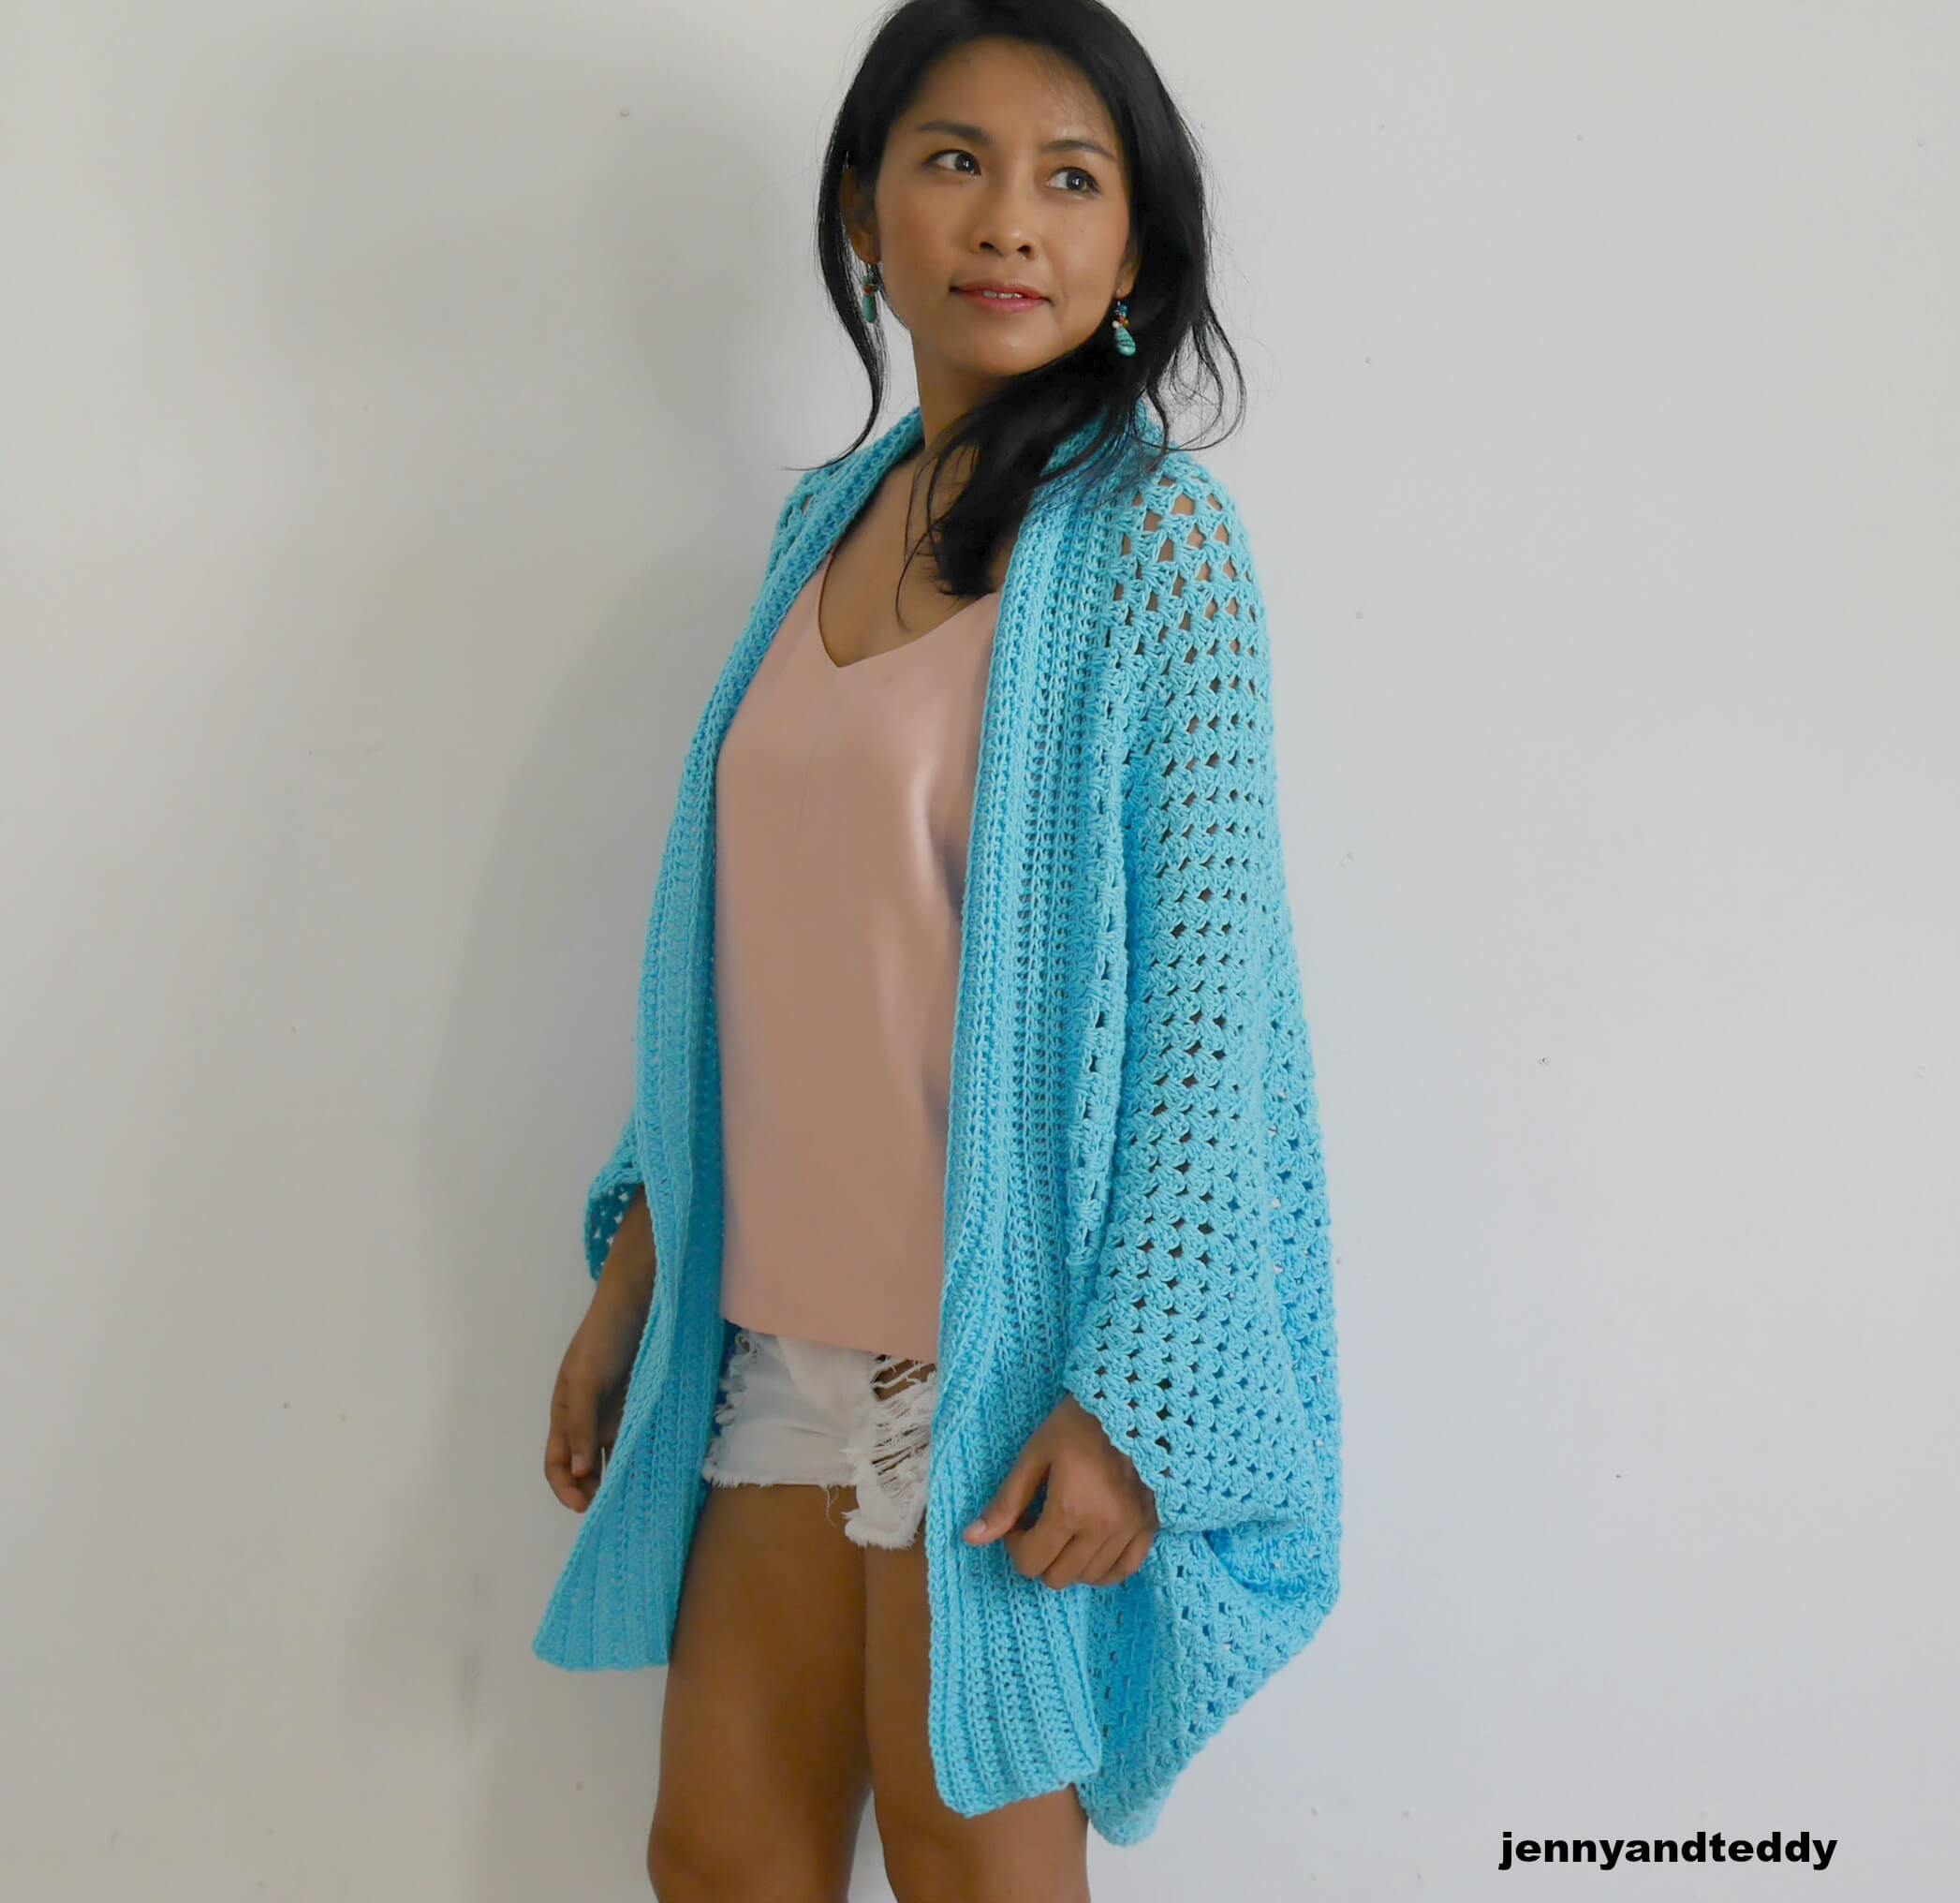
This Blue lagoon cardigan is cozy, and oversize with beautiful drapes perfect for spring and fall season.
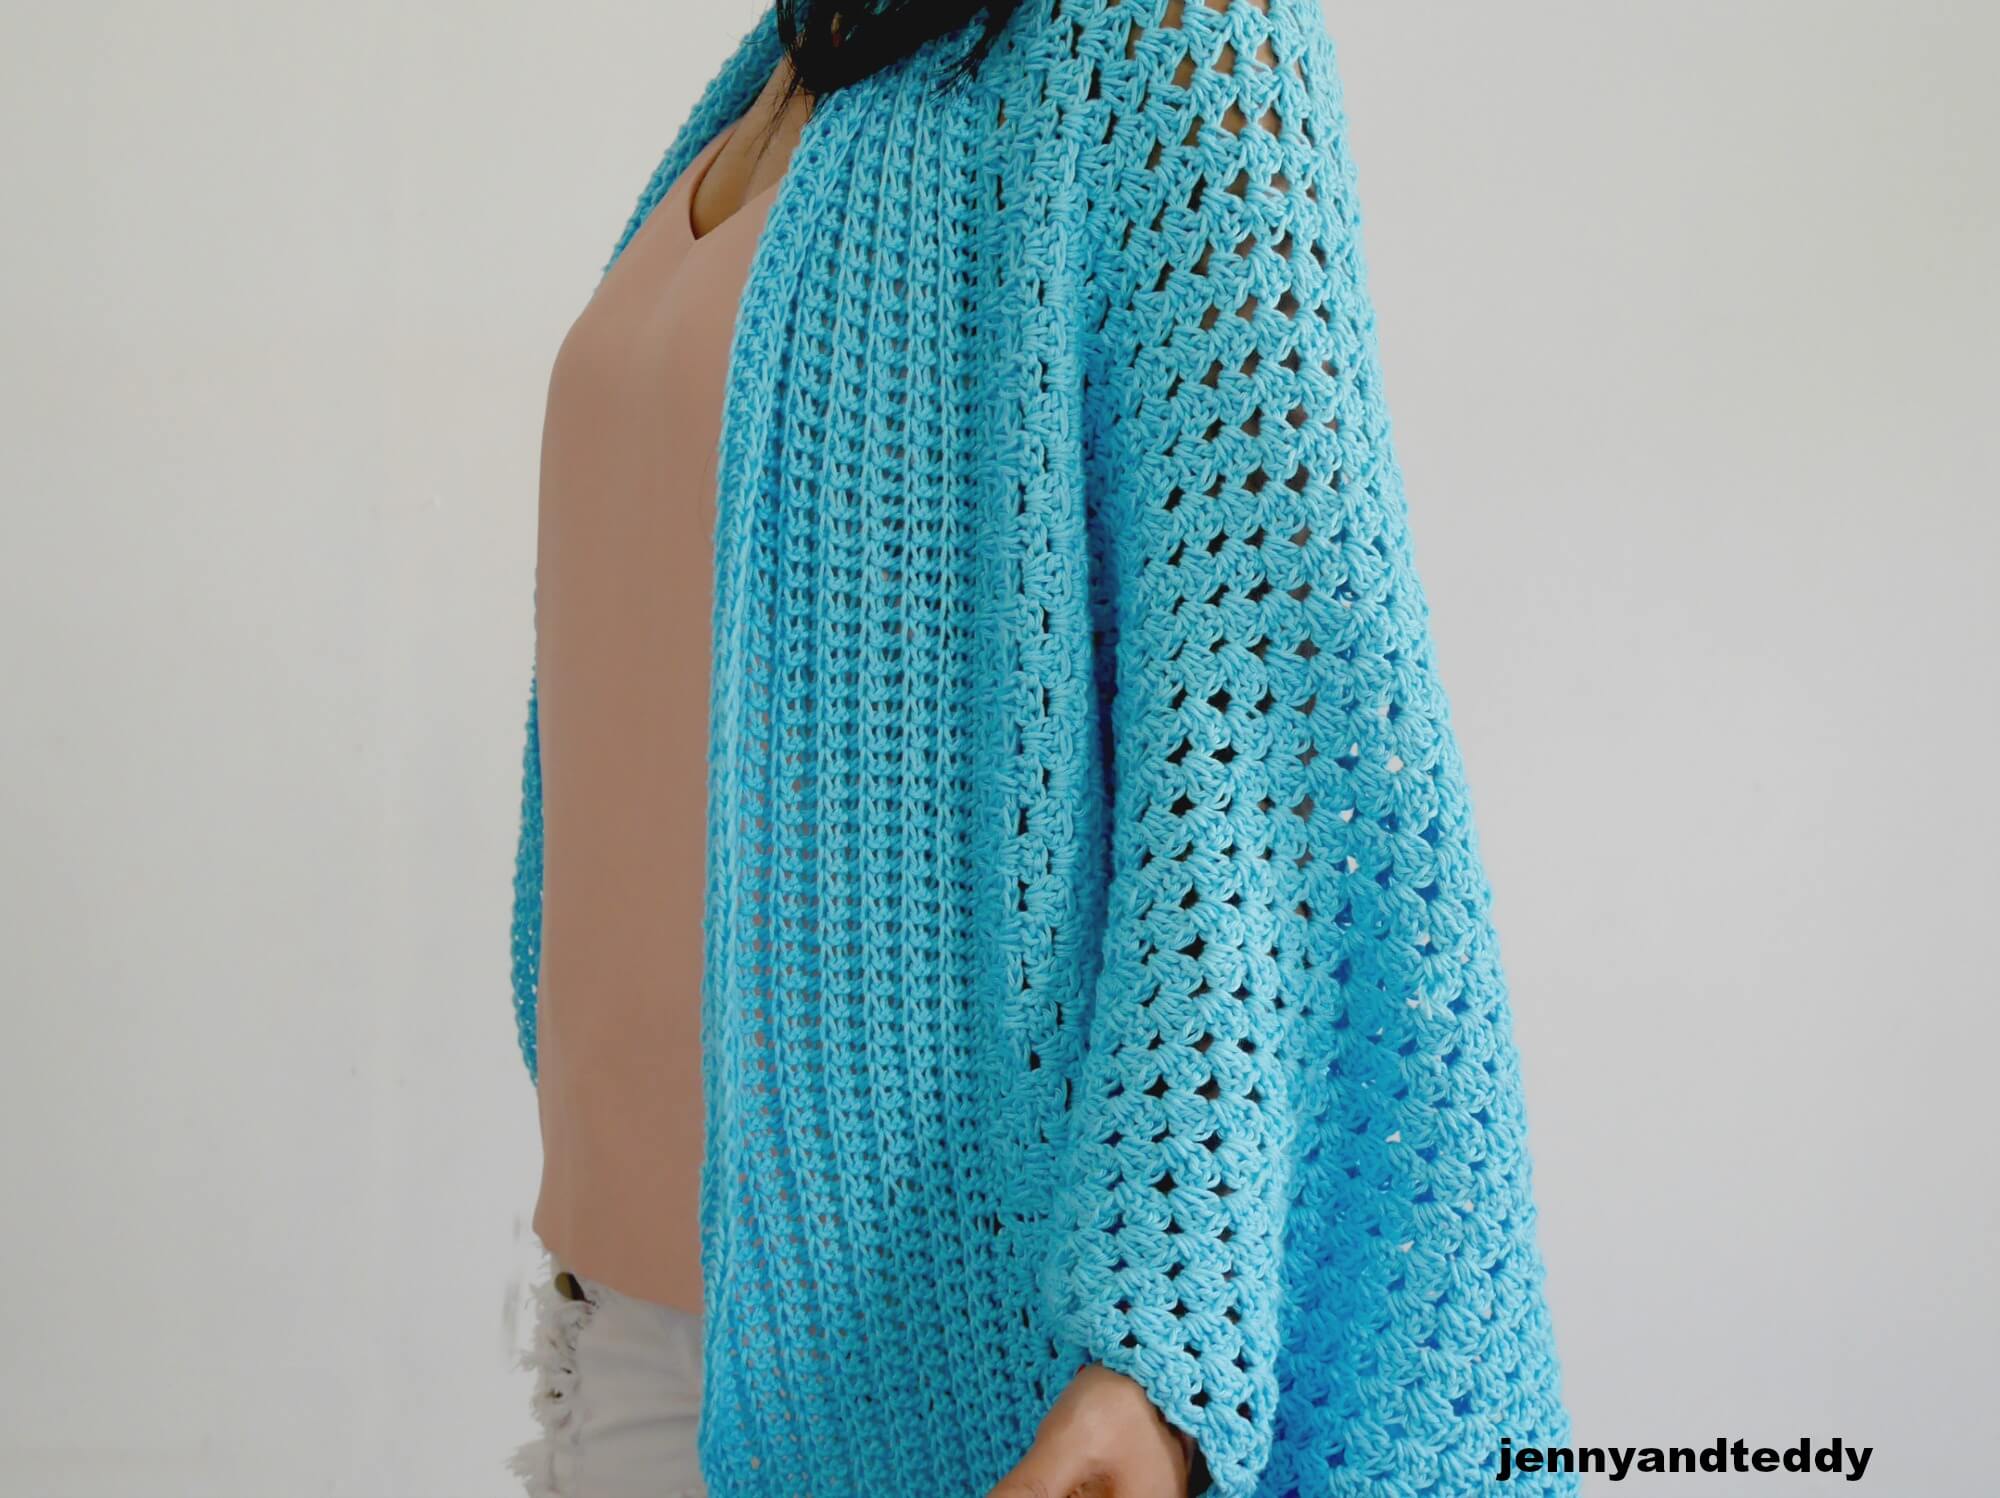
The granny stitch pattern crochet in row is simple and perfect for beginners it is made up of a double crochet stitch which works up really qiuck.
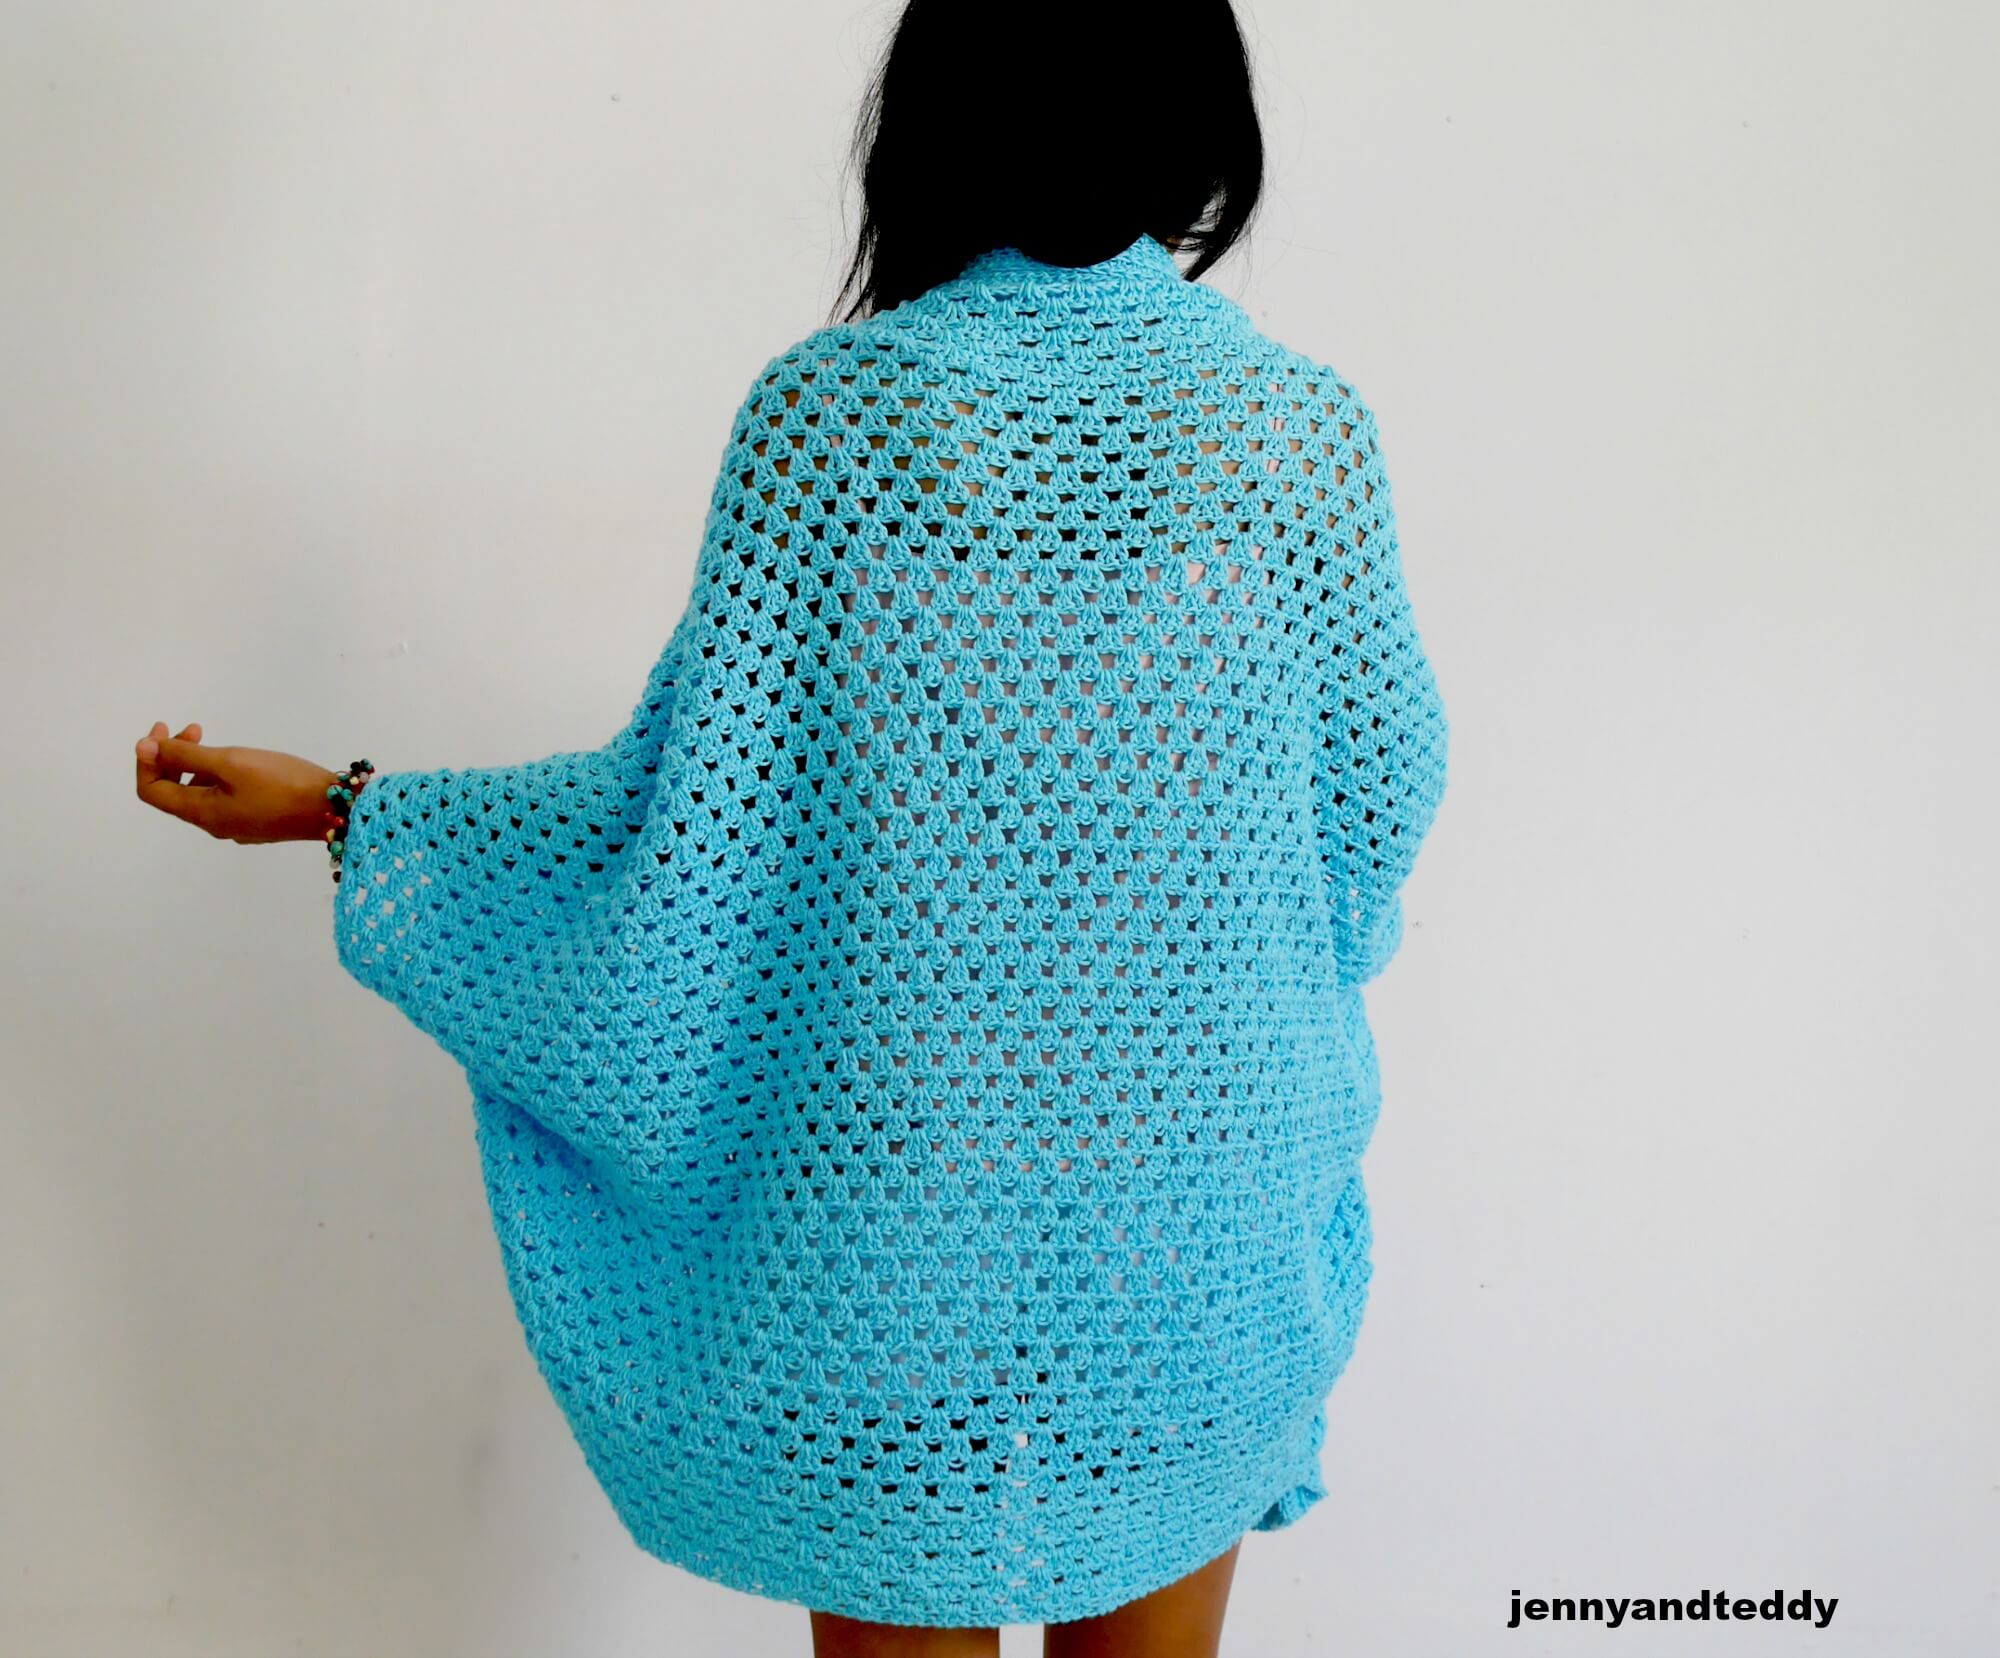
The body of this Cardigan’s front panel and back panel are made up of just one rectangle.
How do you crochet a granny stitch cardigan?
I have made 3 easy step by step for you guys to create your first crochet garment with this free pattern.
- Step1: crocheting one big rectangle with granny stitch in a row.
- Step2: fold each end up to create the armhole.
- Step3: add the collar, and all is done.
How much time does it take to crochet a cardigan for beginners?
For me to crochet this cardigan, I spent about 1 weekend with lots of breaks in between.
For a beginner, probably 20-25 hours without a break.
Remember, this cardigan is a super simple construction. Once you are done with your rectangle, the rest with be very quick.
Want to make more things from granny stitch crochet?
Get the free pattern below or this pattern is also available as an inexpensive, ad-free, PDF printable instant download in my etsy shop. Thank you so much for your love and support. I am really appreciate you.
Supplies & materials.
- I used Cotton yarn DK weight or 3 light. I am using about 1200-1500 yard fit sizes, small to Medium.
- ( Easy to adjust the size. See pattern instruction below) yarn weight 3.
- DK yarn 3 weight, Lion brand coboo, viscose & cotton baby yarn from darn good yarn. Or any cotton blend yarn with DK weight.
- 4.0 mm crochet hook size
- Sewing yarn needle
Skill and abbreviations
(American crochet terms)
You will need to know how to make
- St (stitch)
- sc, which means single crochet
- dc, which means double crochet
- hdc, which means half double crochet
- Blo, which means crochet in the back loop only
- ch, Chain
- slip knot
- Granny crochet stitch tutorial.
Finished Size Approximately: Sample size small to fit Medium
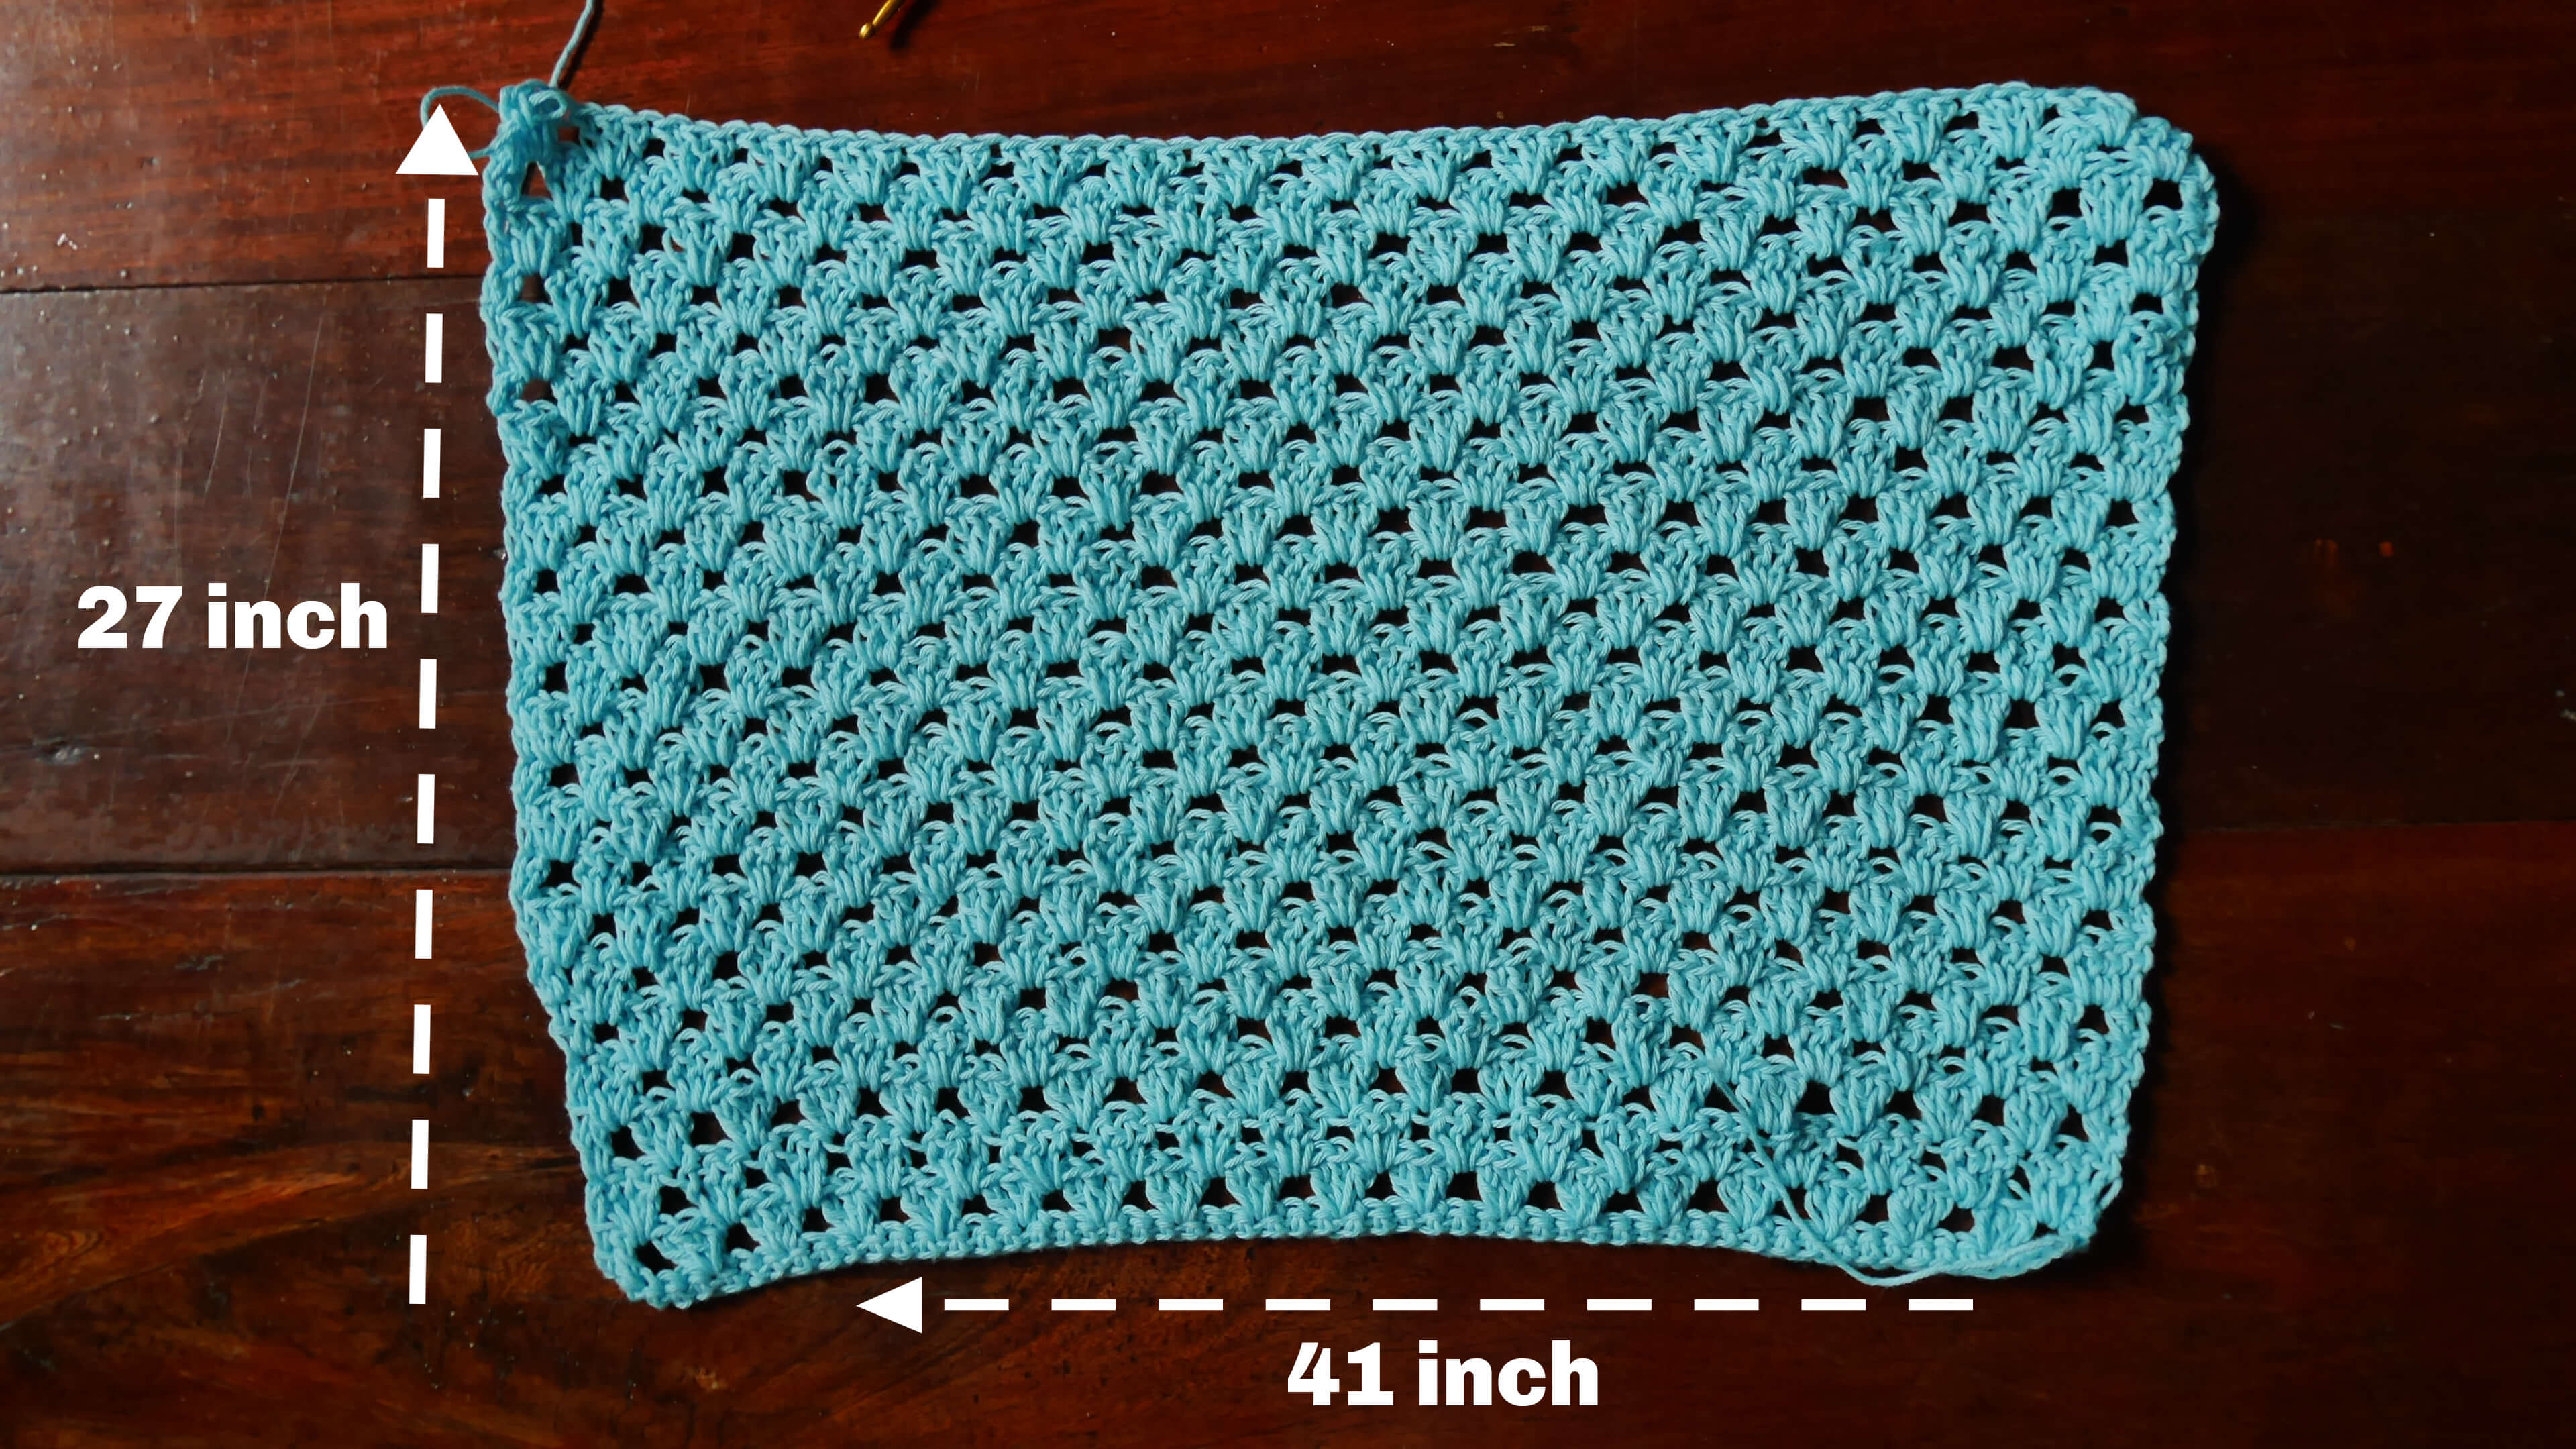
Measurement of the rectangle.
- S-M 41x 27 inch (example size)
- L-XL: 44×27 inch
- 2xl-3xl : 46×27 inch
- 4xl: 48x 28 inch
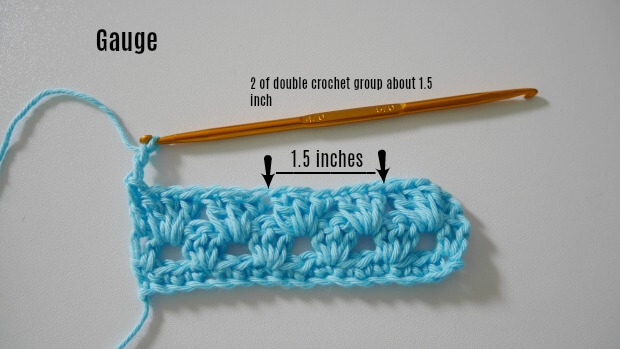
Gauge: 2 groups of double crochet= 1.5-1.7 inch
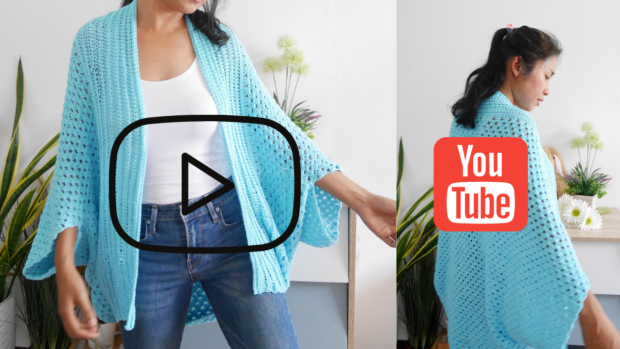
How to crochet an easy cardigan for a beginner video tutorial.
Granny stitch easy cardigan free crochet pattern instruction.
Start off by making a slip knot. Then make 140 (138+2=140) ( multiple of 3+2) chains foundation chain.
- S-M chain 138+2=140
- L-XL chain 150+2=152
- 2xl-3xl chain 159+2=161
- 4xl chain 165+2=167
(you can adjust the size of the cardigan to small by decreasing the foundation chain.
Or Bigger size by increasing the foundation chain.
After you get the foundation chain, then make sc in each chain across, chain2, and turn.
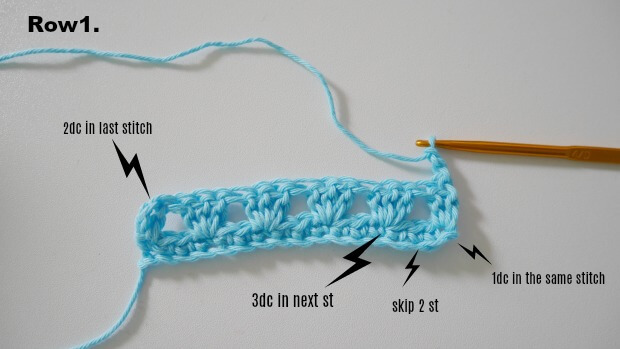
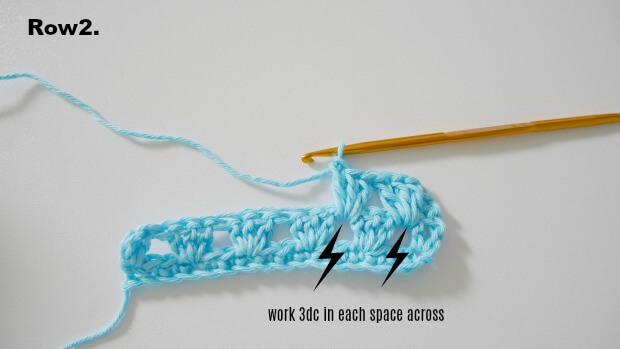
Row1: make 1dc in the same stitch * skip 2 stitches, then work 3dc in the next stitch* repeat * to * across until the end of the row until you will have 3 stitches remain, skip 2 st, 2dc in the last stitch, ch2 turn. (ch2 does not count as a stitch).
Row2. now you will work 3dc in each space ( between double crochet groups) across until the end of the row, then dc in the last stitch or ch2 space from the previous row, chain2, and turn. (ch2 does not count as a stitch).
Repeat rows 1 and 2 until your rectangle measures approximately 41 inches wide and 27 inches long, then finish off and leave a long tail for sewing.
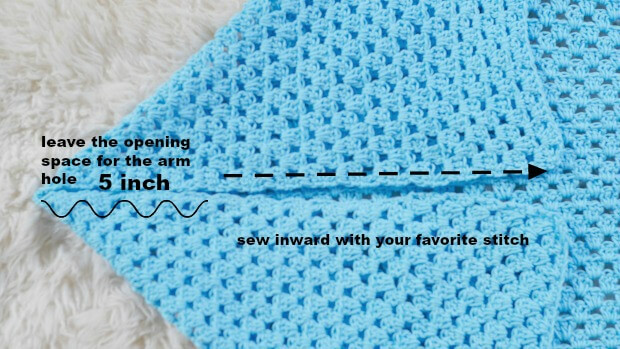
Shape armhole.
Lay the piece of rectangle flatted and fold each corner inward until they meet, then use your yarn needle to seam the corner with your preferred method.
( I used whip stitch) and leaving holes in the arm.
For the armholes, I leave my one about 5 inches or your preferred length.
Repeat for the other side.
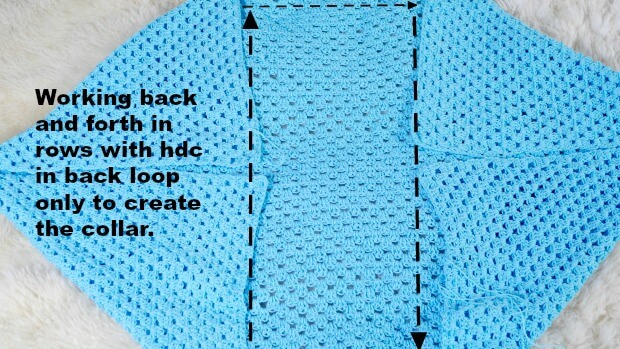
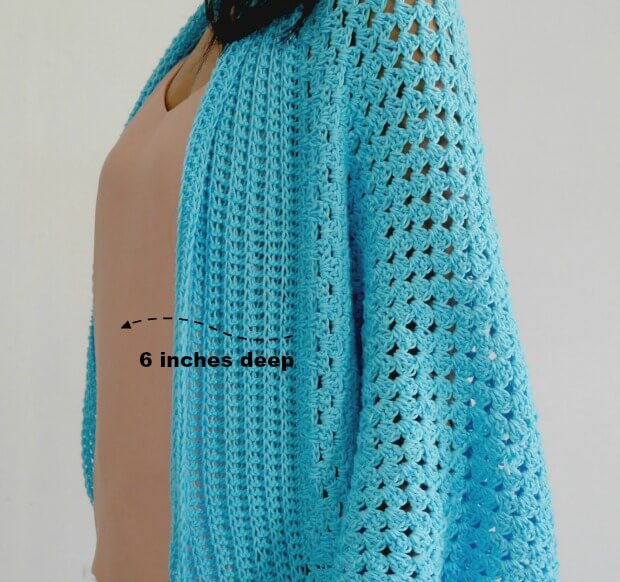
For the edging/collar.
For the collar, we will work along the edge of the opening of the cardigan back and forth in rows with Hdc in the back loop only.
Start at the bottom front corner of the cardigan where the first stitch marker is placed, working around the back of the neck to the bottom front corner on the other side where the second stitch marker is placed.
(See photo below.)
Add this pattern to your Ravelry.
Start by Placing each stitch marker at the bottom front corner of the cardigan.
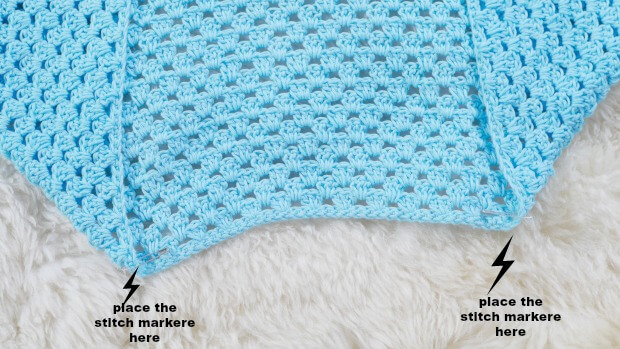
Rejoin your yarn at the first stitch marker in place.
Row1. hdc all around the opening of the cardigan, start at where the first stitch marker is placed and finish at the second stitch marker is placed, chain 1, and turn.
Row2. make hdc in the back loop only all around the opening of the cardigan start at where the first stitch marker is placed and finish at the second stitch marker is placed, chain1, and turn.
Row3. Repeat row 2 until your collar measures around 6 inches deep. Fasten off and weave in the end.
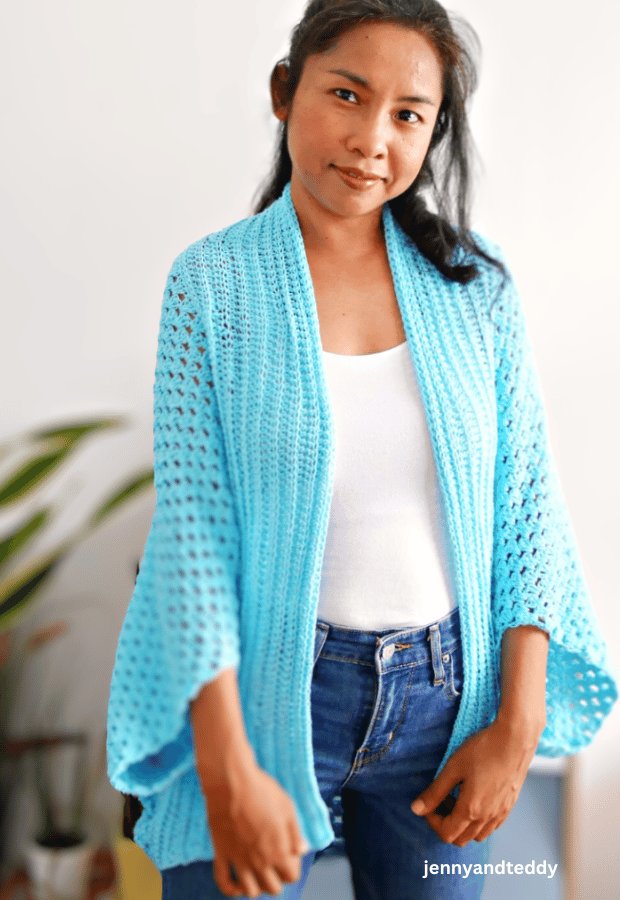
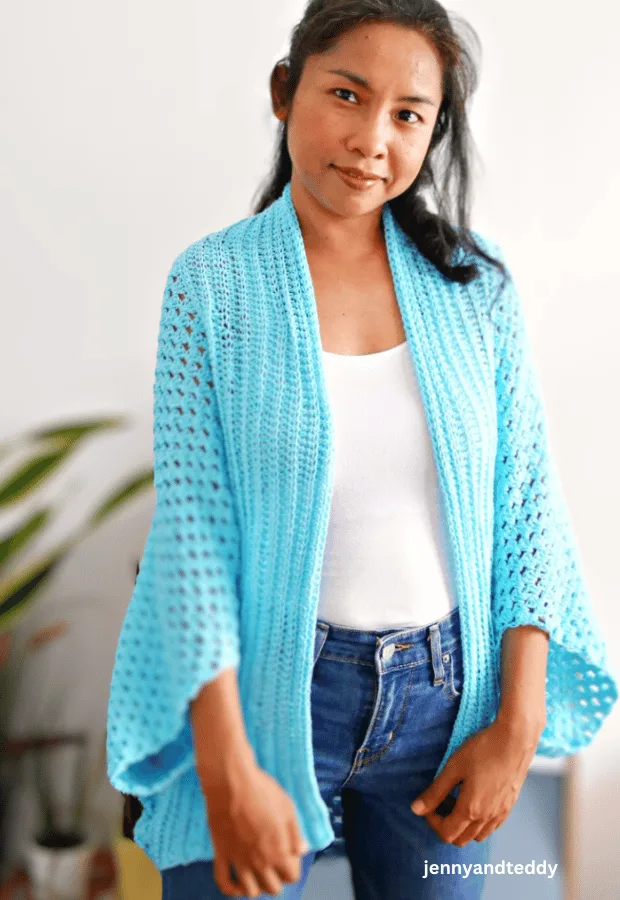
Now enjoy your new cardigan.
If you make one, I would love to see your creation. Tag me on Instagram! would love to see your creation.
Happy crocheting.
Lillian
Monday 7th of August 2023
Hi for me it would be so much better if there was way less ads. I’m already overwhelmed and I don’t have the patience to try and save or print the instructions. I love the colour and the granny stitch. Thank you.
jane
Tuesday 8th of August 2023
Hi Lillian thx you so much for your support however I also need the ads to keep the light going to provide more free pattern and tutorial you can also buy the pdf ads free version on my shop.
Kristy
Wednesday 2nd of March 2022
i have redone the foundation multiple times and there is no way it measures 41". i am using the same size hook, same weight yarn, and my tension is like yours. i see you say to keep adding until you get to 41", so should the pattern actually be keep making chains until it reached 41"? i also started the rows and they look nothing like yours. i am a beginner and thought this would be a great pattern to start with but i am confused and discouraged :(
Christina
Monday 31st of January 2022
Something is not adding up. I am making a L-XL size. Using a 3 weighted yarn with a 4 mm hook and loose tension. However 150+2 chain is no where near 41” long. It sits at about 38.5” long. So now I either have to have a likely too short cardigan or undo almost HALF and restart….what am I missing here….?
jane
Tuesday 1st of February 2022
Hi christina, maybe u couldgo up for one siz e for crochet hook for 5.00 mm. Let me know if it help.
Rhonda
Sunday 8th of August 2021
Hi. Wondering if I can make this shorter. Too much around the butt lol. I am a size medium. Thank you.
jane
Monday 9th of August 2021
Hi Rhonda, yes you can make it shorter by start with 132+2=134 chain and the height of the rectangle u could go for 22 inch instead of 27 inch.
Jeanette Medina
Friday 12th of February 2021
I would like to make this longer, how would I do that?
jane
Saturday 13th of February 2021
Hi Jeanette, make it longer add more row.