
I promise you will just love this little guy’s mini crochet pig free pattern; his name is “Willy.” He is just a baby pig, and he has a little red nose made from a small button and a pointy ear.
He loves to go to school and make lots of friends. Don’t you want to make him? Crocheting an amigurumi pig can be fun and take little time.
Easy crochet pig pattern.
This free crochet pig pattern is easiest than any other crochet animal patterns that I make because there is no need to crochet the nose part. We use a button instead.
Basic stitches: This cute amigurumi pig is made from basic crochet stitches like single crochet and double crochet increase or decrease.
Simple seam: we will need to do a basic seam for each of the crochet pieces together to create the cute crochet piggy.
How to crochet a little baby pig amigurumi.
You can make this cute crochet mini pig in 3 easy steps.
- Step 1. Crocheted the head and body part of the pig with a simple shape.
- Step 2: crochet another itty bitsy piece of the pig, like the arm, leg, and ears.
- Step 3: attached and seaming all pieces together, and that’s all you did!
About the yarn for making this mini piggy pattern.
In this free crochet pattern, I use acrylic yarn in dk weight, or 4 medium weight is fine.
Acrylic yarn: this polyester fiber yarn is perfect for beginner and any other level of crochet experience because they are budget friendly and make a beautiful finish.
Cotton yarn and plant fiber: will be fine as well. Just remember to make your crochet tension steady.
Need more free & easy crochet animal patterns to make this weekend?
Supplies & Materials.
To make you will need
1. Acrylic yarn in this pattern, I normally used 8 ply
2. Plastic eyes with safety backing 7.5mm ( you can find it at any craft shop)
3. Fibre polyester fill for stuffing
4. Sewing yarn needle
5. Ribbon or button
7. Crochet hook size1.25mm and craft glue
Note
The size of the crochet hook really does not matter. The doll designed will work just fine with different sizes of crochet hooks; only the end size of the creation will be slightly different.
In this pattern, working in round continuously, you may use a contrasting color short piece of yarn to mark the beginning of each round. When round one ends. Do not join at the end of each round; you will begin the second round in the next stitch.
At the end of each round, I have given the number of stitches you should have. If you are off by 1 or 2 stitches, do not worry about it.
Skill and abbreviations.
- American crochet term.
- You will need to know how to make a magic ring or adjustable ring
- Single crochet (sc)
- Crochet increase (inc) which mean-make 2 single crochet in the same stitch
- Crochet decrease (dec), which mean-Crochet 2 stitches together
- Stitch (st)
- * = Repeat stitches from * to end of *
- Chain (ch)
- Slip stitch (sl st)
- change colour
Amigurumi crochet pig free pattern instruction.
Finish Size
-Approximately 4-4.5 inches tall.
-The size of Willy may vary depending on the size of the yarn and crochet hook.
Let’s start with the head (orange)
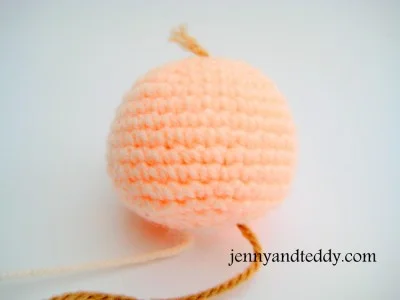
You will work from top to bottom
Round1. Make magic ring and 7sc in ring (7)
Round2. 2sc in each st around (14)
Round3. *Sc in next st, 2sc in next st*and repeat from * around (21)
Round4. *Sc in next 2 st,2sc in next st*and repeat from * around (28)
Round5. *Sc in next 3 st,2sc in next st*and repeat from * around (35)
Round6-13. Sc in each st around (35)
Round14. *sc in each of next 3 st,dec 1*and repeat from * around (28)
Round15. *sc in each of next 2 st,dec 1*and repeat from * around (21)
Round16. *sc in each of next st,dec 1*and repeat from * around (14)
Round17. *sc in each of next st,dec 1*and repeat from * around then
have last 2 st free make sc in each of st and finish of
leave long tail for sewing(10)And stuffing polyester firmly.
The Piggy Arm.
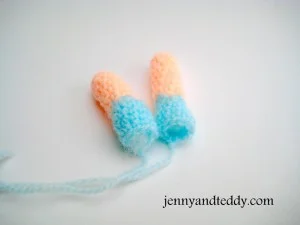
Make 2 pieces.
Round1. Make magic ring and 8sc in ring (8) orange
Round2-7. sc in each st around (8) orange
Round8-11. sc in next 3 st ,2sc in next st*and repeat from*around (10) blue
Then finish off, leaving a long tail for sewing and stuffing polyester just a little.
Crochet pig Ears (orange).
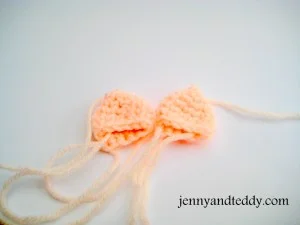
Make 2 pieces.
Round1. Make magic ring and 3sc in ring (3)
Round2. 2sc in each st around (6)
Round3. sc in next st,2sc in next st*and repeat from * around (9)
Round4. sc in next 2 st,2sc in next st*and repeat from * around (12)
Round5-7. sc in each st around (12)
Then finish of leave long tail for sewing and stuffing polyester just a little.
Tiny pig Legs.
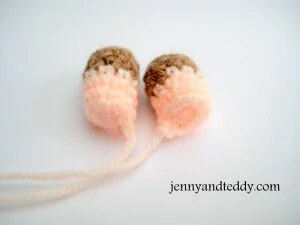
Make 2 pieces.
Round1. Make a magic ring and 10sc in ring (10) brown
Round2-4.sc in each st around (10) brown
Round5-6.sc in each st around (10) orange
Then finish off and stuffing polyester just a little.
Body.
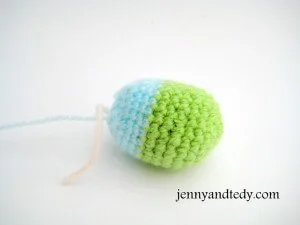
You will work from bottom to top.
Round1. Make a magic ring and 5sc in ring (5) green
Round2. 2sc in each st around (10) green
Round3. *Sc in next st, 2sc in next st*and repeat from * around (15) green
Round4. *Sc in next 2 st,2sc in next st* and repeat from * around (20) green
Round5. *Sc in next 3 st,2sc in next st*and repeat from * around (25) green
Round6-9. Sc in each st around (25) green
Round10-12. Sc in each st around (25) blue
Round13. *sc in each of next 3 st,dec 1*and repeat from * around (20) blue
Round14. *sc in each of next 2 st,dec 1*and repeat from * around (15) blue
Round15. *sc in each of next st,dec 1*and repeat from * around (10) blue
Finish off and leave a long tail for sewing.
And stuffing polyester firmly.
Nose.
Use a button, and sew or glue it to the face.
Bag (red).
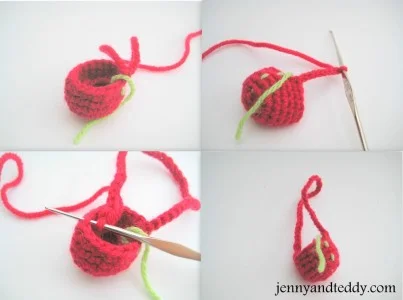
Round1. Make magic ring and 6sc in ring (6)
Round2. 2sc in each st around (12)
Round3. *Sc in next st, 2sc in next st* and repeat from * around (18)
Round4-7. sc in each st around (18) do not fasten off because we are going to use it for bag strip.
Make a strip by.
1. Ch 22 or length to fit your baby pig body
2. Add decorative buttons, ribbon, etc., on the bag and finish off.
Assemble all the piggy parts.
Sew ears to the head and body to the head, then attach arms and legs.
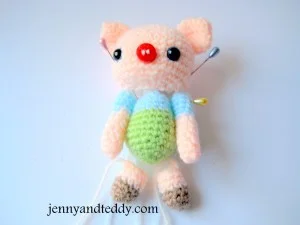
Happy crocheting!
Jane.

Yvonne
Monday 2nd of November 2015
This little piggy is so cute the girls will love him. Thank you so much for sharing
ileana-carmen
Friday 22nd of August 2014
So cute!
Cindy
Monday 21st of July 2014
So cute!
Thanks so much for sharing at AMAZE ME MONDAY...
Blessings, Cindy
http://www.dwellings-theheartofyourhome.com/2014/07/amaze-me-monday-68.html
jane
Monday 21st of July 2014
Thanks Cindy.
Hannah
Sunday 14th of April 2013
Thank you so much for sharing this adorable pattern!
I just finished one of my own. =)
Here is a link to a photo of the finished project: http://www.flickr.com/photos/65921072@N03/8650067881/
jane
Tuesday 16th of April 2013
thank you for stopping by. your little pig is so cute and thanks for sharing.
pam
Sunday 19th of August 2012
hoi ik heb dat varkentje gemaakt lief maar dan een meisje ook heel leuk hoor ik wil je bedanken voor het mooie patroontje heel mooi groetjes pam uit nederland
jane
Sunday 19th of August 2012
thank you.