 Look at this cute amigurumi cat! Everyone called him “Lucky” because he love to bring happyness to every place he stayed. He have a big smile with very shiny face. So let’s grab a crochet hook and jump in!
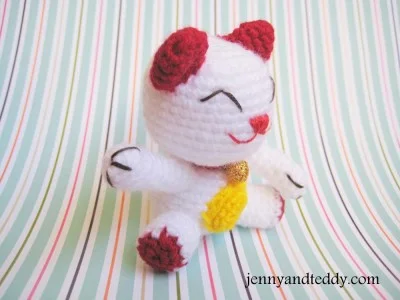
Finish Size
-Approximately 4 inch tall (without counting ear)
-Size of Lucky cat may varies depend on size of yarn and crochet
hook
Materials
To make Lucky you will need
1. White and red colour acrylic yarn in this pattern, I normally
used 8ply
2. Fibre polyester fill for stuffing
3. Sewing yarn needle
4. Embroidery red and black
5. Ribbon for an optional
6. Crochet hook size1.25mm and craft glue
Skill and abbreviations
You will need to know how to make a magic ring or adjustable ring
-Single crochet (sc)
-Crochet increase (inc) which mean-make 2 single crochet in same
stitch
-Crochet decrease (dec) which mean-Crochet 2 stitches together
-Stitch (st)
* = Repeat stitches from * to end of *
-Chain (ch)
-Slip stitch (sl st)
-change colour
Beginner start here on how to make magic adjustable ring.
My beginner tutorial check it out here
Beginner guide to making your first ever amigurumi
How to start magic ring or adjustable ring
How to put an eyes on amigurumi
Let’s start with head (colour white)
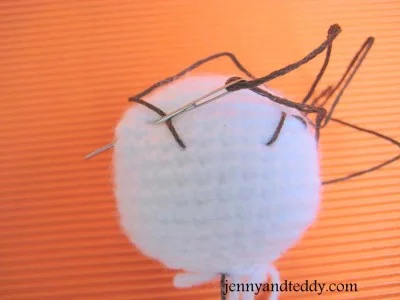
You will work from top to bottom
Round1. Make magic ring and 7sc in ring (7)
Round2. 2sc in each st around (14)
Round3. *Sc in next st, 2sc in next st* and repeat from * around (21)
Round4. *Sc in next 2 st,2sc in next st* and repeat from * around (28)
Round5.* Sc in next 3 st,2sc in next st* and repeat from * around (35)
Round6-13. Sc in each st around (35)
Round14. *sc in each of next 3 st,dec 1* and repeat from * around (28)
Round15. *sc in each of next 2 st,dec 1* and repeat from * around (21)
Round16. *sc in each of next st,dec 1* and repeat from * around (14)
Round17. *sc in each of next st,dec 1* and repeat from * around, then have
last 2 st free make sc on that st and finish of leave long tail for sewing(10)
And stuffing polyester firmly .Then make face and a nose.
Body (white)
You will work from bottom to top
Round1. Make magic ring and 5sc in ring (5) white
Round2. 2sc in each st around (10) white
Round3. *Sc in next st, 2sc in next st * and repeat from * around (15)
Round4.* Sc in next 2 st, 2sc in next st* and repeat from * around (20)
Round5. *Sc in next 3 st, 2sc in next st* and repeat from * around (25)
Round6. *Sc in next 4 st, 2sc in next st* and repeat from * around (30)
Round7. sc in each st and around (30)
Round8. *sc in each of next 4 st,dec 1* and repeat from * around (25)
Round9-11. sc in each st and around (25)
Round12. *sc in each of next 3 st,dec 1* and repeat from * around (20)
Round13.* sc in each of next 2st,dec 1* and repeat from * around (15)
Round14.* sc in each of next st,dec 1* and repeat from * around (10)
Finish of leave long tail for sewing and stuffing polyester firmly.
Arms make 2 pieces (white)
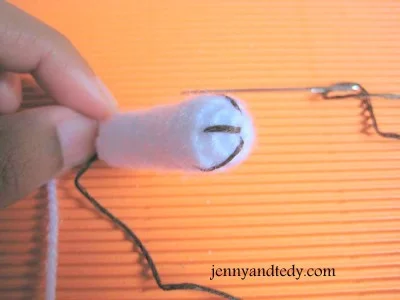
You will work from bottom to top
Round1. Make magic ring and 5sc in ring (5)
Round2. 2sc in each st around (10)
Round3. Sc in each st around (10)
Round4. *sc in each of next 3st,dec 1* and repeat from * around (8)
Round5-11. Sc in each st around (8)
Then finish of leave long tail for sewing and stuffing polyester just a little.
Ears (colour red)
Make 2 pieces
Round1. Make magic ring and 3sc in ring (3)
Round2. 2sc in each st around (6)
Round3. *Sc in next st, 2sc in next st* and repeat from * around (9)
Round4. *Sc in next 2 st, 2sc in next st* and repeat from * around (12)
Round5-6. sc in each st around (12)
Then finish of leave long tail for sewing and do not stuffing polyester in the ears .
Legs
Make 2 pieces
Round1. Make magic ring and 6sc in ring (6) red
Round2. 2sc in each st around (12) red
Round3. *Sc in next st, 2sc in next st* and repeat from * around (18) white
Round4. *sc in each of next 4st,dec 1* and repeat from * around (15) white
Round5. *sc in each of next 3st,dec 1* and repeat from * around (12) white
Round6-8. sc in each st around (12) white
And finish of leave long tail for sewing.
Collar (red)
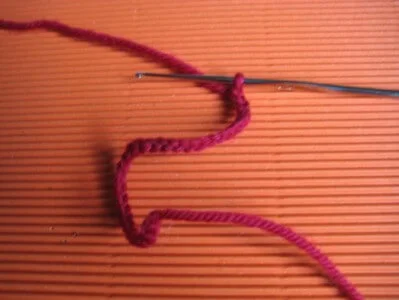
- Ch 15 or length to fit your lucky cat neck, do not join yet.
- Add decorative button, ribbon etc.
- Fasten off and weave in ends.
Money bag (yellow)
Make 1 piece
Start with chain 5 (5)
Round1. *Sc in next 4st from hook, 2 Sc in same st* and repeat from * around (12)
Round2. *2Sc in next st, sc in next 3 st* and repeat from * around (15)
Round3. Sc in each of st around (15) then finish of leave long tail for sewing and
do not stuffing polyester in .
Finishing
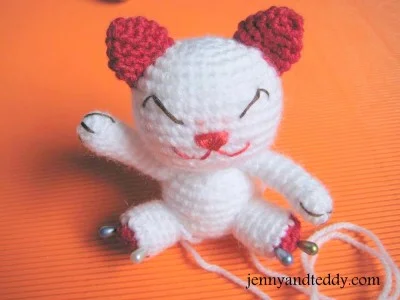
Sew ears to the head and sew body to the head after finish the
ears and the face.
Then sew arms and attach legs to body
so that lucky cat is in a sitting position.

Stella Lee
Wednesday 1st of October 2014
He looks like the cat that got the cream :o) Pinning!
jane
Friday 3rd of October 2014
thanks Stella!
Audrey
Saturday 23rd of August 2014
I love Lucky Cat! Just wish I knew how to crochet.
Debi and Charly @ Adorned From Above
Tuesday 12th of August 2014
Thank you so much for sharing with Adorned From Above's Link Party Debi @ Adorned From Above