
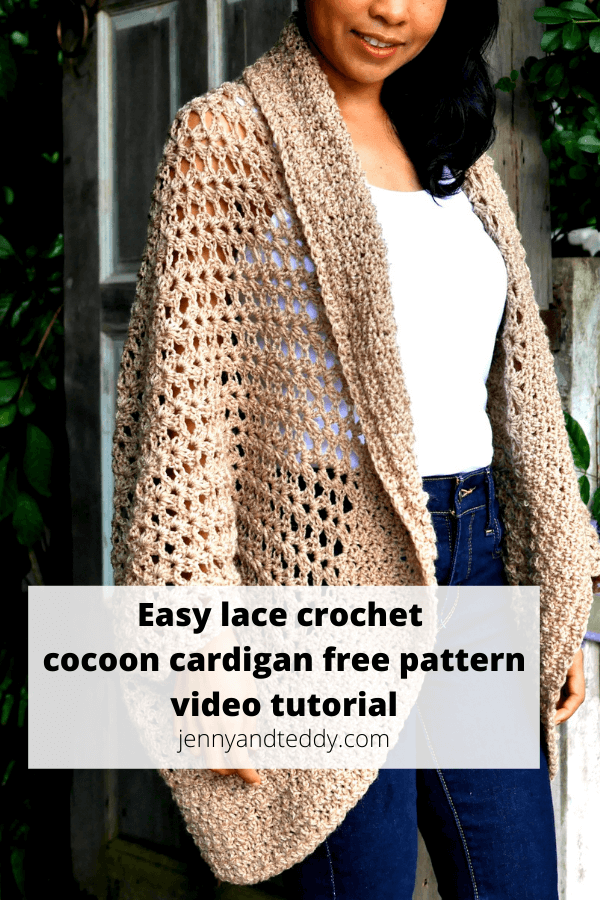

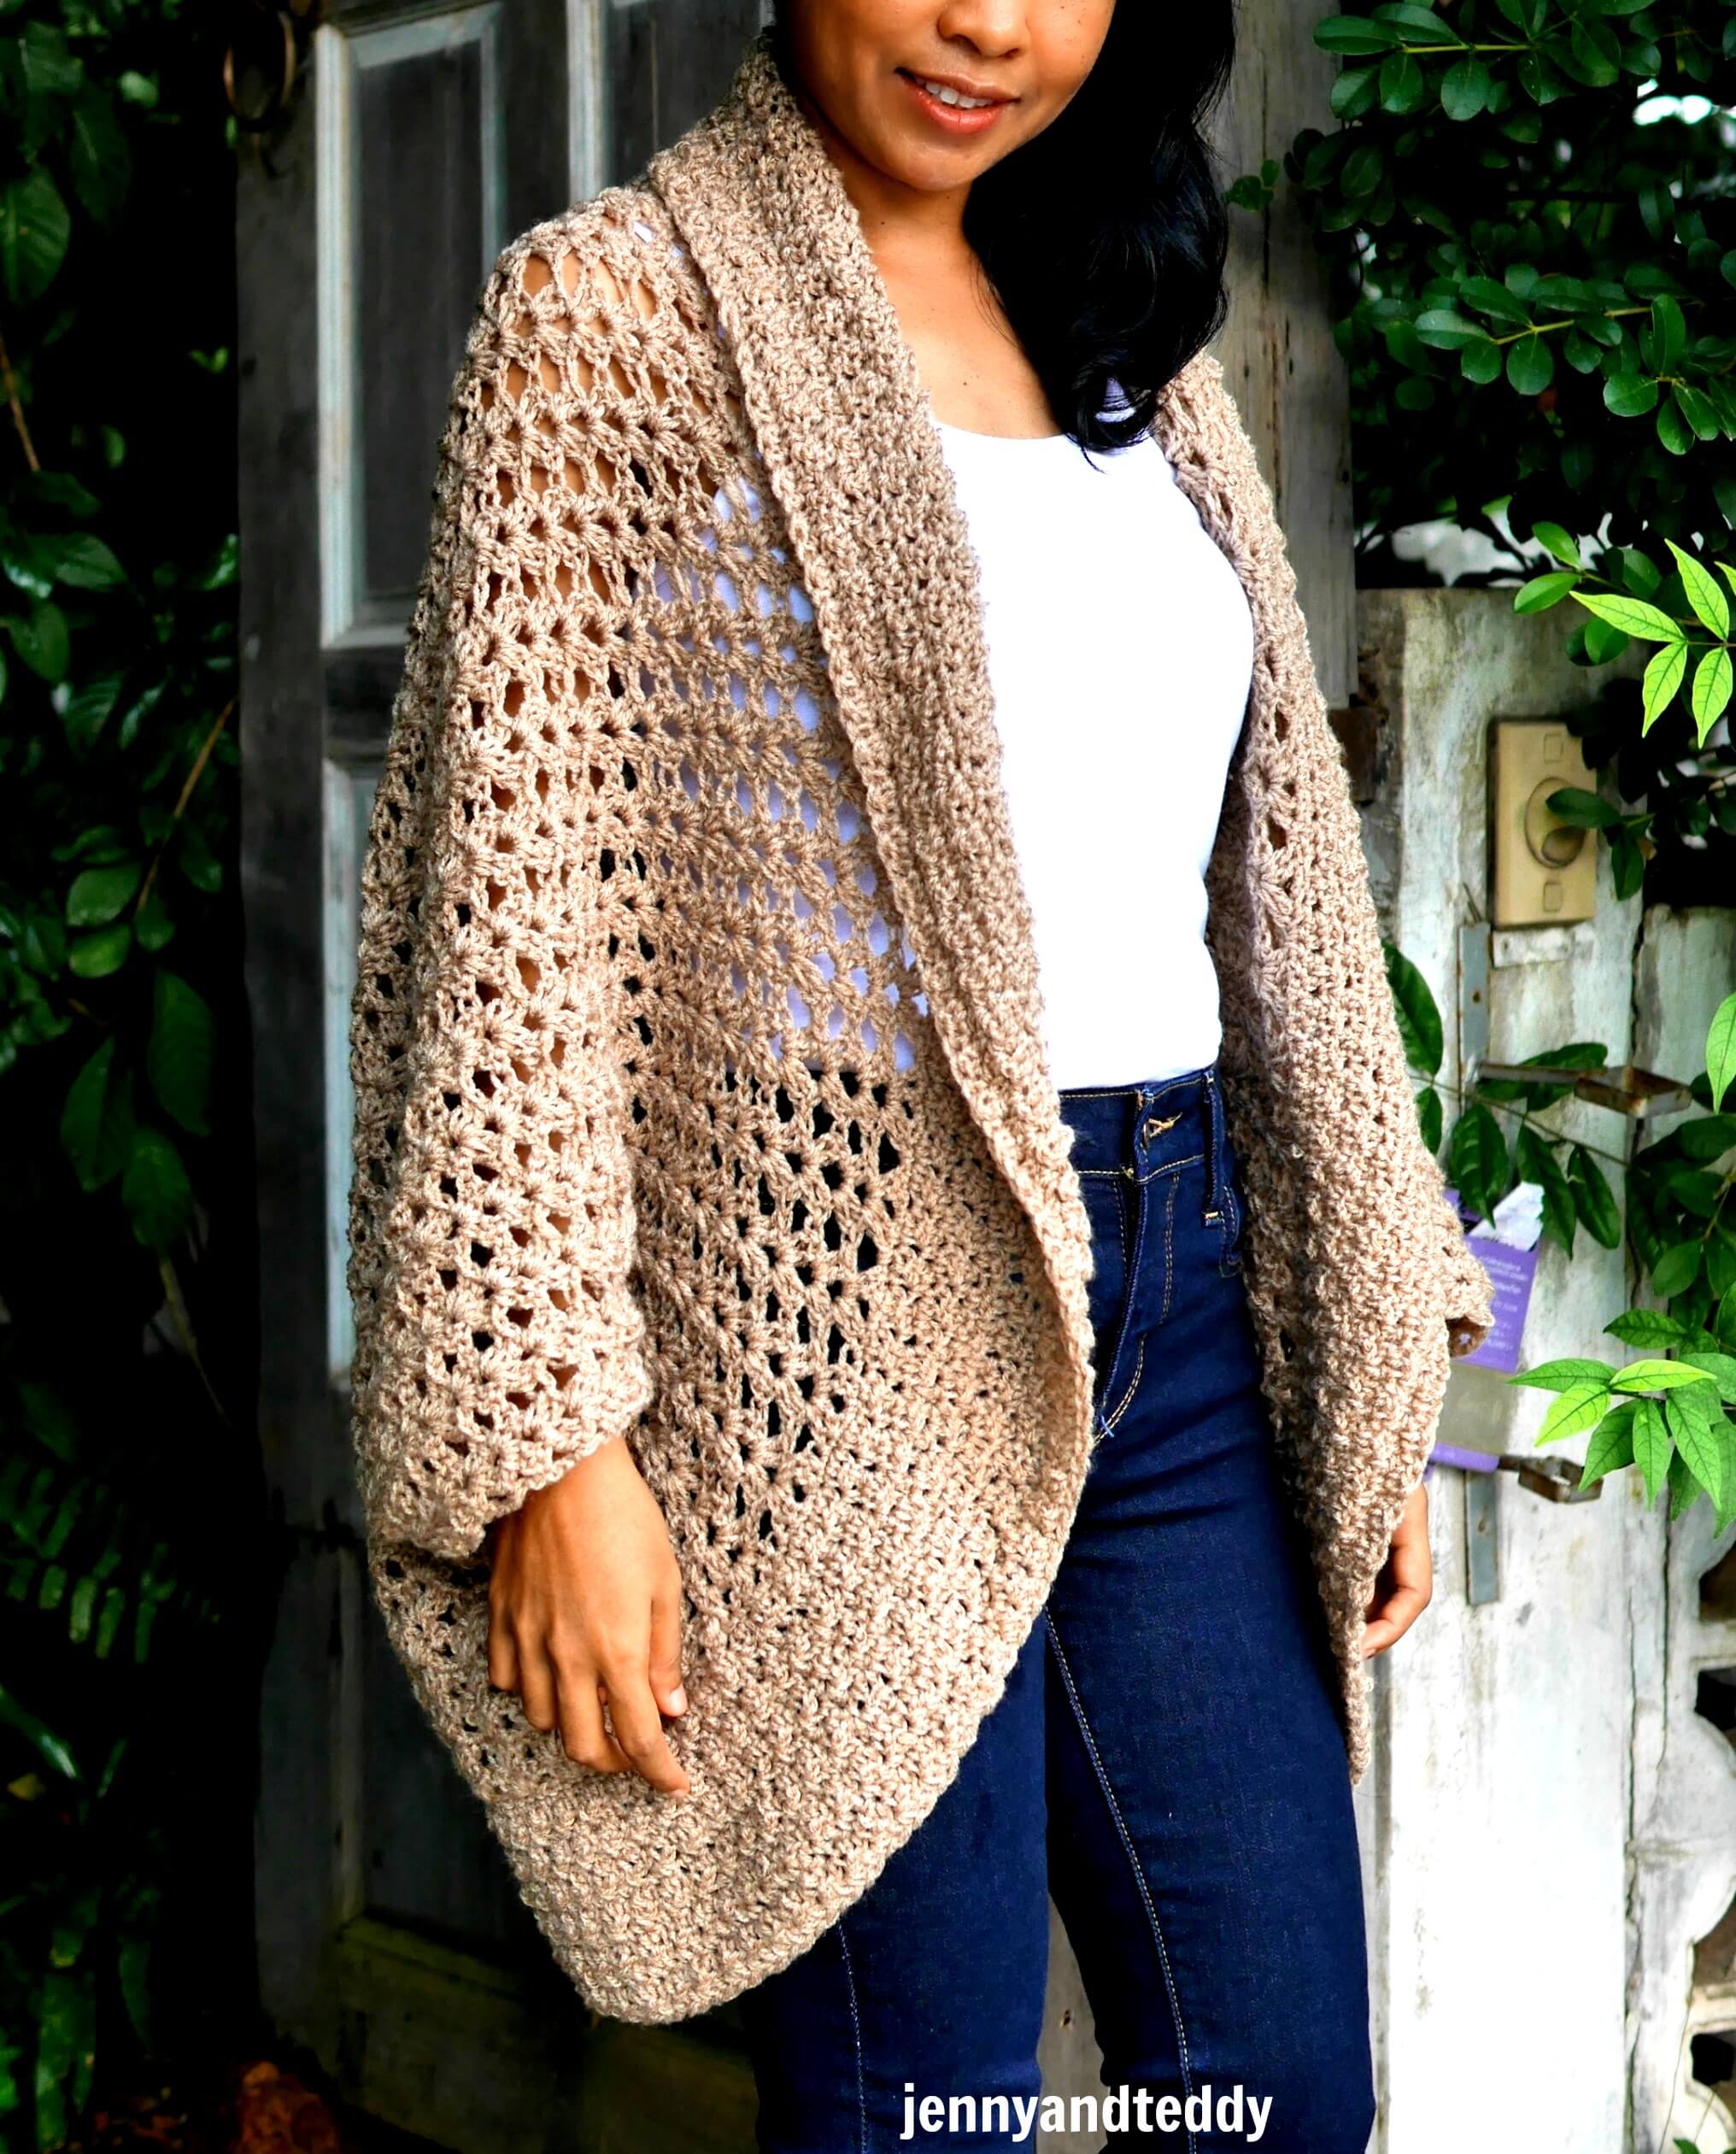
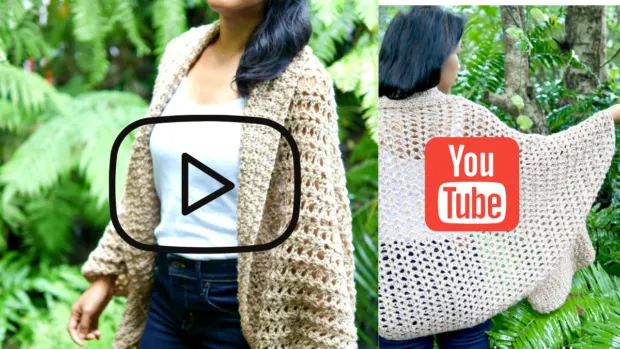
This simple crochet lace cocoon cardigan made with easy lace crochet stitch which is beginner friendly free pattern with step by step video tutorial size from small to plus size.
Let’s meet Toasted honey cocoon crochet cardigan, well…. well , how do I came up with this delicio name? Mmmmm ….this is my favorite breakfast right now ^^.
Oversized & easy.
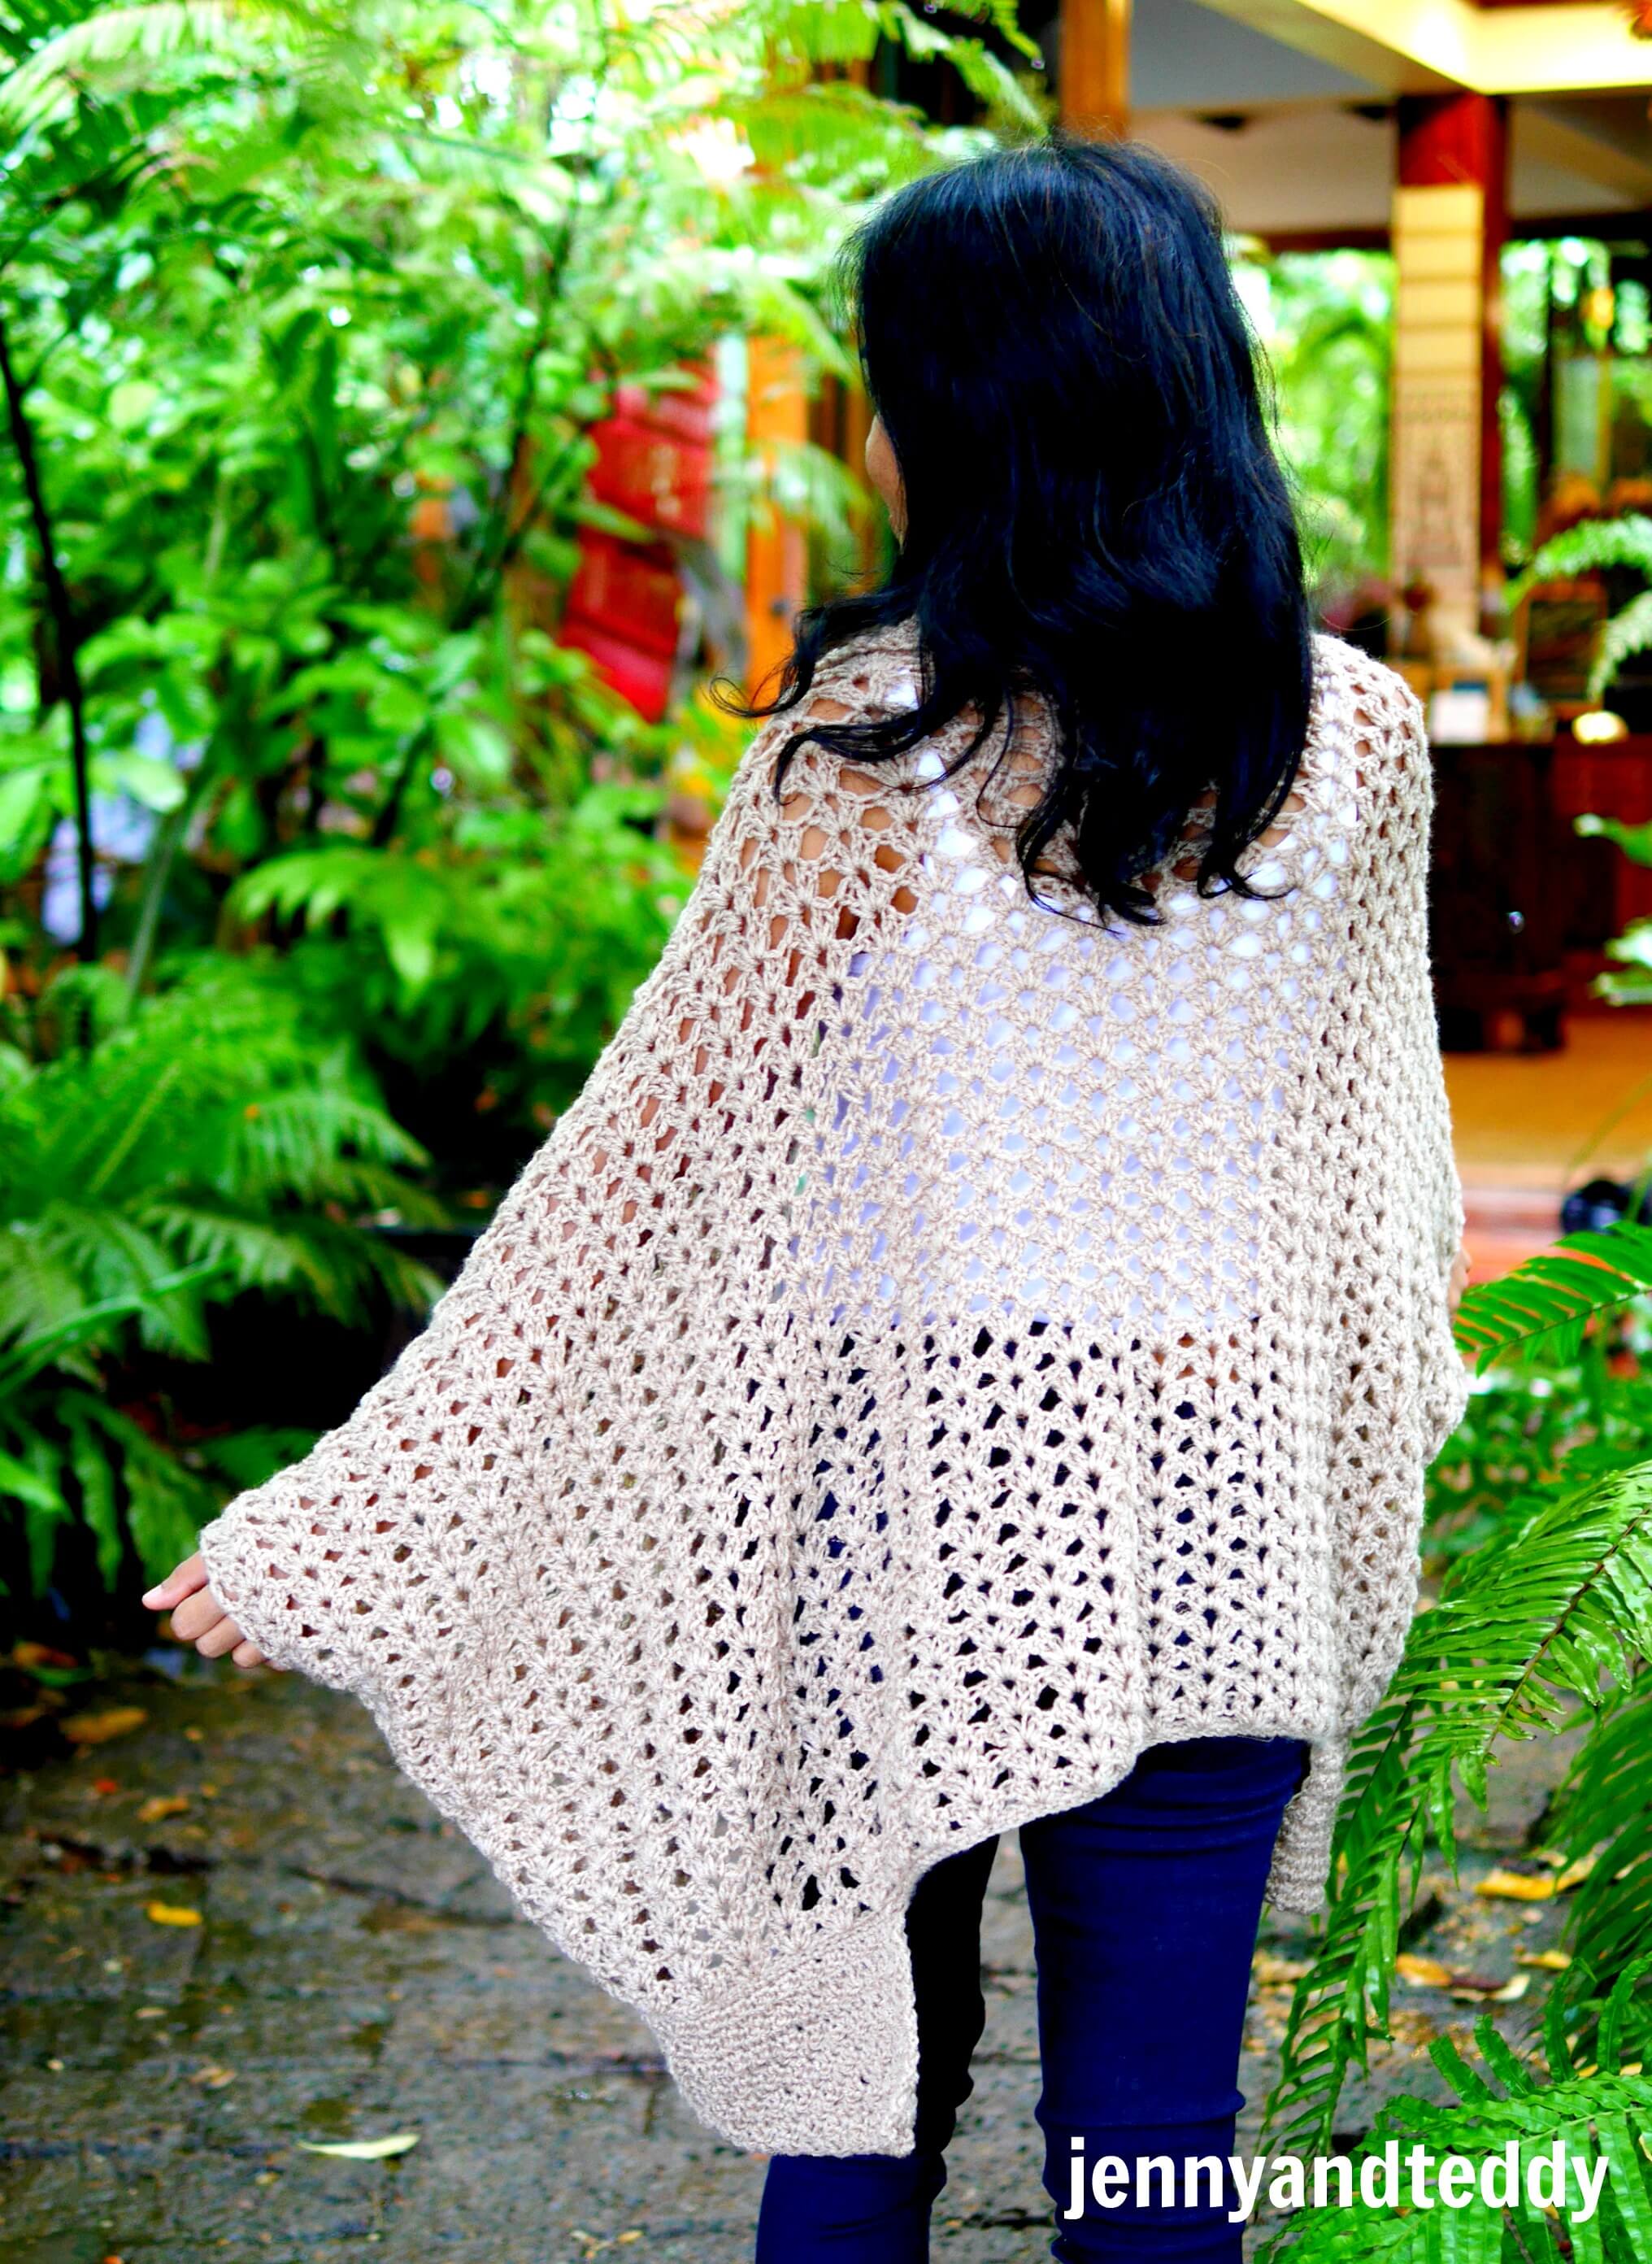
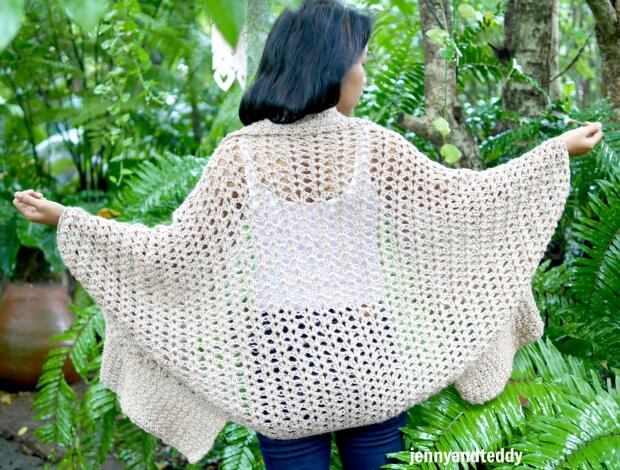
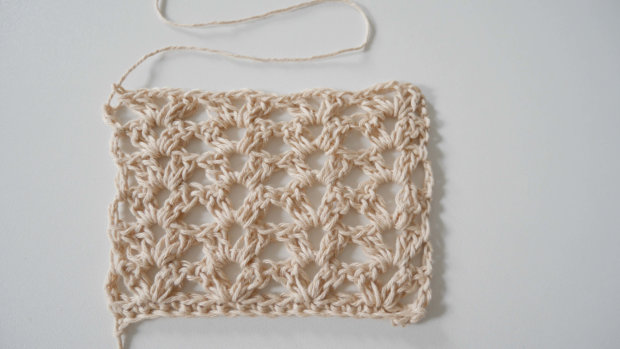
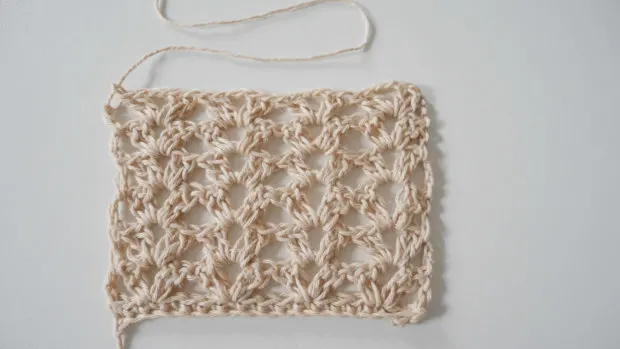
This oversize and super easy construction lace crochet cocoon made from just one big rectangle ,then fold each end up until to create the armhole then add the beautiful draped collar and that all we done!.
About the yarn to make this pretty lace cocoon cardigan.
The yarn that perfect for this crochet cocoon cardigan is any 4 medium weight , for example if you like a good draped , breezy and airy feel go with cotton yarn.
For the colder weather you could go for acrylic or wool yarn and they are more light weight.
Mostly I love to work with cotton yarn but this time I had a big skien of weight wrosted arcylic yarn left over so tada…. toasted honey cocoon cardigan is here!

Let’s get start!
– I am using about 800- 1200 yard fit size small to XL.( easy to adjust the size see pattern instruction below) 100% acrylic yarn weight 4 worsted medium.
or 100% acrylic Lion brand Heartland or Lion brand Wool-Ease yarn weight 4 aran. I use around 1200 yard.
– 3 mm crochet hook
– Sewing yarn needle
-2 stitch marker

Note: we are crochet this lace cocoon cardigan not too tight.
Skill and abbreviations
You will need to know how to make (American crochet term)-sc which mean single crochet
-dc which mean double crochet
-ch Chain
-slip knot
-sk mean skip stitch

Finished Size Approximately: from size small to fit xl. For other size
2xl to 4XL the detail will be in the pattern below.
If you like cocoon cardigan here are some more for you to enjoy.
Get the free pattern below or this pattern is also available as an inexpensive, ad-free, PDF printable instant download in my etsy shop. Thank you so much for your love and support. I am really appreciate you.
Video tutorial on for crochet lace cocoon cardigan.

Measurement.

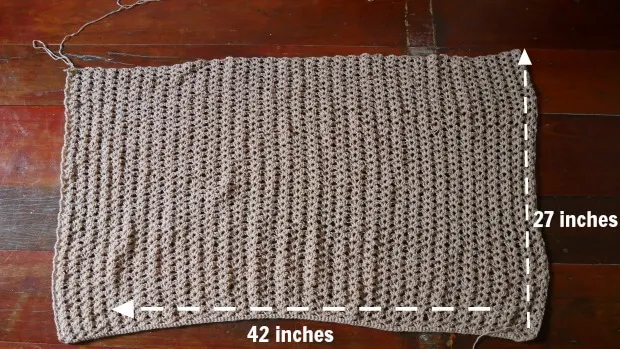
of the rectangle.
-42 inches wide
– 27 inches long
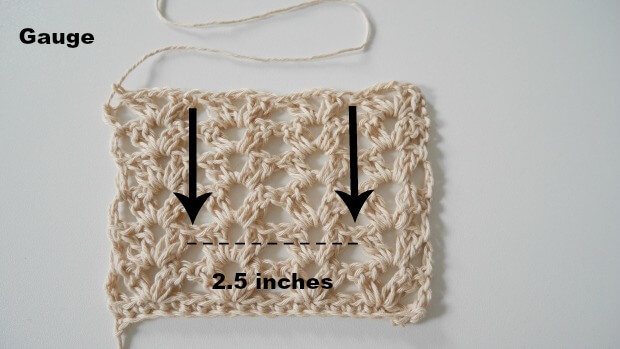
Gauge: 2 group of fancy lace crochet stitch = 2.5 inch

Pick up crochet hook size 3 mm and Start of by making a slip knot Then make 140+2= 142 chains for size small to XL (foundation chain multiple of 4+2).
( size 2XL-3XL 160+2 chain) 48 inches wide x 29 inches long
( size 4XL 176+2 chain) 53 inches widex 30 inches long
Row 1: Sc across, ch 3, turn.
Row 2: then skip the first stitch and make 2dc,ch2,2dc all in the same of the next stitch , then
* skip 3 and make 2dc, ch2,2dc all in next stitch* repeat * to * across until end of the row, then you will have 2 stitch left sk1 and make 1dc in last stitch. ch3 and turn.
Row3. now you will make * 2dc,ch2,2dc in the chain space of the previous row* repeat * to * across until end of the row. at the end make 1dc in ch3 space of the previous row. ch3 and turn.
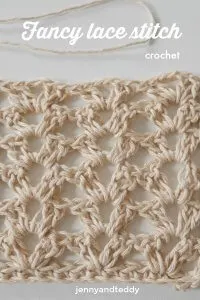
Confuse about this stitch see very detail photo tutorial on fancy lace stitch here.
Repeat row 3 until you get around 27 inches long for size s to 2xl.
Repeat row 3 until you get around 32 inches long for size 3XL to 4xl.
And finished off and leave long tail for sewing.

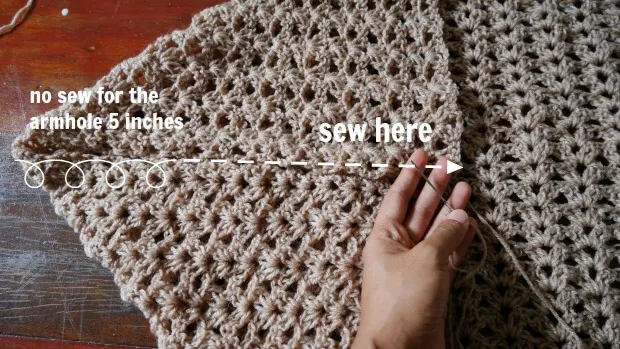
Shape armhole.
Lay the piece of rectangle in flatted and fold each corner inward until they meet then using your yarn needle to seam the corner with your prefer method ( I used whip stitch) and leaving holes for the arm. For the arm holes I leave my one about 5 inch or your prefer length.
Repeat for the other side.


For the edging/collar.
For the collar we will worked along the edge of the opening of the cardigan back and forth in rows with sc for 1 round. Start at the bottom front corner of the cardigan where the first stitch marker place, working around the back of the neck to the bottom front corner on the other side where the second stitch marker place. (See photo below.)
Start by Place each stitch marker at the bottom front corner of the cardigan.
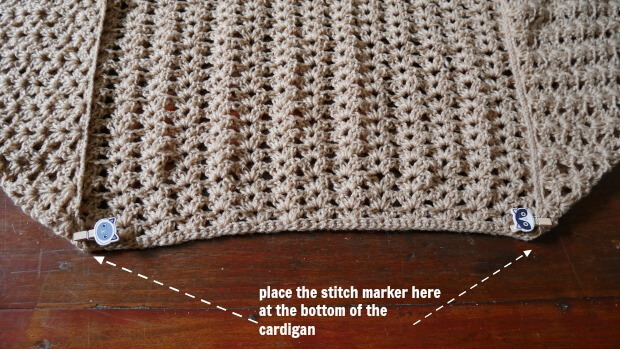
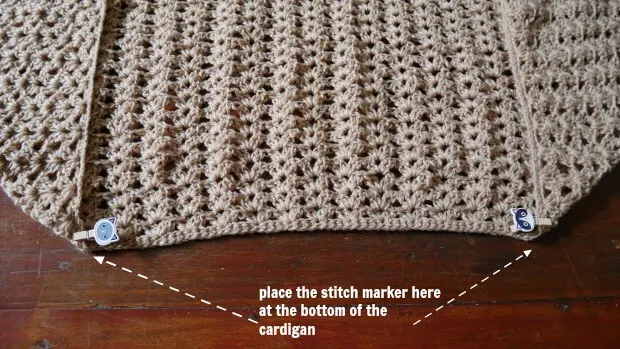
Rejoin your yarn at the first stitch marker is place.

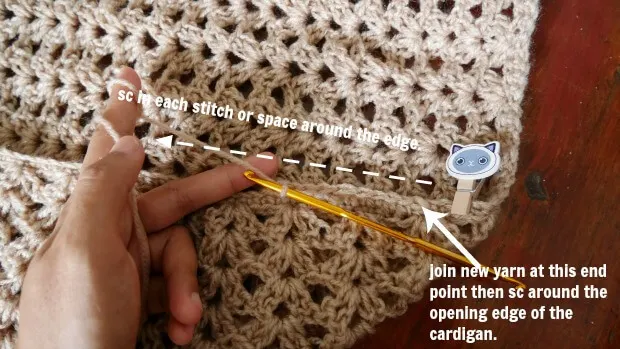
Row1. sc all around the opening of the cardigan start at where the first stitch marker is place and finish at the second stitch marker is place, then ch1 and turn.

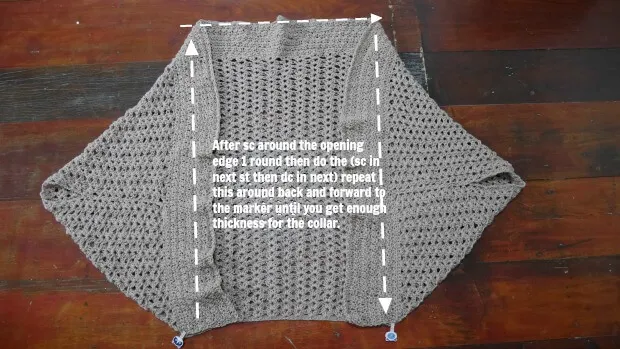
Row2. make *sc in next st snd dc in next st* and repeat this * to * all around the opening of the cardigan start at where the first stitch marker is place and finish at the second stitch marker is place, and then ch1 , turn.
Row3. Repeat row2 until your collar measure around 5-6 inches deep. Fasten off and weave in end.
All done!
Happy crocheting!
If you make one I would love to see your creation tag me on Instagram!
Joy Aganon
Monday 30th of August 2021
Thank you for sharing your patterns 💕
Aisha
Wednesday 9th of June 2021
Thanks and HBD month.. Mine is 6/5💜
jane
Wednesday 9th of June 2021
Thank u Aisha.