
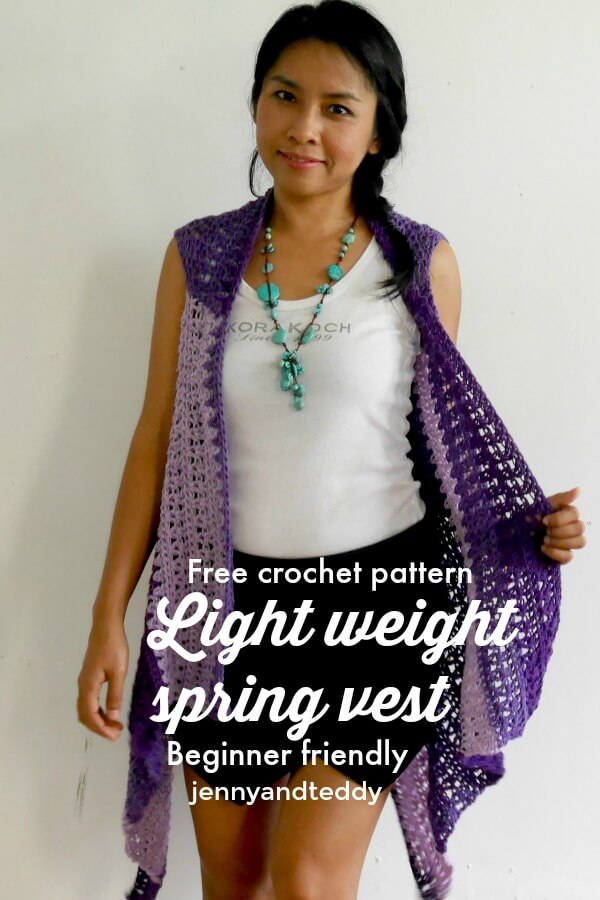
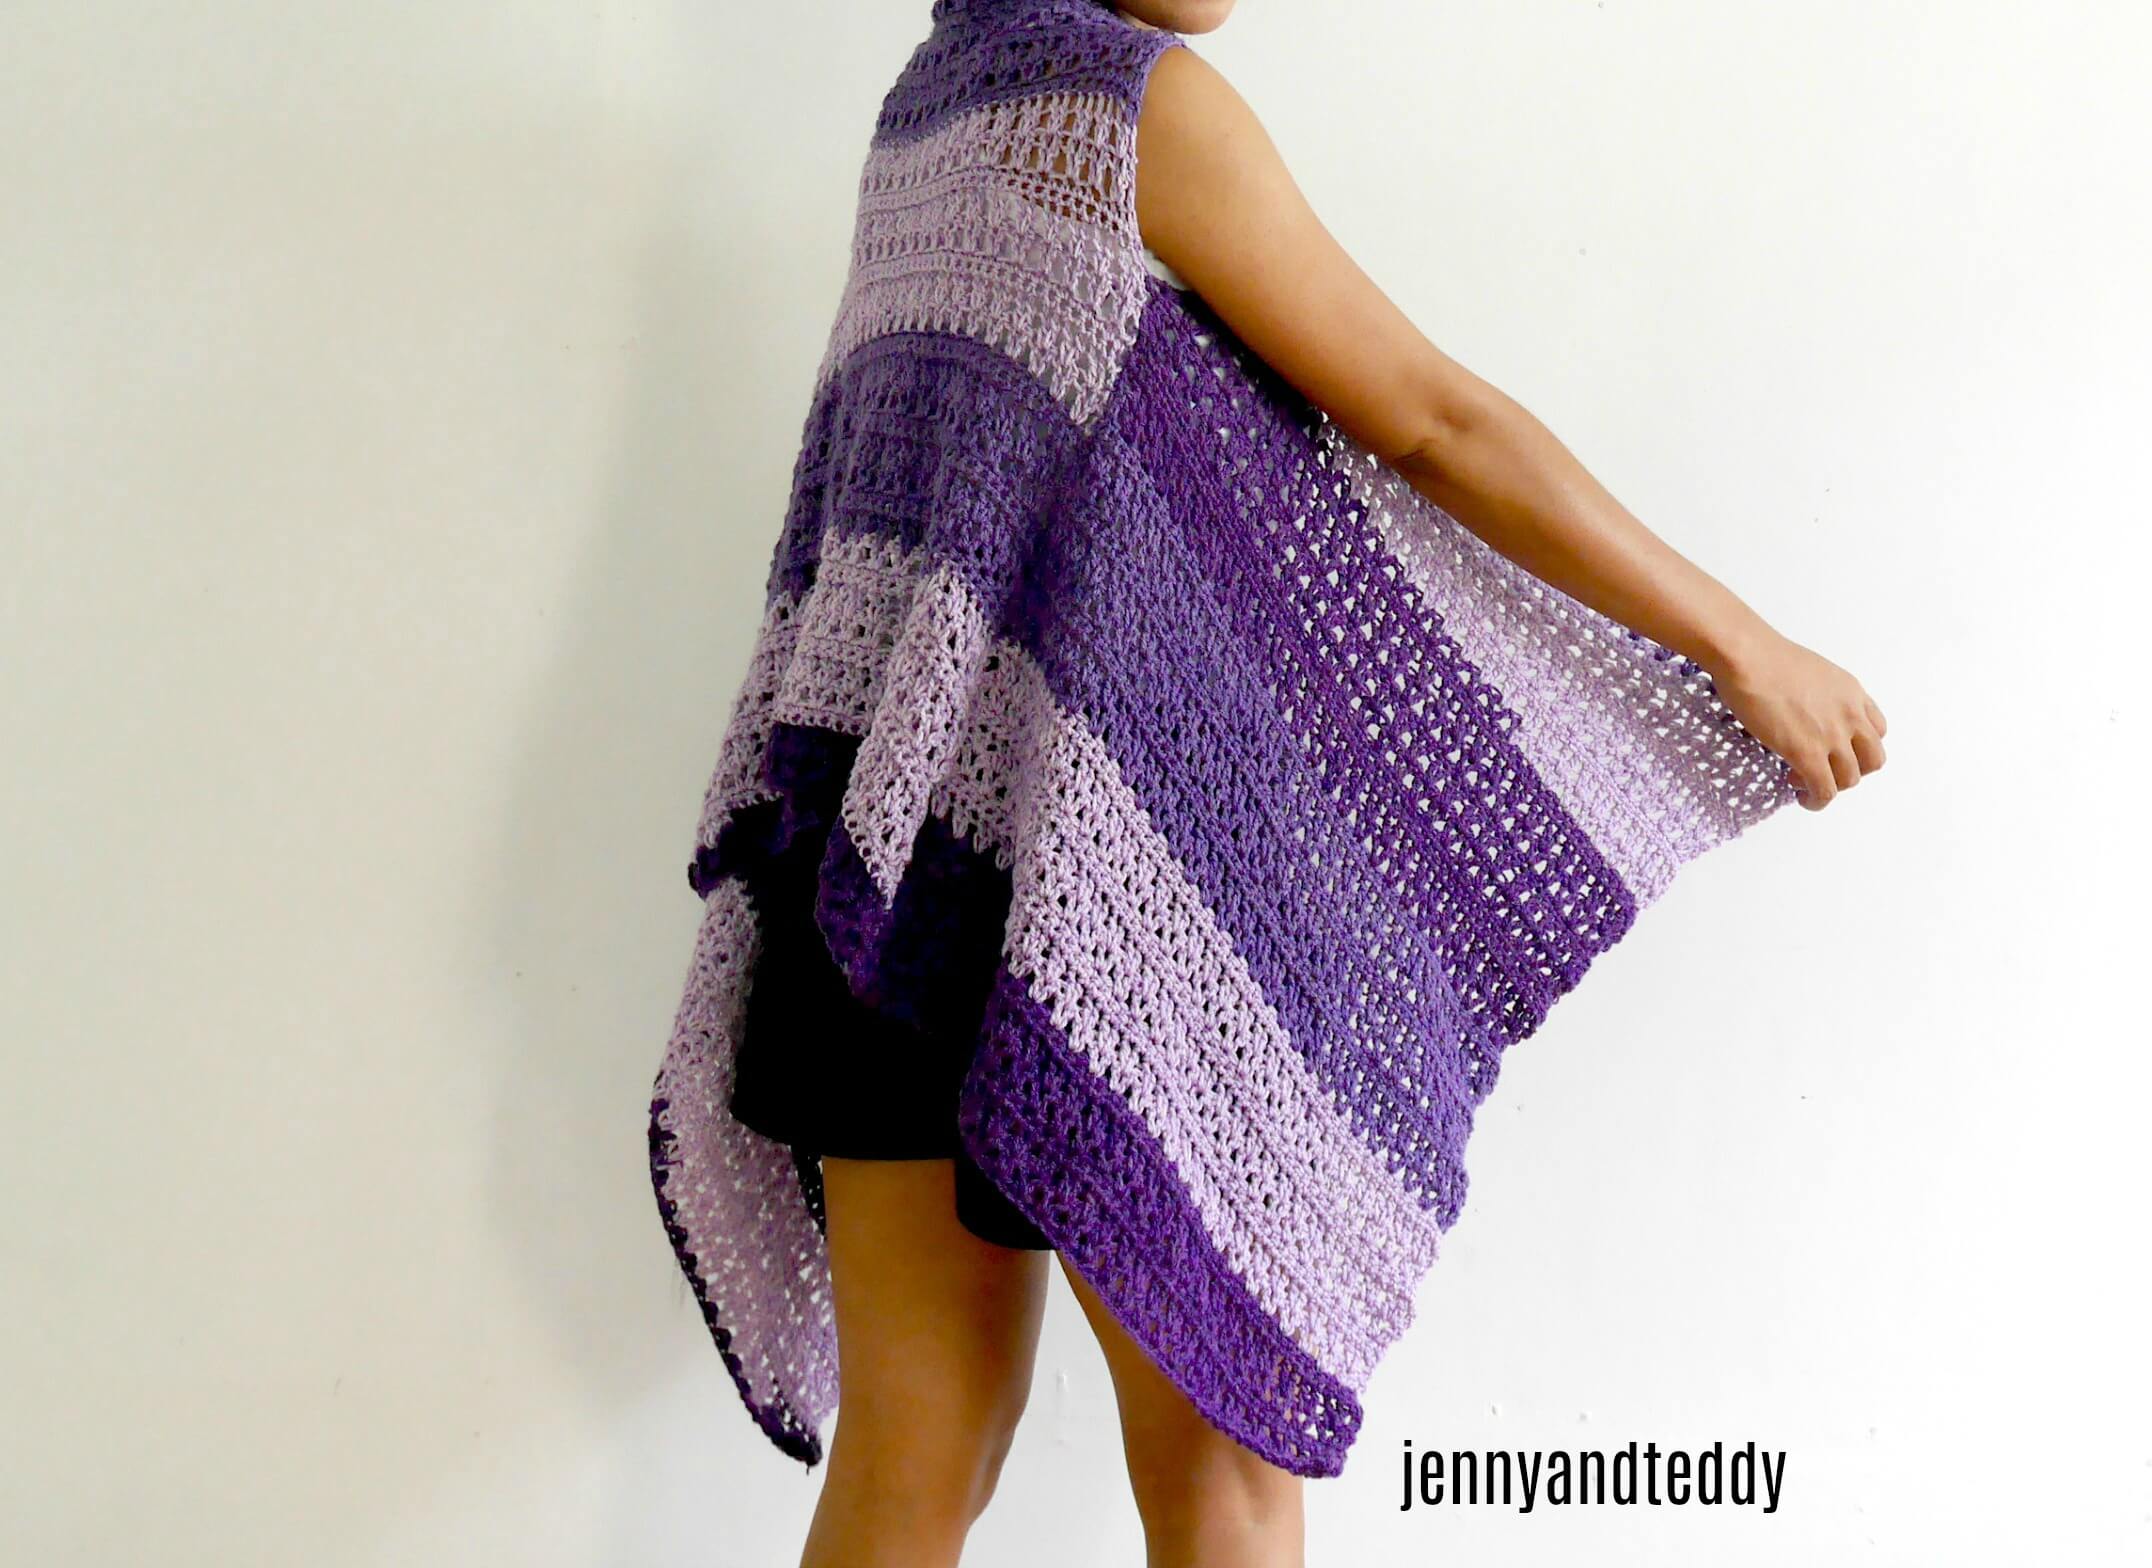
This crochet lightweight spring vest has such a fun color shade that will brighten up your wardrobe.
Not only this easy crochet vest pattern is perfect for beginners but also versatile and simple to throw on top of any outfit from casual style to formal office work.
Hi girls, the vests are back in the fashion trend right here right now! And this lightweight crochet vest is perfect for layering in this transitional season.
Easy crochet vest pattern.
There are a lot of crochet vest patterns out there ranging from beginner level with less experienced crochet to advance crochet skills.
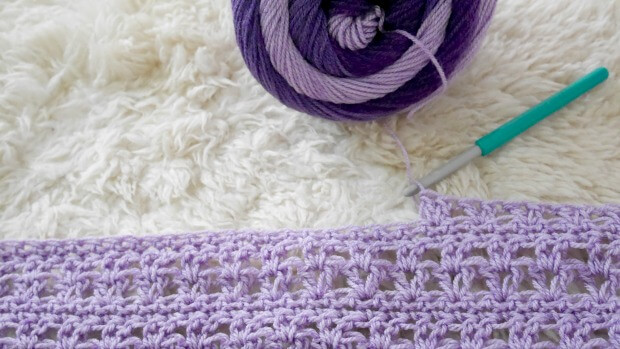
However, this lightweight spring vest crochet pattern falls into an easy level skill, and the basic stitch used in this pattern is a v stitch which is only a one-row repeat.
It’s a beginner-perfect crochet stitch that you will love to use it all the time in your crochet garments.
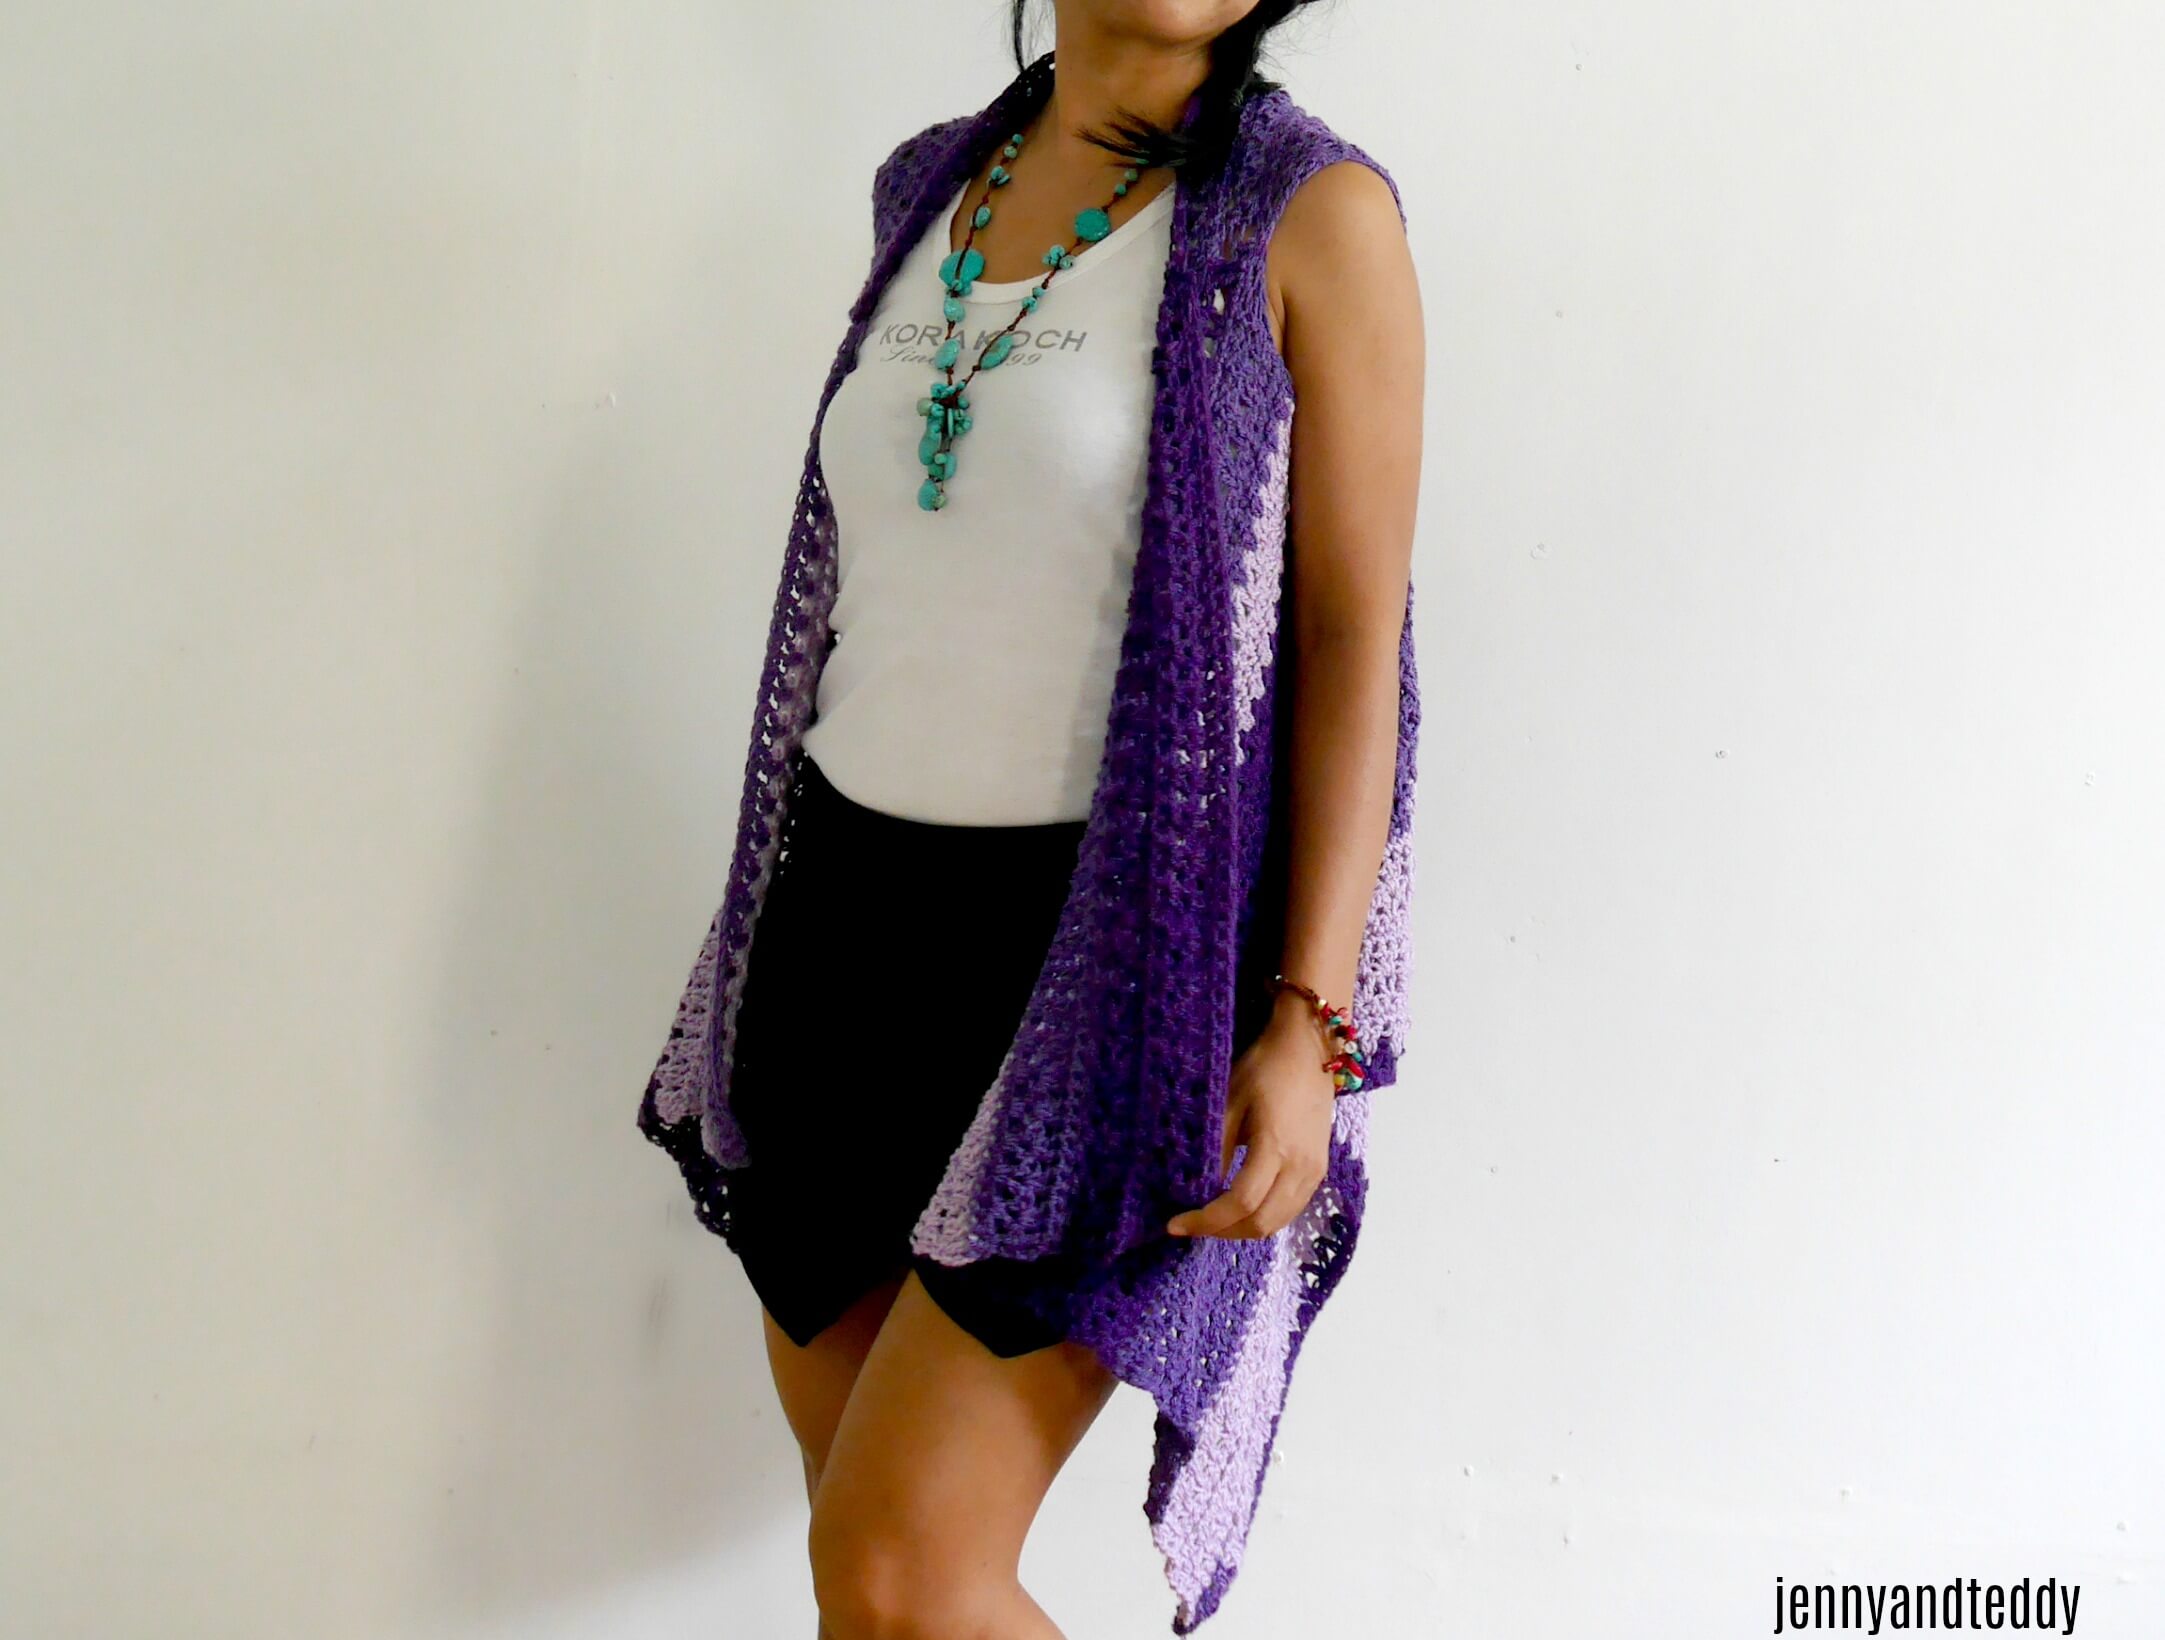
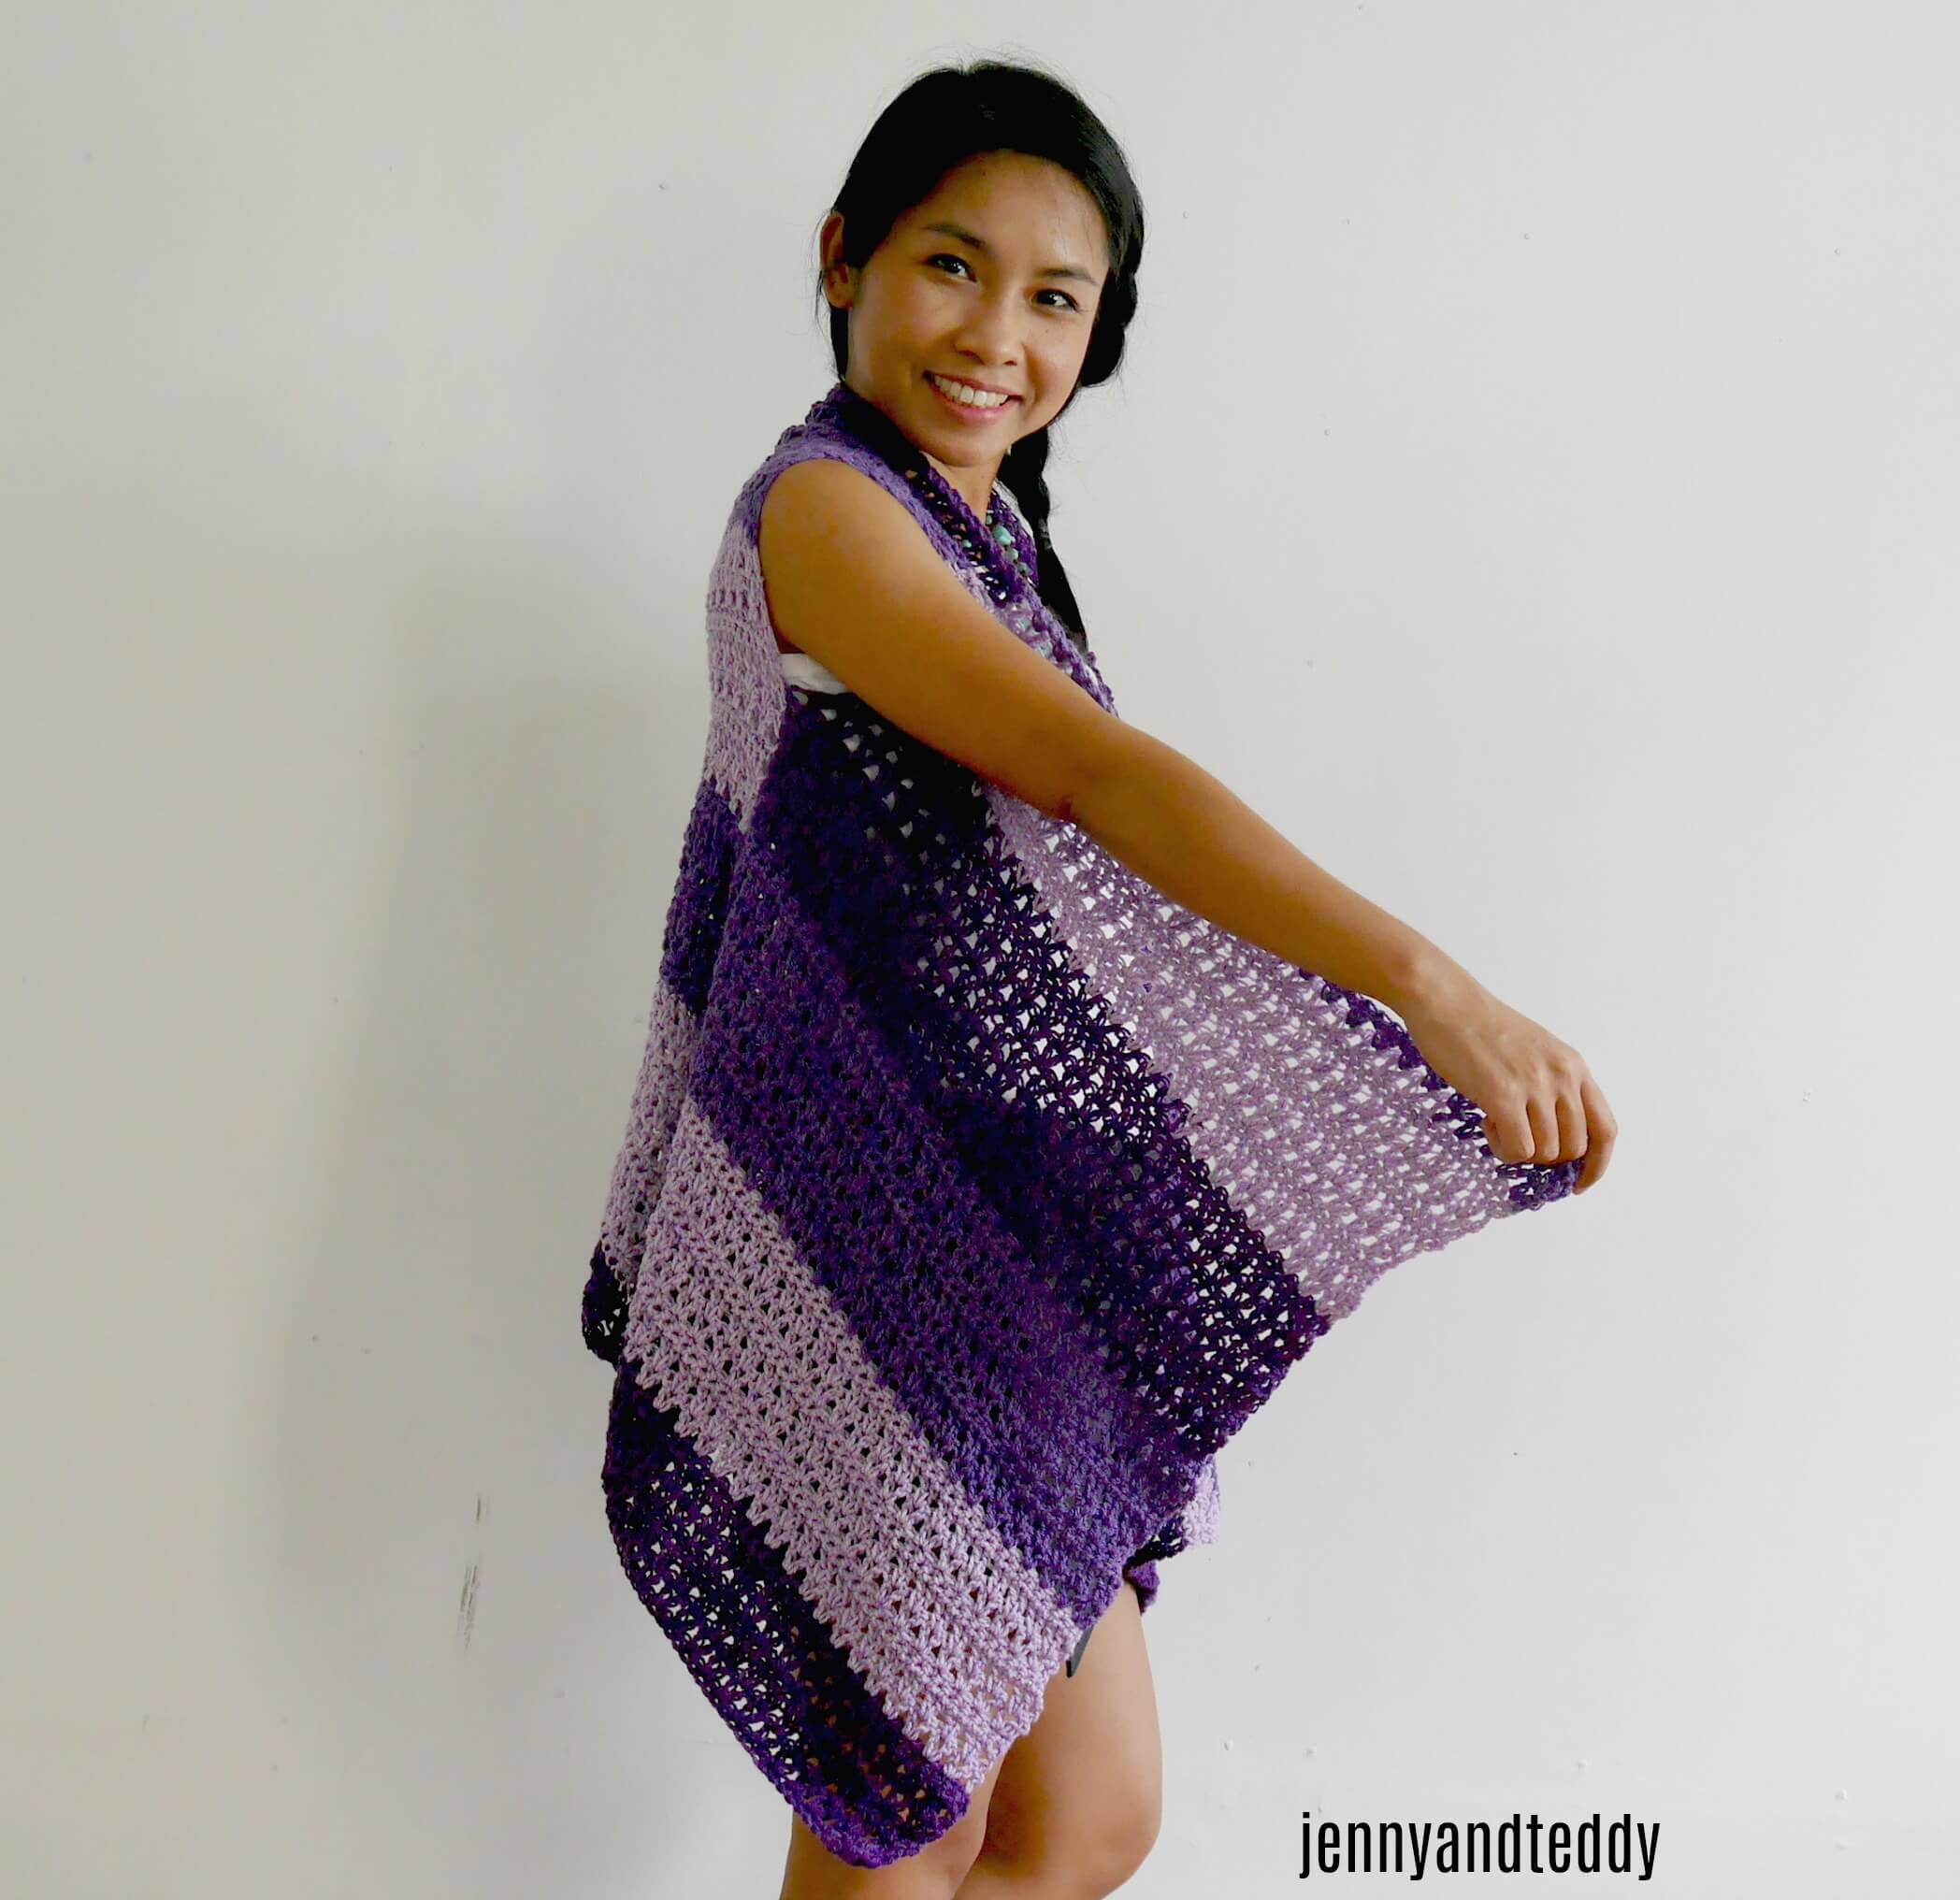
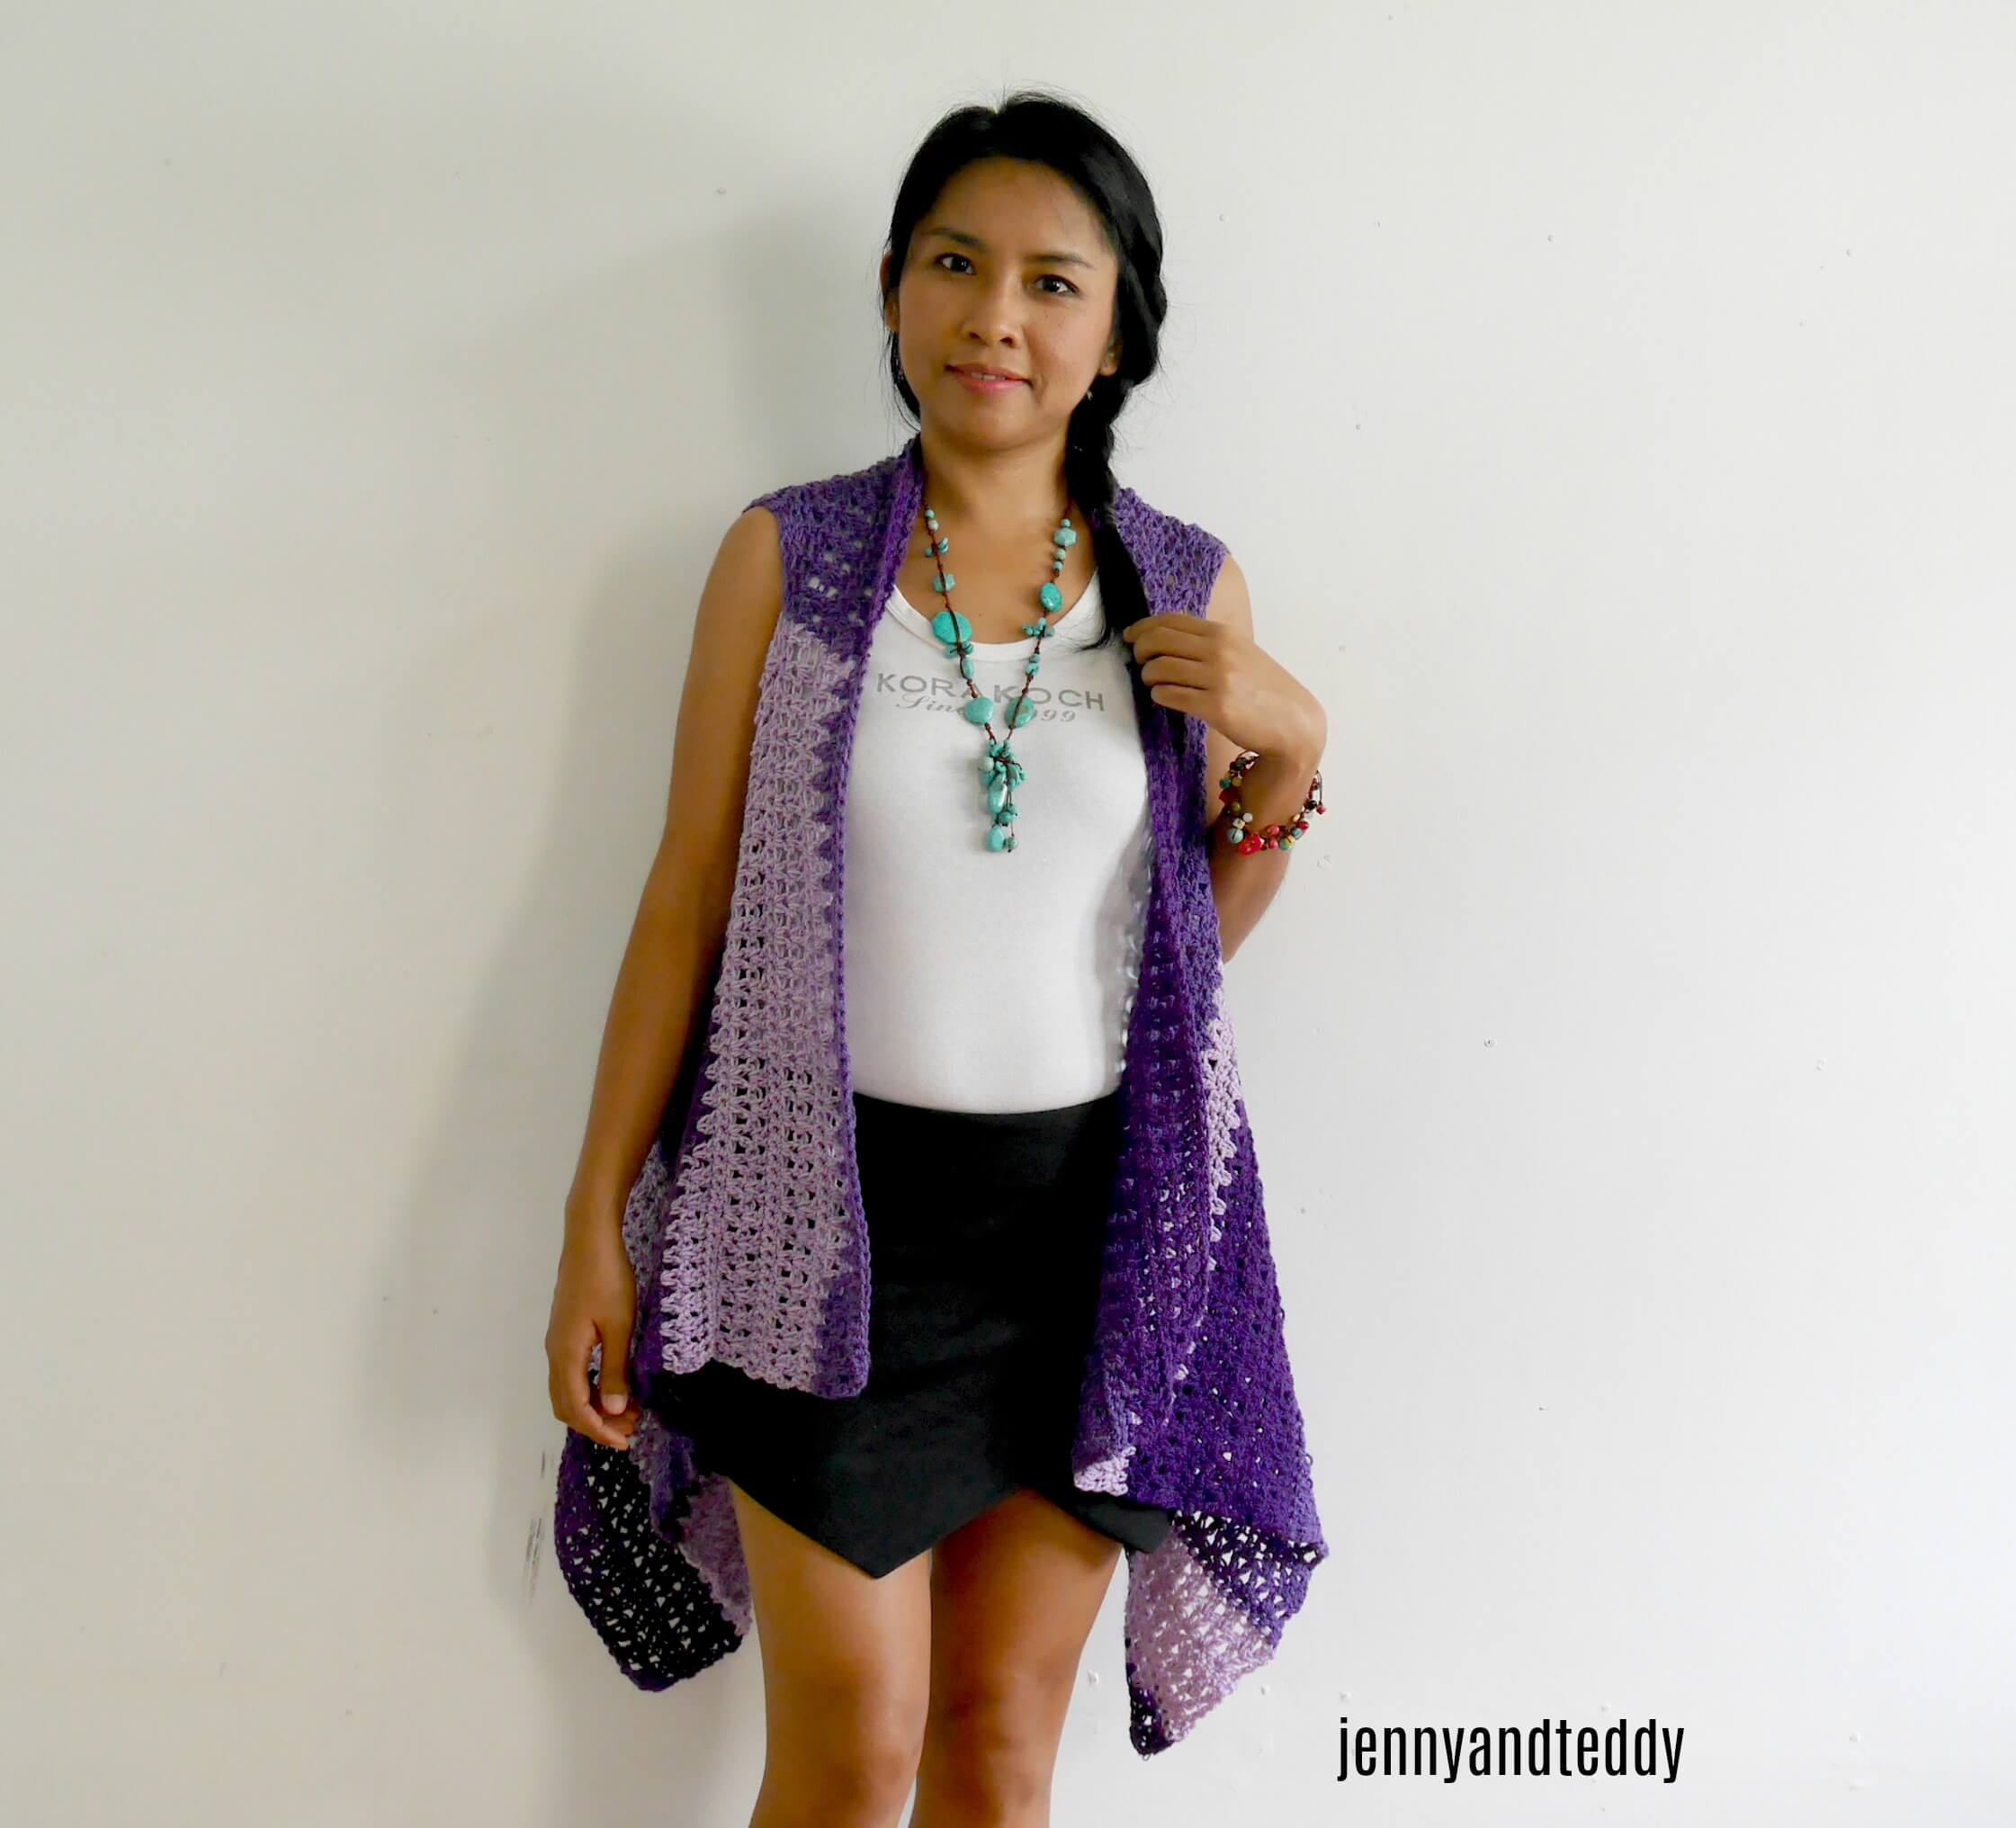
Actually, this beginner-friendly crochet vest pattern has an easy shaping and is made from 3 identical rectangles then join them together by sewing using a yarn needle, and that is all you finished crocheted a vest.
Best yarn for this simple crochet lightweight spring vest pattern.
Polyester yarn: In this crochet sleeveless vest pattern, I use 100 % polyester fiber content in dk weight / 3 light that will give a lightweight look to the crochet vest, and they are budget-friendly yarn That I love.
Plant fiber yarn: you girls can also use any plant fiber content yarn for this spring vest crochet pattern, such as cotton yarn, bamboo, hemp, or more… the plant fiber content will give a pretty drape to the garment and be breathable in the summertime.
Wool yarn: Wool yarn also works fine for this easy vest pattern.
Need more of our favorite free crochet vest patterns?
- Crochet vest top with unique collar.
- Crochet hooded sweater vest with houndstooth stitch.
- Crochet jacket vest with zipper.
- Crochet summer vest.
Supplies & materials.
- I used Lion Brand Mandala 100% acrylic 150 gram 540 m, or you can use any kind of yarn cake. I am using about 2-3 skeins around 1,200 meters fit size small to XL.( easy to adjust the size. See pattern instruction below) yarn weight 3 light.
- 6 mm crochet hook or J/10 US hook size
- Sewing yarn needle
Skill and abbreviations
- (American crochet terms)
- You will need to know how to make
- sc, which means single crochet
- dc, which means double crochet
- ch, Chain
- slip knot
Finished Size Approximately: one size fit all adult from size small to fit xl.
Get the free pattern below or this pattern is also available as an inexpensive, ad-free, PDF printable instant download in my etsy shop. Thank you so much for your love and support. I am really appreciate you.
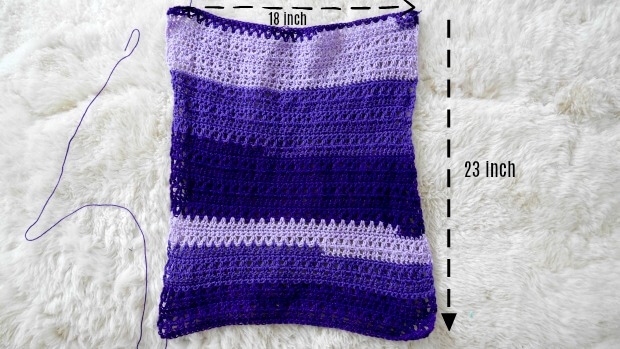
Measurement.
- Of the rectangle.
- 18 inches wide
- 23 inches long

Gauge: 2 group of V double crochet= 1-1.2 inch
Lightweight spring vest free crochet pattern instruction.
Start off by making a slip knot, Then make 60 chains foundation chain.
(you can adjust the size of the vest to be small by decreasing the foundation chain in even numbers.
Or Bigger size by increasing the foundation chain in even numbers. for example ( 70,80,90,100,…..) for foundation chain.
After you get the foundation chain, then make sc in each chain across chain 2, and turn.
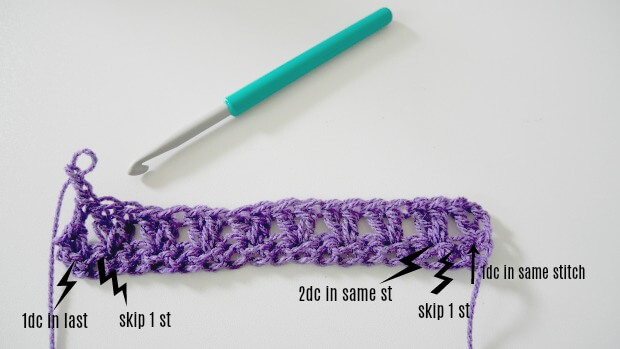
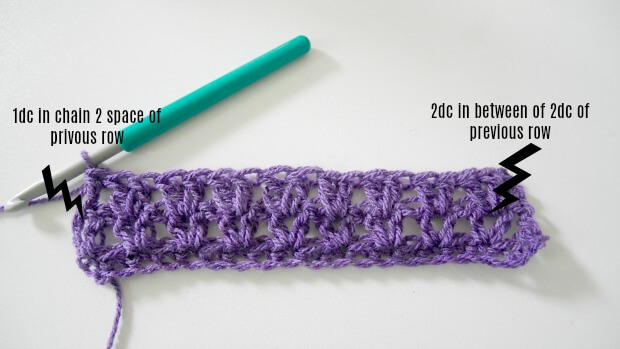
Row1: make 1dc in the same stitch * skip 1 stitch, then work 2dc in the next stitch* repeat * to * across until the end of the row until you will have 2 stitches remain, skip 1 st, 1dc in the last stitch, ch2 turn.
Row2. now you will work *2dc in between each of 2dc of the previous row* repeat * to * across until end of the row, then 1dc in chain 2 space of the previous row, ch1, turn.
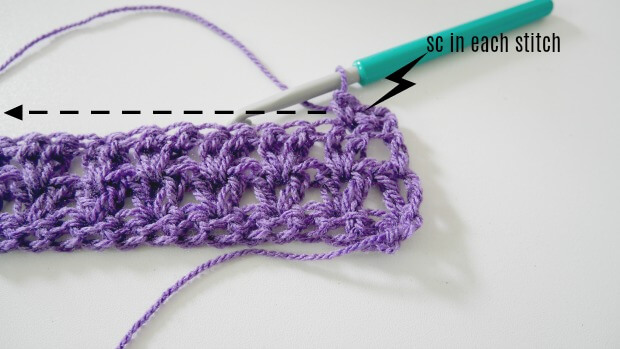
Row3. now you will work *sc in each stitch across until the end of the row, then ch1, turn.
Row4. now you will work *sc in each stitch across until the end of the row, then ch2, turn.
Repeat rows 1-4 until your rectangle measures approximately 18 inches wide and 23 inches long, then finish off and leave a long tail for sewing.
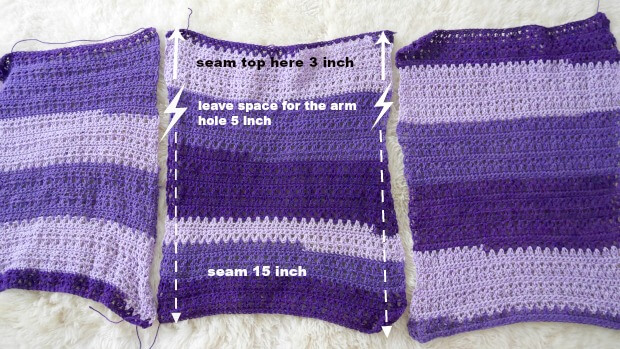
After finishing 3 pieces of the rectangle, it’s time to assemble.
Lay 3 pieces of rectangles side by side. Now, use a yarn needle and whip stitch to Seam up each side of the vest with a whip stitch or you prefer the stitch method.
At the top upper-end seam up 3 inches and Leave space for the arm hole of about 5 inches; you may adjust the how long of the arm hole to fit your size.
At the bottom end, seam up about 15 inches. Finish off and weave in the end.
Now enjoy your lightweight crochet vest.
If you make one, I would love to see your creation. Tag me on Instagram! would love to see your creation.
Happy crocheting.
Colleen Riesel
Tuesday 9th of March 2021
If you chain more than 60 what are the sizes of the rectangles??
jane
Thursday 11th of March 2021
HiColleen if you chain 70 the rectangle will be 22 inch wide fit size Large to XL. 4 chain is about 1.2 inch.
Brittany Iorio
Wednesday 24th of April 2019
So do I make 3 panels exactly the same then seam them together?
jane
Wednesday 24th of April 2019
Hi Brittany, yes make 3 panel the same then seam them together.