

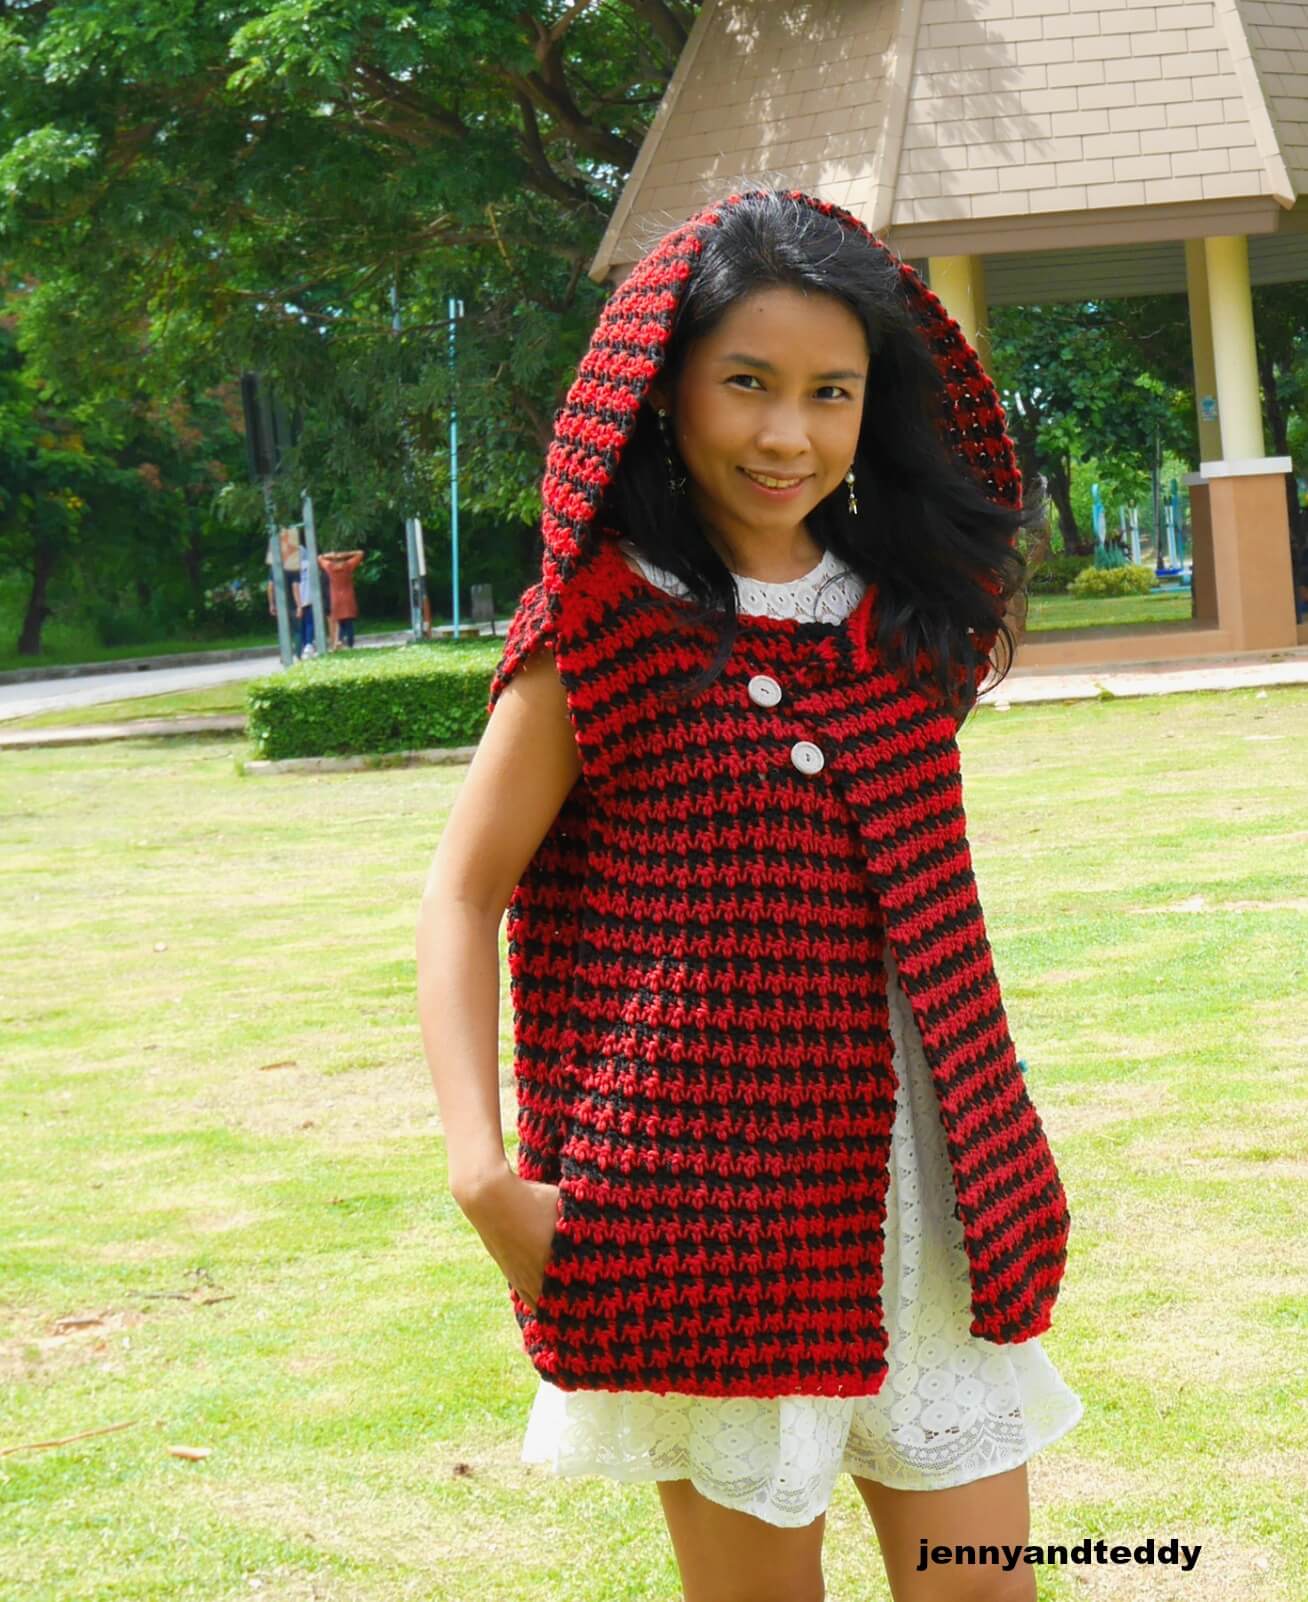
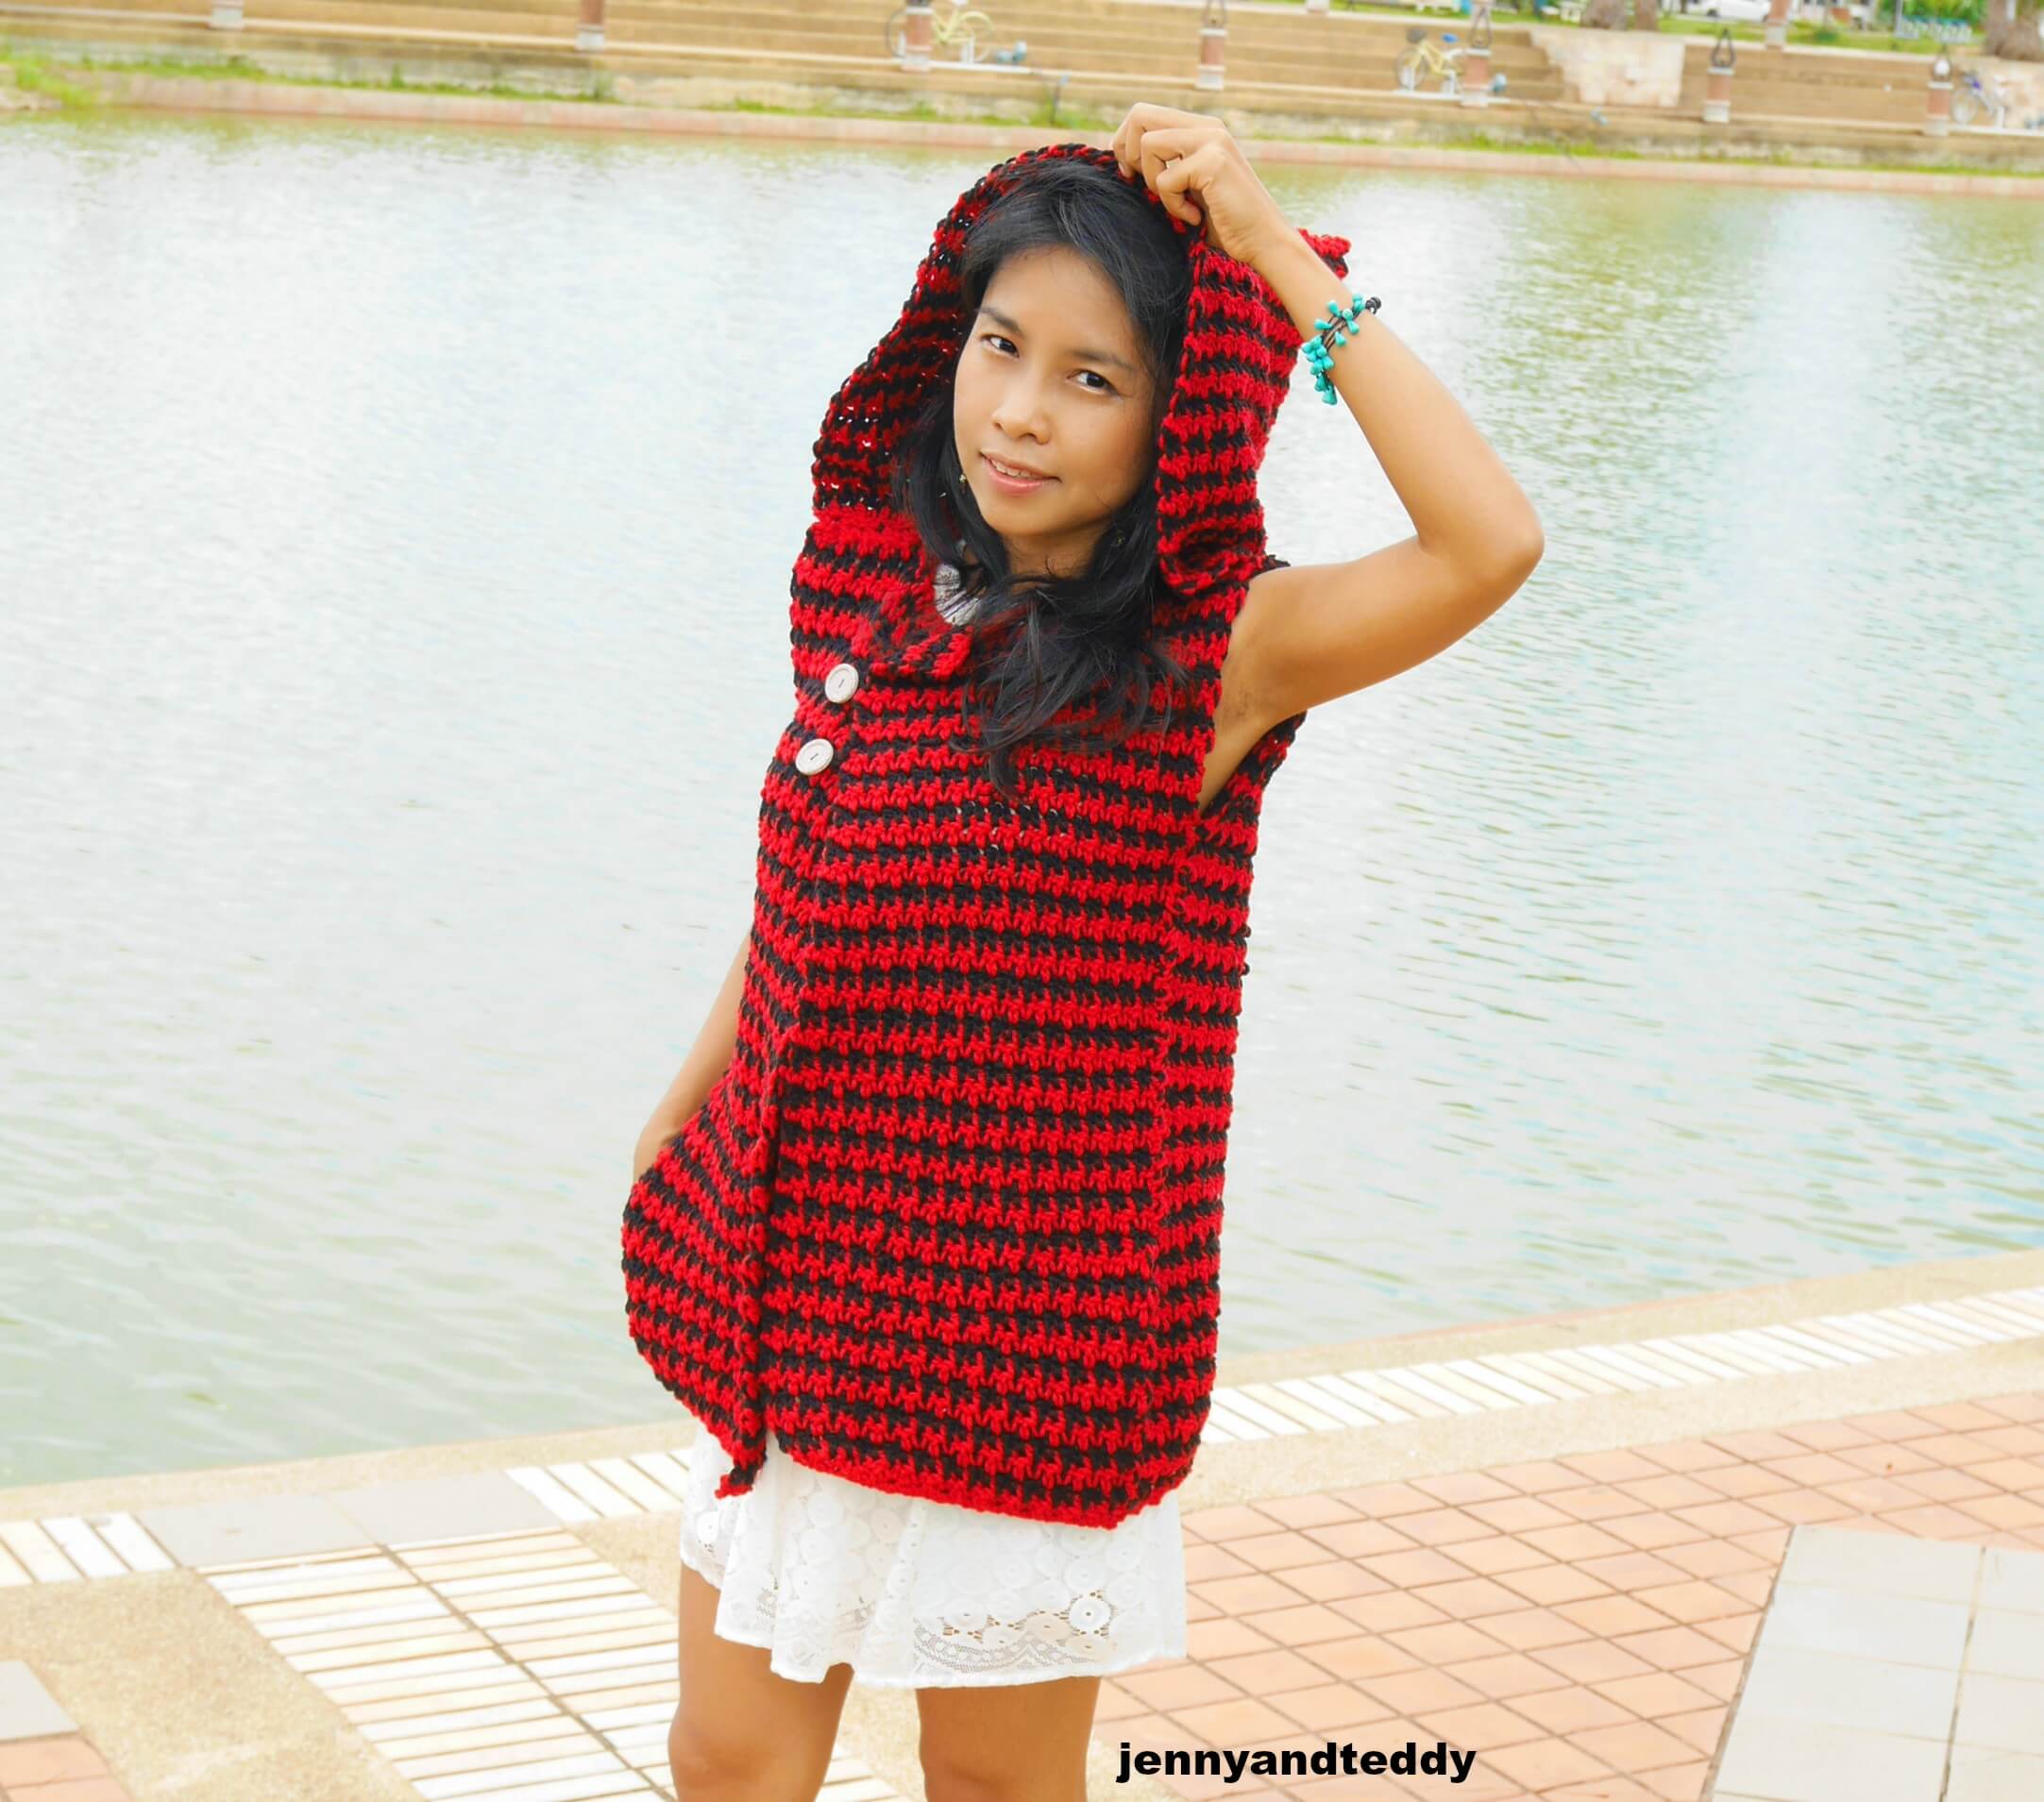
This houndstooth crochet hooded sweater vest is easy, pretty, and fun to crochet for this winter.
This crochet sweater vest jacket is not only a great piece for layering on a cold weather day but also has a pocket to keep your hand warm.
We all love the pocket, right? I do too! This hooded vest will be one of my favorite garments to wear when I go out.
Easy crochet hooded sweater vest pattern.
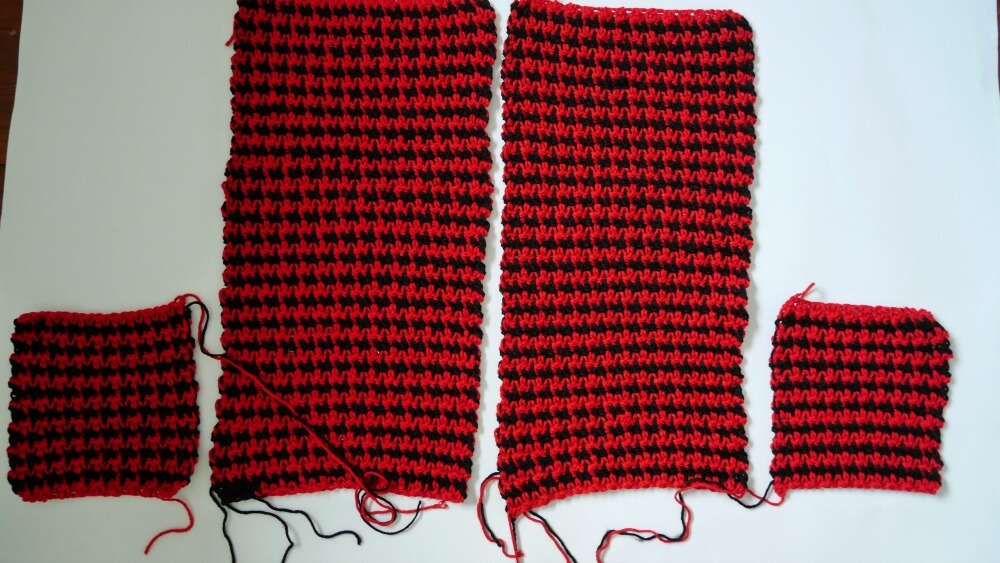
This easy crochet vest with a hoodie, They are made up of 4 crochet rectangles.
And the houndstooth stitch it looks hard but is actually really easy, just like single and double crochet repeat with the color changing in each row,
And no worries if you are a visual learner I have added a video for this stitch, too; you will surely master this stitch in no time!
Best yarn for houndstooth vest pattern.
The yarn I picked for this hooded sweater vest free pattern is 10-ply acrylic yarn, or you go for 5 bulky yarn weights; all is fine with the pattern.

Still need more easy free crochet vest patterns to crochet for this weekend?
Supplies & materials.
- I used bulky yarn, yarn weight 5 bulky. , The one That I would recommend is from Knitpicks Brava bulky yarn, 100% acrylic. They have great varieties at a good price!!! I Love them ^^. Brava bulky yarn.
- Or you could go for a cotton blend for a comfy texture with Plymouth Jeannee Chunky Yarn.
- Even go for luxury and toasty warm 100% wool with Cloudborn Superwash Merino Bulky Yarn.
- I am using about 1400 yards altogether, around 700 yards for red color and 700 yards for black color,
- 6 mm crochet hook or J/10 US hook size
- Sewing yarn needle
- stitch marker
- 2 Buttons
Skill and abbreviations
- (American crochet terms)
- You will need to know how to make
- St (stitch)
- sc which means single crochet
- dc, which means double crochet
- ch, Chain
- slip knot
- houndstooth stitch from Made with love by Glama,
- which means white, *sc on top of the dc from the previous row, then dc on top of sc of the previous row * repeat from * to * across until the end of the row and in the last st make dc, ch1 turn. and switch up the new color.
Get the free pattern below or this pattern is also available as an inexpensive, ad-free, PDF printable instant download in my etsy shop. Thank you so much for your love and support. I am really appreciate you.
Finished Size Approximately:
The model piece wear fit from Small to medium.
( Easy to adjust by adding more or decreasing the chain to the foundation chain. See instructions below for sides large to 2xl).
For me the model wearing this piece, I am 4’9 feet tall.
Gauge: 2 groups of single and double crochet= 1.5 inch
Houndstooth crochet hooded sweater vest free pattern instruction.
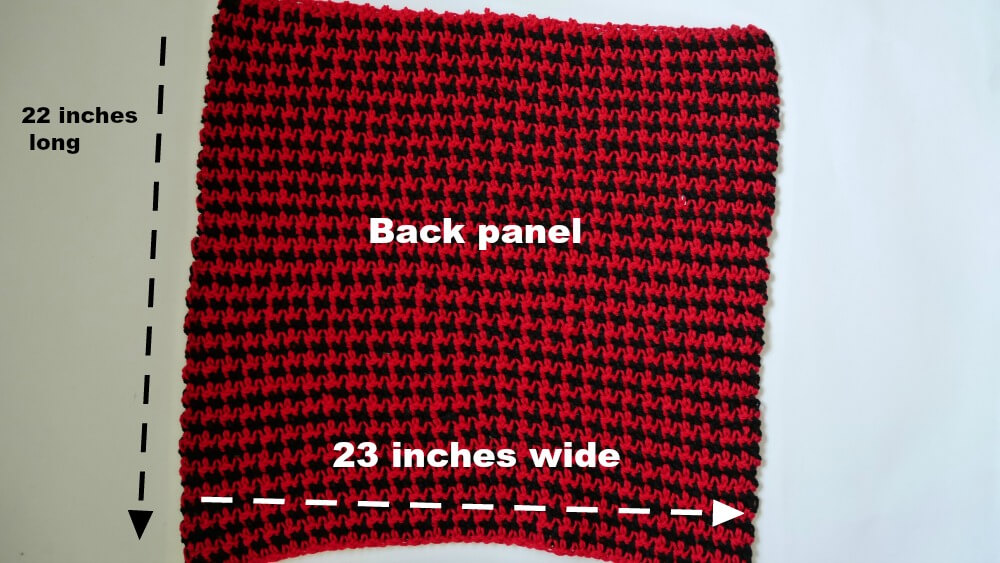
Back panel.
- Measurement of the back panel.
- 23 inches wide
- 22 inches long
For the width: If you need to make it wider, simply add more chains in even number +1 to the foundation chain..like 60+1, 70+1, 80+1, etc. I start this poncho with foundation chains of 60+1.
For the length: add more rows.
- Back panel. Start off by making a slip knot.
- Then make 56+1 chains ( fit size s and m),
- (size L chain 60+1)
- (size xl chain 66+1)
- (size 2xl chain 70+1)
- (foundation chain) red.
Row1. red, sc in the next chain from hook, then dc in next chain * sc in next, then dc in next* repeat from * to * across until the end of the row, and in the last chain, make dc, ch1 turn.
Do not cut the yarn off; instead of that, tug the tail in and crochet all the way so this will make a tidy edge.
Row2. black, *sc on top of the dc from the previous row, then dc on top of sc of the previous row * repeat from * to * across until the end of the row and in the last st make dc, ch1 turn.
Row3. red, *sc on top of the dc from the previous row, then dc on top of sc of the previous row * repeat from * to * across until the end of the row and in the last st make dc, ch1 turn.
Repeat rows 2 and 3 until your piece measures approximately 22 inches long, and Fasten off. Set aside waiting for assembly.
The front panel on both sides.
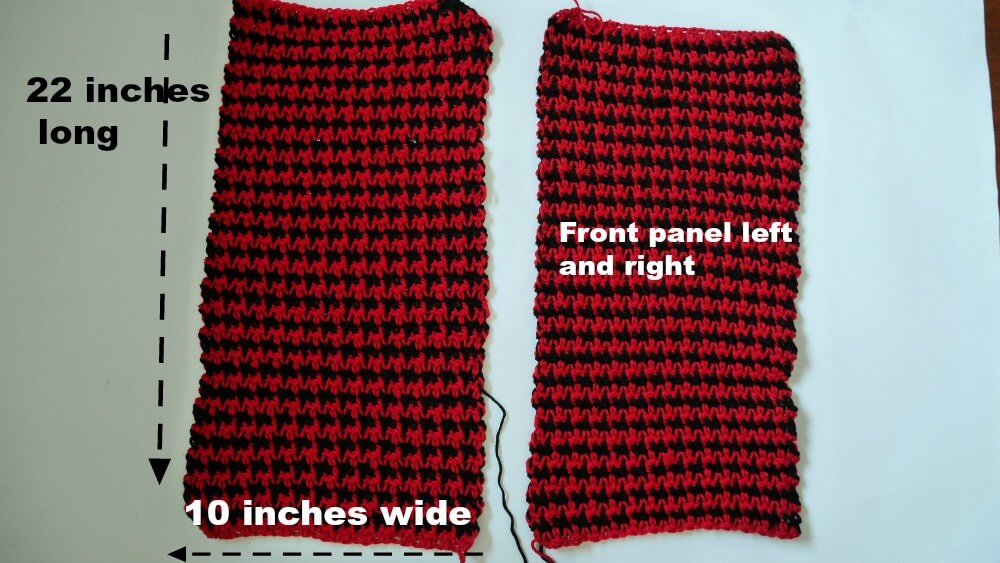
- Measurement of the front panel.
- 10 inches wide
- 22 inches long
Start off by making a slip knot.
- Then ( make 28+1 chains for sizes s and m)
- (size L chain 30+1)
- (size xl chain 32+1)
- (size 2xl chain 34+1)
- (foundation chain) red.
Row1. red, sc in the next chain from hook, then dc in next chain * sc in next, then dc in next* repeat from * to * across until the end of the row, and in the last chain, make dc, ch1 turn.
Row2. black, *sc on top of the dc from the previous row, then dc on top of sc of the previous row * repeat from * to * across until the end of the row and in the last st make dc, ch1 turn.
Row3. red, *sc on top of the dc from the previous row, then dc on top of sc of the previous row * repeat from * to * across until the end of the row and in the last st make dc, ch1 turn.
Repeat rows 2 and 3 until your piece measures approximately 22 inches long, and Fasten off.
Repeat the same process to make the second piece of a rectangle. Set aside waiting for assembly.
Hooded.
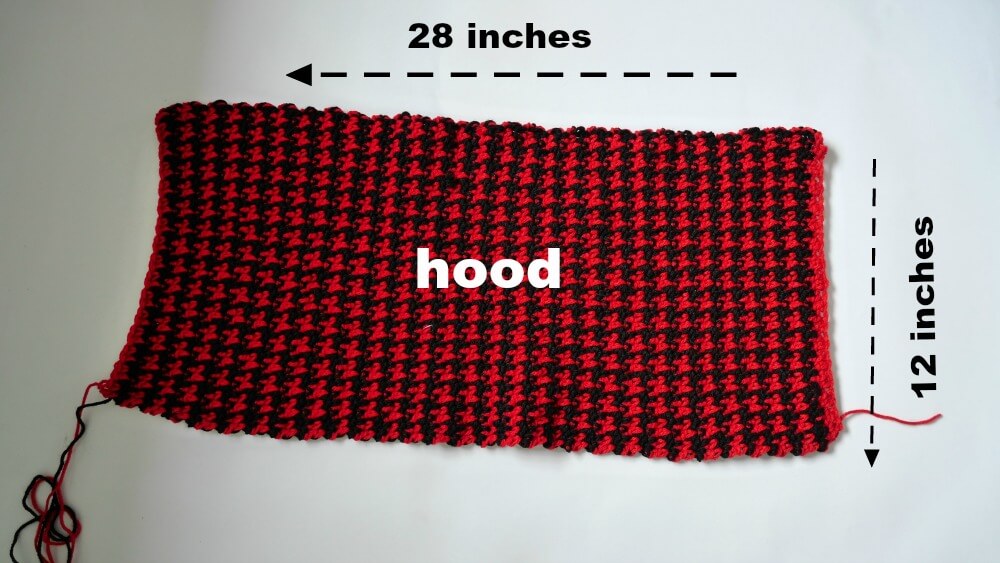
- Measurement of the hooded.
- 12 inches wide
- 28 inches long
All size. Start off by making a slip knot. Then make 32+1 chains (foundation chain) red.
Row1. red, sc in the next chain from hook, then dc in next chain * sc in next, then dc in next* repeat from * to * across until the end of the row, and in the last chain, make dc, ch1 turn.
Row2. black, *sc on top of the dc from the previous row, then dc on top of sc of the previous row * repeat from * to * across until the end of the row and in the last st make dc, ch1 turn.
Row3. red, *sc on top of the dc from the previous row, then dc on top of sc of the previous row * repeat from * to * across until the end of the row and in the last st make dc, ch1 turn.
Repeat rows 2 and 3 until your piece measures approximately 28 inches long, and Fasten off.
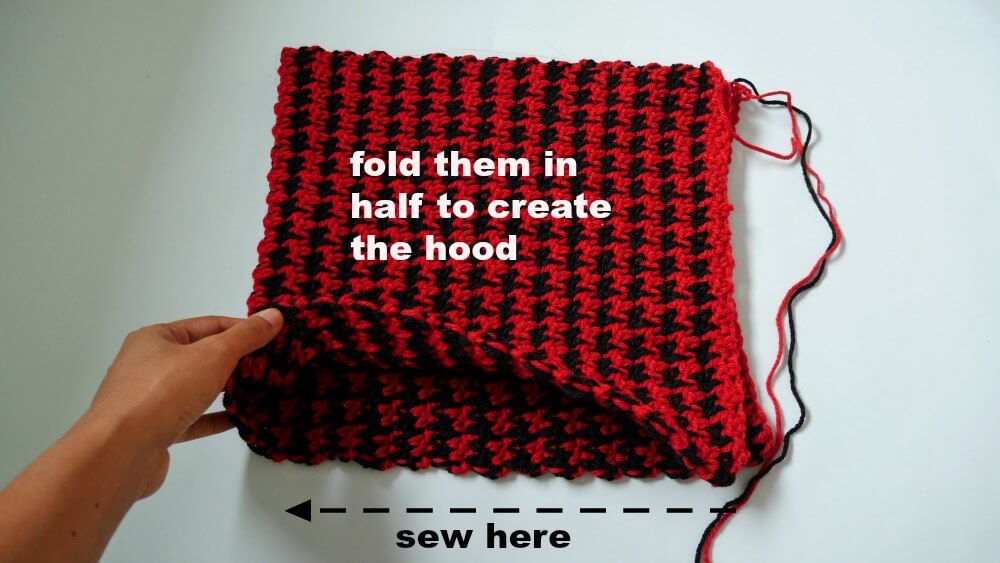
Then fold the rectangle in half and sew on one side to create the hood.
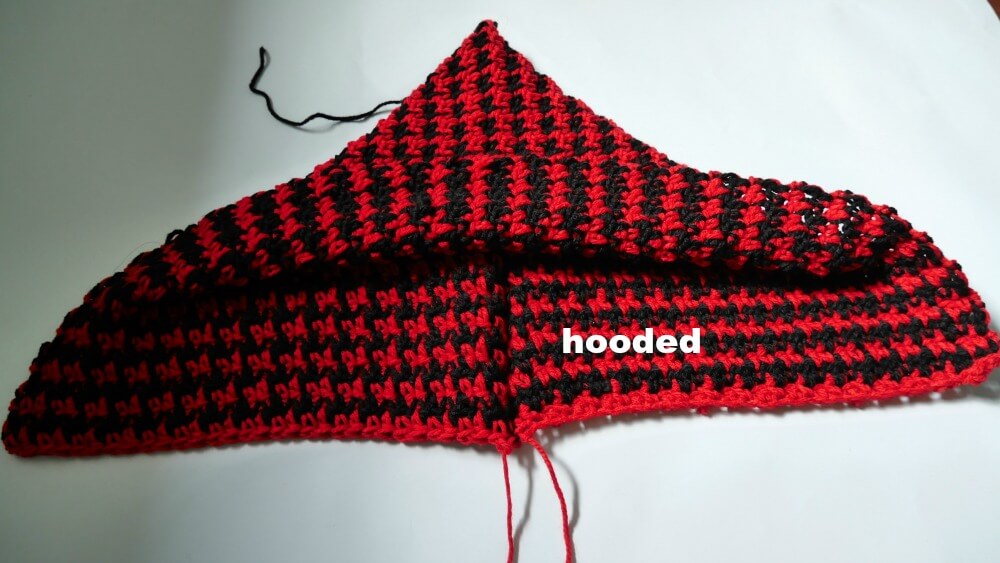
Set aside waiting for assembly.
Pocket.
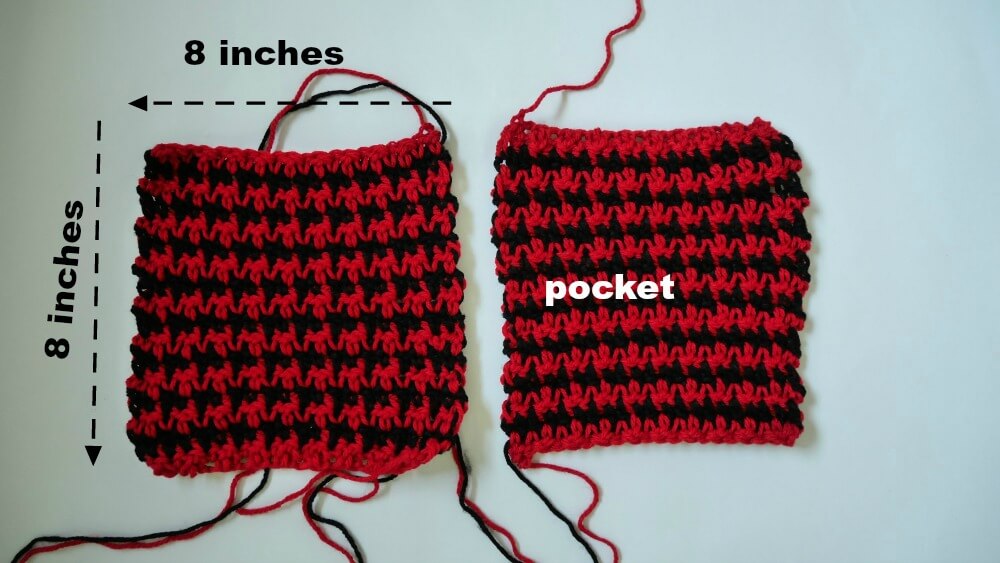
- Measurement of the pocket.
- 8 inches wide
- 8 inches long
For all sizes, Start off by making a slip knot. Then make 20+1 chains (foundation chain) red
Row1. red, sc in the next chain from hook, then dc in next chain * sc in next, then dc in next* repeat from * to * across until the end of the row, and in the last chain, make dc, ch1 turn.
Row2. black, *sc on top of the dc from the previous row, then dc on top of sc of the previous row * repeat from * to * across until the end of the row and in the last st make dc, ch1 turn.
Row3. red, *sc on top of the dc from the previous row, then dc on top of sc of the previous row * repeat from * to * across until the end of the row and in the last st make dc, ch1 turn.
Repeat rows 2 and 3 until your piece measures approximately 8 inches long, and Fasten off. Set aside waiting for assembly.
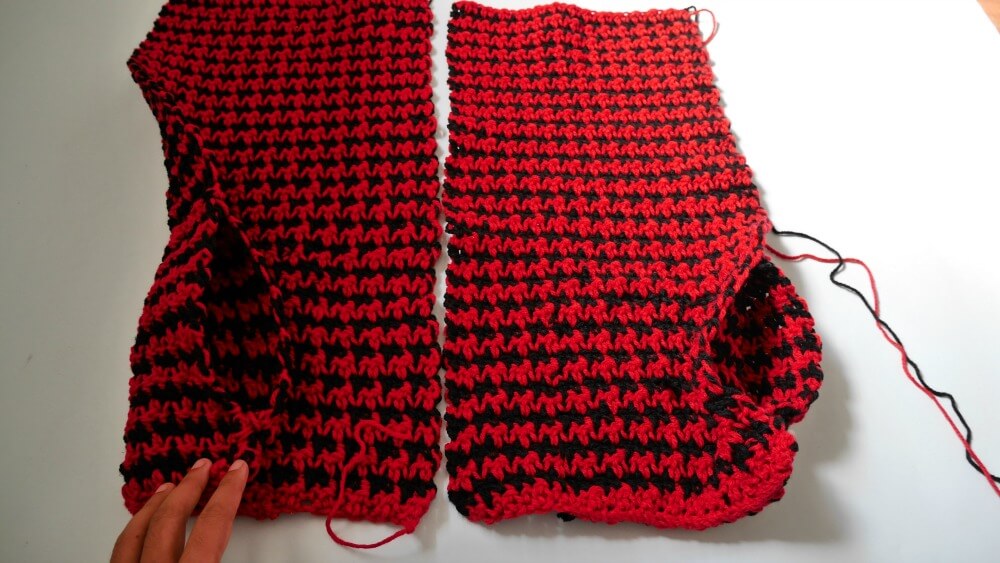
Assemble sweater vest.
We will assemble the front panel first to create the pocket.
Lay the pocket pieces under the front panel so it does not so confuse the right side or left side ( just my way ), but you guys can do it on your way, whatever is easy for you.
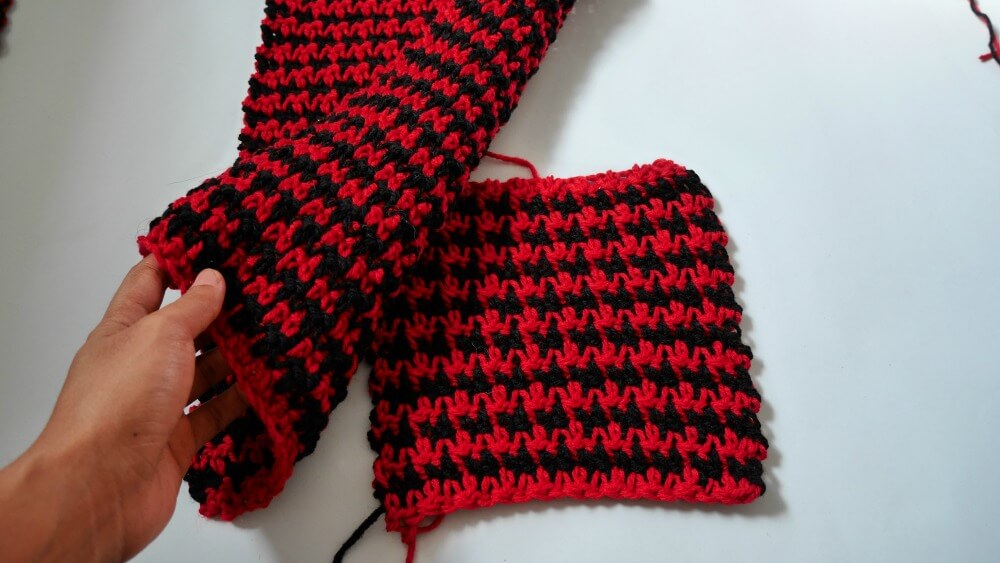
Sewing them by using your yarn needle.
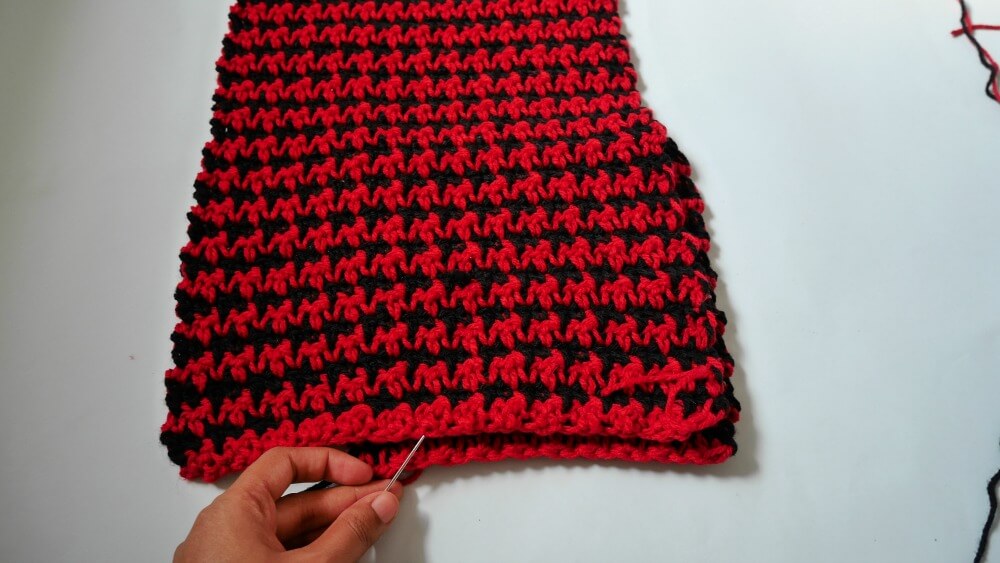
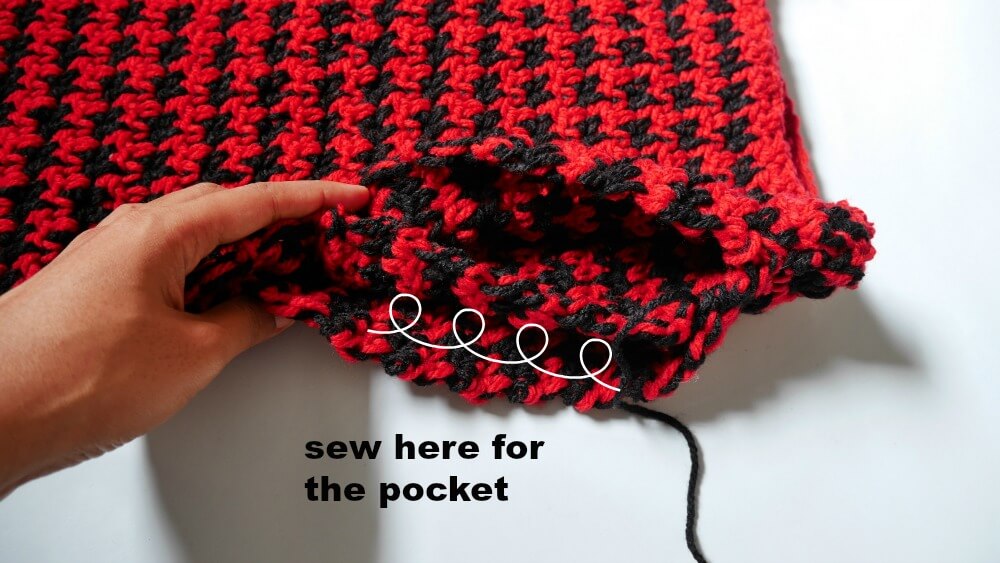
Here I show a picture of what it looking in the back.
Repeat on the other side. After finish will look like this.
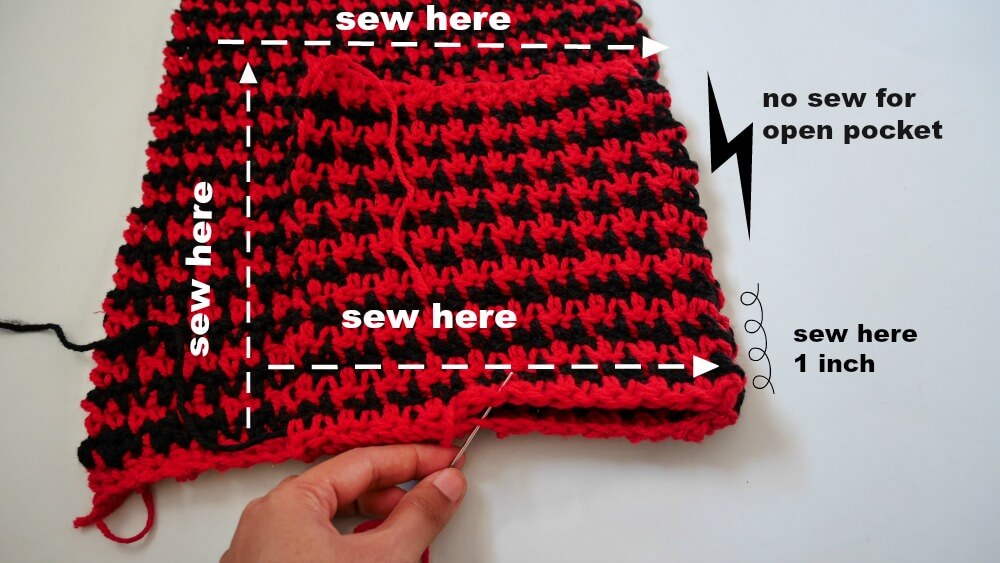
Time to assemble back panel to the front panel.
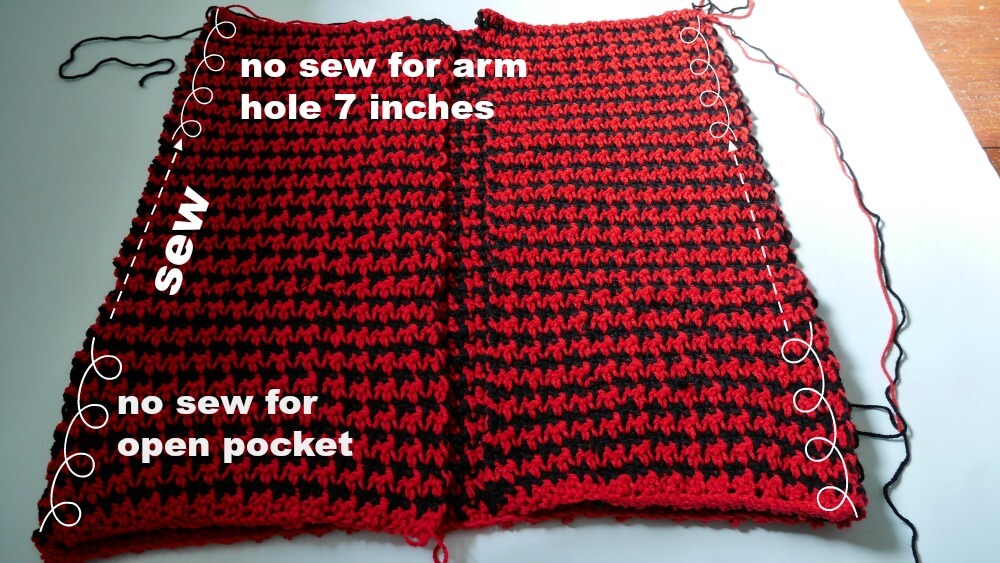
Then sew the pocket to the back panel. See the pic below.
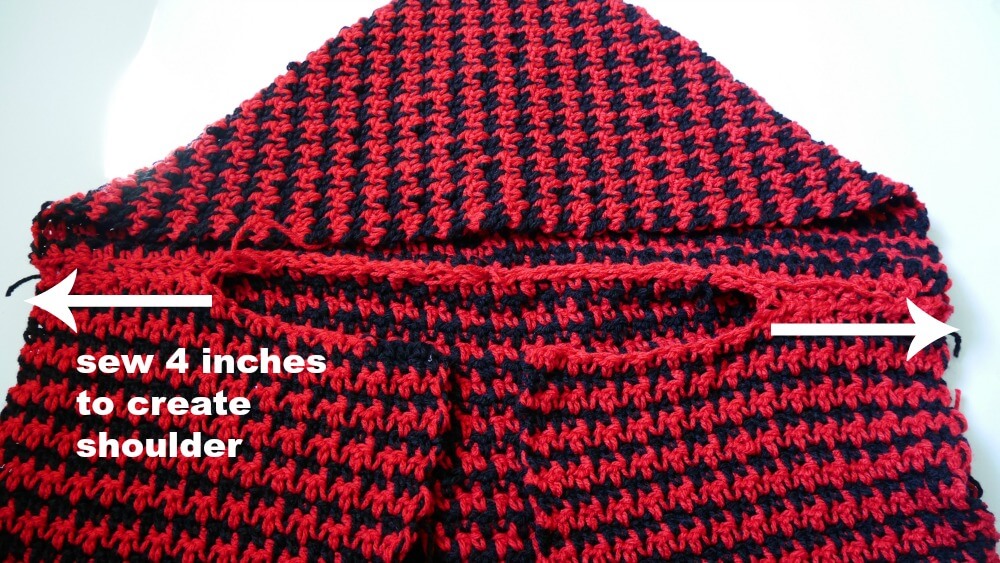
After finishing sewing the back panel to the front panel now, it is time to attach hooded to the vest.
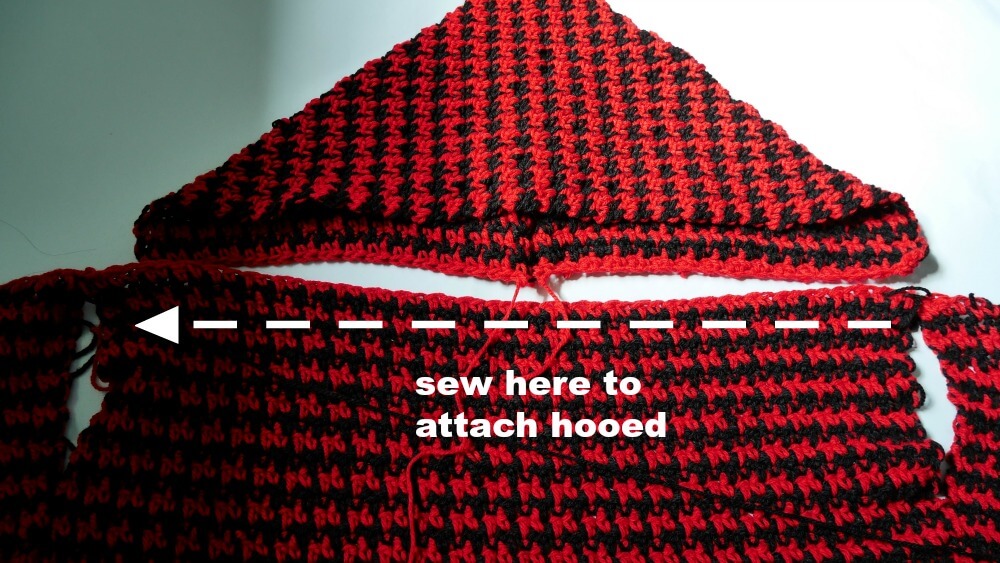
To create the shoulder.
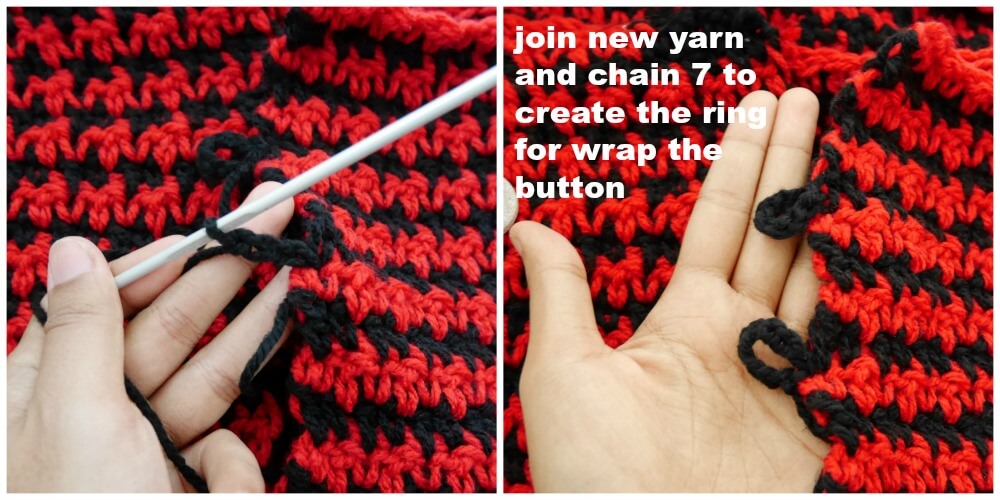
Finally, add a button, and done!
All done! Hope you guys enjoy making this Hooded vest cardigan.
If you make one, I would love to see your creation. Tag me on Instagram! would love to see your creation.
Happy crocheting.
Dr. Collene Van Noord
Tuesday 7th of May 2019
Is this considered adult S, M, L, etc? The model looks so young I'm wondering if it is sized for a child or adult (HS). Thanks!
jane
Thursday 23rd of May 2019
Hi Dr.Collene, The size for the model is size small to medium adult, bust around30-34 inch.
Sarah
Thursday 12th of July 2018
I was just wondering if you block your clothing projects and if not, do they hold up well?
jane
Thursday 12th of July 2018
Hi Sarah, I did not blocking this vest cardigan it's hold up so well because the chunky yarn.