
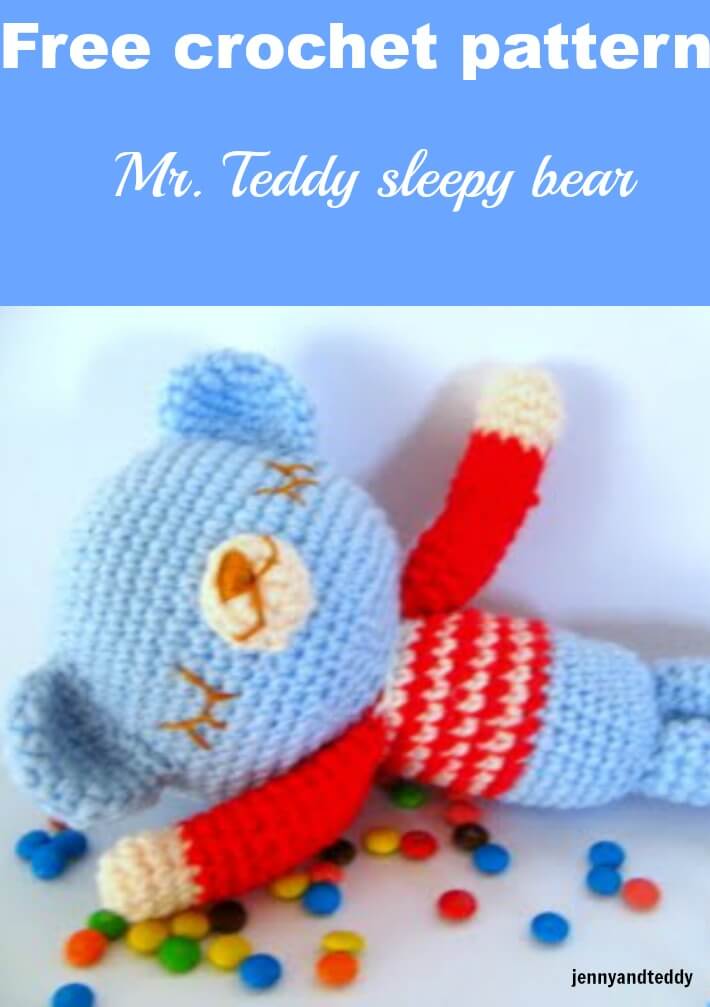


How to crochet an amigurumi sleepy bear?
Can beginner crocheters crochet a teddy bear? Yes, you can absolutely! The crochet bear is mostly made from simple crochet stitches that create the bear’s head and body arm. And leg.

Here 3 easy steps to crocheted a bear.
- Basic crochet stitch: In this sleeping teddy bear, all of the pieces, like the head, body, arm, leg, ears, and nose, are made from a single crochet increase and decrease.
- Simple seam: All pieces of the crochet bear require a basic seam together to attach each piece.
- Add a unique character to your crochet teddy bears: to make your crochet sleep bear unique, you can make some changes to the pattern, like changing the color and changing the eyes and nose, or even give him a little cheek blush to add some cuteness. The imagination is not limited.
About the yarn & yarn weight for an easy bear pattern.
So, now we talking about How I should pick a yarn for this crochet sleepy bear amigurumi pattern.
Yarn fiber content.
Acrylic yarn: Well, If you are a beginner with less experience crocheting, I would recommend acrylic yarn for crocheting an amigurumi bear because acrylic yarn tent to have more fluff than cotton yarn.
And the good thing about acrylic yarn is that it is more flexible and stretchy, and you won’t see the stitch much, even if your stitch tension is too tight to too loose.
Cotton yarn: cotton yarn is great for sensitive baby skin if you are going to make this crochet sleepy teddy bear for the little one in your family.
however, your stitch tension might have to be steady; otherwise, your crochet bear will look like a puzzle bear. Can you picture this bear when you stuff the polyester fill, and you can see the bit of polyester fill inside? Yeah, that is it.
Bamboo yarn: bamboo yarn is also perfect for ultra-sensitive skin, so they are great for making a gift for a baby.
Yarn weight.
DK weight or 4 medium: For the yarn weight to crochet a sleeping bear, I would recommend dk weight/3 light or 4 medium weight in case you want a similar size with this free pattern.
Bulky yarn: you girl can always use a bulky yarn or dk weight hold double when crocheting to make it bear a bigger size.
Overall you can use any yarn weight and crochet hook size as the recommended level for crocheting a teddy bear.


Materials you will need to crochet a sleepy bear.
- Acrylic yarn: for this pattern, I usually used 8-ply
- For the sleepy eyes , I use a thread brown color (you can find it at any craft shop)
- Polyester fiberfill for stuffing
- Sewing yarn needle and embroidery
- Crochet hook size 2.5mm and craft glue


Skill and abbreviations.
- American crochet term.
- You will need to know how to make a magic ring or adjustable ring
- Single crochet (sc)
- Crochet increase (inc) which mean-make 2 single crochet in same stitch
- Crochet decrease (dec) which mean-Crochet 2 stitches together
- Stitch (st)
- * = Repeat stitches from * to end of *
- Chain (ch)
- Slip stitch (sl st)
- change colour
New to crocheting amigurumi?
Check out this basic tip and trick for crocheting animal amigurumi.
- The beginner guide to crochet amigurumi.
- How to join the leg.
- How to attach the eyes.
- How to crochet a magic ring.
BUY PDF on my ETSY shop.
Easy crochet sleepy bear amigurumi video tutorial.


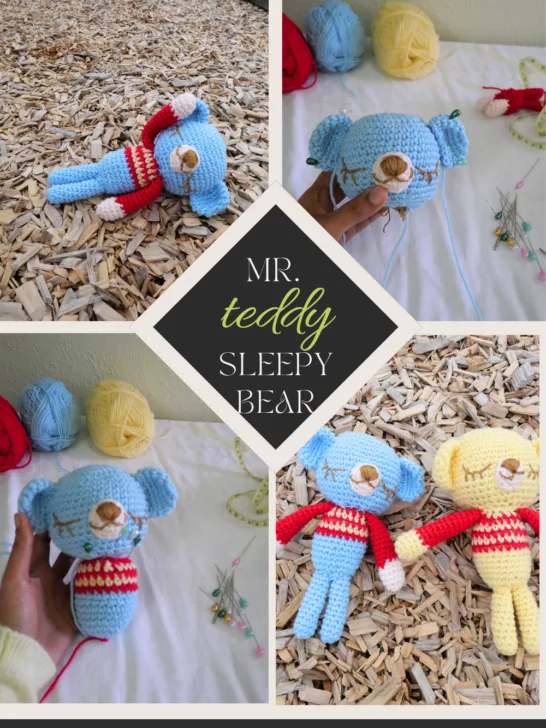
Free crochet sleepy bear pattern Mr. Teddy amigurumi.
Finish Size: Approximately 9-10 inches.
Size varies depending on the size of the yarn and crochet hook
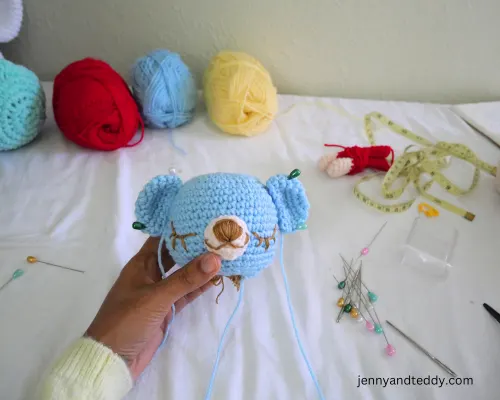
Let’s start with crocheting the bear head Colour of your choice.

You will work from top to bottom
Round1. Make magic ring and 8sc in ring (8)
Round2. inc x 8 (16)
Round3. (1sc,inc) x 8 (24)
Round4. (2sc,inc) x8 (32)
Round5. (3sc,inc) x 8 (40)
Round6-16. sc in each st around (40)
Round17. (3sc,dec) x 8 (32)
Round18. (2sc,dec) x 8 (24)
Round19. (2sc,dec) x 6 (18)
Round20. sc in each st. (18)
then finish off and leave long tail for sewing. And stuffing polyester firmly.
The bear body colour of your choice.


You will work from bottom to top
Round1. Make a magic ring and 6sc in ring (6) blue
Round2. inc x 6 (12) blue
Round3. (1sc,inc) x 6 (18) blue
Round4. (2sc,inc) x 6 (24) blue
Round5-10. Sc in each st around (24) blue
Round11. Sc in each st around (24) red
Round12. Sc in each st around (24) white
Round13. (4sc,dec) x 4 (20) red
Round14. (3sc,dec) x 4 (16) white
Then finish off and leave long tail for sewing. And stuffing polyester firmly.
The bear Arms color of your choice.
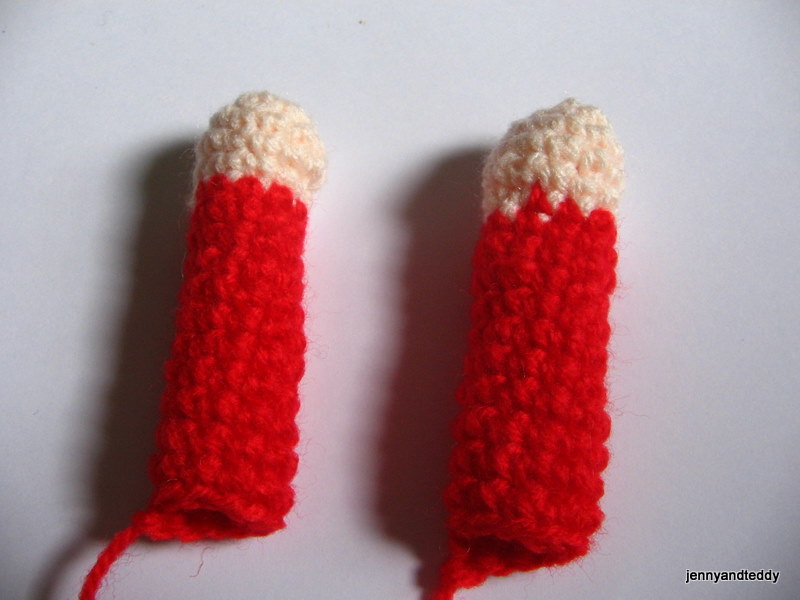
Make 2 pieces
Round1. Make magic ring and 6sc in ring (6) skin color
Round2. inc x 6 (12) skin color
Round3-4. Sc in each st around (12) skin color
Round5.(4sc,dec 1) x 2 (10)skin colour
Round6-16. Sc in each st around (10) red
Then finish off and leave the long tail for sewing. And stuffing polyester.
The Bear Ears. Make 2 pieces (color of your choice).
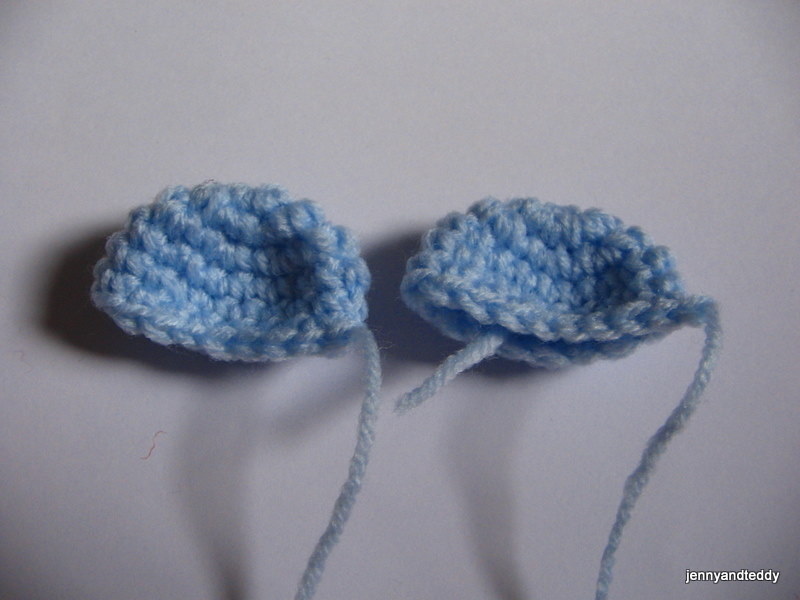
Round1. Make magic ring and 7sc in ring (7)
Round2. inc x 7 (14)
Round3. (1Sc, inc) x 7 around (21)
Round4. sc in each st around (21)
Round5. (1sc, dec) x 7 (14)
Round6. sc in each st around (14)
Finish off and leave the long tail for sewing. And do not stuff polyester.
The Nose makes 1 piece.
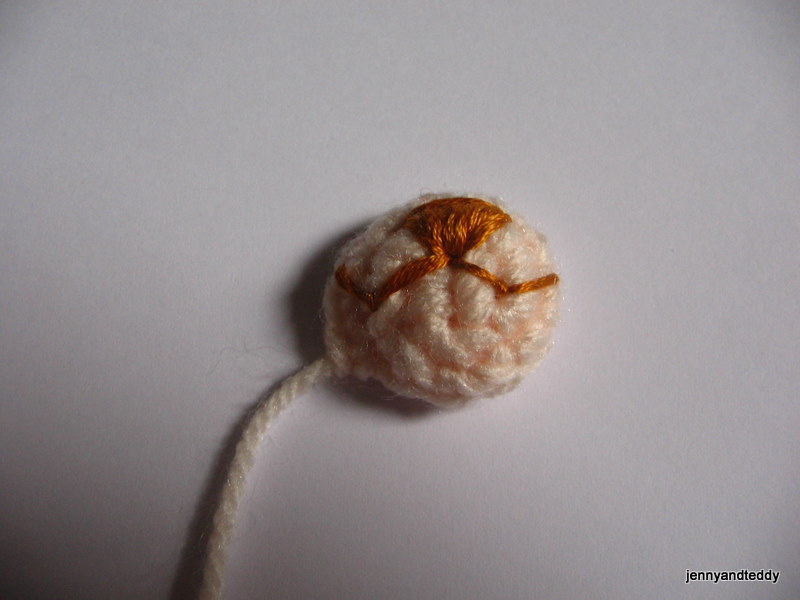
Round1. Make magic ring and 6sc in ring (6)
Round2. inc x 6 (12)
Round3. sc in each st around (12)
Finish off and leave the long tail for sewing. And do not stuff polyester.
The bear Legs color of your choice. Make 2 pieces.

You will work from bottom to top
Round1. Make magic ring and 8sc in ring (8)
Round2-14. Sc in each st around (8)
Then finish off and leave the long tail for sewing. And stuffing polyester firmly.
Assemble the bear.
Sewing ears and nose to the head and body to the head. Then arms and legs.


Thank you,I hope you guy enjoy making him.
Lou Lou Girls
Monday 29th of December 2014
Hello cute lady! I bet this little gem made a lot of people happy! Pinned and tweeted. Thank you for being a part of our party. I hope to see you tonight at 7 pm. We love to party with you! Lou Lou Girls
LH
Sunday 3rd of November 2013
Thanks for this pattern - just made a slightly adapted version for my nephew's Christmas present. It turned out great!
jane
Sunday 3rd of November 2013
I am glad you like it.
M K
Tuesday 13th of March 2012
Thank you!
Cj
Sunday 4th of March 2012
Your animals are so wonderful and cute.
caden
Tuesday 3rd of January 2012
thanks for the tutorials , its really helpful~!