
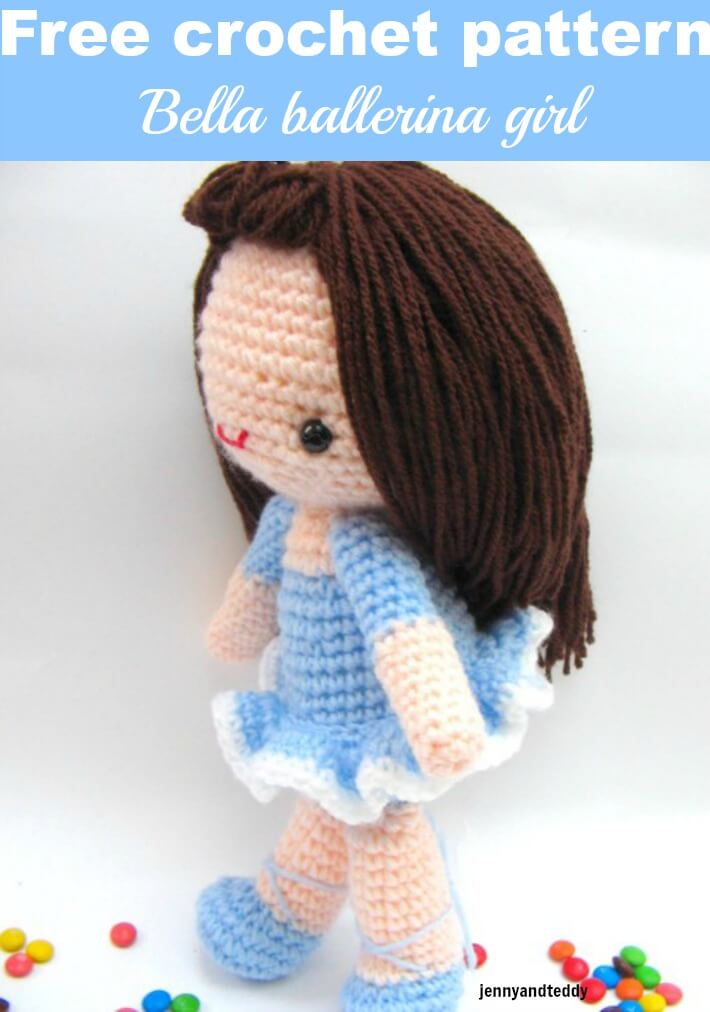


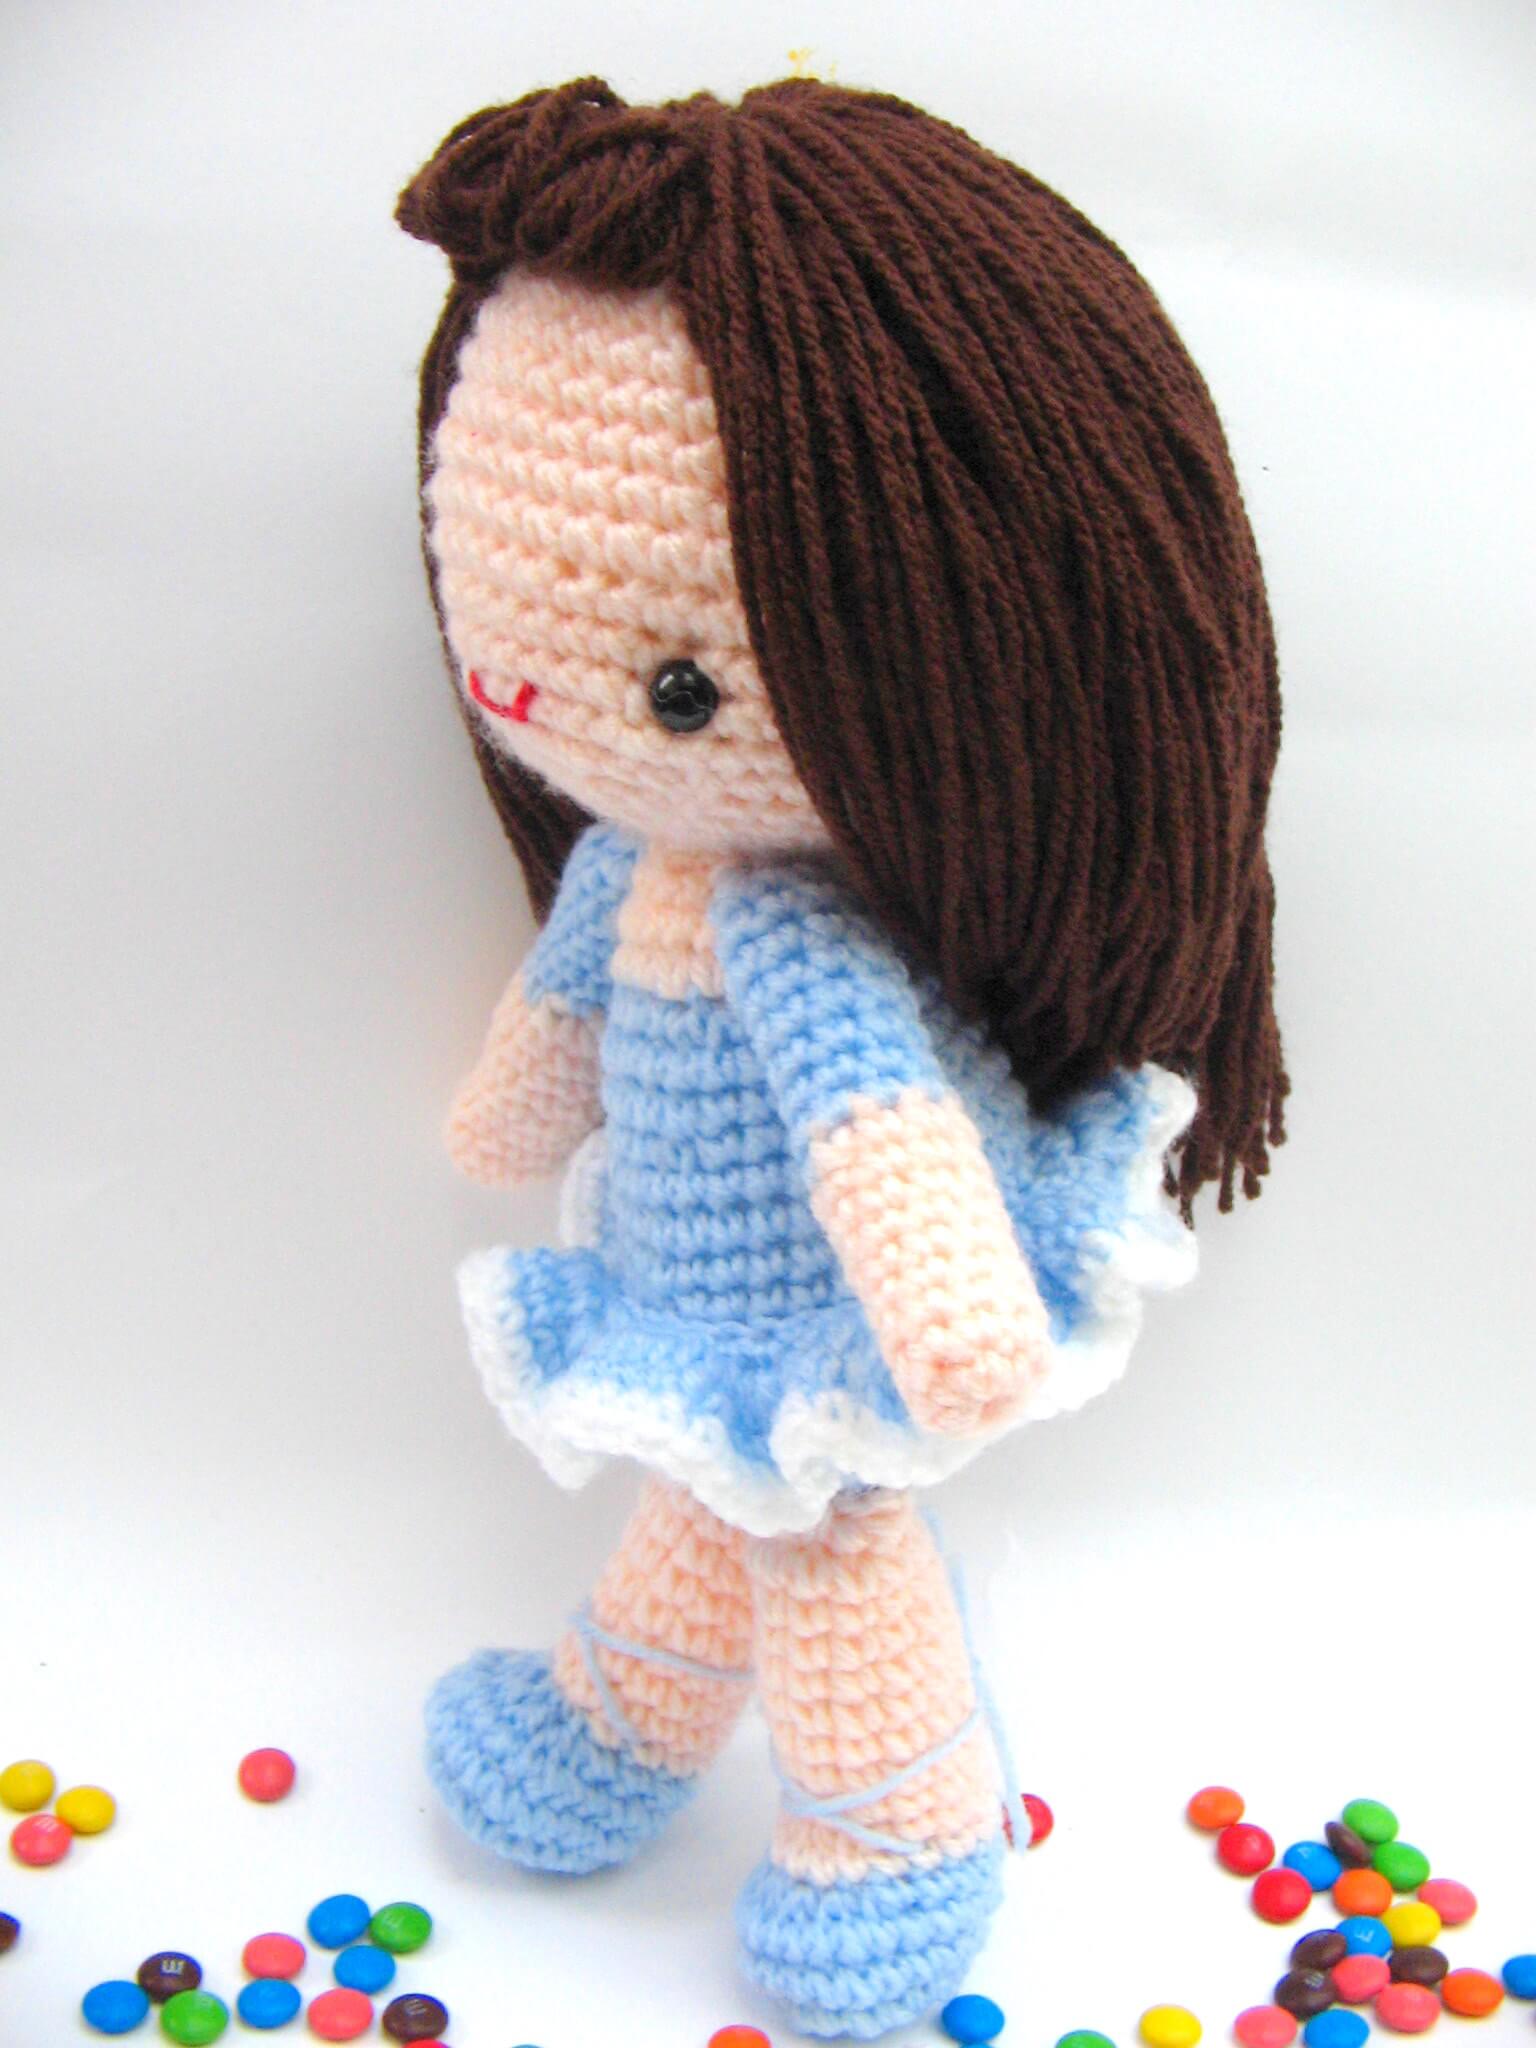

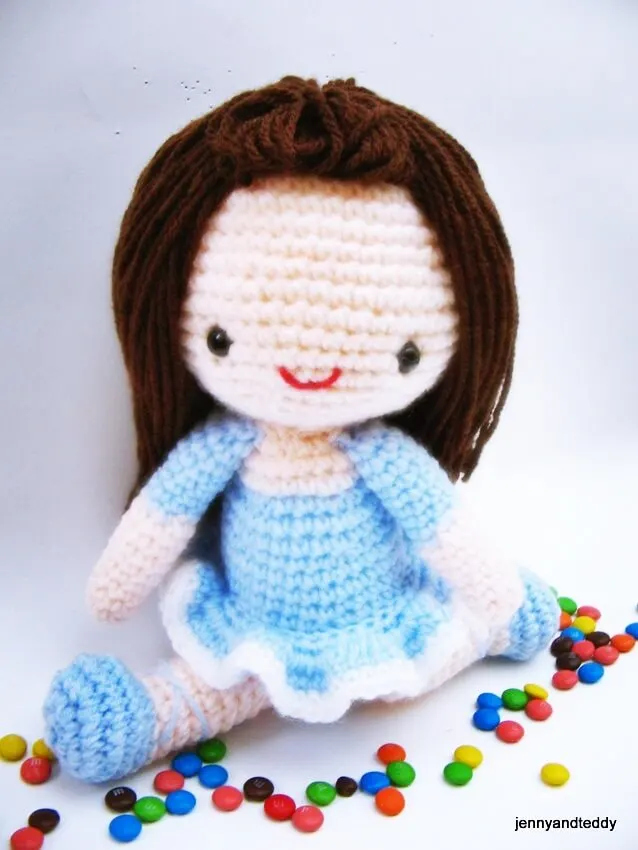
Bella the Ballerina crochet doll will be a great gift for your grandchild, or you could just crochet her for yourself.
If you love making amigurumi crochet dolls, same as me, you are going to love how easy to crochet a ballerina doll; all you need is a single crochet stitch.
Bella is one of my favorite Amigurumi doll patterns; you guys can easily customize her in different hair colors and add your own style to create different characters, even making them a set of friends.
Easy Amigurumi ballerina doll pattern.
Y’all know how much I love crocheting an amigurumi doll, I’m obsessed with this cute crochet doll in a ladybug custome, an amigurumi doll in a bunny hat, and a doll in a frog hat I have so much fun making them.
I honestly can’t even remember what it was like to not have cute amigurumi dolls around the house. They do add a happy vibe to the home.
Crocheting ballerina dolls is so much fun and enjoyable at the same time; they are easier than you think and use way less yarn than crochet garments.
The free crochet ballerina amigurumi doll pattern is made from simple crochet stitches that only need a single crochet increase and decrease to create the 3D shape.
How to crochet ballerina doll Bella step by step.
Step1. crochet the basic body part of the doll. Use basic crochet stitches with single crochet increase and decrease to crochet the body part of the ballerina, like the doll head in a sphere shape and body.
For the arm, we crocheted in a tube shape, and for the leg, we crocheted the ballerina shoes first, then continued to crochet the leg in a tube shape.
Step2. basic seam, after we finish all parts of your crochet dolls, then we will attach them by sewing using a yarn needle.
Step3. Add character. Now after we have finished attaching all parts of the ballerina doll, it is time to add some detail to give your crochet dolls unique, for example, add different hairstyles, tutu skirts with bright colors or even ballet shoes with lace etc..
About yarn for crocheting a ballerina doll pattern.
Acrylic yarn: acrylic yarn is good budget value and great for less experience or beginner crocheters because even if your stitch tension is not steady because you are new to crocheting amigurumi.
The yarn fiber will fluff it out, so you cannot see through each stitch as much as you crocheting with cotton yarn.
Cotton yarn and plant fiber: they are great for the more experienced crocheter if your stitch tension is more steady, and the plant fiber is good for sensitive skin if you are going to make it for your little one.
Yarn weight: for the yarn weight, you girl can use any yarn weight, and the crochet hook size, as the label recommends, will be just fine, but your doll will have a different size according to the yarn weight you use.
For example, if you use chunky yarn to crochet dolls, your doll will be a bigger size than sport weight or fingering weight.
Materials & supplies.
To make you will need
1. Acrylic yarn, for this pattern, I normally used 8 ply
2. Plastic eyes with safety backing 7.5mm (you can find it at any craft shop)
3. Polyester fiberfill for stuffing
4. Sewing yarn needle and embroidery
5. Ribbon or button
7. Crochet hook size1.25mm and craft glue
Note
The size of the crochet hook really does not matter. The doll design will work just fine with different sizes of crochet hooks. Only the end size of the creation will be slightly different.
In this pattern, you will be working in the round continuously; you may use a contrasting color short piece of yarn to mark the beginning of each round.
When you end a round, do not join at the end of each round; you will begin the second round in the next stitch.
At the end of each round, I have given the number of stitches you should have. If you are off by 1 or 2 stitches, do not worry about it.

Skill and abbreviations.
- American crochet term.
- You will need to know how to make a magic ring or adjustable ring
- Single crochet (sc)
- Crochet increase (inc) which mean-make 2 single crochet in the same stitch
- Crochet decrease (dec), which mean-Crochet 2 stitches together
- Stitch (st)
- * = Repeat stitches from * to end of *
- Chain (ch)
- Slip stitch (sl st)
- change color
- blo means back loop only
- Flo means front loop only
My beginner amigurumi dolls tutorial. Check it out here.
- Learn how to crochet amigurumi for beginners.
- How to add eyes character for amigurumi dolls.
- How to crochet adjustable ring.
- Joining leg for amigurumi dolls.
Bella easy ballerina crochet doll pattern free instruction.
Finish Size
Approximately 7.5-8 inches tall
Size varies depending on the size of the yarn and crochet hook
Let’s start with the doll head Colour of your choice.

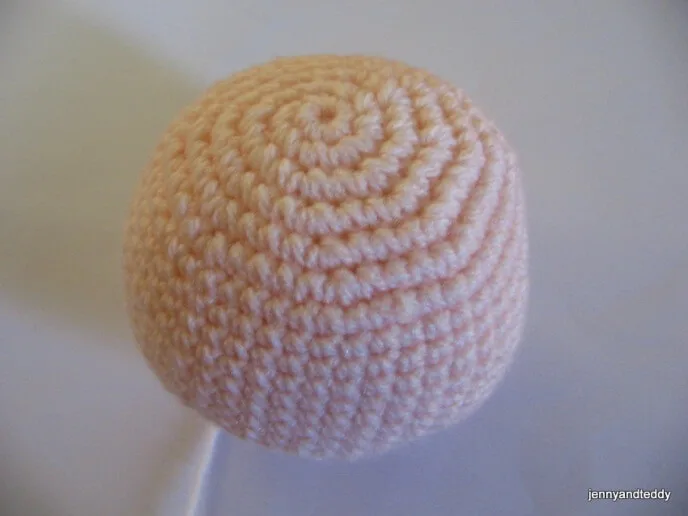
You will work from top to bottom.
Round1. Make magic ring and 8sc in ring (8)
Round2. 2sc in each st around (16)
Round3. *Sc in next st, 2sc in next st* and repeat from * around (24)
Round4. *Sc in next 2 st,2sc in next st* and repeat from * around (32)
Round5. *Sc in next 3 st,2sc in next st* and repeat from * around (40)
Round6. *Sc in next 4 st,2sc in next st* and repeat from * around (48)
Round7-16. Sc in each st around (48)
Round17. *sc in each of next 6 st,dec 1* and repeat from * around (42)
Round18. *sc in each of next 5 st,dec 1* and repeat from * around (36)
Round19. *sc in each of next 4 st,dec 1* and repeat from * around (30)
Round20. *sc in each of next 3 st,dec 1* and repeat from * around (24)
Round21. *sc in each of next 2 st,dec 1* and repeat from * around (18)
Round22. *sc in next st,dec 1* and repeat from * around (12), then finish off and leave long tail for sewing. And stuffing polyester firmly.
Crocheting doll Hair.
When making hair for the doll, the technique I normally use a small book, or you can use a piece of cardboard to hold the yarn together. It depends on how long of doll hair you want. For me, my hair doll is approximately 4 inches on each side.
Then cut it to one side.
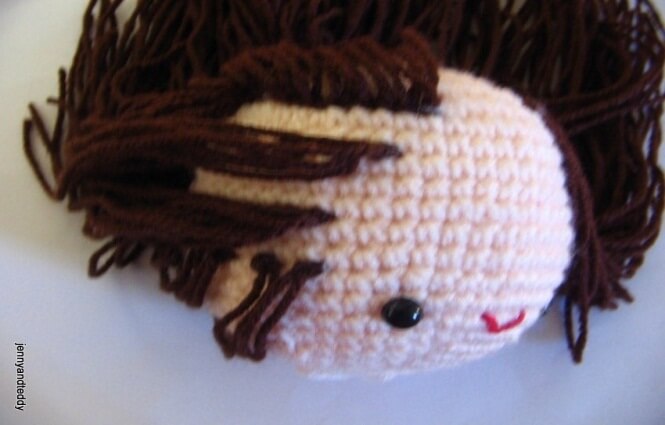
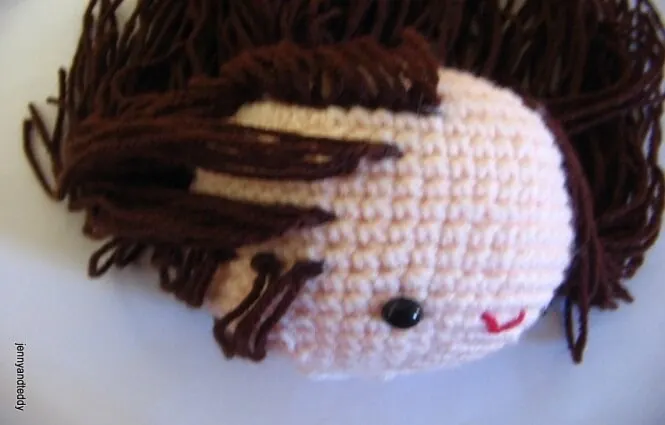
Fold the yarn in half and insert a crochet hook under the head skin and pull through to make the loop. Put the end pieces through the loop and pull it tightened. Repeat to form a horizontal line around the head.
Then wrap the yarn around your finger and use another piece of yarn to tighten it up. And attached this piece in front of the face of the doll.
Attached hair by sewing.
Then use a small book, or you can use a piece of cardboard to hold the yarn together. It depends on how long of doll hair you want. Then we divided the yarn into many groups and tightened them up.
And we sew it onto the top of the doll’s head.
Crocheted the doll’s body, the color of your choice.

You will work from bottom to top.
Round1. Make magic ring and 8sc in ring (8) blue
Round2. 2sc in each st around (16) blue
Round3. *Sc in next st, 2sc in next st* and repeat from * around (24) blue
Round4. *Sc in next 2 st,2sc in next st* and repeat from * around (32) blue
Round5. *Sc in next 3 st,2sc in next st* and repeat from * around (40) blue
Round6-8. Sc in each st around (40) blue
Round9. *sc in each of next 6 st,dec 1* and repeat from * around (35) blue
Round10. *sc in each of next 5 st,dec 1* and repeat from * around (30) blue
Round11-14. Sc in each st around (30) blue
Round15. *sc in each of next 4 st,dec 1* and repeat from * around (25) blue
Round16-17. Sc in each st around (25) blue
Round18. *sc in each of next 3 st,dec 1* and repeat from * around (20) skin color
Round19. *sc in each of next 2 st,dec 1* and repeat from * around (15) skin color
Round20. Sc in each st around (15) skin color
Then finish off and leave the long tail for sewing. And stuffing polyester firmly.
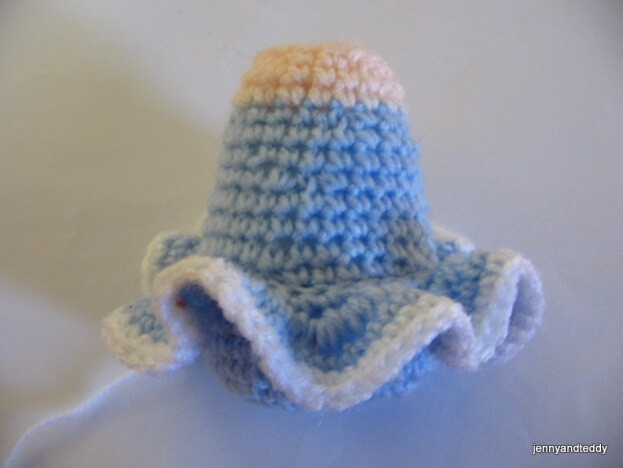
Crocheting ballerina tutu skirt.
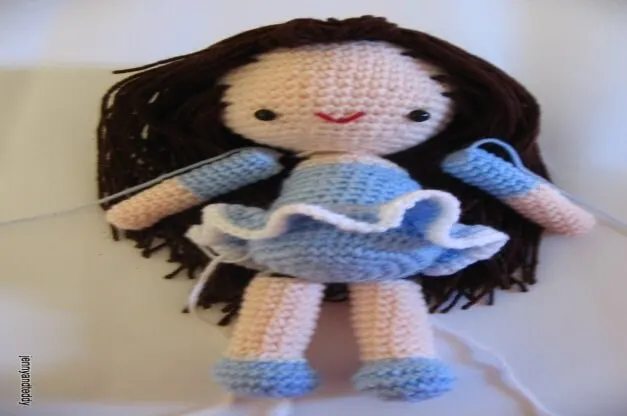
We make skirts by crocheting the outside of the body, as in the picture demonstration.
Insert crochet hook on round 9. And make a single crochet in each st around the body.
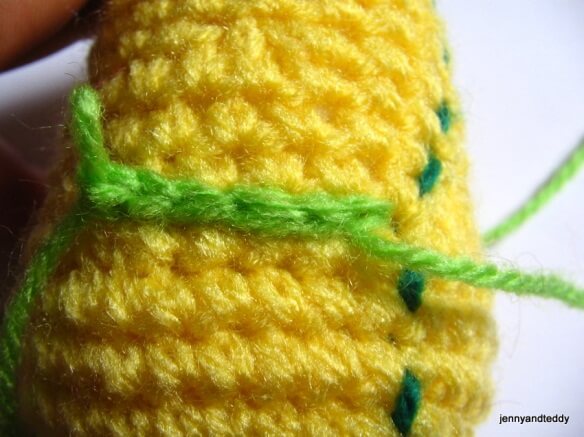
Start at round.9 of the body. Count from bottom to top
Then we count back from round 9,8,7,6,5 of the body because the skirt is going down from round 9.
- Sc in each st around (counting st in this round is not important) blue
- Sc in each st around (counting st in this round is not important) blue
Round7. 3Sc in each st around (no st count) blue
Round6. sc in each st around (counting st in this round is not important) blue
- Sc in each st around (counting st in this round is not important) white
Then finish off and leave the long tail for sewing.
Arms color of your choice.
Make 2 pieces

Round1. Make magic ring and 9sc in ring (9) skin color
Round2-9. sc in each st around (9) skin color
Round10-16. Sc in each st around (24) blue color
Then finish off and leave the long tail for sewing. And stuffing polyester.
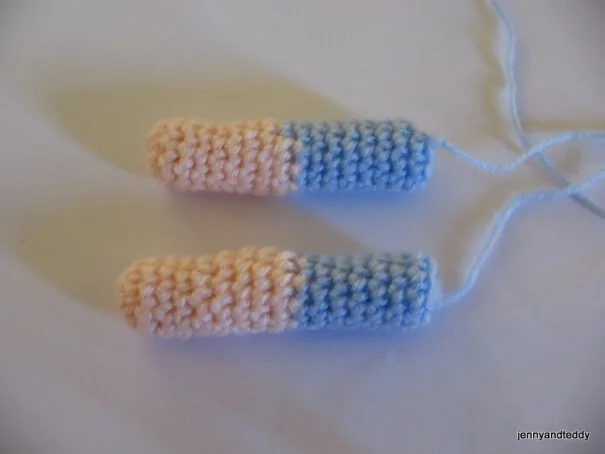
Legs color of your choice. Make 2 pieces.

You will work from bottom to top
Crochet ballerina shoes. ( in blue color)
Round1. Make magic ring and 8sc in ring (8) blue
Round2. 2sc in each st around (16) blue
Round3. *Sc in next st, 2sc in next st* and repeat from * around (24) blue
Round4-5. Sc in each st around (24) blue
Round6. (sc in each of next5 st) then (dec 7 time)
(sc in each of next 5 st) (17) blue
Round7. (sc in each of next5 st) then (dec 4 time)
(sc in each of next 4 st) (13) Skin color
Round8-17. Sc in each st around (13) skin color
Then finish off and leave the long tail for sewing. And stuffing polyester firmly.
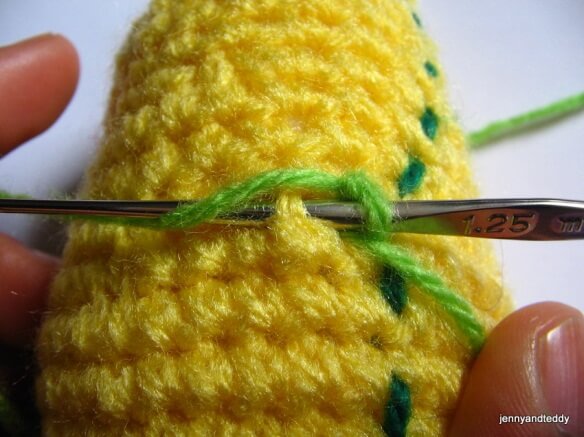
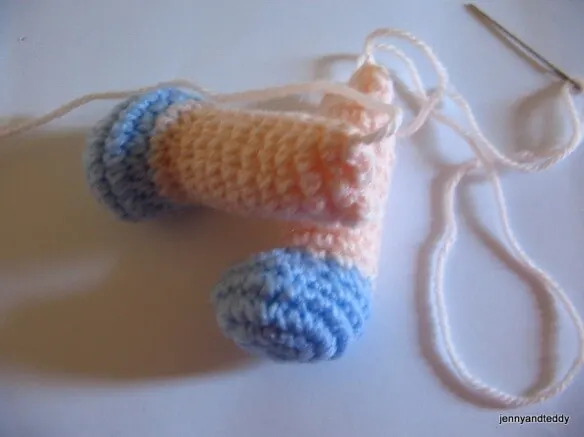
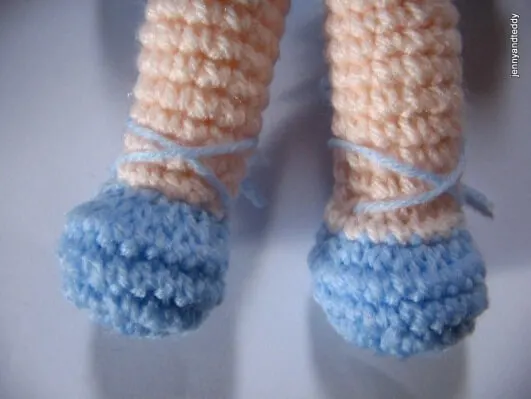
Making ballerina Shoelace.
Make 2 pieces followed by pictures.

Assemble the doll.
Finishing. Sewing body to the head. Then arms and legs.

Happy crocheting!
Charlotte
Thursday 16th of June 2022
I’m confused about the placement of the eyes and mouth …On the ballerina.
jocelyn
Wednesday 6th of February 2019
I am a little confused how you start the skirt on round 9? Any tips would be great. thank you!
jane
Thursday 7th of February 2019
Hi Jocelyn, I add more photo to show u in the post. hope it help
Chandra Maple
Wednesday 9th of January 2019
I love this little doll pattern! She is precious, and not complicated! I was wondering if you have done, or could do, a video tutorial on the hair? Thanks!
jane
Friday 11th of January 2019
MM the video tutorial for the doll hair is not yet but I had the photo tutorial instead. Thanks u. Chandra.
Meena jethwani
Saturday 8th of September 2018
My little granddaughter loved it
jane
Saturday 8th of September 2018
thank you Meena.
Christopher Loy
Saturday 9th of December 2017
Jane My name is Christopher and I am the facilitator and instructor for the Community Aide Coalition crocheting group at Twin Rivers Correctional center in Washington state. We recently made and sent some blankets and animals to the Ronald McDonald house in Seattle. Some of the patterns used were used were you patterns and wanted to let you know that the children LOVED them. If you would like to see the pictures of the group I can send them. Thank you and look forward to seeing more great patterns in the future.
[email protected]
jane
Saturday 9th of December 2017
Aww Thanks you so much for taking the time to write and let me know the children love it. You So sweet! ^^