
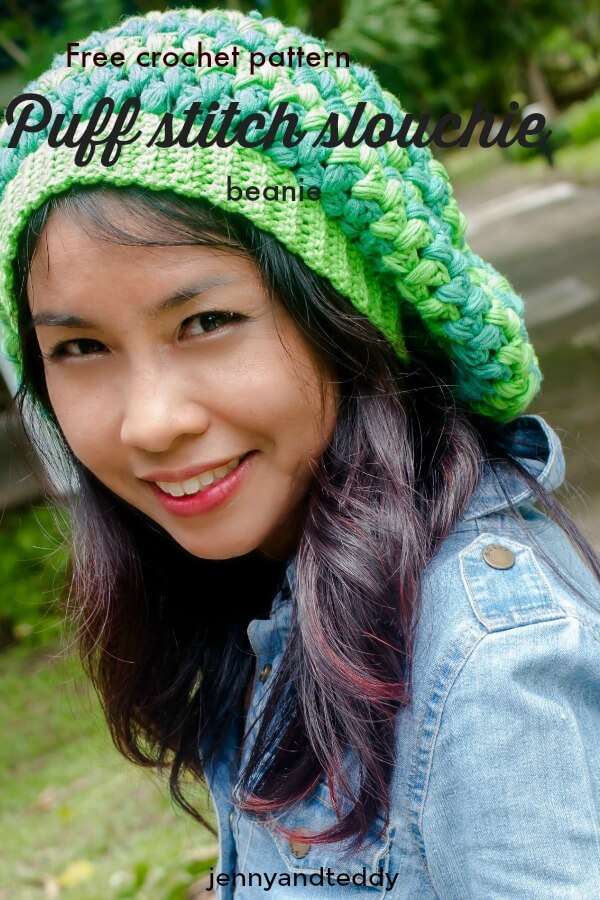
If you are learning how to crochet a puff stitch, You will love this easy puff stitch crochet hat pattern!
This puff stitch beanie is fun, cozy, and feminine, and it will be fantastic for adding to your wardrobe.
I was keen to try my hand at learning to crochet a new stitch, and the puff stitch was so surprisingly easy than I thought.
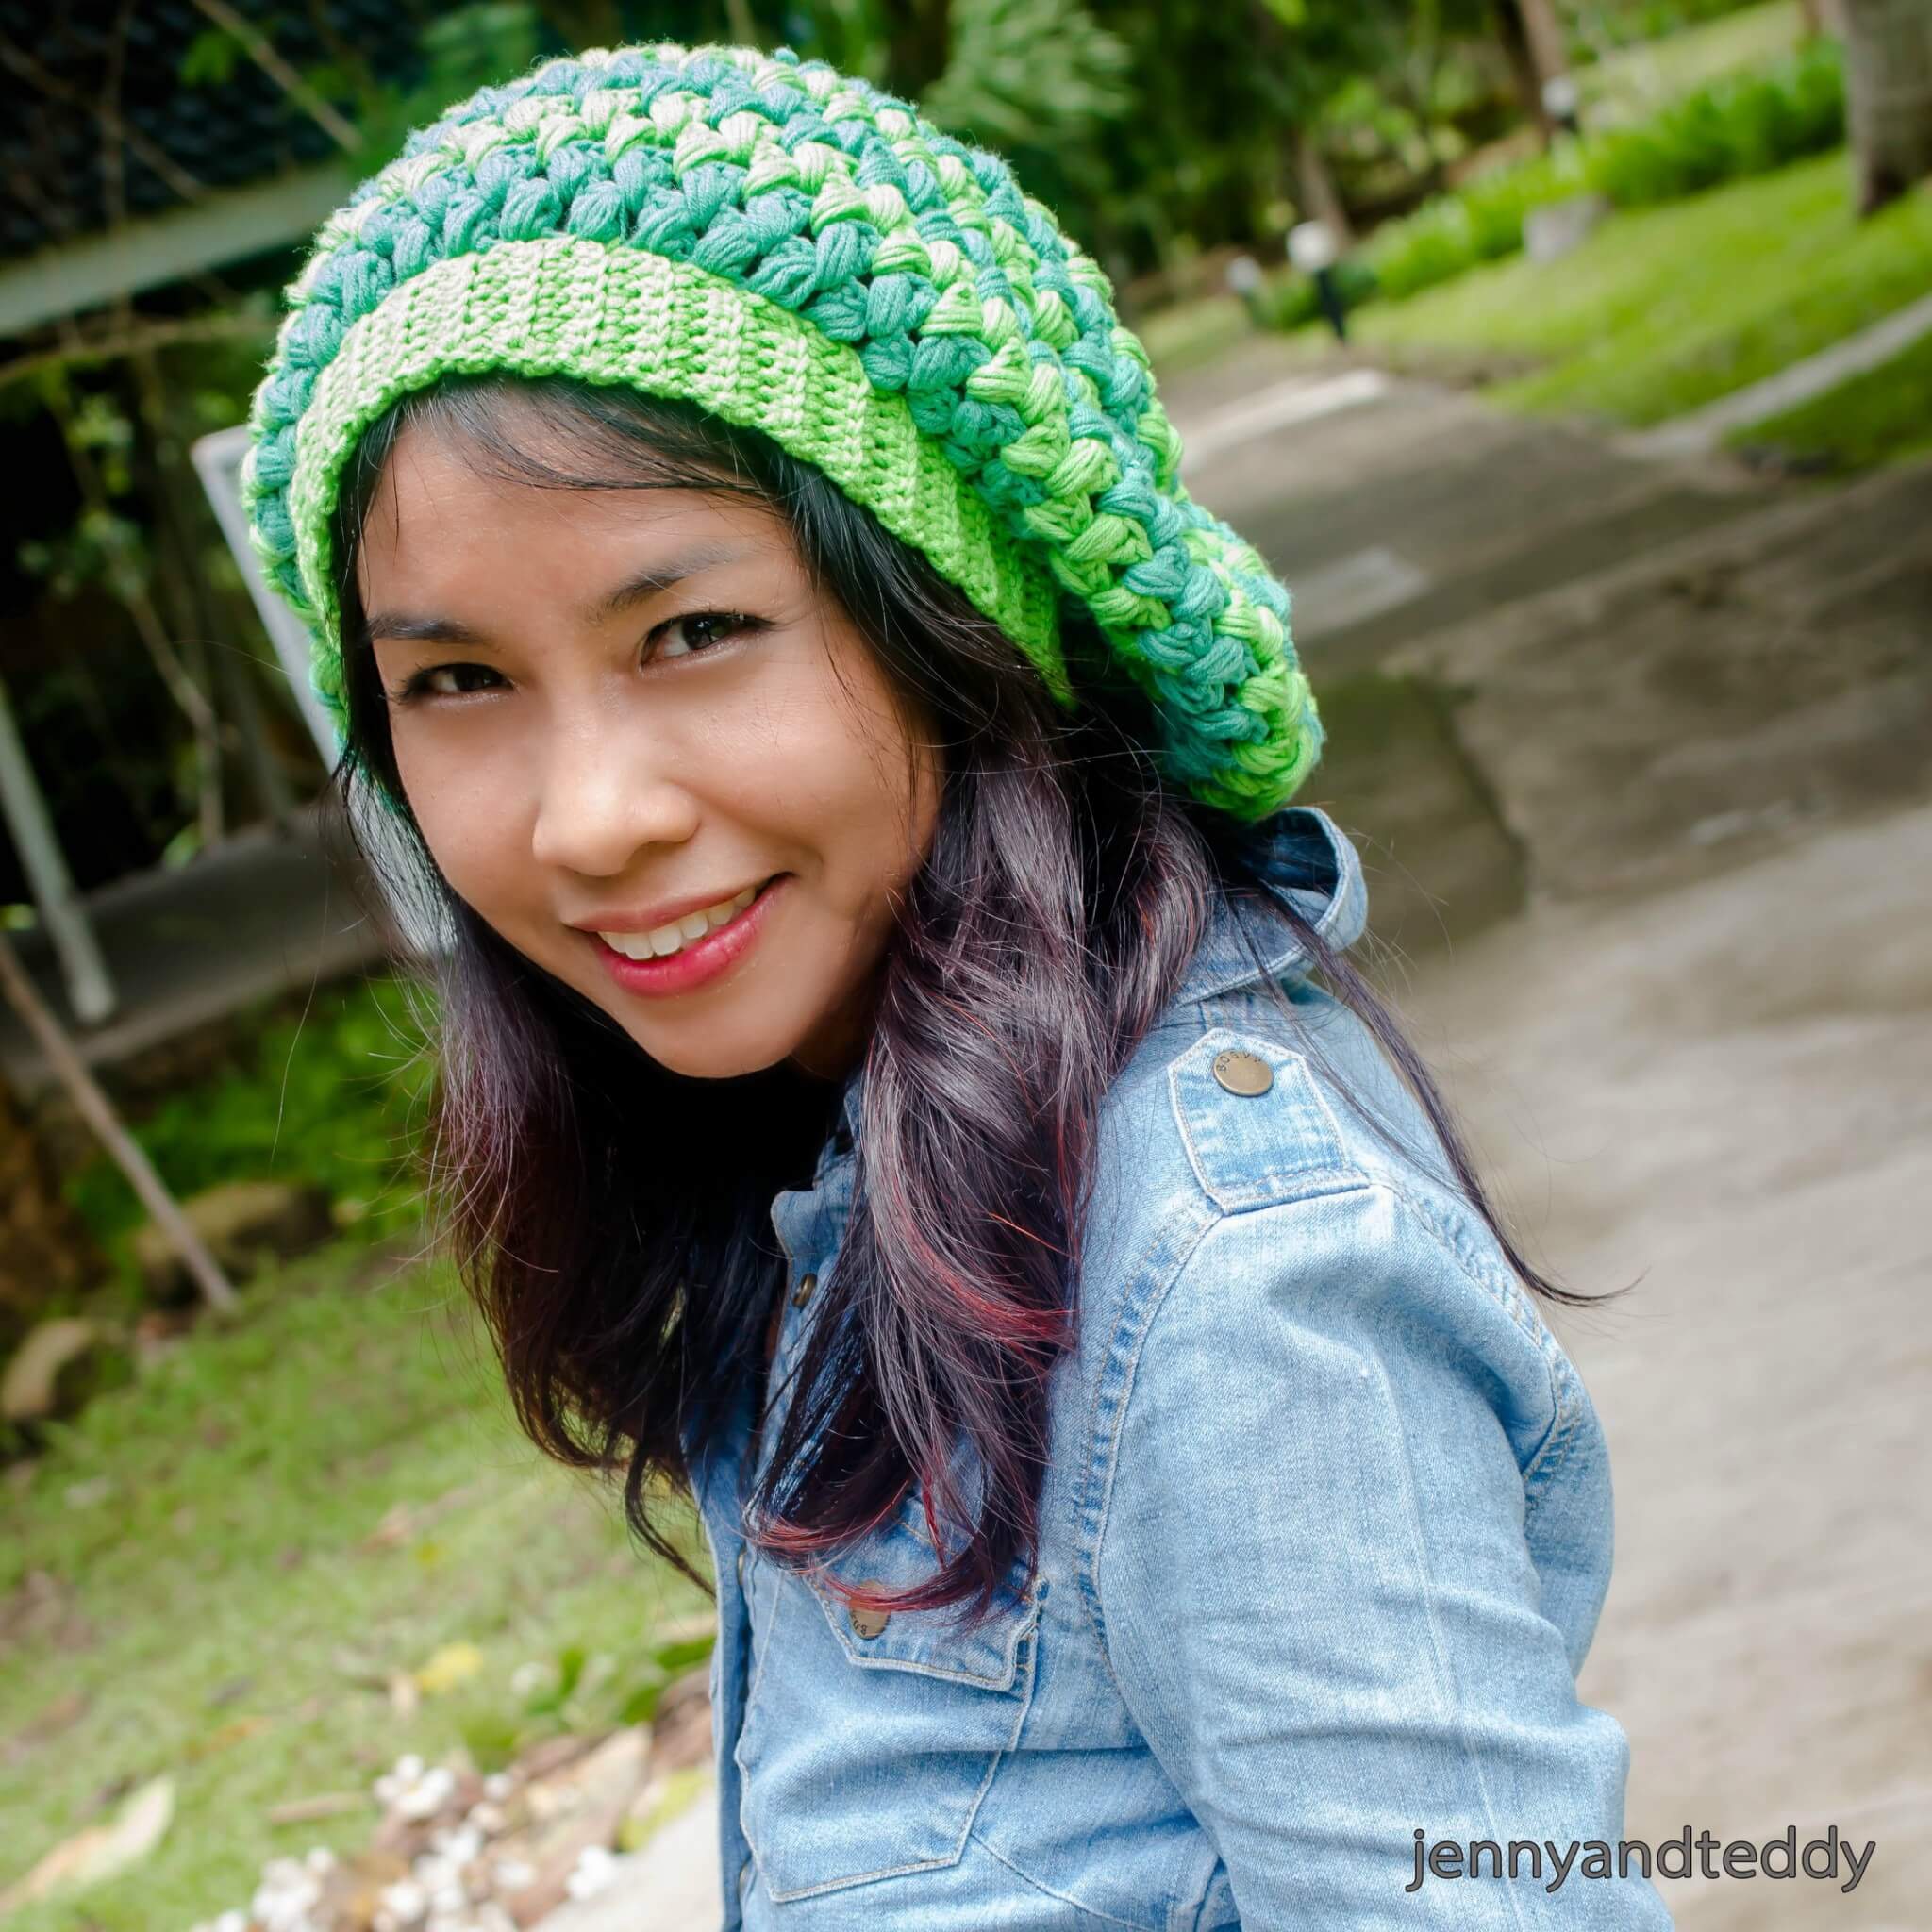
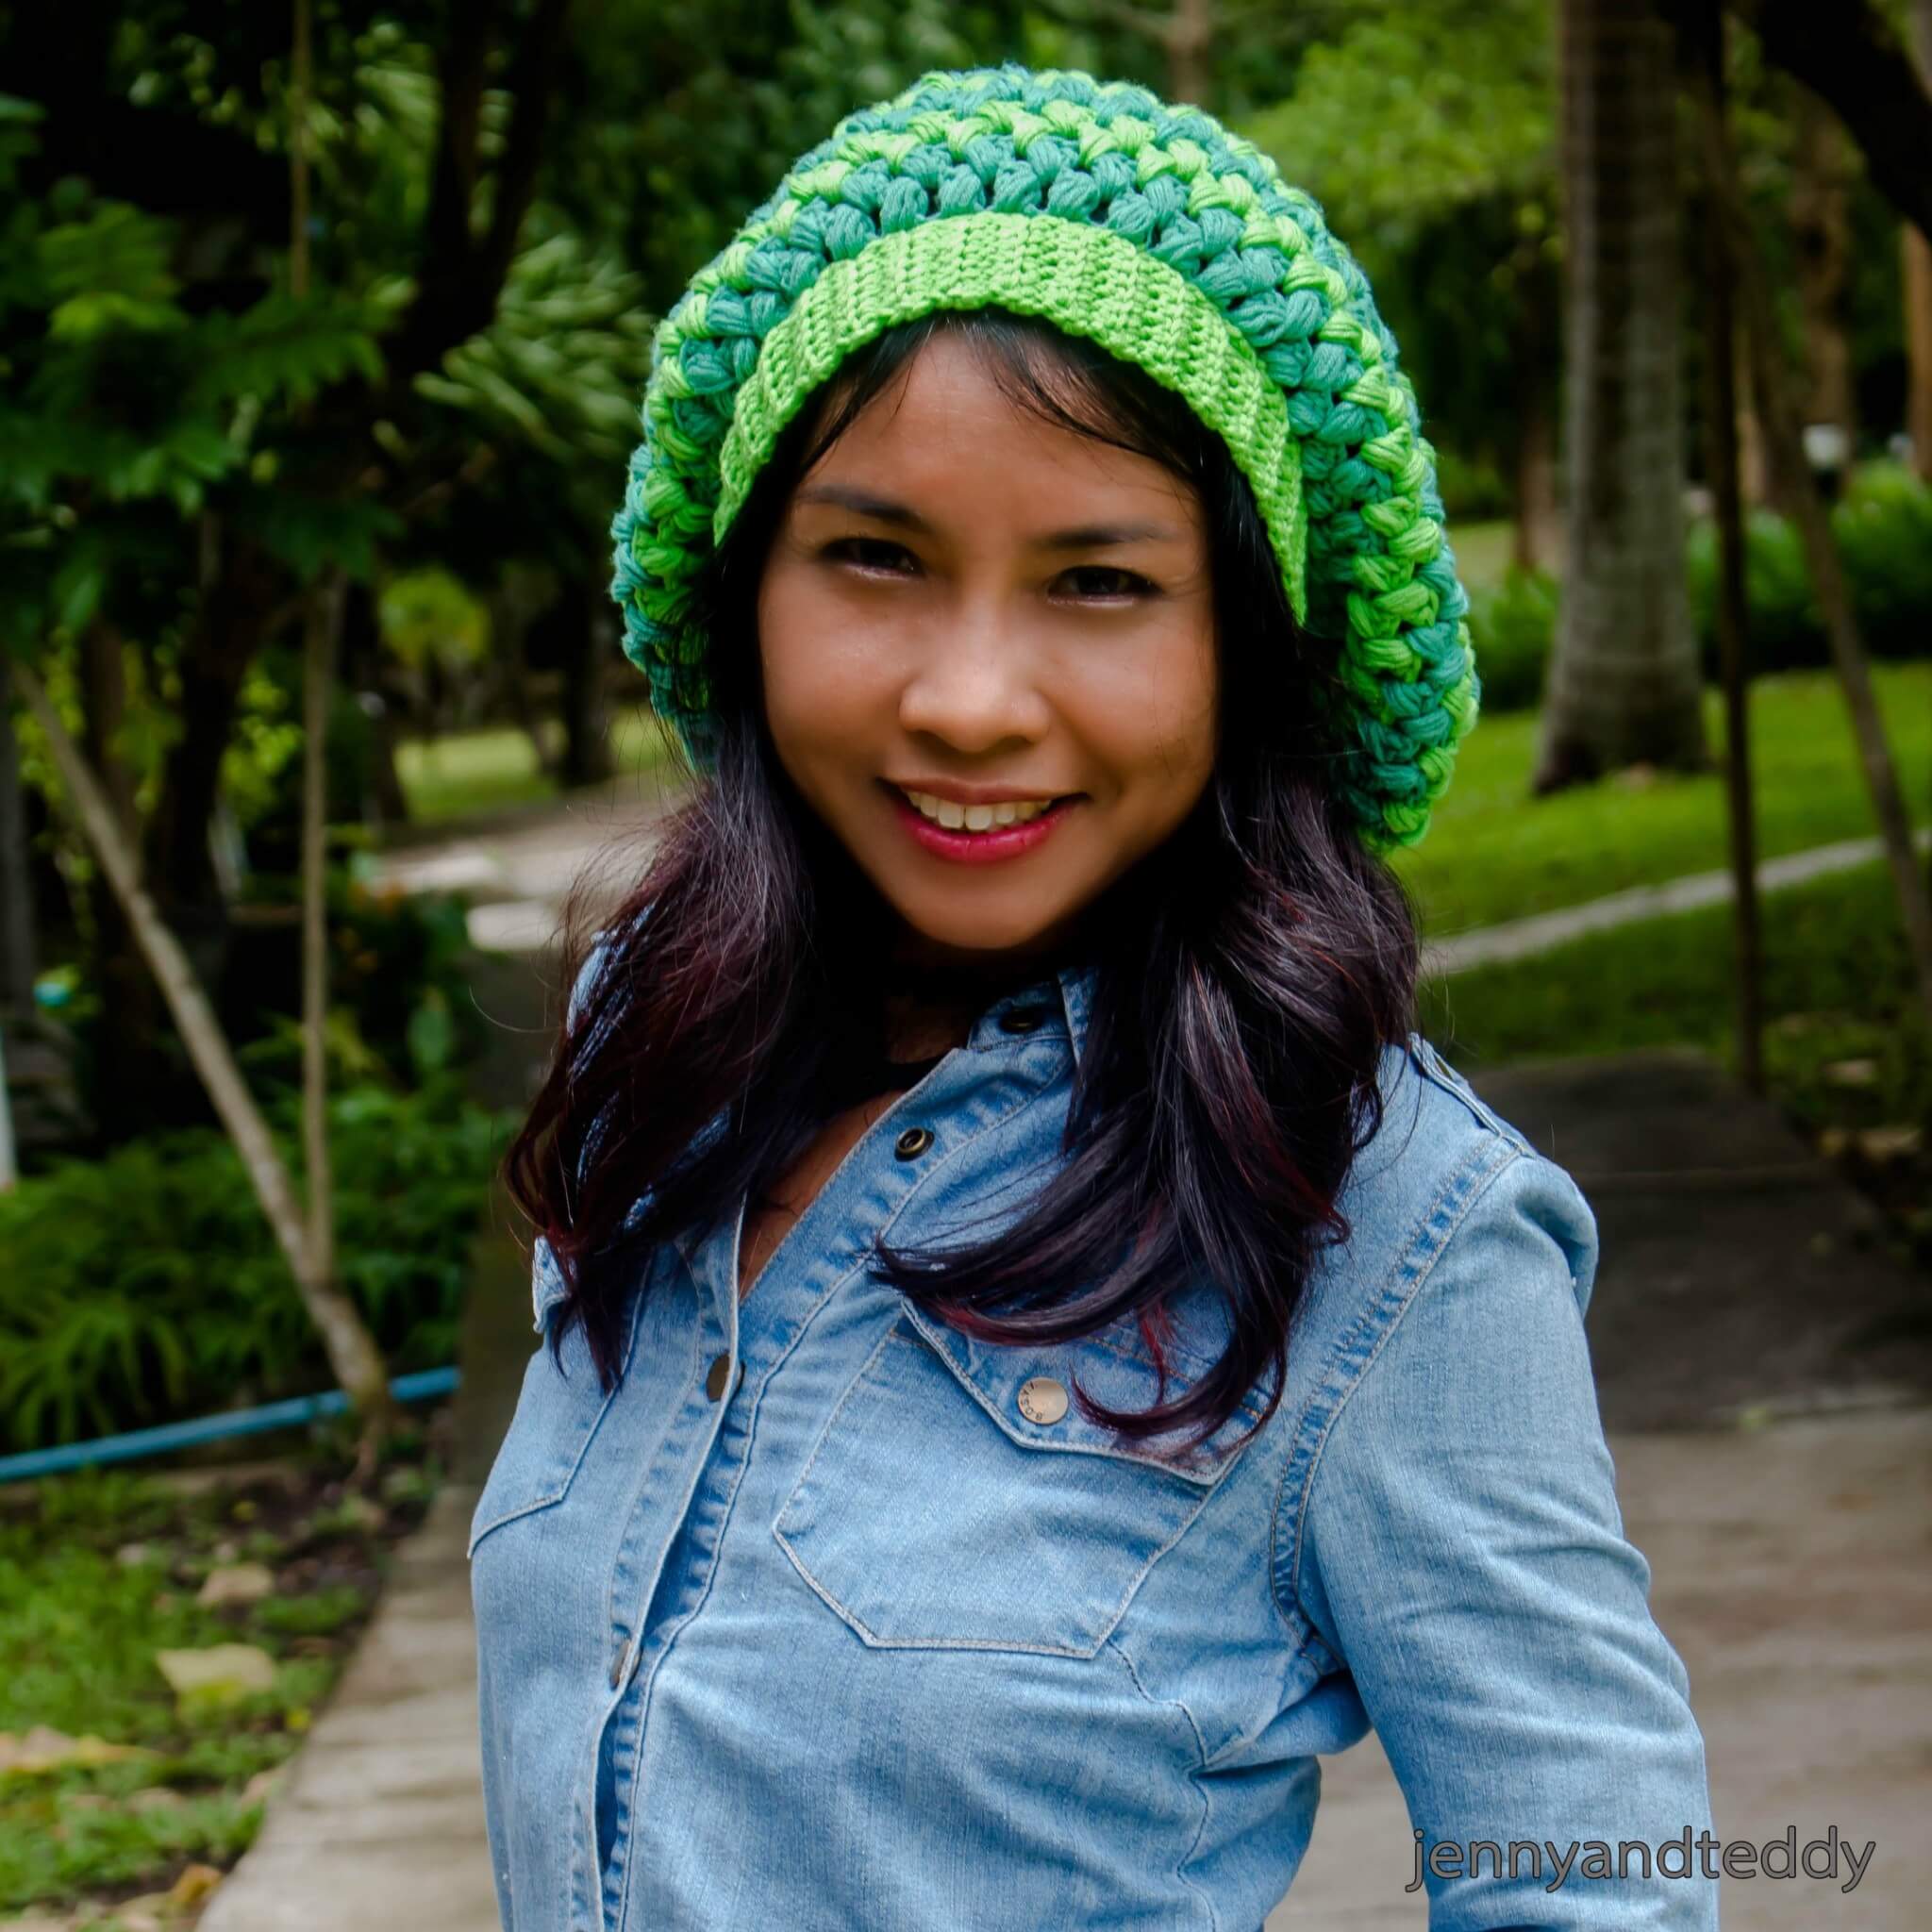
I love the 3D texture that came out very pretty and nice. I have crocheted the beanie in a mix of two colors of the green tone that I love for the rainy season.
Easy crochet puff stitch beanie pattern.
This sweet and cute crochet puff stitch slouchy hat free pattern has a very simple, straightforward structure made from one crochet rectangle and joins them to create the circle, then closing the gap at the top end.
The brimmed of the puff stitch beanie is crocheted separately and attached to the hat body that it!
Here I will break it down into easy steps for you, girl.
How to make a slouchy puff stitch crochet hat step by step.
Crochet a puff stitch hat can’t get any easier than these four steps I recommend for you, girl.
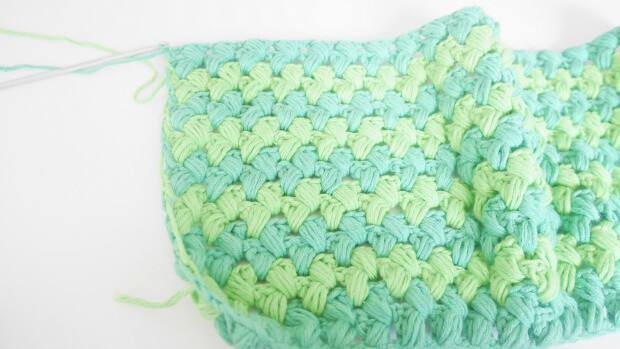
- Step 1: crochet puff stitch in a row to create a long rectangle that can wrap around your head perfectly.
- Step 2: crocheted the ribbed band and attach them to the puff rectangle by sewing using a yarn needle.
- Step 3: Join the rectangle to create the circle by sewing.
- Step 4: Now, we will close the top of a crochet hat by sewing using a yarn needle. All done!
Get the free pattern below or this pattern is also available as an inexpensive, ad-free, PDF printable instant download in my etsy shop. Thank you so much for your love and support. I am really appreciate you.
Need more texture beanie to crocheted?
Supplies & materials.
- I used 4 medium-weight yarn, or you can switch to dk weight for a lightweight hat; this crochet puff stitch eats up a lot of yarn so you might need about 3-4 skien.
- 3.5 mm hook or 4.0 mm crochet hook size.
- yarn needle
Skill and abbreviations.
- American crochet term.
- Sl st (slip stitch)
- hdc, which mean-half double crochet
- blo, which mean-crochet in the back loop only
- flo, which mean-crochet in front loop only
- ch, Chain
- YO – Yarn Over
- How to crochet a puff stitch: Puff Stitch (PS) Insert your hook into the stitch and pull up a loop, YO repeat this 3 more times. You should have 8 loops on the hook. YO and pull through all 8 loops. Ch 1 to secure the puff.
Puff stitch free crochet hat pattern instruction.
Crochet hat body.
chain in sets of 3, until you reach, desired size+3 chain ( or fit around your head perfectly)
Start with the foundation chain (90+3)
Row 1: Dc in 4th chain from the hook. Make a puff stitch in the chain right behind the dc you just made. (Skip one chain, dc in next. Make a puff stitch in the skipped chain). Rep ()to end of row. Hdc in the last chain.
Row 2: Ch 3 and turn. Skip the first stitch and dc in the first puff stitch. Make a puff stitch in the space of the previous row ( dc in next puff stitch, Make a puff stitch in the space of the previous row). Rep ()to end of row. Hdc in turning chain.
Rep row 2.-22 or until your project reaches the desired length. And finish off, leave a long tail for sewing ( you could change up the different colors)
Video tutorial from bhookedcrochet for this zig zag puff stitch.
Crocheted the ribbed band.
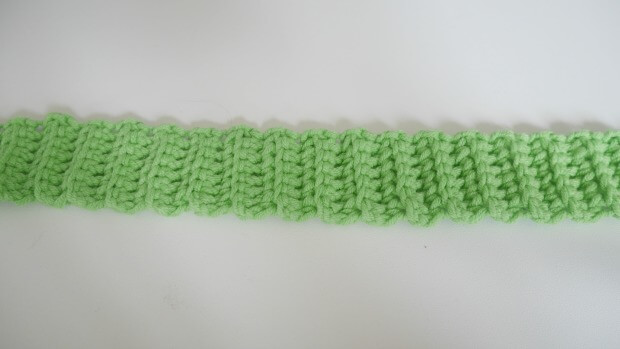
Make band
Next, make the band.
Start with making a slip knot and 8 chains.
Row 1. Sc in the next chain from hook and sc in each chain to end turn and chain1.
Row 2. Sc in back loop only and in each stitch to end turn and chain1.
Repeat round 2 until you get the length matching the rectangle!
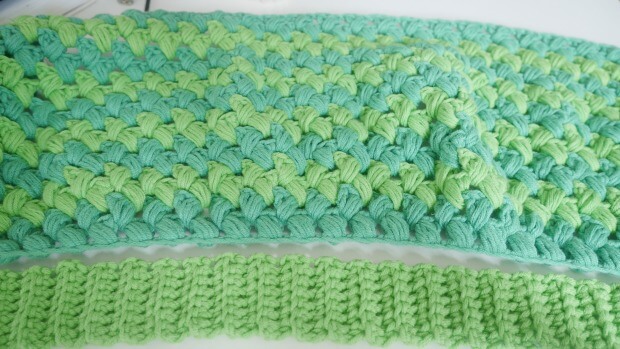
Assemble the beanie hat.
Attach the band and the rectangle together by sewing using a yarn needle.

Then sew the short side of the rectangular piece and close the top of the hat by weaving the tail and pulling tight to close.
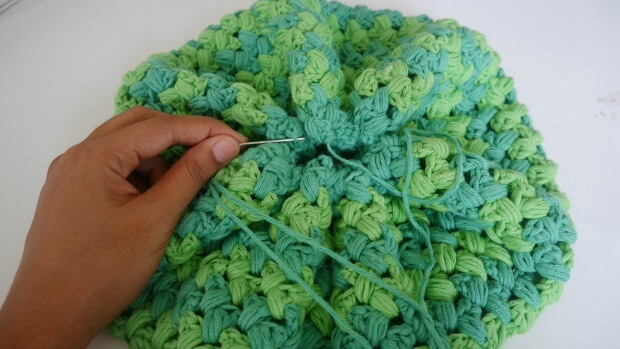
Here we have it, your very own puff stitch slouchy beanie hat.
If you make one, I would love to see your creation tag me on Instagram or Facebook!
Happy crocheting!